Tài liệu Lab 6.2.8 Password Recovery Procedure on a Catalyst 2900 Series Switches ppt
Bạn đang xem bản rút gọn của tài liệu. Xem và tải ngay bản đầy đủ của tài liệu tại đây (256.33 KB, 7 trang )
Lab 6.2.8 Password Recovery Procedure on a Catalyst 2900 Series Switches
Objective
• Create and verify a basic switch configuration verify it.
• Change passwords to the password recovery procedure be performed.
Background/Preparation
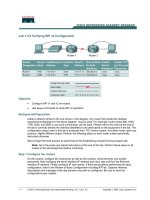
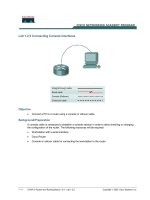
Cable a network similar to the one in the diagram. The configuration output used in this lab is
produced from a 2950 series switch. Any other switch used may produce different output. The
following steps are to be executed on each switch unless specifically instructed otherwise. .
Instructions are also provided for the 1900 Series switch, which initially displays a User Interface
Menu. Select the “Command Line” option from the menu to perform the steps for this lab.
Start a HyperTerminal session.
Note: Go to the erase and reload instructions at the end of this lab. Perform those steps on all
switches in this lab assignment before continuing.
Step 1 Configure the switch
Configure the hostname, access, and command mode passwords, as well as the management LAN
settings. These values are shown in the chart. If problems occur while performing this configuration,
refer to the Basic Switch Configuration lab.
Step 2 Configure the host attached to the switch
Configure the host to use the same subnet for the address, mask, and default gateway as on the
switch.
1 - 7 CCNA 3: Switching Basics and Intermediate Routing v 3.0 - Lab 6.2.8 Copyright 2003, Cisco Systems, Inc.
Step 3 Verify connectivity
a. To verify that the host and switch are correctly configured, ping the switch IP address from the
host.
b. Was the ping successful?
____________________________________________________
c. If the answer is no, troubleshoot the host and switch configurations.
Step 4 Reset the console password
a. Have a classmate change the console and VTY passwords on the switch. Save the changes to
the startup-config file and reload the switch.
b. Now without knowing the passwords, try to gain access to the switch.
Step 5 Recover access to the switch (2900XL is essentially the same)
a. Make sure that a PC is connected to the console port and a HyperTerminal window is open.
b. Turn the switch off. Turn it back on while holding down the “MODE” button on the front of the
switch at the same time that the switch is powered on. Release the “MODE” button after the
STAT LED goes out.
c. The following output should be displayed:
C2950 Boot Loader (C2950-HBOOT-M) Version 12.1(11r)EA1, RELEASE
SOFTWARE (fc1)
Compiled Mon 22-Jul-02 18:57 by antonino
WS-C2950-24 starting
Base ethernet MAC Address: 00:0a:b7:72:2b:40
Xmodem file system is available.
The system has been interrupted prior to initializing the flash files
system. The following commands will initialize the flash files system,
and finish loading the operating system software:
flash_init
load_helper
boot
d. To initialize the file system and finish loading the operating system.
Type flash_init
Type load_helper
Type dir flash: (do not forget to type the : (colon) after the word “flash”)
Enter the commands required to initialize the flash file system. First type flash_init, then type
load_helper. Finally type dir flash:.
Note: Do not forget to type the colon (:) after the word flash.
e. Type rename flash:config.text flash:config.old to rename the configuration file.
This file contains the password definition.
2 - 7 CCNA 3: Switching Basics and Intermediate Routing v 3.0 - Lab 6.2.8 Copyright 2003, Cisco Systems, Inc.
Step 6 Restart the system
a. Type boot to boot the system.
b. Enter N at the following prompt to start the Setup program:
Continue with the configuration dialog? [yes/no] : N
c. Type rename flash:config.old flash:config.text to rename the configuration file
with its original name at the privileged exec mode prompt.
d. Copy the configuration file into memory as follows:
Switch#copy flash:config.text system:running-config
Source filename [config.text]?[enter]
Destination filename [running-config][enter]
e. The configuration file is now reloaded. Change the old unknown passwords as follows:
ALSwitch#configure terminal
ALSwitch(config)#no enable secret
ALSwitch(config)#enable password Cisco
ALSwitch(config)#line console 0
ALSwitch(config-line)#password cisco
ALSwitch(config-line)#exit
ALSwitch(config)#line vty 0 15
ALSwitch(config-line)#password cisco
ALSwitch(config-line)#exit
ALSwitch(config)#exit
ALSwitch#copy running-config startup-config
Destination filename [startup-config]?[enter]
Building configuration
[OK]
ALSwitch#
f. Power cycle the switch and verify that the passwords are now functional. If not, repeat the
procedure.
Step 7 Procedure for the 1900 and 2800 switches
a. Check the boot firmware version number from the Systems Engineering menu. To access the
Systems Engineering menu, follow the procedure below:
1. Disconnect the power cord from the rear panel.
2. Press and hold the Mode button on the front panel.
3. Power-cycle the switch.
4. Release the Mode button one or two seconds after LED above port 1x goes off or when the
diagnostic console is displayed.
Cisco Systems Diagnostic Console
Copyright(c) Cisco Systems, Inc. 1999
All rights reserved.
Ethernet Address: 00-E0-1E-7E-B4-40
3 - 7 CCNA 3: Switching Basics and Intermediate Routing v 3.0 - Lab 6.2.8 Copyright 2003, Cisco Systems, Inc.
Press Enter to continue.
5. Press Enter to display the Diagnostic Console - Systems Engineering menu.
The following Systems Engineering menu will display:
Diagnostic Console - Systems Engineering
Operation firmware version: 8.00.00 Status: valid
Boot firmware version: 3.02
[C] Continue with standard system start up
[U] Upgrade operation firmware (XMODEM)
[S] System Debug Interface
Enter Selection:
6. The bold letters above show the Boot firmware version.
b. Clearing the Password (Firmware Version 1.10 and Later).
To clear the password, follow the steps below:
1. Power-cycle the switch.
After POST completes, the following prompt displays:
Do you wish to clear the passwords? [Y]es or [N]o:
Note: The student will have ten seconds to respond. If a response is not made within that
time, the Management Console Logon screen displays. This waiting period cannot be
changed.
2. Enter [Y]es to delete the existing password from Nonvolatile RAM (NVRAM).
Note: If you type [N]o, the existing password remains valid.
3. Assign a password from the switch management interfaces (management console or
Command Line Interface (CLI)).
c. Viewing the Password (firmware versions between 1.10 and 3.02).
For firmware versions between 1.10 and 3.02, students can view the password they are trying to
recover (instead of clearing it as described in the previous section).
1. Access the diagnostic console.
i. Press and hold the Mode button.
ii. Power-cycle the switch.
iii. Release the Mode button one or two seconds after LED above port 1x goes off or the
diagnostics console is displayed.
The following logon screen will appear:
Cisco Systems Diagnostic Console
Copyright(c) Cisco Systems, Inc. 1999
All rights reserved.
Ethernet Address: 00-E0-1E-7E-B4-40
iv. Press Enter to continue.
4 - 7 CCNA 3: Switching Basics and Intermediate Routing v 3.0 - Lab 6.2.8 Copyright 2003, Cisco Systems, Inc.
2. Press Enter and select the [S] option on the Diagnostic Console - Systems Engineering
menu, and then select the [V] option on the Diagnostic Console - System Debug
Interface menu to display the management console password.
3. To change the password, select the [M] option on the Console Settings menu.
d. Password revovery for Firmware Version 1.09 and Earlier.
Note: If the shipping date is before June 1997, gather the information listed in this section, and
contact the Cisco Technical Assistance Center (TAC)
for password recovery.
Note: This section is also applicable for those Catalyst 2800 switches that do not have the Mode
button in their front panel.
To recover a password, follow the steps below:
1. Contact the Cisco TAC for the factory-installed password.
2. Provide the serial number and/or Media Access Control (MAC) address of the switch.
The serial number is usually located on the back of the unit. To obtain the MAC address,
remove the cover and read the Ethernet address of the Programmable Read-Only Memory
(PROM).
Once the steps are completed, logoff by typing exit, and turn all the devices off. Then remove and
store the cables and adapter.
5 - 7 CCNA 3: Switching Basics and Intermediate Routing v 3.0 - Lab 6.2.8 Copyright 2003, Cisco Systems, Inc.
Erasing and Reloading the Switch
For the majority of the labs in CCNA 3 and CCNA 4 it is necessary to start with an unconfigured
switch. Use of a switch with an existing configuration may produce unpredictable results. These
instructions allow preparation of the switch prior to performing the lab so previous configuration
options do not interfere. The following is the procedure for clearing out previous configurations and
starting with an unconfigured switch. Instructions are provided for the 2900, 2950, and 1900 Series
switches.
2900 and 2950 Series Switches
1. Enter into the privileged EXEC mode by typing enable.
If prompted for a password, enter class (if that does not work, ask the instructor).
Switch>enable
2. Remove the VLAN database information file.
Switch#delete flash:vlan.dat
Delete filename [vlan.dat]?[Enter]
Delete flash:vlan.dat? [confirm] [Enter]
If there was no VLAN file, this message is displayed.
%Error deleting flash:vlan.dat (No such file or directory)
3. Remove the switch startup configuration file from NVRAM.
Switch#erase startup-config
The responding line prompt will be:
Erasing the nvram filesystem will remove all files! Continue? [confirm]
Press Enter to confirm.
The response should be:
Erase of nvram: complete
4. Check that VLAN information was deleted.
Verify that the VLAN configuration was deleted in Step 2 using the show vlan command. If
previous VLAN configuration information (other than the default management VLAN 1) is still
present it will be necessary to power cycle the switch (hardware restart) instead of issuing the
reload command. To power cycle the switch, remove the power cord from the back of the
switch or unplug it. Then plug it back in.
If the VLAN information was successfully deleted in Step 2, go to Step 5 and restart the switch
using the reload command.
5. Software restart (using the reload command)
6 - 7 CCNA 3: Switching Basics and Intermediate Routing v 3.0 - Lab 6.2.8 Copyright 2003, Cisco Systems, Inc.
Note: This step is not necessary if the switch was restarted using the power cycle method.
a. At the privileged EXEC mode enter the command reload.
Switch(config)#reload
The responding line prompt will be:
System configuration has been modified. Save? [yes/no]:
b. Type n and then press Enter.
The responding line prompt will be:
Proceed with reload? [confirm] [Enter]
The first line of the response will be:
Reload requested by console.
After the switch has reloaded, the line prompt will be:
Would you like to enter the initial configuration dialog? [yes/no]:
c. Type n and then press Enter.
The responding line prompt will be:
Press RETURN to get started! [Enter]
1900 Series Switches
1. Remove VLAN Trunking Protocol (VTP) information.
#delete vtp
This command resets the switch with VTP parameters set to factory
defaults.
All other parameters will be unchanged.
Reset system with VTP parameters set to factory defaults, [Y]es or
[N]o?
Enter y and press Enter.
2. Remove the switch startup configuration from NVRAM.
#delete nvram
This command resets the switch with factory defaults. All system parameters will revert to their
default factory settings. All static and dynamic addresses will be removed.
Reset system with factory defaults, [Y]es or [N]o?
Enter y and press Enter.
7 - 7 CCNA 3: Switching Basics and Intermediate Routing v 3.0 - Lab 6.2.8 Copyright 2003, Cisco Systems, Inc.


