Tài liệu Windows 7 Resource Kit- P16 docx
Bạn đang xem bản rút gọn của tài liệu. Xem và tải ngay bản đầy đủ của tài liệu tại đây (1.22 MB, 50 trang )
Understanding Device Installation and Management CHAPTER 17
703
Administrators can prevent users from modifying the Device Installation Settings on their
computers by using Group Policy. For more information, see the section titled “Managing
Device Installation Using Group Policy” later in this chapter.
Using the Devices And Printers Folder
Devices And Printers is a new Start menu and Control Panel item in Windows 7 that provides
users with a single location where they can discover, connect, configure, use, and manage
devices connected to their computers. In previous versions of Windows, there was no central
location where users could view and manage wired and wireless devices connected to their
computers. Beginning with Windows 7, however, users can now use the Devices And Printers
folder to view and manage all devices connected to or discovered by their computer, includ-
ing printers, fax machines, scanners, cameras, removable storage devices, networked devices,
paired WiFi and Bluetooth devices, multifunction devices (which appear as a single device),
and other machines.
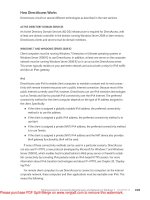
Figure 17-1 shows the Devices And Printers folder on a computer that has a printer, web-
cam, and music player attached to it.
FIGURE 17-1 The new Devices And Printers folder in Windows 7
Features of the Devices And Printers folder include:
n
A context-sensitive command bar that varies depending upon the device selected.
Regardless of which device is selected, the command bar always displays the Add A
Device (which is used for discovering and connecting with wireless devices) and Add A
Printer (which launches the Add Printer wizard) options.
Please purchase PDF Split-Merge on www.verypdf.com to remove this watermark.
CHAPTER 17 Managing Devices and Services
704
n
A context-sensitive right-click menu that also varies depending upon the device
selected. For example, you can access the properties for a device by right-clicking the
device and selecting Properties. These properties pages are extensible by the device
manufacturer, who can add additional tabs and register them for device management
and configuration purposes. Note that the default double-click action for the right-
click menu is also configurable.
n
A device metadata system and a set of XML schemas that device vendors can use to
customize the way their devices are presented to users in the Devices And Printers
folder. For example, Devices And Printers can automatically download additional meta-
data for a newly connected device to display a photorealistic image of the device and
additional manufacturer information that is not available from the hardware or device
driver. For more information, see the section titled “Device Metadata System” later in
this chapter.
n
Integration with the new Device Stage feature of Windows 7, which is discussed in the
next section of this chapter.
The Windows 7 computer itself appears as a device within the Devices And Printers folder.
As Figure 17-2 illustrates, right-clicking your computer device icon displays a menu of actions
that you can perform to configure and manage your computer.
FIGURE 17-2 The context menu for the computer
device icon in Devices And Printers
note Advanced users can perform even more device configuration tasks, such as rolling
back drivers, by right-clicking the computer device icon in Devices And Printers, selecting
System Properties, and selecting Device Manager.
Please purchase PDF Split-Merge on www.verypdf.com to remove this watermark.
Understanding Device Installation and Management CHAPTER 17
705
Understanding Device Stage
Device Stage is a new, intuitive visual interface for supported devices that makes it easier for
users to configure, use, and manage devices connected to their computers. Microsoft is work-
ing with IHVs to help them support Device Stage for their devices. Currently, Device Stage
is supported by only a small selection of multifunction printers, music players, and mobile
phones.
Figure 17-3 shows the new UI for a device that supports Device Stage, which shows brand-
ing information and various tasks from which the user can choose to use and manage the
device. In addition, when the Device Stage UI is open for a device, a photo-realistic shell icon
for the device is displayed on the taskbar. Clicking this icon displays a thumbnail preview of
the device and of the Device Stage UI for the device.
FIGURE 17-3 An example of the Device Stage user interface for a compatible device
Understanding the Device Experience Architecture
Figure 17-4 shows the architecture of the new device experience in Windows 7. New elements
of Windows 7 include:
n
Two new UIs (the Devices And Printers folder and the Device Stage experience).
n
Two underlying features (Device Display Object and Device Metadata System) that
make the new UIs possible.
The device manufacturer must supply the following for each device:
n
XML metadata for the device, which includes both Device Stage XML and Device
Display XML metadata
n
Vendor applications for using the device, which may be Web applications and/or
Windows applications
n
Device drivers for physical layer connectivity with and use of the device
These features of the Windows 7 device experience are described in more detail below.
Please purchase PDF Split-Merge on www.verypdf.com to remove this watermark.
CHAPTER 17 Managing Devices and Services
706
Web
Applications
Physical Layer
(USB, Wi-Fi, Bluetooth, …)
Windows
Applications
Windows
Features
Device
Metadata
System
Function
Discovery
Device
Display
Object
Devices and
Printers
Device Display XML
Device Stage XML
Device Stage
Windows Shell
Printer
Portable Device
Scanner
FAX
Other classes
Partner
Software
New for
Windows 7
Partner
Hardware
Windows
FIGURE 17-4 The architecture of the new device experience in Windows 7
DEVICE CONTAINERS
Because of the growing popularity of multifunction devices, such as printer/copier/fax
/scanners, the PnP architecture has been enhanced in Windows 7 to support the detecting
and grouping together of the different functions that a device supports. This new feature is
called device container, a new PnP device property that groups device functions together into
a single container representing the physical device. Device containers preserve the existing
devnode model of Windows while providing users with a more natural representation of a
physical device. (A devnode is an internal structure that represents a device on a system. It
contains the device stack and information about whether the device has been started and
which drivers have registered for notification on the device. Each device on a computer has a
devnode, and these devnodes are organized into a hierarchical device tree. The Plug and Play
Manager creates a devnode for a device when the device is configured.)
By using device containers, a multifunction device such as a printer/copier/fax/scanner can
be presented to the user as a single device icon in the Devices And Printers folder (and also in
the Device Stage interface if this is supported by the device). Device containers are identified by
a container ID, which is a globally unique identifier (GUID) that is individual to each physical
device. The container ID for a device is generated automatically by PnP. All devnodes belong-
ing to the device container on a given bus share the same container ID.
DEVICE DISPLAY OBJECT
The Device Display Object is responsible for acquiring the XML metadata for a device and
using it to render that device in the Devices And Printers folder (and in the Device Stage UI if
the device supports Device Stage). The Device Display Object includes the Device Metadata
Please purchase PDF Split-Merge on www.verypdf.com to remove this watermark.
Understanding Device Installation and Management CHAPTER 17
707
Retrieval Client (DMRC), which matches devices to Device Stage metadata packages. The De-
vice Display Object is an internal feature of Windows 7 and is not configurable.
DEVICE METADATA SYSTEM
The Device Metadata System is new in Windows 7 and provides a process for defining and
distributing metadata packages for devices that users connect to their computers. Device
metadata is information that enriches the way that devices are displayed by and used with
Windows; it consists of two types of metadata:
n
Device Display XML metadata This type of metadata is conceptually similar to
sleeve art for music CDs and allows a photorealistic device icon to be displayed along
with additional device information, such as manufacturer, model, and description
fields. Figure 17-5 shows an example of how Device Display XML metadata can enhance
how the device is displayed in the Devices And Printers folder. (The bottom portion of
the Devices And Printers window in the figure has been enlarged by dragging its upper
border upward.)
n
Device Experience XML metadata This type of metadata is conceptually similar to
a simple Web page and is used by the Device Stage UI. For example, such metadata
can enable branding by allowing background and overlay images to be displayed and
can display a large, photorealistic image of the device, provide real-time device status
information, display a vendor logo and marketing information, and describe what the
user can do with the device. See Figure 17-3 earlier in this chapter for an example of
how this metadata can be used to display a device that supports Device Stage.
FIGURE 17-5 Device Display XML metadata can enhance how a device is displayed.
Please purchase PDF Split-Merge on www.verypdf.com to remove this watermark.
CHAPTER 17 Managing Devices and Services
708
The device metadata system for Windows 7 delivers device metadata in the form of a
package. This package consists of XML files, graphics files, and icon files and typically contains
the following:
n
PackageInfo.xml Contains the hardware IDs, model ID, timestamp, schemas, and
index and locale information for the device
n
DeviceInfo.xml Contains additional device information with an icon file for the
device
n
WindowsInfo.xml Contains additional information needed by Windows
If the device supports Device Stage, the following additional metadata files are included in
the device metadata package:
n
Behavior.xml Defines the layout of the Device Stage UI with any branding graphics
included by the vendor
n
Task.xml Defines the tasks that the user can perform with the device using the
Device Stage interface with associated icons and commands for these tasks
n
Resource.xml Contains any localized resources needed for the Device Stage interface
note XML metadata can be associated with a device using either the hardware ID or
model ID of the device, with model ID being the preferred method.
IHVs that create metadata packages for their devices must submit this metadata to
Windows Quality Online Services (Winqual). This must be done to validate the quality of the
metadata and digitally sign the package to guard against tampering. Once the package has
been signed by Winqual, it can be distributed to users by the following methods:
n
Embedding the metadata in the hardware of the device
n
Including the metadata in the vendor’s software that is included with the device
n
Installing the metadata on user's computers as an Original Equipment Manufacturer
(OEM) add-on
n
Making the metadata available for download from Windows Metadata and Internet
Services (WMIS)
When a device is first connected to a Windows 7 computer, Windows acquires the metadata
for the device by using the following process:
1. The DMRC checks the computer's local metadata cache and metadata store for meta-
data that applies to the device.
2. If no metadata is found for the device, the DMRC visits the WMIS Web site to determine
whether any metadata is available for the device.
3. If no metadata is available for the device from WMIS, a standard icon is displayed for
the device and descriptive information found in the device's driver is displayed. The
Please purchase PDF Split-Merge on www.verypdf.com to remove this watermark.
Understanding Device Installation and Management CHAPTER 17
709
device is then displayed in the Unspecified Device section at the bottom of the Devices
And Printers folder.
4. If metadata is found and downloaded for the device from WMIS, the Device Display
Object feature parses the metadata and uses it to display the device in the Devices And
Printers folder (and in the Device Stage interface if the device supports Device Stage).
Users can opt out of downloading metadata from WMIS by configuring the Device Instal-
lation Settings on their computers. For more information, see the section titled “Configur-
ing Device Installation Settings” earlier in this chapter. Administrators can also prevent the
downloading of metadata from WMIS by using Group Policy. See the following section titled
“Managing Device Installation Using Group Policy” for information.
note Some older systems may display some internal devices, such CD/DVD-ROM drives,
USB root hubs, and other devices, as separate devices in the Devices And Printers folder
because the system is reporting these devices as removable when they actually are not.
Updating the basic input/output (BIOS) on these older systems may resolve this problem.
Managing Device Installation Using Group Policy
Group Policy is the recommended method for managing device installation behavior across
an enterprise network where Active Directory Domain Services is deployed. The following
sections summarize the various policy settings available for managing the device installation
experience on Windows 7.
Managing Device Installation Behavior
Policy settings for controlling device installation behavior in Windows 7 are found under the
following node in Group Policy Object Editor:
Computer Configuration\Policies\Administrative Templates\System\Device Installation
Policies controlling device installation behavior, described in Table 17-1, are per-computer
policies only. They may apply to Windows Vista and Windows Server 2008 only, to Windows
7 and Windows Server 2008 R2 only, or to all of these platforms—see the first column of the
table for more information on which platforms to apply each policy. Policy settings that are
new in Windows 7 are prefixed with an asterisk (*). Policy settings that were introduced in
Windows Vista but have now been deprecated in Windows 7 are prefixed with two asterisks
(**).
Although configured policy settings will be available for use on the computer without a
reboot, they will take effect for only device installations initiated after the policy settings have
been applied. In other words, the policy settings are not retroactive, and they will not affect
the state of any devices that were installed previously.
Please purchase PDF Split-Merge on www.verypdf.com to remove this watermark.
CHAPTER 17 Managing Devices and Services
710
TABLE 17-1 Policies for Managing Device Installation Behavior
POLICY NAME DESCRIPTION
Allow Remote
Access To The Plug
And Play Interface
(Applies to
Windows Vista or
later versions)
Specifies whether remote access to the PnP interface is allowed.
If you enable this setting, remote connections to the PnP inter-
face will be allowed.
If you disable or do not configure this setting, the PnP interface
will not be available remotely.
Note that this policy should be enabled only if the administrator
of the system requires the ability to retrieve information about
devices on this system from another remote computer, such as
using Windows Device Manager to connect to this system from a
remote computer.
Configure Device
Installation Timeout
(Applies to
Windows Vista or
later versions)
Specifies the number of seconds the system will wait for a device
installation task to complete. If the task is not completed within
the specified number of seconds, the system will terminate the
installation.
If you disable or do not configure this setting, the system will
wait 300 seconds (5 minutes) for any device installation task to
complete before terminating installation.
**Do Not Create
System Restore
Point When New
Device Driver In-
stalled
(Applies only to
Windows Vista and
Windows Server
2008)
If you enable this setting, system restore points will not be
created when a new device driver is installed or updated.
If you disable or do not configure this setting, a system restore
point will be created whenever a new driver is installed or an
existing device driver is updated.
Do Not Send A
Windows Error
Report When A
Generic Driver Is
Installed On A
Device
(Applies to
Windows Vista or
later versions)
If you enable this setting, a Windows error report will not be sent
when a generic driver is installed.
If you disable or do not configure this setting, a Windows error
report will be sent when a generic driver is installed.
Please purchase PDF Split-Merge on www.verypdf.com to remove this watermark.
Understanding Device Installation and Management CHAPTER 17
711
POLICY NAME DESCRIPTION
*Prevent Creation
Of A System
Restore Point
During Device
Activity That Would
Normally Prompt
Creation Of A
Restore Point
(Applies to
Windows Vista or
later versions)
Lets you prevent Windows from creating a system restore point
during device activity that normally prompts Windows to create
a system restore point. Windows usually creates restore points
for certain driver activity, such as the installation of an unsigned
driver. A system restore point enables you to restore your system
to its state before the activity more easily.
If you disable or do not configure this policy setting, Windows
creates a system restore point as it normally does.
Note: This policy setting replaces the Do Not Create System
Restore Point When New Device Driver Installed policy setting
used in Windows Vista.
*Prevent Device
Metadata Retrieval
From The Internet
(Applies only to
Windows 7 and
Windows Server
2008 R2)
If you enable this policy setting, Windows does not retrieve
device metadata for installed devices from the Internet. This
policy setting overrides the setting in the Device Installation
Settings dialog box on the user's computer.
If you disable or do not configure this policy setting, the setting
in the Device Installation Settings dialog box controls whether
Windows retrieves device metadata from the Internet.
*Prevent Windows
From Sending An
Error Report When
A Device Driver
Requests Additional
Software During
Installation
(Applies only to
Windows 7 and
Windows Server
2008 R2)
If you enable this policy setting, Windows does not send an error
report when a device driver that requests additional software is
installed.
If you disable or do not configure this policy setting, Windows
sends an error report when a device driver that requests
additional software is installed.
Please purchase PDF Split-Merge on www.verypdf.com to remove this watermark.
CHAPTER 17 Managing Devices and Services
712
POLICY NAME DESCRIPTION
Prioritize All
Digitally Signed
Drivers Equally
During The Driver
Ranking And
Selection Process
(Applies to
Windows Vista or
later versions)
When selecting which driver to install, do not distinguish
between drivers signed by a Windows Publisher certificate and
drivers signed by others.
If you enable this setting, all valid Authenticode signatures are
treated equally for the purpose of selecting a device driver to
install. Selection is based on other criteria (such as matching
hardware or compatible IDs) rather than whether the driver
was signed by a Windows Publisher certificate or by another
Authenticode certificate. A signed driver is still preferred over
an unsigned driver. However, drivers signed by Windows
Publisher certificates are not preferred over drivers signed by
other Authenticode certificates.
If you disable or do not configure this setting, drivers signed by
a Windows Publisher certificate are selected for installation over
drivers signed by other Authenticode certificates.
Note: In Windows Vista, this policy setting was named Treat All
Digitally Signed Drivers Equally In The Driver Ranking And
Selection Process.
*Specify Search
Order For Device
Driver Source
Locations
(Applies only to
Windows 7 and
Windows Server
2008 R2)
If you enable this policy setting, you can select whether Windows
searches Windows Update first, searches Windows Update last, or
does not search Windows Update.
If you disable or do not configure this policy setting, members
of the Administrators group can determine the order in which
Windows searches source locations for device drivers.
Turn Off “Found
New Hardware”
Balloons During
Device Installation
(Applies to
Windows Vista or
later versions)
If you enable this setting, “Found New Hardware” balloons will
not appear while a device is being installed.
If you disable or do not configure this setting, “Found New Hard-
ware” balloons will appear while a device is being installed unless
the driver for the device has suppressed the balloons.
Best practices for configuring these policy settings include the following:
n
To ensure that users of Windows 7 computers have an optimal device experience,
enable the Specify Search Order For Device Driver Source Locations policy setting and
configure the setting to Search Windows Update First. This will prevent users from
Please purchase PDF Split-Merge on www.verypdf.com to remove this watermark.
Understanding Device Installation and Management CHAPTER 17
713
being able to modify their device installation settings, as described in the section titled
“Configuring Device Installation Settings” earlier in this chapter.
n
If you enable the Configure Device Installation Timeout policy setting, you cannot
specify a time shorter than the default value of 300 seconds. Some devices, such as re-
dundant array of independent disks (RAID) controllers and other boot-critical devices,
can take a long time to initialize, and the default value for this setting was chosen to
accommodate PnP installation of such devices to prevent boot failure. The reason an
installation time-out value is specified at all is that improperly written driver installa-
tion packages can stop responding during installation, causing the system itself to stop
responding. This was a problem in earlier versions of Windows because an improperly
written driver could cause an interactive prompt to be displayed in the background
where it couldn’t be accessed. In Windows Vista, however, device installation has been
moved out of Newdev.dll into the PnP service (DrvInst.exe), and the PnP service starts a
separate, new process instance for each device installation. These architectural changes
to how device installation works in Windows Vista make it much harder for an improp-
erly written driver to make the PnP service stop responding. If the installation process
instance does stop responding, however, the time-out value set here kills the process
and displays the Add New Hardware wizard, allowing the user to specify a different
driver to install. However, the reason for allowing administrators to be able to config-
ure this policy setting is that if the administrator knows that the installation of some
driver package(s) on some device(s) will take longer than the default time-out period
(but not actually stop responding from the UI), she can allow the system to wait for a
longer period of time for the installation to complete.
Managing Driver Installation Behavior
Policy settings for controlling driver installation behavior, including driver signing and driver
search, are found under Computer Configuration\Policies\Administrative Templates\System
\Driver Installation or User Configuration\Policies\Administrative Templates\System\Driver
Installation, or both. However, the only driver installation policy setting that still applies in
Windows 7 is the one that can be used to manage the driver installation behavior for standard
users, specifically the following machine policy setting:
Computer Configuration\Policies\Administrative Templates\System\Driver Installation
\Allow Non-Administrators To Install Drivers For These Device Setup Classes
This policy applies to Windows Vista or later versions and can be used to specify a list
of device setup class GUIDs describing device drivers that standard users can install on the
system. Enabling this setting allows users to install new drivers for the specified device setup
classes. (The drivers must be signed according to Windows Driver Signing Policy or by pub-
lishers already in the TrustedPublisher store.) Disabling this policy setting or leaving it Not
Configured means that only members of the local Administrators built-in group can install
new device drivers on the system.
Please purchase PDF Split-Merge on www.verypdf.com to remove this watermark.
CHAPTER 17 Managing Devices and Services
714
To configure this policy, follow these steps:
1. Using Group Policy Object Editor on a Windows Vista computer, open the Group Policy
object (GPO) linked to the organizational unit (OU) where your target users have their
computer accounts.
2. Navigate to the policy setting and double-click it to open it.
3. Enable the policy. Click Show and then click Add.
4. Type the GUID for the device setup class for the device type that you want to allow
standard users to be able to install on computers targeted by the GPO. For example,
to allow users to install imaging devices, such as digital cameras and scanners, type
{6bdd1fc6-810f-11d0-bec7-08002be2092f} in the Add Item text box. Continue by
adding other GUIDs as needed.
MoRe inFo For a list of device setup classes and their GUIDs, see
/>Blocking Installation of Removable Devices
Policy settings for blocking device installation are found under the following node in the
Group Policy Object Editor:
Computer Configuration\Policies\Administrative Templates\System\Device Installation
\Device Installation Restrictions
Please purchase PDF Split-Merge on www.verypdf.com to remove this watermark.
Understanding Device Installation and Management CHAPTER 17
715
Policies for blocking device installation, described in Table 17-2, are per-computer policies
only. All but one of these policies apply to Windows Vista or later versions (the policy setting
marked with an asterisk applies only to Windows 7 and Windows Server 2008 R2). In addition,
two of these policy settings (marked with a double asterisk) have been updated in Windows 7
with new functionality.
Configured policy settings will be applied during the next background refresh of Group
Policy. In other words, these policies do not require a reboot or logon/logoff to take effect
after you configure them.
TABLE 17-2 Computer Policies for Blocking Device Installation
POLICY NAME DESCRIPTION
Allow Administrators
To Override Device
Installation
Restriction Policies
(Applies to Windows
Vista or later versions)
Allows members of the Administrators group to install and update
the drivers for any device, regardless of other policy settings.
If you enable this setting, administrators can use Add Hardware
wizard or Update Driver wizard to install and update the drivers for
any device.
If you disable or do not configure this setting, administrators are
subject to all policies that restrict device installation.
If this computer is a Remote Desktop server, enabling this policy
also affects redirection of the specified devices from a Remote
Desktop client to this computer.
Allow Installation Of
Devices That Match
Any Of These Device
IDs
(Applies to Windows
Vista or later versions)
Specifies a list of PnP hardware IDs and compatible IDs that describe
devices that can be installed. This setting is intended for use only
when the Prevent Installation Of Devices Not Described By Other
Policy Settings setting is enabled and does not take precedence
over any policy setting that would prevent a device from being
installed.
If you enable this setting, any device with a hardware ID or compat-
ible ID that matches an ID in this list can be installed or updated
if that installation has not been prevented specifically by any of
the following policy settings: Prevent Installation Of Devices That
Match Any Of These Device IDs, Prevent Installation Of Devices For
These Device Classes, or Prevent Installation Of Removable Devices.
If another policy setting prevents a device from being installed, the
device cannot be installed even if it is also described by a value in
this policy setting.
If you disable or do not configure this setting and no other policy
describes the device, the Prevent Installation Of Devices Not
Described By Other Policy Settings setting determines whether the
device can be installed.
If this computer is a Remote Desktop server, enabling this policy
also affects redirection of the specified devices from a Remote
Desktop client to this computer.
Please purchase PDF Split-Merge on www.verypdf.com to remove this watermark.
CHAPTER 17 Managing Devices and Services
716
POLICY NAME DESCRIPTION
Allow Installation
Of Devices Using
Drivers That Match
These Device Setup
Classes
(Applies to Windows
Vista or later versions)
Specifies a list of device setup class GUIDs describing devices that
can be installed. This setting is intended for use only when the
Prevent Installation Of Devices Not Described By Other Policy
Settings setting is enabled and does not have precedence over
any setting that would prevent a device from being installed.
If you enable this setting, any device with a hardware ID or compat-
ible ID that matches one of the IDs in this list can be installed or
updated if that installation has not been specifically prevented by
any of the following policy settings: Prevent Installation Of Devices
That Match Any Of These Device IDs, Prevent Installation Of De-
vices For These Device Classes, or Prevent Installation Of Remov-
able Devices. If another policy setting prevents a device from being
installed, the device cannot be installed even if it is also described
by a value in this setting.
If you disable or do not configure this setting and no other policy
describes the device, the setting Prevent Installation Of Devices Not
Described By Other Policy Settings determines whether the device
can be installed.
If this computer is a Remote Desktop server, enabling this policy
also affects redirection of the specified devices from a Remote
Desktop client to this computer.
Display A Custom
Message Title When
Installation Is
Prevented By Policy
(Applies to Windows
Vista or later versions)
Specifies a customized message that is displayed to the user in the
title of the notification balloon when policy prevents the installation
of a device.
If you enable this setting, this text is displayed as the title text of
the message displayed by Windows Vista whenever device installa-
tion is prevented by policy.
If you disable or do not configure this setting, Windows Vista
displays a default title whenever device installation is prevented by
policy.
Note: In Windows Vista, this policy was named Display A Custom
Message When Installation Is Prevented By Policy (Balloon Title).
Display A Custom
Message When
Installation Is
Prevented By Policy
(Applies to Windows
Vista or later versions)
Specifies a customized message that is displayed to the user in the
text of the notification balloon when policy prevents the installa-
tion of a device.
If you enable this setting, this text is displayed as the main body
text of the message displayed by Windows Vista whenever device
installation is prevented by policy.
Please purchase PDF Split-Merge on www.verypdf.com to remove this watermark.
Understanding Device Installation and Management CHAPTER 17
717
POLICY NAME DESCRIPTION
If you disable or do not configure this setting, Windows Vista
displays a default message whenever device installation is
prevented by policy.
Note: In Windows Vista, this policy was named Display A Custom
Message When Installation Is Prevented By Policy (Balloon Text).
Prevent Installation
Of Devices Not
Described By Other
Policy Settings
(Applies to Windows
Vista or later versions)
This setting controls the installation policy for devices that are not
specifically described by any other policy.
If you enable this setting, any device that is not described by either
Allow Installation Of Devices That Match These Device IDs or Allow
Installation Of Devices For These Device Classes cannot be installed
or have its driver updated.
If you disable or do not configure this setting, any device that is not
described by the Prevent Installation Of Devices That Match Any Of
These Device IDs, Prevent Installation Of Devices For These Device
Classes, or Deny Installation Of Removable Devices policies can be
installed and have its driver updated.
If this computer is a Remote Desktop server, enabling this policy
also affects redirection of the specified devices from a Remote
Desktop client to this computer.
**Prevent Installation
Of Devices That Match
Any Of These Device
IDs
(Applies to Windows
Vista or later versions
and is updated in
Windows 7)
Lets you specify a list of PnP hardware IDs and compatible IDs
for devices that Windows is prevented from installing. This policy
setting takes precedence over any other policy setting that allows
Windows to install a device.
If you enable this policy setting, Windows is prevented from install-
ing a device whose hardware ID or compatible ID appears in the list
you create. If you enable this policy setting on a remote desktop
server, the policy setting affects redirection of the specified devices
from a remote desktop client to the remote desktop server.
If you disable or do not configure this policy setting, devices can
be installed and updated as allowed or prevented by other policy
settings.
Note: This policy has been updated in Windows 7 to add retro-
active uninstall functionality, that is, to enable the removal of
devices that were installed before the application of the policy (for
example, during an OEM preload of Windows onto a system). To
enable retroactive uninstall functionality, enable the policy setting
and select the Also Apply To Matching Devices That Are Already
Installed check box. Then be sure to enable and configure the Time
(In Seconds) To Force Reboot When Required For Policy Changes To
Take Effect policy setting because uninstalling previously installed
devices will trigger a reboot.
Please purchase PDF Split-Merge on www.verypdf.com to remove this watermark.
CHAPTER 17 Managing Devices and Services
718
POLICY NAME DESCRIPTION
**Prevent Installation
Of Devices Using
Drivers That Match
These Device Setup
Classes
(Applies to Windows
Vista or later versions
and is updated in
Windows 7)
Lets you specify a list of device setup class GUIDs for device drivers
that Windows is prevented from installing. This policy setting takes
precedence over any other policy setting that allows Windows to
install a device.
If you enable this policy setting, Windows is prevented from install-
ing or updating device drivers whose device setup class GUIDs
appear in the list you create. If you enable this policy setting on
a remote desktop server, the policy setting affects redirection of
the specified devices from a remote desktop client to the remote
desktop server.
If you disable or do not configure this policy setting, Windows can
install and update devices as allowed or prevented by other policy
settings.
Note: This policy has been updated in Windows 7 to add retroactive
uninstall functionality, that is, to enable the removal of devices that
were installed before the application of the policy (for example,
during an OEM preload of Windows onto a system). To enable
retroactive uninstall functionality, enable the policy setting and
select the Also Apply To Matching Devices That Are Already
Installed check box. Then be sure to also enable and configure
the Time (In Seconds) To Force Reboot When Required For Policy
Changes To Take Effect policy setting because uninstalling
previously installed devices will trigger a reboot.
Prevent Installation
Of Removable Devices
(Applies to Windows
Vista or later versions)
Prevents removable devices from being installed.
If you enable this setting, removable devices may not be installed,
and existing removable devices cannot have their drivers updated.
If you disable or do not configure this setting, removable devices
can be installed and existing removable devices can be updated as
permitted by other policy settings for device installation.
Note: This policy setting takes precedence over any other policy
settings that allow a device to be installed. If this policy setting
prevents a device from being installed, the device cannot be
installed or updated, even if it matches another policy setting that
would allow installation of that device.
For this policy, a device is considered removable when the drivers
for the device to which it is connected indicate that the device is
removable. For example, a USB device is reported to be removable
by the drivers for the USB hub to which the device is connected.
If this computer is a Remote Desktop server, enabling this policy
also affects redirection of the specified devices from a Remote
Desktop client to this computer.
Please purchase PDF Split-Merge on www.verypdf.com to remove this watermark.
Understanding Device Installation and Management CHAPTER 17
719
POLICY NAME DESCRIPTION
*Time (In Seconds)
To Force Reboot
When Required For
Policy Changes To
Take Effect
(Applies only to
Windows 7 and
Windows Server
2008 R2)
If you enable this setting, set the number of seconds that you want
the system to wait until a reboot to enforce a change in device
installation restriction policies. (The default is 120 seconds.)
If you disable or do not configure this setting, the system will not
force a reboot.
Note: If no reboot is forced, the device installation restriction right
will not take effect until the system is restarted.
MoRe inFo For information on how to identify device IDs for PnP devices, see
/>Managing Device Redirection Behavior
A new addition to Windows 7 is a number of policy settings that you can use to control the
redirection of USB devices on your system. These policy settings are supported only on
Windows 7 and Windows Server 2008 R2 and are machine policies that are found in the
following location:
Computer Configuration\Policies\Administrative Templates\System\Device Redirection
\Device Redirection Restrictions
The two policies available for configuration are as follows:
n
Prevent Redirection Of USB Devices Prevents redirection of USB devices.
•
If you enable this setting, an alternate driver for USB devices cannot be loaded.
•
If you disable or do not configure this setting, an alternate driver for USB devices
can be loaded.
n
Prevent Redirection Of Devices That Match Any Of These Device IDs Prevents
redirection of specific USB devices (see Figure 17-6).
•
If you enable this setting, an alternate driver for the USB device cannot be loaded.
•
If you disable or do not configure this setting, an alternate driver for the USB device
can be loaded.
Please purchase PDF Split-Merge on www.verypdf.com to remove this watermark.
CHAPTER 17 Managing Devices and Services
720
FIGURE 17-6 Details of the new Prevent Redirection Of Devices That Match Any Of These Device IDs
policy setting
Troubleshooting Device Installation
The following sections outline specific troubleshooting steps with regard to device installa-
tion. For general guidance on troubleshooting hardware problems in Windows 7, see Chapter
30, “Troubleshooting Hardware, Driver, and Disk Issues.”
Using Event Logs
Windows event logs can be useful for troubleshooting device installation problems and driver
issues. In addition to checking the System Event Log, you should check the Operational Event
Logs under Applications And Services Logs\Microsoft\Windows\DriverFrameworks-UserMode
when experiencing problems installing devices and device drivers. For more information on
using Event Viewer, see Chapter 21, “Maintaining Desktop Health.”
Using WinSAT
WinSAT is a tool included in Windows 7 that provides a benchmark of system performance
based on ratings of the following hardware:
n
Processor
n
Physical memory (RAM)
n
Hard disk (%SystemDrive% only)
Please purchase PDF Split-Merge on www.verypdf.com to remove this watermark.
Understanding Device Installation and Management CHAPTER 17
721
n
Graphics and gaming graphics
WinSAT results are saved in both the registry and in an XML file saved in the %SystemRoot%
\Performance\WinSAT\Datastore directory. You can also run WinSAT on demand by opening
Performance Information And Tools in Control Panel and clicking Re-run The Assessment.
WinSAT stores a history of up to one hundred system assessments and discards the oldest
assessment when the limit is reached. WinSAT never deletes the initial assessment produced
during the Machine Out-Of-Box Experience (MOOBE).
WinSAT can also be useful to determine which drivers are slowing down the boot process
or blocking a system from Sleep mode. Problem drivers will be flagged under Performance
Issues with messages such as “Drivers are causing Windows to start slowly” or “Drivers are
interfering with Windows entering sleep mode.” The solution to these situations is usually to
update the problem drivers. However, these messages might also be reported as a result of
configuration issues with devices.
Using Windows Error Reporting
When a device driver or device install fails for any reason, the user is prompted to send infor-
mation to Microsoft using WER, where Microsoft, ISVs, and IHVs can analyze the information
and provide updated drivers if needed. When a user makes a report, an entry is created on
the WER site, logging the problem. Data is collected for the following types of device
installation failures:
n
Device errors Errors with distinct Device Manager codes.
n
Import errors Problems staging device drivers.
n
Install errors Reported when a driver has successfully staged but fails to install when
the device is connected to the system.
n
Driver not found Reported when a matching driver package cannot be located.
n
Driver protection errors WRP processing errors: driver is flagged as protected but
fails to meet criteria.
n
Generic driver found Reported when a specific driver for a device is not available
and Windows Vista installs a generic driver.
n
Windows Update errors When a user encounters one of these errors and elects to
report it, additional data is collected. The data gathered depends on the nature of the
problem.
In each case, WER tracks the following information:
n
Number of users (hits) who have seen the same problem in the last 30 days
n
Number of hits per locale (English, German, French, and so on)
n
Number of hits by operating system version
n
Total number of hits
n
Bugs filed on this problem
Please purchase PDF Split-Merge on www.verypdf.com to remove this watermark.
CHAPTER 17 Managing Devices and Services
722
Developers use the information gathered to track high-profile driver requests and petition
manufacturers to provide drivers through either Windows Update or the WER interface itself.
Both internal Microsoft employees and manufacturers have access to WER data and the
Winqual site found at . If a driver becomes available, it can be
added to the response portion of the WER interface. After users elect to report the data, they
are prompted to fill out a survey. (Note that if the IHV or ISV creates a response for the given
error, the user can see the response without filling out a survey.) This response may be edited
to provide a link to the driver on the third-party Web site, which should decrease the number
of support calls requesting drivers for devices.
note By default, Windows 7 sends a Windows error report when a generic driver is
installed on a device. You can use Group Policy to modify this behavior. See the section
titled “Managing Device Installation Behavior” earlier in this chapter for more information.
Using the SetupAPI Log File
In Windows XP, the SetupAPI.log found under %Windir% is a plain text log file that you can
use to troubleshoot issues with installing devices. Beginning with Windows Vista, this log
is moved to %Windir%\Inf and consists of two separate log files: SetupAPI.app.log and
SetupAPI.dev.log. Each log file is made up of distinct sections, with each section representing
one device install.
<Log Header>
>>> Section header
Device Driver install section 1
<<< End Section
>>> Section header
Device Driver install section 2
<<< End Section
>>> Section header
Device Driver install section 3
<<< End Section
…
The INF file for the device driver controls device installation, and the SetupAPI logs record
a series of entries corresponding to each instruction in the INF file, along with whether the
action succeeded or failed. When parsing these logs to troubleshoot device installation issues,
a good place to start is looking for problem descriptions such as “device did not install” or
“wrong driver installed” or a message saying “Exit status: FAILURE”.
The following example illustrates a device installation problem reported in the SetupAPI logs.
Please purchase PDF Split-Merge on www.verypdf.com to remove this watermark.
Understanding Device Installation and Management CHAPTER 17
723
>>> [Device Install (Hardware initiated) - USB\VID_045E&PID_00BD\{0D51C6EB-7E08-D342-
9E60-177B6A619B96}]
>>> Section start 2006/08/17 13:40:16.348
ump: Creating Install Process: DrvInst.exe 13:40:16.348
ndv: Retrieving device info
ndv: Setting device parameters
ndv: Building driver list
dvi: {Build Driver List} 13:40:16.645
dvi: Searching for hardware ID(s):
dvi: usb\vid_045e&pid_00bd&rev_0100
dvi: usb\vid_045e&pid_00bd
dvi: Searching for compatible ID(s):
dvi: usb\class_ff&subclass_ff&prot_ff
dvi: usb\class_ff&subclass_ff
dvi: usb\class_ff
dvi: Enumerating INFs from path list 'C:\Windows\INF'
inf: Searched 0 potential matches in published INF directory
inf: Searched 34 INFs in directory: 'C:\Windows\INF'
dvi: {Build Driver List - exit(0x00000000)} 13:40:16.818
ndv: Selecting best match
dvi: {DIF_SELECTBESTCOMPATDRV} 13:40:16.819
dvi: No class installer for 'Microsoft® Fingerprint Reader'
dvi: No CoInstallers found
dvi: Default installer: Enter 13:40:16.821
dvi: {Select Best Driver}
!!! dvi: Selecting driver failed(0xe0000228)
dvi: {Select Best Driver - exit(0xe0000228)}
!!! dvi: Default installer: failed!
!!! dvi: Error 0xe0000228: There are no compatible drivers for this device.
dvi: {DIF_SELECTBESTCOMPATDRV - exit(0xe0000228)} 13:40:16.824
ndv: {Core Device Install}
ndv: Device install status=0xe0000203
ndv: Performing device install final cleanup
ndv: Queueing up error report since device installation failed
ndv: {Core Device Install - exit(0xe0000203)}
ump: Server install process exited with code 0xe0000203 13:40:16.832
<<< Section end 2006/08/17 13:40:16.837
<<< [Exit status: FAILURE(0xe0000203)]
The problem reported is failure to install the Microsoft Fingerprint Reader, and the cause of
the problem is reported in the error message “There are no compatible drivers for this device.”
By default, Windows Vista and later versions log device behavior in the SetupAPI logs at a
more verbose level than in previous versions of Windows. You can use the following DWORD
registry value to configure the verbosity level for these logs:
HKLM\Software\Microsoft\Windows\CurrentVersion\Setup\LogLevel
Please purchase PDF Split-Merge on www.verypdf.com to remove this watermark.
CHAPTER 17 Managing Devices and Services
724
The default setting for this value is 0x2000ffff. For information on how to configure
logging levels for the SetupAPI logs, see the white paper, “Debugging Device Installation in
Windows Vista,” found at />Using Driver INF Files
WRP protects the integrity of system files and system registry settings, including device
drivers and device settings. Drivers are added to the list of WRP-protected files on the system
only if they have been specifically flagged for protection by WRP when being staged to the
driver store.
When a driver package has been specifically flagged for WRP protection and that driver
package is staged to the driver store, an event is logged to the event logs to indicate this.
To verify that a third-party driver you plan to install will be protected using WRP, open the
INF file for the driver and look for Pnplockdown=1 in the [Version] section. Microsoft recom-
mends that ISVs who develop third-party drivers for Windows 7 include this setting (called
the lockdown flag) in their INF files, which causes WRP to prevent users with administrative
privileges from deleting or modifying the driver files referenced in the INF file. However, this
is only a recommendation; ISVs are not required to include this setting in case compatibility
issues should arise.
Using Device Manager Error Codes
Device Manager error codes are the codes that accompany icons displayed with exclamation
points (also known as bangs) in the Device Manager console (Devmgmt.msc). To view these
error codes, open the properties of the problem device in Device Manager and look under
Device Status on the General tab. You can view the hardware ID of the problem device by
selecting Hardware Ids from the Property list box on the Details tab. When you parse
SetupAPI logs, this ID can be useful for gaining further understanding of why the device
did not install or is not working properly.
Windows 7 reports the same Device Manager error codes as previous versions of Windows.
Knowledge Base article 245386, found at documents
these codes, explaining the meaning of each and the kinds of scenarios that can cause them to
be reported.
note During a device installation, if a user is prompted to install the device in the future
and responds by choosing No, a driver must still be installed. Otherwise, the PnP service
will continue to redetect the driver and prompt for installation. In this scenario, the Null
driver (which actually means that the device is configured not to use a driver) is installed
and Device Manager displays error code 28. If the user later wants to install the device, the
user must select the Update Driver option in Device Manager because the device previously
was assigned an error code because it could not be installed with any driver.
Please purchase PDF Split-Merge on www.verypdf.com to remove this watermark.
Understanding Device Installation and Management CHAPTER 17
725
Device Manager error codes are reported only during device installation; they are never
reported during driver staging. This means that if a Device Manager error code is reported,
the problem occurred during device installation and not driver staging. A good place to start
troubleshooting is looking at how physical installation of the device occurred and whether it
was done properly. Device Manager error codes are also reported in the SetupAPI.dev.log file.
See the section titled “Using the SetupAPI Log File” earlier in this chapter for more information.
Using Driver Verifier
Another device driver troubleshooting tool is Driver Verifier, which can monitor kernel-mode
drivers and graphics drivers and detect illegal function calls or other actions that could corrupt
the system. Driver Verifier can subject drivers to a variety of stresses to uncover improper driver
behavior. The Driver Verifier Manager tool (Verifier.exe) is located in %WinDir%\System32 and
can be run either graphically (press Windows Logo Key+R, type verifier, and press Enter) or
from an elevated command prompt using various parameters (type verifier /? to learn more
about these parameters).
MoRe inFo For more information about using Driver Verifier, see
/>Repairing Driver Store Corruption
If the driver store becomes corrupt, new drivers cannot be added to it and Windows may
not be able to copy driver files from it. The inability to add new drivers or install new devices
could therefore indicate problems with the driver store. Possible causes of driver store corrup-
tion can include:
n
Interrupted write operations from sudden power loss.
n
Damaged clusters on %SystemDrive% (use ChkDsk.exe to resolve).
n
Bad memory being accessed during memory-mapped input/output (I/O).
n
Malware or possibly even misbehaving anti-malware software.
If you suspect that driver store corruption is the problem, contact Microsoft Product
Support Services (PSS) for troubleshooting.
Repairing Index File Corruption
If the files used to index the driver store are missing or corrupt, new drivers cannot be added
to the driver store. The inability to add new drivers or install new devices could therefore
indicate problems with these index files. Possible causes of index file corruption are similar to
causes of driver store corruption.
If index files become corrupt, restore them from your most recent system backup. The
three index files for the driver store are Infpub.dat, Infstore.dat, and Drvindex.dat, and they
are found under %SystemRoot%\Inf. You can also use System Restore to restore index files
Please purchase PDF Split-Merge on www.verypdf.com to remove this watermark.
CHAPTER 17 Managing Devices and Services
726
because these files are added to protection points, but this approach is generally not recom-
mended because reverting to a previous restore point can affect other aspects of the system
and its installed software. Restoring from backup is therefore preferred.
diReCt FRoM tHe SoURCe
Troubleshooting Driver Signing Issues
Sampath Somasundaram, SDET
DMI Team, Windows
I
f you see a Windows Security dialog box with a check box that says Windows Can’t
Verify The Publisher Of This Driver Software, you should verify the validity of the
driver signature by checking the following:
1. See whether the INF file contains the CatalogFile=FileName entry and whether
the FileName matches the CAT file in the same directory.
2. If the preceding step is successful, double-click the catalog file, view the signa-
ture, view the certificate, and check the Certification Path tab. Verify that the
entire chain of certificates is trusted. If not, add them all to the trusted root
CA store on the local computer. The last one should be added to the TrustedPub-
lisher store.
If you see a Windows Security dialog box with a check box that says Always Trust
Software From Some_name, install the certificate in the TrustedPublisher store on
the local computer. Alternatively, you can select the check box and click Install,
and the system will add the certificate automatically to the TrustedPublisher store.
Note that you must use Mmc.exe to install the certificate, not the Certmgr.exe UI,
because Certmgr.exe installs the certificate in the current user’s store only.
If the package is signed but an unsigned dialog box still shows, determine whether
any older unsigned versions of the driver are in the driver store. Open a command
prompt and type pnputil.exe –e. To remove a driver from the driver store, type
pnptuil –d OEMfilename.inf, where OEMFilename.inf is the OEM file name listed by
pnputil –e for the driver package.
To check whether the catalog file actually contains the driver files, use the
Signtool.exe utility from the WDK/Platform Software Development Kit (SDK) and
type signtool verify /c catalogfilename filename.
Finally, to determine why your new latest freshly signed driver is losing to in-box
drivers, do the following:
n
Select the option to treat all signing as equal.
n
Compare the date of your driver with that of the in-box driver.
n
Check the version to see whether the dates are equal.
Please purchase PDF Split-Merge on www.verypdf.com to remove this watermark.
Understanding Power Management CHAPTER 17
727
Understanding Power Management
The goal of power management in Windows is to maximize energy efficiency. This is accom-
plished by minimizing the amount of power used while automatically providing required
performance on demand. Power management is an increasingly important issue for businesses
as a result of rising energy costs and energy consumption by today's desktop and mobile
computers. In the United States, the Environmental Protection Agency has estimated that PCs
at home and in the workplace use about 2 percent of all electrical energy consumed. Leaving
a PC on at home can add up to 8 percent to the total household power usage for the average
home.
By contrast, putting a PC into Sleep mode for 14 hours a day can save between 600 and
760 kWh per year of electricity consumption. In 2009, this means savings of approximately
$63,000 per year per 1,000 PCs for which this is done. The business and environmental
importance of improving the power efficiency of PCs is compelling, and Microsoft has made
numerous enhancements in this area in Windows 7.
Power Management Enhancements in Windows 7
Windows XP delivered improvements in the area of power management, such as support for
hibernation and standby and the ability of Windows to automatically power down monitors
and hard drives to reduce energy consumption. Windows Vista built upon these advances
with a number of improved power management capabilities, including:
n
Improved support for ACPI 2.0. In addition, Windows Vista also provides support for
selected features of ACPI 3.0.
n
Standard (non-ACPI) HALs are no longer supported in Windows Vista; only the ACPI
Programmable Interrupt Controller (PIC) HAL and ACPI Advanced Programmable
Interrupt Controller (APIC) HAL are supported in Windows Vista.
n
Simplified power plan model, including three default power plans:
•
Balanced Automatically balances system performance with energy consumption—
for example, by speeding up the processor when performing CPU-intensive activi-
ties, such as playing a 3D game, and slowing down the processor when performing
activities that require little CPU, such as editing a document in Microsoft Office
Word. Balanced is the default power plan in Windows Vista.
•
Power Saver Saves power at the expense of maximum performance. On mobile
systems, this helps to maximize battery life. On desktop and server platforms, it
works to reduce energy consumption.
•
High Performance Maximizes system performance at the expense of power
savings.
n
Mobile users can easily switch between power plans using the enhanced battery meter
in the notification area or the battery tile in Windows Mobility Center. Desktop and
server users can switch power plans in Power Options in Control Panel.
Please purchase PDF Split-Merge on www.verypdf.com to remove this watermark.