Tài liệu CSS Mastery- P3 doc
Bạn đang xem bản rút gọn của tài liệu. Xem và tải ngay bản đầy đủ của tài liệu tại đây (1.63 MB, 50 trang )
USING BACKGROUNDS FOR EFFECT
77
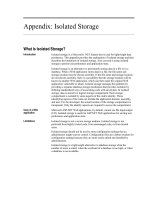
Figure 4-5. Example of a stylized rounded-corner box
You can actually use the same approach, but this time, instead of setting a background color on
the box, you can set a repeating background image. For this to work, you will need to apply the
bottom curve image to another element. In this case, I used the last paragraph element in the
box:
.box {
width: 424px;
background: url(/img/tile2.gif) repeat-y;
}
.box h2 {
background: url(/img/top2.gif) no-repeat left top;
padding-top: 20px;
}
.box .last {
background: url(/img/bottom2.gif) no-repeat left bottom;
padding-bottom: 20px;
}
.box h2, .box p {
padding-left: 20px;
padding-right: 20px;
}
<div class="box">
<h2>Headline</h2>
<p class="last">Content</p>
</div>
Figure 4-6 shows the resulting styled box. Because no height has been given to the box, it will
expand vertically as the text size is increased.
Please purchase PDF Split-Merge on www.verypdf.com to remove this watermark.
CHAPTER 4
78
Figure 4-6. Styled fixed-width box. The height of the box expands as the text size is increased.
Flexible rounded-corner box
The previous examples will all expand vertically if you increase your text size. However, they do
not expand horizontally, as the width of the box has to be the same as the width of the top and
bottom images. If you want to create a flexible box, you will need to take a slightly different
approach. Instead of the top and bottom curves consisting of a single image, they need to be
made up of two overlapping images (see Figure 4-7).
Figure 4-7. Diagram showing how the top graphics expand to form a flexible rounded-corner box
As the box increases in size, more of the larger image will be revealed, thus creating the illusion
that the box is expanding. This concept is sometimes referred as the sliding doors technique
because one image slides over the other, hiding it from view. More images are required for this
method to work, so you will have to add a couple of extra, nonsemantic elements to your markup.
<div class="box">
<div class="box-outer">
Please purchase PDF Split-Merge on www.verypdf.com to remove this watermark.
USING BACKGROUNDS FOR EFFECT
79
<div class="box-inner">
<h2>Headline</h2>
<p>Content</p>
</div>
</div>
</div>
This method requires four images: the top two images make up the top curve, and the bottom two
images make up the bottom curve and the body of the box (see Figure 4-8). As such, the bottom
images need to be as tall as the maximum height of the box. We will name these images top-
left.gif, top-right.gif, bottom-left.gif, and bottom-right.gif.
Figure 4-8. The images required to create the flexible rounded-corner box
First, you apply the bottom-left.gif to the main box div and bottom-right.gif to the outer div.
Next you apply top-left.gif to the inner div and finally top-right.gif to the heading. Last, it is
a good idea to add some padding to space out the contents of the box a little.
.box {
width: 20em;
background: #effce7 url(/img/bottom-left.gif) no-repeat left bottom;
}
.box-outer {
background: url(/img/bottom-right.gif) no-repeat right bottom;
padding-bottom: 1em;
}
Please purchase PDF Split-Merge on www.verypdf.com to remove this watermark.
CHAPTER 4
80
.box-inner {
background: url(/img/top-left.gif) no-repeat left top;
}
.box h2 {
background: url(/img/top-right.gif) no-repeat right top;
padding-top: 1em;
}
.box h2, .box p {
padding-left: 1em;
padding-right: 1em;
}
In this example, I have set the width of the box in ems, so increasing the text size in your browser
will cause the box to stretch (see Figure 4-9). You could, of course, set the width in percentages
and have the box expand or contract depending on the size of the browser window. This is one of
the main principles behind elastic and liquid layouts, something I will be covering later in the
book.
Figure 4-9. Flexible rounded-corner boxes expand both horizontally and vertically as the text is
resized.
The addition of a couple of extra nonsemantic elements is not ideal. If you only
have a couple of boxes, it is probably something you can live with. But if you
are concerned you could always add the extra elements using JavaScript (and
the DOM) instead. For more details on this topic, see the excellent article by
Roger Johansson of 456 Berea Street at www.456bereastreet.com/archive/
Please purchase PDF Split-Merge on www.verypdf.com to remove this watermark.
USING BACKGROUNDS FOR EFFECT
81
200505/transparent_custom_corners_and_borders.
Mountaintop corners
Mountaintop corners are a simple yet very flexible concept, first coined by Dan Cederholm of
www.simplebits.com, author of the best-selling friends of ED book Web Standards Solutions
(friends of ED, 2004 and updated 2009). Suppose you want to create a variety of different-colored
rounded-corner boxes. Using the previous methods you would have to create different corner
graphics for each color theme. This may be okay if you only had a couple of themes, but say you
wanted to let your users create their own themes? You’d probably have to create the corner
graphics dynamically on the server, which could get very complicated.
Fortunately, there is another way. Instead of creating colored corner graphics, you can create
curved, bitmap corner masks (see Figure 4-10). The masked area maps to the background color
you are using while the actual corner area is transparent. When placed over a colored box, they
give the impression that the box is curved (see Figure 4-11).
Figure 4-10. In a bitmapped corner mask, the white mask will cover the background color,
creating a simple curved effect.
As these corner masks need to be bitmapped, subtle curves work best. If you try to use a large
curve, it will appear jagged and unsightly.
Please purchase PDF Split-Merge on www.verypdf.com to remove this watermark.
CHAPTER 4
82
The basic markup is similar to the previous method; it requires four elements to apply the four
corner masks to:
<div class="box">
<div class="box-outer">
<div class="box-inner">
<h2>Headline</h2>
<p>Content</p>
</div>
</div>
</div>
The CSS is also very similar:
.box {
width: 20em;
background: #effce7 url(/img/bottom-left.gif)
«
no-repeat left bottom;
}
.box-outer {
background: url(/img/bottom-right.gif) no-repeat right bottom;
padding-bottom: 5%;
}
.box-inner {
background: url(/img/top-left.gif) no-repeat left top;
}
.box h2 {
background: url(/img/top-right.gif) no-repeat right top;
padding-top: 5%;
}
Please purchase PDF Split-Merge on www.verypdf.com to remove this watermark.
USING BACKGROUNDS FOR EFFECT
83
.box h2, .box p {
padding-left: 5%;
padding-right: 5%;
}
Figure 4-11. Mountaintop corner box
The main difference, apart from using different images, is the addition of a background color on
the main box div. If you want to change the color of the box, you can simply change the color
value in the CSS without having to re-create any new graphics. This method is only suitable for
creating very simple boxes; however, it provides a great deal of flexibility and can be used over
and over again on different projects.
Multiple background images
The previous examples are great, but most of them rely on the addition of nonsemantic markup to
your code. These extra elements are needed because you can only add one background image
per element. Wouldn’t it be great if you could add multiple background images instead? Well,
through the magic of CSS 3 you can. What’s more, the syntax is extremely simple and takes the
same form as regular background images. The main difference is that instead of defining one
background image to use, you can use as many images as you like. Here’s how it’s done:
.box {
background-image: url(/img/top-left.gif),
url(/img/top-right.gif),
url(/img/bottom-left.gif),
url(/img/bottom-right.gif);
background-repeat: no-repeat,
no-repeat,
no-repeat,
no-repeat;
Please purchase PDF Split-Merge on www.verypdf.com to remove this watermark.
CHAPTER 4
84
background-position: top left,
top right,
bottom left,
bottom right;
}
<div class="box">
<h2>Headline</h2>
<p>Content<p>
</div>
You start by defining all the images you want to use with the background-image property. Next,
you set whether you want them to repeat on not. Last, you set their positions using the
background-position property. You can see the results in Figure 4-12. Safari has supported
multiple background images as far back as version 1.3, and the latest versions of Firefox and
Opera have now started to catch up. Internet Explorer doesn’t yet support multiple background
images, but don’t let that stop you from using this technique in situations where it doesn’t matter if
IE users see square corners instead.
Figure 4-12. A rounded corner box made using CSS 3 multiple backgrounds
Please purchase PDF Split-Merge on www.verypdf.com to remove this watermark.
USING BACKGROUNDS FOR EFFECT
85
border-radius
In these days of high-definition computer games with on-the-fly texture mapping, you would think
that browsers would be able to draw a simple rounded corner box themselves, without the need
of raster graphics. Well, now they can, thanks to the new CSS 3 border-radius property. All you
need to do is set the radius of the desired border and let the browser do the rest (see Figure 4-
13).
.box {
border-radius: 1em;
}
Figure 4-13. A rounded corner box made using the CSS 3 border-radius property
Because this property is new, there is still some disagreement about how it should actually work.
So until this property gets wider adoption, you’ll need to use browser-specific extensions to
invoke it. Currently, both Firefox and Safari support this property, so I’ll use the –moz and –webkit
prefixes.
.box {
-moz-border-radius: 1em;
-webkit-border-radius: 1em;
border-radius: 1em;
}
Please purchase PDF Split-Merge on www.verypdf.com to remove this watermark.
CHAPTER 4
86
Browser manufacturers are always experimenting with new extensions to CSS.
Some of these may come from yet to be implemented versions of CSS, while
others may find their way into the specifications at a later date. Some
extensions may never become part of the formal specification, such as those
used by Safari for rendering UI elements on the iPhone.
So as not to confuse other user agents or invalidate your code, these
extensions can be invoked by adding a vendor-specific prefix to your selector,
property, or value. For instance, Mozilla uses the –moz prefix, while Safari uses
the –webkit prefix. There are similar prefixes for IE, Opera, and all the major
browsers. Each browser has its own set of special features you can access
using these prefixes, so you’ll probably need to check which ones are available
on the vendors developer site.
Using this mechanism, you can try out new CSS 3 features before they become
an official recommendation. However, make sure you use these extensions
with care, as the format of these experimental features may differ between
browsers and could change or disappear by the time the specification becomes
an official recommendation.
border-image
Last on my list of new CSS 3 tricks is the border-image property. This excellent addition to CSS
allows you to define a single image to act as the border of an element. What good is a single
image, you may ask? The beautify of this property is that it allows you to slice up that image into
nine separate sectors, based on some simple percentage rules, and the browser will
automatically use the correct sector for the corresponding part of the border. Known as nine-slice
scaling, this technique helps avoid the distortion you’d normally get when resizing rounded corner
boxes. It’s a little difficult to visualize, so I think an example is in order.
Imagine you had a 100-pixel high image of a curved box, like the one in Figure 4-14. If you draw
two lines 25 percent from the top and bottom of the box, then another two lines 25 percent from
the left and the right, you will have divided the box up into nine sectors.
Please purchase PDF Split-Merge on www.verypdf.com to remove this watermark.
USING BACKGROUNDS FOR EFFECT
87
Figure 4-14. The source file for our border image, with the division points draw on for illustration
purposes.
The border-image property will automatically use the images in each sector for the corresponding
border. So the image in the top-left sector will be used for the top-left border, and the image in the
middle-right sector for the right-hand-side border. I want my borders to be 25 pixels wide, so I set
that as the width in my CSS. If the images aren’t big enough, they will automatically tile, creating
an expandable box (see Figure 4-15). Here is how you achieve this effect in code:
.box {
-webkit-border-image: url(/img/corners.gif)
25% 25% 25% 25% / 25px round round;
}
Safari has supported this property for a while, through the use of the Webkit-specific extension,
as shown in this example. Firefox 3.5 and Opera 9.5 now also support border-image, which
opens up its use to a much wider audience.
Please purchase PDF Split-Merge on www.verypdf.com to remove this watermark.
CHAPTER 4
88
Figure 4-15. A rounded corner box using the border-image property
Drop shadows
Drop shadows are a popular and attractive design feature, adding depth and interest to an
otherwise flat design. Most people use a graphics package like Photoshop to add drop shadows
directly to an image. However, using the power of CSS, it is possible to apply simple drop shadow
effects without altering the underlying image.
There are various reasons you may want to do this. For instance, you may allow nontechnical
people to administer your site who have no experience using Photoshop, or you may simply be
uploading images from a location where you do not have access to Photoshop, such as an
Internet cafe. By having a predefined drop shadow style, you can simply upload a regular image
and have it displayed on your site with a drop shadow.
One of the nicest benefits of using CSS is that it is nondestructive. If you decide that you want to
remove the drop shadow effect later on, you can simply alter a couple of lines in your CSS files
rather than having to reprocess all of your images.
Easy CSS drop shadows
This very simple drop shadow method was first described by Dunstan Orchard of
www.1976design.com. It works by applying a large drop shadow graphic to the background of a
wrapper div. The drop shadow is then revealed by offsetting the image using negative margins.
The first thing you need to do is create the drop shadow graphic. I created my drop shadow
graphic using Adobe Photoshop. Create a new Photoshop file, the dimensions of which are as
large as the maximum size of your image. I created a file that’s 800 pixels by 800 pixels just to be
Please purchase PDF Split-Merge on www.verypdf.com to remove this watermark.
USING BACKGROUNDS FOR EFFECT
89
on the safe side. Unlock the background layer and fill it with the color you want your shadow to sit
on. In my case I simply kept the background layer white. Create a new layer and fill it with white.
Now move this layer up and left by 4 or 5 pixels and then apply a 4- or 5-pixel-wide drop shadow
to this layer. Save this image for web and call it shadow.gif (see Figure 4-16).
Figure 4-16. The shadow.gif zoomed in so you can see the 5-pixel drop shadow
The markup for this technique is very simple:
<div class="img-wrapper"><img src="dunstan.jpg" width="300"
«
height="300" alt="Dunstan Orchard" /></div>
To create the effect, you first need to apply your shadow graphic to the background of the
wrapper div. Because divs are block-level elements, they stretch horizontally, taking up all the
available space. In this situation we want the div to wrap around the image. You can do this by
explicitly setting a width for the wrapper div, but doing so reduces the usefulness of this
technique. Instead, you can float the div, causing it to shrink-wrap on modern browsers, with one
exception—IE 5.x on the Mac. You may want to hide these styles from IE 5.x on the Mac. For
more information on hiding rules from various browsers, see Chapter 8, which discusses hacks
and filters.
.img-wrapper {
background: url(/img/shadow.gif) no-repeat bottom right;
clear: right;
float: left;
}
To reveal the shadow image and create the drop shadow effect (see Figure 4-17), you need to
offset the image using negative margins:
Please purchase PDF Split-Merge on www.verypdf.com to remove this watermark.
CHAPTER 4
90
.img-wrapper img {
margin: -5px 5px 5px -5px;
}
Figure 4-17. Image with a drop shadow applied
You can create a good, fake photo border effect by giving the image a border and some padding
(see Figure 4-18):
.img-wrapper img {
background-color: #fff;
border: 1px solid #a9a9a9;
padding: 4px;
margin: -5px 5px 5px -5px;
}
Figure 4-18. The final result of our simple drop shadow technique
Please purchase PDF Split-Merge on www.verypdf.com to remove this watermark.
USING BACKGROUNDS FOR EFFECT
91
This works for most modern, standards-compliant browsers. However, we need to add in a
couple of simple rules to get it working correctly in IE 6:
.img-wrapper {
background: url(/img/shadow.gif) no-repeat bottom right;
clear: right;
float: left;
position: relative;
}
.img-wrapper img {
background-color: #fff;
border: 1px solid #a9a9a9;
padding: 4px;
display: block;
margin: -5px 5px 5px -5px;
position: relative;
}
The drop shadow effect now works in IE 6.
Drop shadows à la Clagnut
Richard Rutter of www.clagnut.com came up with a similar method for creating drop shadows.
Instead of using negative margins, his technique uses relative positioning to offset the image:
.img-wrapper {
background: url(/img/shadow.gif) no-repeat bottom right;
float:left;
line-height:0;
}
.img-wrapper img {
background:#fff;
padding:4px;
border:1px solid #a9a9a9;
position:relative;
left:-5px;
top:-5px;
}
Please purchase PDF Split-Merge on www.verypdf.com to remove this watermark.
CHAPTER 4
92
Box-shadow
While the previous techniques server their purpose, they are all a little cumbersome. Wouldn’t it
be good if browsers could create their own drop shadows, doing away with the need of
Photoshop filters and raster graphics? Well you guessed it, CSS 3 allows us to do this as well,
using the handy box-shadow property. This property takes four values: the vertical and horizontal
offsets, the width (and hence blurriness) of the shadow, and the color. So in the following
example, I am offsetting the shadow by three pixels, making it six pixels wide and medium gray
(see Figure 4-19).
img {
box-shadow: 3px 3px 6px #666;
}
Figure 4-19. A lovely drop shadow using the box-shadow effect
Because this is another one of those experimental CSS 3 properties, you will need to use the
Safari and Firefox extensions for now. However, it hopefully won’t be long until this property is
more widely supported.
img {
-webkit-box-shadow: 3px 3px 6px #666;
-moz-box-shadow: 3px 3px 6px #666;
box-shadow: 3px 3px 6px #666;
}
One of the most exciting things about this property is the fact that it works in conjunction with the
border-radius property (see Figure 4-20). This means you can now programmatically create
drop shadows on rounded corner boxes without even having to open up your graphics package!
Please purchase PDF Split-Merge on www.verypdf.com to remove this watermark.
USING BACKGROUNDS FOR EFFECT
93
Figure 4-20. A drop shadow on a rounded corner box
We used this effect quite liberally on the UX London 2009 website, serving up drop shadows to
modern browsers (see Figure 4-21), and regular boxes to less-capable browsers (see Figure 4-
22).
Please purchase PDF Split-Merge on www.verypdf.com to remove this watermark.
CHAPTER 4
94
Figure 4-21. The UX London website as seen by Firefox. Notice the solid box shadows created
using CSS 3.
Please purchase PDF Split-Merge on www.verypdf.com to remove this watermark.
USING BACKGROUNDS FOR EFFECT
95
Figure 4-22. The UX London website again, this time viewed on Internet Explorer. The design is
bereft of shadows, but most users won’t notice anything is missing.
Opacity
The clever use of opacity can give your designs an extra dimension. It can also be used to layer
elements over each other, so you get a hint of what lies beneath. As well as being a cool trick,
this can also be used to improve the usability on your site.
CSS opacity
CSS opacity has been available in most modern browsers for quite some time, so I’m surprised
that it’s not used more often. Unsurprisingly, it isn’t supported by older version of Internet
Explorer. However, a quick bit of IE-specific code will fix that problem. As an example of its use,
imagine you wanted to pop up an alert message to your users, layering it over the existing
document so they could still see what was underneath (see Figure 4-23).
Please purchase PDF Split-Merge on www.verypdf.com to remove this watermark.
CHAPTER 4
96
.alert {
background-color: #000;
border-radius: 2em;
opacity: 0.8;
filter: alpha(opacity=80); /*proprietary IE code*/
}
Figure 4-23. A rounded corner alert box with 80 percent opacity
The one big problem with CSS opacity is that it’s inherited by the contents of the element you’re
applying it to, as well as the background. So if you look closely at Figure 4-23, you’ll see that the
text on the page is showing through the alert text as well. This doesn’t matter if you’re using a
very high opacity in combination with high-contrast text. However, with lower opacities, the
content of your box can start to get unreadable. This is where RGBa comes in.
RGBa
RGBa is a mechanism for setting color and opacity in one go. RGB stands for “Red,” “Green,”
and “Blue,” while the “a” stands for “alpha transparency.” To use RGBa in the previous example,
you would do something like this:
Please purchase PDF Split-Merge on www.verypdf.com to remove this watermark.
USING BACKGROUNDS FOR EFFECT
97
.alert {
background-color: rgba(0,0,0,0.8);
border-radius: 2em;
}
The first three numbers represent the red, green, and blue values of the color. In this case, the
alert box is going to be black, so these are all set to 0. As with opacity, the last number is the
decimal value of opacity, so 0.8 means this background will be 80 percent opaque, or to put it
another way, 20 percent transparent. A value of 1 would make the alert 100 percent opaque,
while a value of 0 would make it fully transparent. The results of this technique are shown in
Figure 4-24.
Figure 4-24. A rounded corner alert box with 80 percent opacity using RGBa
PNG transparency
One of the biggest benefits of the PNG file format is its support for alpha transparency. This
allows you to get really creative with your designs (see Figure 4-25). Unfortunately, Internet
Explorer 6 doesn’t natively support PNG transparency, although IE 7 and 8 do. However, there
are a couple of ways you can get older versions of Internet Explorer to play ball.
Please purchase PDF Split-Merge on www.verypdf.com to remove this watermark.
CHAPTER 4
98
Figure 4-25. The old Revyver site had a beautiful example of PNG transparency at the bottom of
the viewport. As the page scrolled, you would get glimpses of the content show through the
branches of the tree and arcs of the rainbow.
The best-known way of forcing PNG transparency support in IE 6 is to use the proprietary
AlphaImageLoader filter. To do this, you need to include the following line of code in your CSS.
filter:progid:DXImageTransform.Microsoft.AlphaImageLoader
(src=/img/my-image.png', sizingMethod='crop');
Unfortunately, using this code will invalidate your CSS, so your best option is to filter this off into a
separate IE 6–specific style sheet.
.img-wrapper div {
filter:progid:DXImageTransform.Microsoft.AlphaImageLoader
(src='/img/shadow2.png', sizingMethod='crop');
background: none;
}
The first rule uses a proprietary filter to load in the PNG and enforce alpha transparency. The
original background image will still be displayed, so the second rule simply hides the original
background image.
Internet Explorer has another piece of proprietary code called a conditional comment that will let
you serve up a particular stylesheet to specific versions of IE. In this case, you only want IE 6 to
Please purchase PDF Split-Merge on www.verypdf.com to remove this watermark.
USING BACKGROUNDS FOR EFFECT
99
see the new stylesheet, so you can place the following code in the head of the page:
<! [if ie 6]>
<link rel="stylesheet" type="text/css" href="ie6.css"/>
<![endif] >
Don’t worry too much about conditional comments at this stage; you will learn
all about them in detail in Chapter 8.
The problem with this technique is that it forces you to include this line of code for every alpha-
transparent PNG you want to use. As such, it is somewhat cumbersome to use.
The other alternative is to use a technique known as the IE PNG fix. This involves using a little-
known, Microsoft-specific extension to CSS called behaviors. By downloading the appropriate
.htc file and pointing to it in your IE 6–specific stylesheet, you can enable PNG transparency on
any element you want.
img, div {
behavior: url(iepngfix.htc);
}
For more information on this technique and to download the .htc file, visit www.twinhelix.com/
css/iepngfix.
CSS parallax effect
Background images aren’t only about creating rounded corner boxes and drop shadows. We can
have a lot of fun with them as well. Clearleft did just that when we launched our Silverback
usability testing application. If you go to www.silverbackapp.com and resize the browser window,
you will notice a strange effect (see Figure 4-26). The background images move at slightly
different speeds, giving the impression that the page has depth. This phenomenon is known as
parallax scrolling and was the mainstay of many old school computer games.
Please purchase PDF Split-Merge on www.verypdf.com to remove this watermark.
CHAPTER 4
100
Figure 4-26. Change the window size on www.silverbackapp.com and see what happens.
To achieve this effect, you first need to create a couple of different background images. We
created one image of our vines on a green background and then two further images of vines on
an alpha transparent background. This allowed the midground and foreground images to flow
over each other and the background, without obscuring the view.
The main background will be applied to the body element. However, assuming we’re not using
CSS 3 multiple-background images, we’ll need to add two new elements to attach our
backgrounds to. The content of the page then needs to sit in front of these elements so you can
interact with it. You could place the foreground div in front of the content, but this would partially
block your content and make it difficult to interact with. So the markup structure will look
something like this:
<body>
<div class="midground">
<div class="foreground">
<p>Your content will go here!</a>
</div>
</div>
</body>
Please purchase PDF Split-Merge on www.verypdf.com to remove this watermark.
USING BACKGROUNDS FOR EFFECT
101
The first thing you need to do is add the main background to the body element. You want this
image to tile horizontally, so you will need to set the image-repeat property to repeat-x. You also
want the body element to take on the color of the background, which in this instance is light
green. Last, you want to offset your image horizontally by 20 percent, relative to the size of the
window. This is where the magic happens. As the window resizes, the position of the background
image will change, and it will appear to move across the screen.
body {
background-image: url(/img/bg-rear.jpg);
background-repeat: repeat-x;
background-color:#d3ff99;
background-position: 20% 0;
}
You now need to do the same with the midground and foreground images, choosing higher
percentages so they move faster relative to each other and give that sense of depth. We decided
to set the midground’s position to 40 percent, and the foreground position to a whopping 150
percent. You can obviously play around with these positions to generate the effect that is right for
you.
body {
background-image: url(/img/bg-rear.jpg);
background-repeat: repeat-x;
background-color:#d3ff99;
background-position: 20% 0;
}
.midground {
background-image: url(/img/bg-mid.png);
background-repeat: repeat-x;
background-color: transparent;
background-position: 40% 0;
}
.foreground {
background-image: url(/img/bg-front.png);
background-repeat: repeat-x;
background-color: transparent;
background-position: 150% 0;
}
Please purchase PDF Split-Merge on www.verypdf.com to remove this watermark.