Tài liệu Java Database Programming Bible- P5 docx
Bạn đang xem bản rút gọn của tài liệu. Xem và tải ngay bản đầy đủ của tài liệu tại đây (1000.63 KB, 50 trang )
Chapter 6:Inserting, Updating, and Deleting Data
-199-
Using INSERT SELECT
The INSERT statement illustrated in the example of Listing 6-1 is primarily intended for inserting
records into a table one at a time. For applications such as storing information from membership
applications or entering employee records, this is the perfect solution. However, there are times when
you want to copy subsets of data from one table to another. On these occasions, doing the transfer
one record at a time introduces a lot of overhead because each record has to be individually retrieved
from one table and inserted into another other.
SQL allows you to handle these situations by combining the INSERT command with a SELECT
command, which queries the database for the desired records. The advantage of this approach is that
the whole process is carried out within the RDBMS, avoiding the overhead of retrieving records and
reinserting them externally.
The SELECT statement
The SELECT statement is used to query the database for specific rows. This is the basic form of the
SELECT statement:
SELECT
Field1, Field2,
FROM
TableName
[ WHERE ];
In place of a comma-delimited list of field names, you can supply the asterisk wildcard character, *, to
request all fields:
SELECT * FROM TableName;
Cross-Reference
The SELECT statement is discussed in detail in Chapter 7.
An example of a situation where you might use INSERT SELECT is the creation of a table
containing only the first and last names from the Contact_Info Table. As illustrated in Chapter 5, the
SQL command to create the table is as follows:
CREATE TABLE Names
(First_Name VARCHAR(20), Last_Name LName VARCHAR(30));
To insert the corresponding data from the original Contact_Info Table, use a SQL INSERT SELECT
command to select the desired fields from the Contact_Info Table, and insert them into the new Names
Table. Here's an example:
INSERT INTO Names
SELECT First_Name, Last_Name FROM Contact_Info;
Essentially, this command tells the database management system to perform these two separate
operations internally:
TEAMFLY
Team-Fly
®
Please purchase PDF Split-Merge on www.verypdf.com to remove this watermark.
Chapter 6:Inserting, Updating, and Deleting Data
-200-
A SELECT (to query the Contact_Info Table for the FName and LName fields from all
records)
An INSERT (to input the resulting record set into the new Names Table
By performing these operations within the RDBMS, the use of the INSERT SELECT command
eliminates the overhead of retrieving the records and reinserting them.
The WHERE clause
The optional WHERE clause allows you to make conditional queries; for example, you can get all
records where the last name is "Corleone" and insert them into the Names Table with this statement:
INSERT INTO Names
SELECT First_Name, Last_Name FROM Contact_Info WHERE Last_Name =
'Corleone';
Using INSERT SELECT with JDBC
As with any other SQL command, it is easy to use INSERT SELECT with JDBC. If you substitute
the code snippet of Listing 6-2 for the main() of Listing 6-1 and run the example again, you will create
a Name Table populated with the first and last names.
Listing 6-2: Using INSERT SELECT with JDBC
public static void main(String args[]){
DataInserter inserter = new DataInserter();
String SQLCommand = "INSERT INTO NAMES "+
"SELECT First_Name,Last_Name FROM CONTACT_INFO "+
"WHERE Last_Name = 'Corleone'; ";
inserter.execute(SQLCommand);
}
}
Once you have data in a table, you are likely to have to update it to reflect changes in data fields like
addresses or inventory item count. The next section shows how to use the SQL UPDATE command to
modify data in a table.
The UPDATE Statement
A frequent requirement in database applications is updating records. For example, when a contact
moves, you need to change his or her address. Do this with the SQL UPDATE statement, using a
WHERE clause to identify the record you want to change. Here's an example:
Please purchase PDF Split-Merge on www.verypdf.com to remove this watermark.
Chapter 6:Inserting, Updating, and Deleting Data
-201-
UPDATE Contact_Info
SET Street = '55 Broadway', ZIP = '10006'
WHERE First_Name = 'Michael' AND Last_Name = 'Corleone';
This statement first evaluates the WHERE clause to find all records with matching First_Name and
Last_Name. It then makes the address change to all of those records.
Caution
If you omit the WHERE clause from the UPDATE statement, all records in the given
table are updated.
Using Calculated Values with UPDATE
You can also use the UPDATE statement to update columns with calculated values. For example, if you
add stock to your inventory, instead of setting the Qty column to an absolute value, you can simply add
the appropriate number of units with a calculated UPDATE statement like this:
UPDATE Inventory
SET Qty = QTY + 24
WHERE Name = 'Corn Flakes';
When you use a calculated UPDATE statement like this, you need to make sure that you observe the
rules for INSERTS and UPDATES mentioned earlier. In particular, ensure that the data type of the
calculated value is the same as the data type of the field you are modifying, as well as short enough to
fit in the field.
Common Problems with UPDATE
Two common problems can result from the use of calculated values:
§ Truncation can result from number conversions, such as conversion from a real number to an
integer.
§ Overflow occurs when the resulting value is larger than the capacity of the column. This causes
the database system to return an error.
Problems of this type can be avoided if you observe the rules for INSERTS and UPDATES mentioned
earlier.
Listing 6-3: Using UPDATE with JDBC
package jdbc_bible.part2;
import java.awt.event.*;
import java.sql.*;
import sun.jdbc.odbc.JdbcOdbcDriver;
Please purchase PDF Split-Merge on www.verypdf.com to remove this watermark.
Chapter 6:Inserting, Updating, and Deleting Data
-202 -
public class DataUpdater{
static String jdbcDriver = "sun.jdbc.odbc.JdbcOdbcDriver";
static String dbName = "Contacts";
static String urlRoot = "jdbc:odbc:";
private ActionListener exceptionListener = null;
public DataUpdater(){
registerDriver();
}
public void setDatabaseName(String dbName){
this.dbName=dbName;
}
public void registerDriver(){
try {
Class.forName(jdbcDriver);
DriverManager.registerDriver(new JdbcOdbcDriver());
}
catch(ClassNotFoundException e){
System.err.println(e.getMessage());
}
catch(SQLException e){
System.err.println(e.getMessage());
}
}
public void execute(String SQLCommand){
String url = urlRoot+dbName;
try {
Connection con = DriverManager.getConnection(url);
Statement stmt = con.createStatement();
stmt.execute(SQLCommand);
con.close();
}
catch(SQLException e){
System.err.println(e.getMessage());
Please purchase PDF Split-Merge on www.verypdf.com to remove this watermark.
Chapter 6:Inserting, Updating, and Deleting Data
-203 -
}
}
public static void main(String args[]){
DataUpdater inserter = new DataUpdater();
String SQLCommand = "UPDATE CONTACT_INFO "+
"SET STREET = '58 Broadway', ZIP = '10008' "+
"WHERE First_Name = 'Michael' AND "+
"Last_Name ='Corleone';";
inserter.execute(SQLCommand);
}
}
Once again, the basic Java code used to issue the SQL command remains unchanged. To try it out,
compile and execute the example; you should be able to see the modified record in your Contact_Info
Table.
Transaction Management with COMMIT and ROLLBACK
Transaction management refers to the capability of a relational database management system to
execute database commands in groups, known as transactions. A transaction is a group or sequence
of commands, all of which must be executed in order and must complete successfully. If anything goes
wrong during the transaction, the database management system will allow the entire transaction to be
cancelled or "rolled back." If, on the other hand, it completes successfully, the transaction can be
saved to the database or "committed."
A transaction typically involves several related commands, as in the case of a bank transfer. If Client A
orders a transfer of funds to Client B, at least two database-access commands must be executed:
§ Client A's account must be debited.
§ Client B's account must be credited.
If one of these commands is executed but the other is not, the funds will either vanish from Client A's
account without appearing in Client B's account, or, perhaps worse from the viewpoint of the bank, the
funds will be credited to Client B's account without being withdrawn from Client A's account, leaving
the bank in the hole.
This situation obviously becomes dramatically more complicated in the real world, where a large
financial institution, with hundreds or thousands of users all accessing the database at the same time,
can potentially have vast numbers of incomplete transactions active at any given moment.
The solution is to combine logically related commands into groups that are committed as a single
transaction. If a problem arises, the entire transaction can be rolled back and the problem fixed without
serious adverse impact on business operations.
Please purchase PDF Split-Merge on www.verypdf.com to remove this watermark.
Chapter 6:Inserting, Updating, and Deleting Data
-204 -
The primary commands used in managing transactions are COMMIT and R OLLBACK. As their names
suggest, the COMMIT command commits changes made from the beginning of the transaction to the
point at which the command is issued, and the ROLLBACK command undoes them. In addition, most
databases support the AUTOCOMMIT option, which tells the RDBMS to commit all commands
individually, as they are executed. This option can be used with the SET command. For example:
SET AUTOCOMMIT [ON | OFF] ;
By default, the SET AUTOCOMMIT ON command is executed at startup, telling the RDBMS to commit all
statements automatically as they are executed. If you do not want these commands to be
automatically executed, set the AUTOCOMMIT option to off as follows:
SET AUTOCOMMIT OFF;
When you start to work with a transaction, turn Autocommit off; then issue the commands required by
the transaction, and, assuming that everything executes correctly, commit the transaction using this
command:
COMMIT;
If any problems should arise during the transaction, you can cancel the entire transaction by using the
following command:
ROLLBACK;
Note
Transaction-management syntax varies considerably from one database management
system to the next, but the basic syntax shown previously is supported by all common
database management systems.
The use of COMMIT and ROLLBACK in a JDBC example is very straightforward. Here's a modification to
the example of Listing 6-3, which specifically turns Autocommit on. Simply insert the
con.setAutoCommit(true) line into the stmt.execute(SQLCommand) method, as shown:
public void execute(String SQLCommand){
String url = urlRoot+dbName;
try {
Connection con = DriverManager.getConnection(url);
con.setAutoCommit(true);
Statement stmt = con.createStatement();
stmt.execute(SQLCommand);
con.close();
}
catch(SQLException e){
System.err.print(e.getMessage());
}
}
Please purchase PDF Split-Merge on www.verypdf.com to remove this watermark.
Chapter 6:Inserting, Updating, and Deleting Data
-205-
Adding the setAutoCommit(true) line tells the database management system to commit all
changes automatically. If you compile and execute the modified code, you should get exactly the same
results as you do when you run the original example.
Now modify the code to turn Autocommit off, using setAutoCommit(false), as shown here:
public void execute(String SQLCommand){
String url = urlRoot+dbName;
try {
Connection con = DriverManager.getConnection(url);
con.setAutoCommit(false);
Statement stmt = con.createStatement();
stmt.execute(SQLCommand);
con.close();
}
catch(SQLException e){
System.err.print(e.getMessage());
}
}
This time, when you run the example, it throws an "Invalid Transaction State" exception, and the
update has not been made. The exception is thrown because we have not terminated the transaction
before closing the connection.
Now alter the code in the try block to the following; the change is made as before, because we have
specifically told the database management system to commit the change:
try {
Connection con = DriverManager.getConnection(url);
con.setAutoCommit(false);
Statement stmt = con.createStatement();
stmt.execute(SQLCommand);
con.commit();
con.close();
}
If you change the try block by replacing the con.commit() with con.rollback(), the change will
be rolled back, so no change will be visible. This time, however, no exception is thrown, as you can
see here:
try {
Connection con = DriverManager.getConnection(url);
Please purchase PDF Split-Merge on www.verypdf.com to remove this watermark.
Chapter 6:Inserting, Updating, and Deleting Data
-206 -
con.setAutoCommit(false);
Statement stmt = con.createStatement();
stmt.execute(SQLCommand);
//con.commit();
con.rollback();
con.close();
}
You can check to see if the UPDATE has been executed by inserting a SELECT statement to read the
updated value of the Street field after the update command is executed but before it is rolled back. The
try block now looks like this:
try {
Connection con = DriverManager.getConnection(url);
con.setAutoCommit(false);
Statement stmt = con.createStatement();
stmt.execute(SQLCommand);
String query = "SELECT Street FROM Contact_Info "+
"WHERE First_Name = 'Michael' AND Last_Name ='Corleone';";
ResultSet rs = stmt.executeQuery(query);
rs.next();
System.out.println("Street = "+rs.getString(1));
con.rollback();
con.close();
}
When you run this version, it shows that the new value of Street matches the update, but when you
look in the database, the previous value is still there because the change has been rolled back.
Cross-Reference
RecordSets and the SELECT are discussed in detail in Chapter 7
.
The DELETE Statement
The last data-manipulation command is DELETE, which is used for deleting entire records or groups of
records. Again, when using the DELETE command, you use a WHERE clause to identify the records to
be deleted.
Please purchase PDF Split-Merge on www.verypdf.com to remove this watermark.
Chapter 6:Inserting, Updating, and Deleting Data
-207-
Use of the DELETE command is very straightforward. For example, this is the command you use to
delete records containing the First_Name: "Michael" and the Last_Name: "Corleone":
DELETE FROM Contact_Info
WHERE First_Name = 'Michael' AND Last_Name = 'Corleone';
Caution
INSERT, DELETE, and UPDATE can cause referential integrity problems with other
tables, as well as significant problems within the table you are working on. Delete with
care.
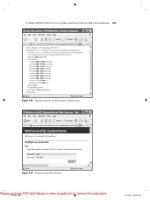
A Swing-Based Table Editor
To illustrate the topics covered in this chapter, the Swing-based table builder created in Chapter 5 is
extended by the addition of a table editor (see Figure 6-1). The table editor is based on components
derived from components built in Chapter 5. A new Edit menu (with Insert, Update, Delete,
JMenuItems) and a new JTable in a JInternalFrame (for handling the Insert, Edit, and Delete
functions) are also added.
Figure 6-1: Inserting data with SQL INSERT
The events are as follows:
1. The user selects a database.
2. The user selects an action: Insert, Update, or Delete.
3. The user selects the table.
4. A TableEdit frame is displayed for user interaction.
5. A SQL command is created dynamically and executed on command.
The first step in building the table editor is to create the Edit menu by subclassing the DBMenu
convenience class. The DBMenuItems Insert, Update, and Delete to the Edit menu are added and
hooked into the Jframe, which forms the basis of the MainFrame class.
Listing 6-4: Edit menu with insert, update, and delete items
Please purchase PDF Split-Merge on www.verypdf.com to remove this watermark.
Chapter 6:Inserting, Updating, and Deleting Data
-208-
package jdbc_bible.part2;
import java.awt.*;
import java.awt.event.*;
import java.util.Vector;
import javax.swing.*;
import javax.swing.event.*;
public class EditMenu extends DBMenu{
JMenuItem insertItem;
JMenuItem updateItem;
JMenuItem deleteItem;
JMenuItem exitItem;
public EditMenu(){
setText("Edit");
setActionCommand("Edit");
setMnemonic((int)'E');
insertItem = new DBMenuItem("Insert",'I',itemListener,false);
updateItem = new DBMenuItem("Update",'U',itemListener,false);
deleteItem = new DBMenuItem("Delete",'D',itemListener,false);
add(insertItem);
add(updateItem);
add(deleteItem);
}
}
As discussed in Chapter 5, the DBMenu base class and the DBMenuItem class are simply
convenience classes for building menus. Using these convenience classes simplifies the menu code
considerably.
TableEditFrame
TableEditFrame, shown in Listing 6-5, is very similar to the TableBuilderFrame discussed in
Chapter 5. It extends JInternalFrame and contains a JTable used to set up the fields for the
Please purchase PDF Split-Merge on www.verypdf.com to remove this watermark.
Chapter 6:Inserting, Updating, and Deleting Data
-209 -
database table. It also contains a JTextArea, which provides a preview of the generated SQL
command, and an "Insert Data" button.
Listing 6-5: TableEditFrame
package jdbc_bible.part2;
import java.awt.*;
import java.awt.event.*;
import java.util.EventObject;
import java.util.EventListener;
import java.util.Vector;
import javax.swing.*;
import javax.swing.event.*;
import javax.swing.table.*;
/**
* TableEditFrame extends JInternalFrame to create a display which builds
* SQL CREATE statements
* <p/>
* TableBuilder, which extends JTable, is a key component.
*/
class TableEditFrame extends JInternalFrame{
protected JTable table;
protected JTextArea SQLPane = new JTextArea();
protected JButton insertButton = new JButton("Insert Data");
protected DatabaseUtilities dbUtils;
protected String tableName = null;
protected String colNames[] = null;
protected String dataTypes[] = null;
protected String SQLCommand[] = null;
protected String SQLCommandRoot = "";
TEAMFLY
Team-Fly
®
Please purchase PDF Split-Merge on www.verypdf.com to remove this watermark.
Chapter 6:Inserting, Updating, and Deleting Data
-210-
public TableEditFrame(String tableName, DatabaseUtilities dbUtils){
setSize(600,400);
setLocation(10,10);
setClosable(true);
setMaximizable(true);
setIconifiable(true);
setResizable(true);
getContentPane().setLayout(new BorderLayout());
this.tableName=tableName;
this.dbUtils=dbUtils;
SQLCommandRoot = "INSERT INTO "+tableName+" VALUES ";
setTitle(SQLCommandRoot);
init();
setVisible(true);
}
// initialise the JInternalFrame
private void init(){
colNames = dbUtils.getColumnNames(tableName);
dataTypes = dbUtils.getDataTypes(tableName);
table = createTable(colNames,15);
TableChangeListener modelListener = new TableChangeListener();
table.getModel().addTableModelListener(modelListener);
JScrollPane sqlScroller = new JScrollPane(SQLPane);
JScrollPane tableScroller = new JScrollPane(table);
JSplitPane splitter = new JSplitPane(JSplitPane.VERTICAL_SPLIT,
sqlScroller,tableScroller);
splitter.setDividerLocation(100);
getContentPane().add(splitter,BorderLayout.CENTER);
getContentPane().add(insertButton,BorderLayout.SOUTH);
insertButton.addActionListener(new ButtonListener());
}
Please purchase PDF Split-Merge on www.verypdf.com to remove this watermark.
Chapter 6:Inserting, Updating, and Deleting Data
-211-
protected JTable createTable(String[] colNames,int nRows){
String[][] rowData = new String[nRows][colNames.length];
for(int i=0;i<nRows;i++){
for(int j=0;j<colNames.length;j++)rowData[i][j]="";
}
JTable table = new JTable(rowData,colNames);
return table;
}
public Vector parseTable(){
int rows = table.getRowCount();
int cols = table.getColumnCount();
Vector tableValues = new Vector();
if(rows>=0&&cols>=0){
for(int i=0;i<rows;i++){
String rowData = "";
for(int j=0;j<cols;j++){
String field = (String)table.getValueAt(i,j);
if(field.length()>0){
field = fixApostrophes(field);
if(j>0)rowData += ", ";
if(dataTypes[j].equals("CHAR")||
dataTypes[j].equals("VARCHAR"))
rowData += "'"+field+"'";
else
rowData += field;
}
}
if(rowData.length()==0)break;
tableValues.addElement(" ( " + rowData + " );\n");
}
}
Please purchase PDF Split-Merge on www.verypdf.com to remove this watermark.
Chapter 6:Inserting, Updating, and Deleting Data
-212-
return tableValues;
}
private String fixApostrophes(String in){
int n=0;
while((n=in.indexOf("'",n))>=0){
in = in.substring(0,n)+"'"+in.substring(n);
n+=2;
}
return in;
}
// Listener for the Insert Button
class ButtonListener implements ActionListener{
public void actionPerformed(ActionEvent event){
dbUtils.execute(SQLCommand);
}
}
// Listener for Edit events on the JTable
class TableChangeListener implements TableModelListener{
public TableChangeListener(){
}
public void tableChanged(TableModelEvent event){
Vector rowData = parseTable();
SQLCommand = new String[rowData.size()];
SQLPane.setText("");
for(int i=0;i<rowData.size();i++){
if(rowData.elementAt(i)==null)break;
SQLCommand[i] = SQLCommandRoot+(String)rowData.elementAt(i);
SQLPane.append(SQLCommand[i]);
}
}
}
Please purchase PDF Split-Merge on www.verypdf.com to remove this watermark.
Chapter 6:Inserting, Updating, and Deleting Data
-213-
}
The parseTable() method has been modified slightly and now returns a vector of Strings. This
change supports the ability to issue several SQL INSERT commands as a result of a one-button click.
An additional change has been made to the TableChangeListener, which now accesses the
DatabaseUtilities class directly rather than through the event system. Again, this has been done
to support the ability to issue several SQL commands in response to a button click.
The Controller Class
The DatabaseManager class is shown in Listing 6-6. It is based on the class used in Chapter 5. It
incorporates additional code to hook in the new menu and a new method,
displayTableEditFrame(), to display the new JInternalFrame, TableEditFrame.
Listing 6-6: DatabaseManager — Controller class
package jdbc_bible.part2;
import java.awt.*;
import java.awt.event.*;
import java.util.Vector;
import javax.swing.*;
import javax.swing.event.*;
public class DBManager extends JFrame{
JMenuBar menuBar = new JMenuBar();
JDesktopPane desktop = new JDesktopPane();
String database = null;
String tableName = null;
String menuSelection = null;
TableBuilderFrame tableMaker = null;
TableEditFrame tableEditor = null; // added for Chapter 6
DatabaseUtilities dbUtils = null;
TableMenu tableMenu = new TableMenu();
EditMenu editMenu = new EditMenu(); // added for Chapter 6
Please purchase PDF Split-Merge on www.verypdf.com to remove this watermark.
Chapter 6:Inserting, Updating, and Deleting Data
-214-
MenuListener menuListener = new MenuListener();
public DBManager(){
setJMenuBar(menuBar);
setTitle("JDBC Database Bible");
getContentPane().setLayout(new BorderLayout());
getContentPane().add(desktop,BorderLayout.CENTER);
setSize(new Dimension(640,480));
menuBar.add(tableMenu);
tableMenu.setMenuListener(menuListener);
menuBar.add(editMenu); // added for Chapter 6
editMenu.setMenuListener(menuListener);
setVisible(true);
}
private void displayTableBuilderFrame(){
tableName = JOptionPane.showInputDialog(this,"Table:",
"Select table",JOptionPane.QUESTION_MESSAGE);
tableMaker = new TableBuilderFrame(tableName);
tableMaker.setCommandListener(new CommandListener());
desktop.add(tableMaker);
tableMaker.setVisible(true);
}
private void displayTableEditFrame(){ // added for Chapter 6
tableName = JOptionPane.showInputDialog(this,"Table:",
"Select table",JOptionPane.QUESTION_MESSAGE);
tableEditor = new TableEditFrame(tableName,dbUtils);
desktop.add(tableEditor);
tableEditor.setVisible(true);
}
Please purchase PDF Split-Merge on www.verypdf.com to remove this watermark.
Chapter 6:Inserting, Updating, and Deleting Data
-215-
private void selectDatabase(){
database = JOptionPane.showInputDialog(this,
"Database:","Select database",
JOptionPane.QUESTION_MESSAGE);
dbUtils = new DatabaseUtilities();
dbUtils.setExceptionListener(new ExceptionListener());
tableMenu.enableMenuItem("New Table",true);
tableMenu.enableMenuItem("Drop Table",true);
editMenu.enableMenuItem("Insert",true);
editMenu.enableMenuItem("Update",true);
editMenu.enableMenuItem("Delete",true);
}
private void executeSQLCommand(String SQLCommand){
dbUtils.execute(SQLCommand);
}
private void dropTable(){
tableName = JOptionPane.showInputDialog(this,"Table:",
"Select table",JOptionPane.QUESTION_MESSAGE);
int option = JOptionPane.showConfirmDialog(null,
"Dropping table "+tableName,
"Database "+database,
JOptionPane.OK_CANCEL_OPTION);
if(option==0){
executeSQLCommand("DROP TABLE "+tableName);
}
}
class MenuListener implements ActionListener{
public void actionPerformed(ActionEvent event){
Please purchase PDF Split-Merge on www.verypdf.com to remove this watermark.
Chapter 6:Inserting, Updating, and Deleting Data
-216-
String menuSelection = event.getActionCommand();
if(menuSelection.equals("Database")){
selectDatabase();
}else if(menuSelection.equals("New Table")){
displayTableBuilderFrame();
}else if(menuSelection.equals("Drop Table")){
dropTable();
}else if(menuSelection.equals("Insert")){
displayTableEditFrame();
}else if(menuSelection.equals("Exit")){
System.exit(0);
}
}
}
class ExceptionListener implements ActionListener{
public void actionPerformed(ActionEvent event){
String exception = event.getActionCommand();
JOptionPane.showMessageDialog(null, exception,
"SQL Error", JOptionPane.ERROR_MESSAGE);
}
}
class CommandListener implements ActionListener{
public void actionPerformed(ActionEvent event){
String SQLCommand = event.getActionCommand();
executeSQLCommand(SQLCommand);
}
}
public static void main(String args[]){
DBManager dbm = new DBManager();
}
}
Please purchase PDF Split-Merge on www.verypdf.com to remove this watermark.
Chapter 6:Inserting, Updating, and Deleting Data
-217 -
One of the most useful tools provided by JDBC is the capability to retrieve information about the data
returned in a ResultSet. This information is obtained using the JDBC ResultSetMetaData object
reviewed in the next section.
JDBC ResultSetMetaData
In addition, two methods have been added that use the ResultSetMetaData class to get information
about the table being edited. The two MetaData objects that follow are capable of returning the table
information required:
§ DatabaseMetaData, which returns information at the database level
§ ResultSetMetaData, which returns information at the ResultSet level
The reason for using the ResultSetMetaData object in this example is to restrict the column
information to just the columns being displayed and to defer discussion of the DatabaseMetaData
object until ResultSets have been discussed, since it makes heavy use of ResultSets to return
information.
JDBC ResultSetMetaData provides access to different kinds of information about the data in a
table, including column names and data types. Some of the most useful ResultSet MetaData
methods are the following:
§ int getColumnCount()
§ String getColumnName(int column)
§ String getColumnTypeName(int column)
The following usage is very straightforward. To get the names of all columns in a table, for example, a
simple query is executed to return a ResultSet used to get the ResultSetMetaData. This is then
queried for the desired information.
String SQLCommand = "SELECT * FROM "+tableName+";";
try {
Connection con = DriverManager.getConnection(url);
Statement stmt = con.createStatement();
ResultSet rs = stmt.executeQuery(SQLCommand);
ResultSetMetaData md = rs.getMetaData();
String[] columnNames = new String[md.getColumnCount()];
for(int i=0;i<columnNames.length;i++){
columnNames[i] = md.getColumnLabel(i+1);
}
con.close();
}
Please purchase PDF Split-Merge on www.verypdf.com to remove this watermark.
Chapter 6:Inserting, Updating, and Deleting Data
-218-
Cross-Reference
ResultSetMetaData methods and usage are discussed in Chapter 4;
usage examples are in Chapter 10.
In the expanded version of the DatabaseUtilities class shown in Listing 6-7, a second version of
the execute() method has been added. This new version accepts a String array argument so that it
can loop through a number of SQL INSERT commands.
Listing 6-7: DatabaseUtilities — JDBC code
package jdbc_bible.part2;
import java.awt.event.*;
import java.sql.*;
import java.util.Vector;
import sun.jdbc.odbc.JdbcOdbcDriver;
public class DatabaseUtilities{
static String jdbcDriver = "sun.jdbc.odbc.JdbcOdbcDriver";
static String dbName = "Contacts";
static String urlRoot = "jdbc:odbc:";
private ActionListener exceptionListener = null;
public DatabaseUtilities(){
registerDriver();
}
public void setDatabaseName(String dbName){
this.dbName=dbName;
}
public void registerDriver(){
try {
Class.forName(jdbcDriver);
DriverManager.registerDriver(new JdbcOdbcDriver());
}
catch(ClassNotFoundException e){
reportException(e.getMessage());
}
Please purchase PDF Split-Merge on www.verypdf.com to remove this watermark.
Chapter 6:Inserting, Updating, and Deleting Data
-219-
catch(SQLException e){
reportException(e.getMessage());
}
}
public void execute(String SQLCommand){
String url = urlRoot+dbName;
try {
Connection con = DriverManager.getConnection(url);
Statement stmt = con.createStatement();
stmt.execute(SQLCommand);
con.close();
}
catch(SQLException e){
reportException(e.getMessage());
}
}
public void execute(String[] SQLCommand){
String url = urlRoot+dbName;
try {
Connection con = DriverManager.getConnection(url);
Statement stmt = con.createStatement();
for(int i=0;i<SQLCommand.length;i++){
stmt.execute(SQLCommand[i]);
}
con.close();
}
catch(SQLException e){
reportException(e.getMessage());
}
}
public String[] getColumnNames(String tableName){
Vector dataSet = new Vector();
String[] columnNames = null;
String url = urlRoot+dbName;
TEAMFLY
Team-Fly
®
Please purchase PDF Split-Merge on www.verypdf.com to remove this watermark.
Chapter 6:Inserting, Updating, and Deleting Data
-220-
String SQLCommand = "SELECT * FROM "+tableName+";";
try {
Connection con = DriverManager.getConnection(url);
Statement stmt = con.createStatement();
ResultSet rs = stmt.executeQuery(SQLCommand);
ResultSetMetaData md = rs.getMetaData();
columnNames = new String[md.getColumnCount()];
for(int i=0;i<columnNames.length;i++){
columnNames[i] = md.getColumnLabel(i+1);
}
con.close();
}
catch(SQLException e){
reportException(e.getMessage());
}
return columnNames;
}
public String[] getDataTypes(String tableName){
Vector dataSet = new Vector();
String[] dataTypes = null;
String url = urlRoot+dbName;
String SQLCommand = "SELECT * FROM "+tableName+";";
try {
Connection con = DriverManager.getConnection(url);
Statement stmt = con.createStatement();
ResultSet rs = stmt.executeQuery(SQLCommand);
ResultSetMetaData md = rs.getMetaData();
dataTypes = new String[md.getColumnCount()];
for(int i=0;i<dataTypes.length;i++){
dataTypes[i] = md.getColumnTypeName(i+1);
Please purchase PDF Split-Merge on www.verypdf.com to remove this watermark.
Chapter 6:Inserting, Updating, and Deleting Data
-221 -
}
con.close();
}
catch(SQLException e){
reportException(e.getMessage());
}
return dataTypes;
}
public void setExceptionListener(ActionListener exceptionListener){
this.exceptionListener=exceptionListener;
}
private void reportException(String exception){
if(exceptionListener!=null){
ActionEvent evt = new ActionEvent(this,0,exception);
exceptionListener.actionPerformed(evt);
}else{
System.err.println(exception);
}
}
}
Summary
In this chapter, you learned about:
§ Using SQL INSERT to populate a table
§ Using SQL UPDATE to modify the contents of a table
§ Using SQL DELETE to delete records from a table
§ Using the SELECT clause and how to use it with INSERT
§ Using the WHERE clause and how to use it with UPDATE and DELETE
§ Applying the basics of transaction control with COMMIT and ROLLBACK
§ Using JDBC ResultSetMetaData to get information about a table
§ Using JDBC and Swing to create a JDBC/SQL table editor
Chapter 7 discusses retrieving data from a database by using the SELECT command.
Please purchase PDF Split-Merge on www.verypdf.com to remove this watermark.
Chapter 7:Retrieving Data with SQL Queries
-222-
Chapter 7: Retrieving Data withSQL Queries
In This Chapter
One of the most important functions of any database application is finding the records in the database
tables and returning them in the desired form. The process of finding and returning formatted records
is known as querying the database. This chapter will explore the use of the SQL SELECT command to
query the database created and populated in Chapters 5 and 6.
The SELECT Statement
The SELECT statement is the heart of a SQL query. In addition to its use in returning data in a query, it
can be used in combination with other SQL commands to select data for a variety of other operations,
such as modifying specific records using the UPDATE command.
The most common use of SELECT, however, is as the basis of data-retrieval commands, or queries, to
the database. A simple query specifies the names of the columns to be returned and the name of the
table they can be found in. A basic SELECT command looks like this:
SELECT columnName1, columnName2, FROM tableName;
The SQL command for selecting the First Name and Last Name of each entry in the Contact_Info table
would be as follows:
SELECT First_Name, Last_Name FROM Contact_Info;
In addition to this specific form, where the names of all the fields you want returned are specified in the
query, SQL also supports the following wild-card form:
SELECT * FROM tableName;
The wild card, *, tells the database-management system to return the values for all columns.
Using the WHERE Clause
The real power of the SELECT command comes from the WHERE clause, which allows you to query the
database for specific data. You will have noticed that each of the commands shown above returns
values for all rows. A practical query needs to be more restrictive, returning the requested fields from
only those records that match specific criteria. For example, the WHERE clause enables you to retrieve
all records with a Last_Name Corleone from the Contact_Info table shown in Table 7-1.
Table 7-1: The CONTACT_INFO Table
FIRST_NAME MI LAST_NAME STREET CITY STATE ZIP
Michael A Corleone 123 Pine New York NY 10006
Fredo X Corleone 17 Main New York NY 10007
Sonny A Corleone 123 Walnut Newark NJ 12346
Please purchase PDF Split-Merge on www.verypdf.com to remove this watermark.
Chapter 7:Retrieving Data with SQL Queries
-223-
Table 7-1: The CONTACT_INFO Table
FIRST_NAME MI LAST_NAME STREET CITY STATE ZIP
Francis X Corleone 17 Main New York NY 10005
Vito G Corleone 23 Oak St Newark NJ 12345
Tom B Hagen 37 Chestnut Newark NJ 12345
Kay K Adams 109 Maple Newark NJ 12345
Francis F Coppola 123 Sunset Hollywood CA 23456
Mario S Puzo 124 Vine Hollywood CA 23456
To retrieve all records containing the last name Corleone, you could use the following query:
SELECT * FROM Contact_Info WHERE Last_Name = 'Corleone';
The result of this query will be to return all columns from any row containing the Last_Name Corleone.
The order in which the columns are returned will be the order in which they are stored in the database,
although the row order is arbitrary.
Note
Unlike rows in a spreadsheet, records in a database table have no implicit order. You
must specify explicitly any ordering you need.
To retrieve columns in a specific order, the column names must be specified in the query. For example,
to get the data in First_Name, Last_Name order, use the following query:
SELECT First_Name, Last_Name FROM Contact_Info WHERE Last_Name =
'Corleone';
To get the order reversed, use the following query:
SELECT Last_Name, First_Name FROM Contact_Info WHERE Last_Name =
'Corleone';
Formatting SQL Commands
The SQL engine ignores excess white space, so you can and should insert line breaks for clarity.
Conventionally, major clauses such as the FROM clause and the WHERE clause are placed on their own
lines, unless the command is so brief as to be trivial. For example, many Relational Database
Management Systems (RDBMS) such as SQL Server, format commands in the SQL pane
automatically to conform to this style. A good basic approach when you are not quite sure how to
format a command is to aim for readability. Remember, somebody will have to maintain what you write,
so readability is important.
Key words, table names, and column names are not case sensitive, but the contents of the records
within a table are case sensitive. This means that with a little thought, you can use case to help make
your SQL statements more readable.
Please purchase PDF Split-Merge on www.verypdf.com to remove this watermark.