Tài liệu HTML Utopia: Designing Without Tables Using CSS- P10 docx
Bạn đang xem bản rút gọn của tài liệu. Xem và tải ngay bản đầy đủ của tài liệu tại đây (1.2 MB, 30 trang )
Achieving Full-height Columns
File: styles.css (excerpt)
#main2 {
background-image: url(img/leftbg.gif);
background-position: bottom left;
background-repeat: repeat-y;
}
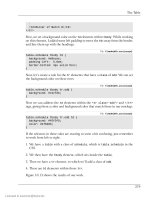
If you view this page now, you’ll see that our full-length faux columns are almost
complete, as Figure 9.22 shows. However, the bottom of each of the columns
needs a little tidying up.
Figure 9.22. Our faux columns are almost complete
Edit the style sheet to remove the content div’s bottom border by replacing the
border property with border-top, border-right, and border-left declarations:
File: styles.css (excerpt)
#content {
margin: 0 240px 0 160px;
border-top: 1px solid #b9d2e3;
border-right: 1px solid #b9d2e3;
249
Licensed to
Chapter 9: Three-column Layouts
border-left: 1px solid #b9d2e3;
background-color: white;
color: black;
}
Also remove the border from the bottom of the left-hand sidebar by removing
the border-bottom declaration from the #sidebar2 rule:
File: styles.css (excerpt)
#sidebar2 {
float: left;
width: 159px;
border-top: 1px solid #b9d2e3;
border-left: 1px solid #b9d2e3;
background-color: white;
color: black;
margin: 0;
padding: 0;
}
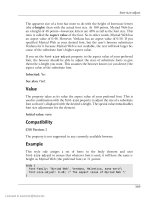
If you view your layout in the browser, you should find that your columns appear
to run the full length of the screen, as shown in Figure 9.23.
250
Licensed to
The Content Order Problem
Figure 9.23. Full-length columns
Admittedly, this effect does require some fiddling around in your graphics program
to prepare the background images so that they line up. However, once you’ve
created your images, the effect works very well.
The Content Order Problem
The floated layout we created above looks fantastic. However, the absolutely
positioned layout does have one point in its favor: in the markup for the absolutely
251
Licensed to
Chapter 9: Three-column Layouts
positioned version of our page, the columns can appear in any order we like. This
might not seem important to you, but it’s important to those who use browsers
that don’t support CSS, and users of screen readers. If we use the floated layout,
these people will have to wade through all of the content of the sidebars before
they get to the page’s main content, which sits at the bottom of our markup.
The effect is more marked if you remove the style sheet so that you can see the
markup for the content sections in order. Comment out the link to your style
sheet and reload the page: you’ll be able to see how much “junk” content occurs
before the main page content (Figure 9.24 illustrates). Now imagine that your
site displayed the same sidebar content on every page—it would be pretty tiresome
for site users to have to listen to a screen reader read out that same content for
every page of your site they visited!
Figure 9.24. Displaying the page without a style sheet
One solution to this problem is to implement a “skip navigation” link. This link
enables the user to skip over repeated or unimportant content in order to get to
the real meat of the page. To effect this solution, we simply link to an id that’s
located at the top of the page’s important content.
252
Licensed to
The Content Order Problem
To see this technique in action, add a link to the navigation list in the page’s
header:
File: index.html (excerpt)
<ul>
<li><a href="">Contact Us</a> | </li>
<li><a href="">About Us</a> | </li>
<li><a href="">Privacy Policy</a> | </li>
<li><a href="">Sitemap</a> | </li>
<li><a href="#content">Jump to content</a></li>
</ul>
Load the page in your browser and click the link, as shown in Figure 9.25. The
page will jump down a little, so that the top of the content div is as close as
possible to the top of the viewport.
Anchors Away
You might be used to achieving this effect using an <a> tag with a name at-
tribute, but modern browsers now support linking directly to an element’s
id, which spares you having to insert additional and otherwise useless anchor
elements.
253
Licensed to
Chapter 9: Three-column Layouts
Figure 9.25. Clicking the link enables users to skip easily to the
main content
These links aren’t particularly useful for visitors who don’t use screen readers or
text-only browsers, though, and various methods have been devised to hide these
links so they’re available only via screen readers and browsers that don’t support
CSS. Unfortunately, due to the way that some screen readers interpret CSS and
JavaScript, these methods can be problematic. So, for optimum accessibility, it’s
recommended that you keep the link visible and locate it somewhere near the
top of the content. Some site owners, such as Molly Holzschlag,
2
have devised
ways of partially hiding the links. On Molly’s site, pictured in Figure 9.26, the
link doesn’t appear until you hover your mouse over the area at the top of the
screen.
2
254
Licensed to
Other Layout Methods
Figure 9.26. The “skip to content” link on molly.com
Other Layout Methods
There are other methods of creating multiple-column layouts with a footer that
can allow you to order your source code more usefully. However, these techniques
tend to entail other compromises. For example, the Source Ordered Columns
example on Position is Everything,
3
pictured in Figure 9.27, offers one alternative
layout method. The compromise is that all of the columns need to be liquid: they
must be set with percentage widths, rather than set with fixed widths that use
pixel values.
3
255
Licensed to
Chapter 9: Three-column Layouts
Figure 9.27. Source ordered columns on Position is Everything
Position is Everything is an excellent source of demos and new ideas for creating
CSS layouts. The site also offers an article called “In Search of the One True
Layout”,
4
which provides an example of a three-column layout with a footer that
behaves as required for the example above. However, it uses some complex
techniques and many browser hacks. As you continue to work with CSS and de-
velop your confidence with this technology, these examples can be invaluable in
helping you to solve problems, but they’re also fun to experiment with in your
spare time.
Summary
In this chapter, we learned how to change an existing layout by adding another
column. Then, we added a footer to our layout and experienced first-hand the
problems footers can cause within an absolutely positioned layout. By recreating
the same layout from a slightly different starting point, we overcame these
problems and produced a layout that positioned elements in a very different
way—without needing to redevelop our style sheet from the ground up!
4
256
Licensed to
Summary
No doubt, you’ve already realized that there’s no single, ideal way to address the
problems posed by CSS layouts. Whenever you tackle a new design, you’ll need
to make a decision as to which type of layout best suits your needs. However, as
we saw in this chapter, in most cases it’s not too difficult to change your mind
later, and switch to a different layout method if you need to.
In the next chapter, we’ll look at another type of layout—the fixed-width lay-
out—and consider some of the ways in which we can create these types of layouts.
Of course, we’ll also address the issues that you’re likely to encounter as you do
so.
257
Licensed to
258
Licensed to
10
Fixed-width Layouts
In the last two chapters, we’ve been creating layouts that we call liquid lay-
outs—those that stretch to fit the size of the user’s browser window. This ap-
proach gives the user control over the size at which they view the design, as it
allows them to resize their window. The other type of layout you may wish to
build is a fixed-width layout. In this type of layout, we fix the width of the
content area to a measurement that will allow the user to avoid scrolling horizont-
ally on most screens.
In this chapter, we’ll create a fixed-width layout that’s centered in the user’s
browser window. Along the way, we’ll look at a few techniques that we can use
to style tables of data effectively, and we’ll discuss a method by which you can
enable your site visitors to use a different layout if they find your fixed-width
layout difficult to read.
Licensed to
Chapter 10: Fixed-width Layouts
The Layout
Figure 10.1. A mockup of the fixed-width layout
260
Licensed to
Creating the Document
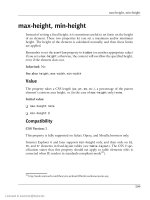
We will start, as in the last chapters, with a mockup that our designer has created
in Fireworks; this is presented in Figure 10.1. As you can see, this layout doesn’t
have a great deal of content. If the table was stretched to the full width of the
page, it might look a little sparse and be difficult to read in a wide browser win-
dow. This is a situation where we might choose to use a fixed-width layout.
Creating the Document
Once again, create an XHTML or HTML document and save it as fixed-
width.html
. Ensure that all of the content in the document is marked up correctly,
then submit it to the W3C validator so you can be certain that the file doesn’t
contain any markup errors that will create problems when you start to add CSS.
A Tabular Layout
Although we discourage using tables for page layout purposes, remember
that using tables is perfectly valid—in fact, it’s recommended—for the display
of tabular data such as might be stored in a spreadsheet. The match schedule
shown in Figure 10.1 is tabular data, so a table is the best way to mark it
up.
File: fixedwidth.html (excerpt)
<!DOCTYPE html PUBLIC "-//W3C//DTD XHTML 1.0 Strict//EN"
"
<html xmlns="
<head>
<title>Footbag Freaks</title>
<meta http-equiv="Content-Type"
content="text/html; charset=iso-8859-1" />
<link rel="stylesheet" type="text/css"
href="fixedwidth.css" />
</head>
<body>
<div id="header">
<img src="img/logo.gif" alt="Footbag Freaks" height="77"
width="203" />
<p>The Home of the Hack</p>
</div> <! header >
<div id="content">
<img src="img/player.gif" height="272" width="111"
alt="World Cup 06 Melbourne" />
<h1>Announcement</h1>
<h2>2006 FOOTBAG WORLD CUP DRAW</h2>
<p>Melbourne, Australia. July 21st - 27th</p>
261
Licensed to
Chapter 10: Fixed-width Layouts
<p>Footbag Freaks is pleased to announce that the draw for
the biggest and most prestigious event in global footbag
is coming to Melbourne in July, 2006 with the staging of
the Footbag World Cup.</p>
<p>Seen as the pinnacle of achievement in the sport, the
2006 World Cup will bring together over 200 of the
world's premier footbag experts, with representative
teams expected from over 40 nations. Entries will close
on March 2, 2006. Tickets to the event will go on sale
from January 1, 2006.</p>
<table class="schedule" summary="Schedule of matches for the
Footbag 2006 World Cup">
<caption>Event Schedule</caption>
<thead>
<tr>
<th scope="col">Match</th>
<th scope="col">Scheduled</th>
<th scope="col">Country</th>
<th scope="col">Vs.</th>
<th scope="col">Country</th>
<th scope="col">Winner plays </th>
</tr>
</thead>
<tbody>
<tr>
<th scope="row"><a href="#">Match 1</a></th>
<td><a href="#">July 21st :12:00pm</a></td>
<td>England</td>
<td>vs.</td>
<td>New Zealand</td>
<td>Winner of Match 12</td>
</tr>
<tr>
⋮
<th scope="row"><a href="#">Match 12</a></th>
<td><a href="#">July 24th :7:00pm</a></td>
<td>Mexico</td>
<td>vs.</td>
<td>Iceland</td>
<td>Winner of Match 1</td>
</tr>
</tbody>
</table>
</div> <! content >
</body>
</html>
262
Licensed to
Creating the Document
Pay special attention to the table’s markup. This table has headings along its top
and down its left-hand side (the title of each match). These headings are marked
up using the th element, while the rest of the cells are marked up using td. We
also use the scope attribute on the headings to explain whether the heading de-
scribes a column (scope="col") or a row (scope="row"). The heading area of
the table is wrapped in a thead element and the body in a tbody element. These
attributes are useful for describing the table correctly, but they’ll also come in
very handy when we come to apply CSS to the page.
I’ve added two divs to the document: one is wrapped around the header area
with the ID header, while the other is wrapped around the content whose ID is
content. Figure 10.2 shows how this unstyled layout displays in the browser.
263
Licensed to
Chapter 10: Fixed-width Layouts
Figure 10.2. The document before any CSS is applied
Centering the Content Area
The first thing we’ll do is center the layout and set its width. We need to insert
an additional div that wraps the entirety of the document’s content, so open
this new div after the opening <body> tag and close it before the closing </body>.
Give this div an ID of wrapper.
264
Licensed to
Centering the Content Area
File: fixedwidth.html (excerpt)
<body>
<div id="wrapper">
<div id="header">
⋮
</div> <! content >
</div> <! wrapper >
</body>
Now, create an external style sheet named fixedwidth.css and add the following
rules to it:
File: fixedwidth.css (excerpt)
body {
margin: 0;
padding: 0;
text-align: center;
min-width: 740px;
}
#wrapper {
text-align: left;
width: 740px;
margin-left: auto;
margin-right: auto;
}
This is all that you need to fix the page’s width and center its content. Let’s step
through these rules.
The first rule affects the body element. It sets the margin and padding to 0, and
the min-width of the layout to 740 pixels. It also sets the text-align property
to center.
We then add a rule for the new wrapper div that we just inserted into our docu-
ment. Here, we set the right and left margins to auto and the width to 740 pixels.
The width value in both rules should be changed to reflect the width of your
layout. 740 pixels is a good width in that it will allow some of the background
to show through even if users’ monitors are set to a resolution of 800×600 pixels.
If you view your document in a browser you should see that the content is
centered in the browser window, and is 740 pixels wide.
Let’s add some more declarations to the body rule to insert the background image
and color that appears in our design mockup.
265
Licensed to
Chapter 10: Fixed-width Layouts
File: fixedwidth.css (excerpt)
body {
margin: 0;
padding: 0;
text-align: center;
min-width: 740px;
background-color: #050845;
color: white;
background-image: url(img/bg.jpg);
background-repeat: repeat-x;
font: small Arial, Helvetica, Verdana, sans-serif;
}
With this markup, we add a background color and image, as we did for our liquid
layouts. We also set the text to display in a small sans-serif font.
Currently, the background image will display across the whole page. Let’s use
the wrapper div to set the content area to display a lighter, more readable back-
ground color, and have the background color display only around the content’s
edges.
File: fixedwidth.css (excerpt)
#wrapper {
text-align: left;
width: 740px;
margin-left: auto;
margin-right: auto;
background-color: #fdf8f2;
color: #01407a;
padding: 10px;
}
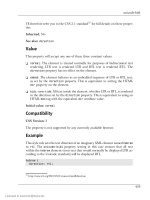
In the markup above, I’ve also added ten pixels of padding in order to create
some space between the edge of the wrapper div and the content. Figure 10.3
shows how the page looks now.
266
Licensed to
The Header Area
Figure 10.3. The design starting to take shape with the addition
of a background image
The Header Area
The header area in this layout is very simple—it contains just the logo and tagline.
The logo falls into its correct place by virtue of the natural flow of the document,
so let’s skip to styling the tagline beneath it using the following rule:
File: fixedwidth.css (excerpt)
#tagline {
font-weight: bold;
color: #050845;
font-style: italic;
margin: 0 0 0.5em 0;
padding: 0 0 0 20px;
}
Note that you’ll need to add id="tagline" to the tagline’s opening <p> tag.
267
Licensed to
Chapter 10: Fixed-width Layouts
This markup sets the color to a deep blue, the font weight to bold, and its style
to italic. We add a bottom margin to provide some space below the tagline and
set left-hand padding to position it beneath the logo. Figure 10.4 shows the results
of our work on the header.
Figure 10.4. The styled header
The Content
With the header complete, let’s move on to style the content area of the page.
This area is already wrapped in a div with an ID of content. If you refer to the
design mockup, you’ll see that this section has a white background. A darker
border sets it out against the off-white background of the wrapper.
Let’s begin by creating a CSS rule for #content by adding the following to the
style sheet:
File: fixedwidth.css (excerpt)
#content {
background-color: white;
border: 1px solid #f0f0f0;
padding: 0;
}
These rules should be fairly self-explanatory by now: we’ve given the div a white
background and a border that’s slightly darker than the background color of the
wrapper. We’ve also set the padding to zero. Because we added padding of ten
pixels to the wrapper, an area that’s ten pixels wide shows the darker color around
the div with id="content"—this is the effect that we are trying to reproduce
from the design mockup.
Next, let’s add some space between the content div and the border. We could
try to remember to apply a margin to every element within this area, but it’s
simpler just to add a new div within the content div and give it a class="inner"
attribute. We can then give #content .inner a 30-pixel margin to create that
space.
268
Licensed to
The Content
File: fixedwidth.css (excerpt)
#content .inner {
margin: 30px;
}
We can now start to look at the contents of the content div. The first thing we
need to deal with is the World Cup ’06 image that sits at the top of the content
area. I inserted it there because I want to use float to position it to the right of
the content.
Add the following rule for #worldcuplogo. It sets float to right, and specifies
left and bottom margins for the logo, inserting space between it and the content
that will wrap around it:
File: fixedwidth.css (excerpt)
#worldcuplogo {
float: right;
margin: 0 0 20px 40px;
}
Once we add id="worldcuplogo" to the image in our XHTML, the logo will
display to the right of the layout, the content flowing around it as shown in Fig-
ure 10.5.
269
Licensed to
Chapter 10: Fixed-width Layouts
Figure 10.5. Floating the logo image
The layout is really taking shape now. With the addition of some very simple
CSS, a few divs, and an id, we’re coming close to replicating the mockup layout
we started with. One of the things I enjoy about using CSS for layout is that it
gives us the ability to put together simple pages that look attractive very quickly.
When the need arises, you can create a news page or simple layout for an an-
nouncement like this one in a very short space of time.
The heading “Announcement” is an h1 element. We can address it using a selector
that addresses any h1 elements that are contained within another element that
has the ID content.
File: fixedwidth.css (excerpt)
#content h1 {
font-size: 120%;
color: #01407a;
padding: 0.3em 0 0.3em 30px;
background-image: url(img/ball.gif);
background-repeat: no-repeat;
270
Licensed to
The Content
background-position: left center;
border-top: 1px solid #c5d6e2;
border-bottom: 1px solid #c5d6e2;
}
Here, we’ve added as a background image the ball image that displays to the left
of the heading in our mockup. We want to display it just once—by default, it
would tile beneath the heading—so we set background-repeat to no-repeat.
We’re also using the background-position property to push the image to the
left and center it vertically.
To stop the heading from appearing on top of the image, we’ve added padding
of 30 pixels to the left of the heading. The top and bottom padding values apply
extra space between the heading and the borders. The current page display is
shown in Figure 10.6.
Figure 10.6. The heading with the background image
We can now spend some time on the h2 below the page header. The mockup
indicates that this second-level heading should display in a larger font than the
271
Licensed to
Chapter 10: Fixed-width Layouts
h1. The properties that we need to add to the #content h2 rule in order to achieve
this are fairly straightforward.
File: fixedwidth.css (excerpt)
#content h2 {
font-size: 260%;
font-weight: normal;
font-family: Georgia, Times, "Times New Roman", serif;
color: #032469;
border-bottom: 1px solid #c5d6e2;
margin: 1em 0 0 0;
}
We’ve specified a serif font for the second-level heading in an effort to match
the font used in the mockup. The rest of the text content that appears before the
Event Schedule table is marked up as paragraphs. The first thing I want to do is
to add a bit more space between the lines of text within those paragraphs. We
can do so with the help of the line-height property.
File: fixedwidth.css (excerpt)
#content p {
line-height: 1.6em;
}
The text that appears directly below the h2 identifies the dates to which the article
is relevant. Add an id="dateline" attribute to this dateline’s opening <p> tag,
and create a CSS rule for it:
File: fixedwidth.css (excerpt)
#dateline {
font-size: 160%;
font-weight: normal;
font-family: Georgia, Times, "Times New Roman", serif;
color: #032469;
margin: 0.3em 0 0 0;
}
The next paragraph of text displays in a bold font in the mockup. Let’s add
class="intro" to this text’s opening <p> tag, then style that class to create the
bold look:
272
Licensed to
The Table
File: fixedwidth.css (excerpt)
.intro {
font-weight: bold;
}
Fantastic! We’ve styled all of the content on the page, with the exception of the
Event Schedule table. We’ll address that next, but first, let’s take a moment to
enjoy the fruits of our labors so far. View your work in a browser; the content
area should look a lot like Figure 10.7.
Figure 10.7. The styled content area
The Table
The finalsection of this layout is the Events Schedule table that’s used to display
the information about the matches that will be played during the tournament.
As we’ve already discussed, though tables should not be used for page design
layouts, they are the ideal way to mark up tabular data, like the kind of informa-
tion you might find displayed in a spreadsheet. We have a nice chunk of tabular
273
Licensed to