Pharo by Example pptx
Bạn đang xem bản rút gọn của tài liệu. Xem và tải ngay bản đầy đủ của tài liệu tại đây (8.73 MB, 352 trang )
Pharo by Example
Andrew P. Black Stéphane Ducasse
Oscar Nierstrasz Damien Pollet
with Damien Cassou and Marcus Denker
Version of 2009-10-28
ii
This book is available as a free download from .
Copyright
©
2007, 2008, 2009 by Andrew P. Black, Stéphane Ducasse, Oscar Nierstrasz and
Damien Pollet.
The contents of this book are protected under Creative Commons Attribution-ShareAlike 3.0
Unported license.
You are free:
to Share — to copy, distribute and transmit the work
to Remix — to adapt the work
Under the following conditions:
Attribution.
You must attribute the work in the manner specified by the author or licensor (but
not in any way that suggests that they endorse you or your use of the work).
Share Alike. If you alter, transform, or build upon this work, you may distribute the resulting
work only under the same, similar or a compatible license.
•
For any reuse or distribution, you must make clear to others the license terms of this work.
The best way to do this is with a link to this web page: creativecommons.org/licenses/by-sa/3.0/
•
Any of the above conditions can be waived if you get permission from the copyright
holder.
• Nothing in this license impairs or restricts the author’s moral rights.
Your fair dealing and other rights are in no way affected by the above. This is
a human-readable summary of the Legal Code (the full license):
creativecommons.org/licenses/by-sa/3.0/legalcode
Published by Square Bracket Associates, Switzerland.
ISBN 978-3-9523341-4-0
First Edition, October, 2009. Cover art by Samuel Morello.
Contents
Preface ix
I Getting Started
1 A quick tour of Pharo 3
1.1 Getting started . . . . . . . . . . . . . . . . . . 3
1.2 The World menu . . . . . . . . . . . . . . . . . 7
1.3 Sending messages. . . . . . . . . . . . . . . . . 8
1.4 Saving, quitting and restarting a Pharo session . . . . . . 9
1.5 Workspaces and Transcripts . . . . . . . . . . . . . 11
1.6 Keyboard shortcuts . . . . . . . . . . . . . . . . 12
1.7 The Class Browser . . . . . . . . . . . . . . . . 15
1.8 Finding classes . . . . . . . . . . . . . . . . . . 16
1.9 Finding methods . . . . . . . . . . . . . . . . . 18
1.10 Defining a new method. . . . . . . . . . . . . . . 20
1.11 Chapter summary. . . . . . . . . . . . . . . . . 25
2 A first application 27
2.1 The Lights Out game. . . . . . . . . . . . . . . . 27
2.2 Creating a new Package . . . . . . . . . . . . . . 28
2.3 Defining the class LOCell . . . . . . . . . . . . . . 29
2.4 Adding methods to a class. . . . . . . . . . . . . . 31
2.5 Inspecting an object . . . . . . . . . . . . . . . . 33
2.6 Defining the class LOGame . . . . . . . . . . . . . 34
2.7 Organizing methods into protocols . . . . . . . . . . 37
iv Contents
2.8 Let’s try our code . . . . . . . . . . . . . . . . . 40
2.9 Saving and sharing Smalltalk code. . . . . . . . . . . 43
2.10 Chapter summary. . . . . . . . . . . . . . . . . 47
3 Syntax in a nutshell 49
3.1 Syntactic elements . . . . . . . . . . . . . . . . 49
3.2 Pseudo-variables . . . . . . . . . . . . . . . . . 52
3.3 Message sends . . . . . . . . . . . . . . . . . . 53
3.4 Method syntax . . . . . . . . . . . . . . . . . . 54
3.5 Block syntax . . . . . . . . . . . . . . . . . . . 55
3.6 Conditionals and loops in a nutshell . . . . . . . . . . 56
3.7 Primitives and pragmas . . . . . . . . . . . . . . 58
3.8 Chapter summary. . . . . . . . . . . . . . . . . 58
4 Understanding message syntax 61
4.1 Identifying messages . . . . . . . . . . . . . . . 61
4.2 Three kinds of messages . . . . . . . . . . . . . . 63
4.3 Message composition . . . . . . . . . . . . . . . 65
4.4 Hints for identifying keyword messages . . . . . . . . 72
4.5 Expression sequences . . . . . . . . . . . . . . . 73
4.6 Cascaded messages . . . . . . . . . . . . . . . . 74
4.7 Chapter summary. . . . . . . . . . . . . . . . . 74
II Developing in Pharo
5 The Smalltalk object model 79
5.1 The rules of the model . . . . . . . . . . . . . . . 79
5.2 Everything is an Object . . . . . . . . . . . . . . . 79
5.3 Every object is an instance of a class . . . . . . . . . . 80
5.4 Every class has a superclass . . . . . . . . . . . . . 87
5.5 Everything happens by sending messages . . . . . . . . 91
5.6 Method lookup follows the inheritance chain . . . . . . . 92
5.7 Shared variables . . . . . . . . . . . . . . . . . 98
5.8 Chapter summary. . . . . . . . . . . . . . . . . 103
v
6 The Pharo programming environment 105
6.1 Overview . . . . . . . . . . . . . . . . . . . . 106
6.2 The Browser . . . . . . . . . . . . . . . . . . . 107
6.3 Monticello . . . . . . . . . . . . . . . . . . . 119
6.4 The Inspector and the Explorer . . . . . . . . . . . . 126
6.5 The Debugger . . . . . . . . . . . . . . . . . . 128
6.6 The Process Browser . . . . . . . . . . . . . . . . 137
6.7 Finding methods . . . . . . . . . . . . . . . . . 138
6.8 Change sets and the Change Sorter . . . . . . . . . . 138
6.9 The File List Browser . . . . . . . . . . . . . . . 141
6.10 In Smalltalk, you can’t lose code . . . . . . . . . . . 143
6.11 Chapter summary. . . . . . . . . . . . . . . . . 144
7 SUnit 147
7.1 Introduction . . . . . . . . . . . . . . . . . . . 147
7.2 Why testing is important . . . . . . . . . . . . . . 148
7.3 What makes a good test? . . . . . . . . . . . . . . 149
7.4 SUnit by example . . . . . . . . . . . . . . . . . 150
7.5 The SUnit cook book . . . . . . . . . . . . . . . . 154
7.6 The SUnit framework . . . . . . . . . . . . . . . 155
7.7 Advanced features of SUnit . . . . . . . . . . . . . 158
7.8 The implementation of SUnit. . . . . . . . . . . . . 159
7.9 Some advice on testing . . . . . . . . . . . . . . . 162
7.10 Chapter summary. . . . . . . . . . . . . . . . . 163
8 Basic Classes 165
8.1 Object . . . . . . . . . . . . . . . . . . . . . 165
8.2 Numbers . . . . . . . . . . . . . . . . . . . . 174
8.3 Characters . . . . . . . . . . . . . . . . . . . 177
8.4 Strings . . . . . . . . . . . . . . . . . . . . . 178
8.5 Booleans . . . . . . . . . . . . . . . . . . . . 179
8.6 Chapter summary. . . . . . . . . . . . . . . . . 181
vi Contents
9 Collections 183
9.1 Introduction . . . . . . . . . . . . . . . . . . . 183
9.2 The varieties of collections. . . . . . . . . . . . . . 184
9.3 Implementations of collections . . . . . . . . . . . . 186
9.4 Examples of key classes. . . . . . . . . . . . . . . 188
9.5 Collection iterators . . . . . . . . . . . . . . . . 197
9.6 Some hints for using collections. . . . . . . . . . . . 201
9.7 Chapter summary. . . . . . . . . . . . . . . . . 202
10 Streams 205
10.1 Two sequences of elements . . . . . . . . . . . . . 205
10.2 Streams vs. collections . . . . . . . . . . . . . . . 206
10.3 Streaming over collections. . . . . . . . . . . . . . 207
10.4 Using streams for file access . . . . . . . . . . . . . 215
10.5 Chapter summary. . . . . . . . . . . . . . . . . 217
11 Morphic 219
11.1 The history of Morphic . . . . . . . . . . . . . . . 219
11.2 Manipulating morphs . . . . . . . . . . . . . . . 221
11.3 Composing morphs . . . . . . . . . . . . . . . . 222
11.4 Creating and drawing your own morphs . . . . . . . . 222
11.5 Interaction and animation . . . . . . . . . . . . . . 226
11.6 Interactors . . . . . . . . . . . . . . . . . . . 229
11.7 Drag-and-drop . . . . . . . . . . . . . . . . . . 230
11.8 A complete example . . . . . . . . . . . . . . . . 232
11.9 More about the canvas . . . . . . . . . . . . . . . 236
11.10 Chapter summary. . . . . . . . . . . . . . . . . 237
12 Seaside by Example 239
12.1 Why do we need Seaside? . . . . . . . . . . . . . . 239
12.2 Getting started . . . . . . . . . . . . . . . . . . 240
12.3 Seaside components . . . . . . . . . . . . . . . . 244
12.4 Rendering XHTML . . . . . . . . . . . . . . . . 248
12.5 CSS: Cascading style sheets . . . . . . . . . . . . . 254
vii
12.6 Managing control flow . . . . . . . . . . . . . . . 256
12.7 A complete tutorial example . . . . . . . . . . . . . 263
12.8 A quick look at AJAX . . . . . . . . . . . . . . . 269
12.9 Chapter summary. . . . . . . . . . . . . . . . . 272
III Advanced Pharo
13 Classes and metaclasses 277
13.1 Rules for classes and metaclasses . . . . . . . . . . . 277
13.2 Revisiting the Smalltalk object model . . . . . . . . . . 278
13.3 Every class is an instance of a metaclass . . . . . . . . . 280
13.4 The metaclass hierarchy parallels the class hierarchy . . . . 281
13.5 Every metaclass Inherits from Class and Behavior . . . . . . 283
13.6 Every metaclass is an instance of Metaclass . . . . . . . . 286
13.7 The metaclass of Metaclass is an Instance of Metaclass . . . . 286
13.8 Chapter summary. . . . . . . . . . . . . . . . . 288
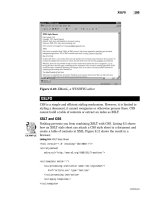
14 Reflection 289
14.1 Introspection . . . . . . . . . . . . . . . . . . 290
14.2 Browsing code . . . . . . . . . . . . . . . . . . 294
14.3 Classes, method dictionaries and methods . . . . . . . . 297
14.4 Browsing environments . . . . . . . . . . . . . . 299
14.5 Accessing the run-time context . . . . . . . . . . . . 300
14.6 Intercepting messages not understood . . . . . . . . . 303
14.7 Objects as method wrappers . . . . . . . . . . . . . 307
14.8 Pragmas . . . . . . . . . . . . . . . . . . . . 310
14.9 Chapter summary. . . . . . . . . . . . . . . . . 311
IV Appendices
A Frequently Asked Questions 317
A.1 Getting started . . . . . . . . . . . . . . . . . . 317
A.2 Collections . . . . . . . . . . . . . . . . . . . 317
A.3 Browsing the system . . . . . . . . . . . . . . . . 318
A.4 Using Monticello and SqueakSource . . . . . . . . . . 320
viii Contents
A.5 Tools . . . . . . . . . . . . . . . . . . . . . 321
A.6 Regular expressions and parsing . . . . . . . . . . . 321
Bibliography 323
Index 324
Preface
What is Pharo?
Pharo is a modern, open source, fully-featured implementation of the
Smalltalk programming language and environment. Pharo is derived from
Squeak
1
, a re-implementation of the classic Smalltalk-80 system. Whereas
Squeak was developed mainly as a platform for developing experimental
educational software, Pharo strives to offer a lean, open-source platform for
professional software development, and a robust and stable platform for
research and development into dynamic languages and environments. Pharo
serves as the reference implementation for the Seaside web development
framework.
Pharo resolves some licensing issues with Squeak. Unlike previous ver-
sions of Squeak, the Pharo core contains only code that has been contributed
under the MIT license. The Pharo project started in March 2008 as a fork of
Squeak 3.9, and the first 1.0 beta version was released on July 31, 2009.
Although Pharo removes many packages from Squeak, it also includes
numerous features that are optional in Squeak. For example, true type fonts
are bundled into Pharo. Pharo also includes support for true block closures.
The user interfaces has been simplified and revised.
Pharo is highly portable — even its virtual machine is written entirely in
Smalltalk, making it easy to debug, analyze, and change. Pharo is the vehicle
for a wide range of innovative projects from multimedia applications and
educational platforms to commercial web development environments.
There is an important aspect behind Pharo: Pharo should not just be a copy
of the past but really reinvent Smalltalk. Big-bang approaches rarely succeed.
Pharo will really favor evolutionary and incremental changes. We want to
1
Dan Ingalls et al., Back to the Future: The Story of Squeak, a Practical Smalltalk Written in
Itself. In Proceedings of the 12th ACM SIGPLAN conference on Object-oriented programming,
systems, languages, and applications (OOPSLA’97). ACM Press, November 1997
URL: http:
//www.cosc.canterbury.ac.nz/~wolfgang/cosc205/squeak.html
.
x Preface
be able to experiment with important new features or libraries. Evolution
means that Pharo accepts mistakes and is not aiming for the next perfect
solution in one big step — even if we would love it. Pharo will favor small
incremental changes but a multitude of them. The success of Pharo depends
on the contributions of its community.
Who should read this book?
This book is based on Squeak by Example
2
, an open-source introduction to
Squeak. The book has been liberally adapted and revised to reflect the differ-
ences between Pharo and Squeak. This book presents the various aspects of
Pharo, starting with the basics, and proceeding to more advanced topics.
This book will not teach you how to program. The reader should have
some familiarity with programming languages. Some background with
object-oriented programming would be helpful.
This book will introduce the Pharo programming environment, the lan-
guage and the associated tools. You will be exposed to common idioms
and practices, but the focus is on the technology, not on object-oriented de-
sign. Wherever possible, we will show you lots of examples. (We have been
inspired by Alec Sharp’s excellent book on Smalltalk
3
.)
There are numerous other books on Smalltalk freely available on the
web but none of these focuses specifically on Pharo. See for example: http:
//stephane.ducasse.free.fr/FreeBooks.html
A word of advice
Do not be frustrated by parts of Smalltalk that you do not immediately
understand. You do not have to know everything! Alan Knight expresses this
principle as follows
4
:
2
3
Alec Sharp, Smalltalk by Example. McGraw-Hill, 1997
URL: />FreeBooks/ByExample/
.
4
/>xi
Try not to care.
Beginning Smalltalk programmers often
have trouble because they think they need to understand
all the details of how a thing works before they can use it.
This means it takes quite a while before they can master
Transcript show: 'Hello World'
. One of the great leaps in OO is
to be able to answer the question “How does this work?”
with “I don’t care”.
An open book
This book is an open book in the following senses:
•
The content of this book is released under the Creative Commons
Attribution-ShareAlike (by-sa) license. In short, you are allowed to
freely share and adapt this book, as long as you respect the conditions
of the license available at the following URL: />licenses/by-sa/3.0/.
•
This book just describes the core of Pharo. Ideally we would like to
encourage others to contribute chapters on the parts of Pharo that we
have not described. If you would like to participate in this effort, please
contact us. We would like to see this book grow!
For more details, visit .
The Pharo community
The Pharo community is friendly and active. Here is a short list of resources
that you may find useful:
• is the main web site of Pharo.
•
is the equivalent of SourceForge for Pharo
projects. Many optional packages for Pharo live here.
Examples and exercises
We make use of two special conventions in this book.
We have tried to provide as many examples as possible. In particular, there
are many examples that show a fragment of code which can be evaluated. We
xii Preface
use the symbol
−→
to indicate the result that you obtain when you select
an expression and print it :
3 + 4 −→ 7 "if you select 3+4 and 'print it', you will see 7"
In case you want to play in Pharo with these code snippets, you can
download a plain text file with all the example code from the book’s web site:
.
The second convention that we use is to display the icon to indicate
when there is something for you to do:
Go ahead and read the next chapter!
Acknowledgments
We would first like to thank the original developers of Squeak for making this
amazing Smalltalk development environment available as an open source
project.
We would also like to thank Hilaire Fernandes and Serge Stinckwich who
allowed us to translate parts of their columns on Smalltalk, and Damien
Cassou for contributing the chapter on streams.
We especially thank Alexandre Bergel, Orla Greevy, Fabrizio Perin, Lukas
Renggli, Jorge Ressia and Erwann Wernli for their detailed reviews.
We thank the University of Bern, Switzerland, for graciously supporting
this open-source project and for hosting the web site of this book.
We also thank the Squeak community for their enthusiastic support of
this book project, and for informing us of the errors found in the first edition
of this book.
Part I
Getting Started
Chapter 1
A quick tour of Pharo
In this chapter we will give you a high-level tour of Pharo to help you get
comfortable with the environment. There will be plenty of opportunities to
try things out, so it would be a good idea if you have a computer handy when
you read this chapter.
We will use this icon:
to mark places in the text where you should try
something out in Pharo. In particular, you will fire up Pharo, learn about the
different ways of interacting with the system, and discover some of the basic
tools. You will also learn how to define a new method, create an object and
send it messages.
1.1 Getting started
Pharo is available as a free download from . There are
three parts that you will need to download, consisting of four files (see
Figure 1.1).
Virtual Machine Shared Sources User-specific system files
Figure 1.1: The Pharo download files for one of the supported platforms.
1.
The virtual machine (VM) is the only part of the system that is different
for each operating system and processor. Pre-compiled virtual machines
are available for all the major computing environments. In Figure 1.1
we see the VM for the selected platform is called Pharo.exe.
4 A quick tour of Pharo
2.
The sources file contains the source code for all of the parts of
Pharo that don’t change very frequently. In Figure 1.1 it is called
SqueakV39.sources.
1
3.
The current system image is a snapshot of a running Pharo system,
frozen in time. It consists of two files: an .image file, which contains the
state of all of the objects in the system (including classes and methods,
since they are objects too), and a .changes file, which contains a log of all
of the changes to the source code of the system. In Figure 1.1, these files
are called pharo.image and pharo.changes.
Download and install Pharo on your computer.
We recommend that you use the image provided on the Pharo by Example
web page.
2
Most of the introductory material in this book will work with any version,
so if you already have one installed, you may as well continue to use it.
However, if you notice differences between the appearance or behaviour of
your system and what is described here, do not be surprised.
As you work in Pharo, the image and changes files are modified, so you
need to make sure that they are writable. Always keep these two files together.
Never edit them directly with a text editor, as Pharo uses them to store the
objects you work with and to log the changes you make to the source code. It
is a good idea to keep a backup copy of the downloaded image and changes
files so you can always start from a fresh image and reload your code.
The sources file and the VM can be read-only — they can be shared between
different users. All of these files can be placed in the same directory, but it is
also possible to put the Virtual Machine and sources file in separate directory
where everyone has access to them. Do whatever works best for your style of
working and your operating system.
Launching.
To start Pharo, do whatever your operating system expects:
drag the .image file onto the icon of the virtual machine, or double-click
the .image file, or at the command line type the name of the virtual machine
followed by the path to the .image file. (When you have multiple VMs installed
on your machine the operating system may not automatically pick the right
one; in this case it is safer to drag and drop the image onto the virtual machine,
or to use the command line.)
Once Pharo is running, you should see a single large window, possibly
containing some open workspace windows (see Figure 1.2), and it’s not
1
Pharo is derived from Squeak 3.9, and presently shares the VM with Squeak.
2
Getting started 5
Figure 1.2: A fresh image.
obvious how to proceed! You might notice a menu bar, but Pharo mainly
makes use of context-dependent pop-up menus.
Start Pharo. You can dismiss any open workspaces by clicking on the red button
in the top left corner of the workspace window.
You can minimize windows (so that they move to the dock on the bottom
of the screen) by clicking on the orange button. Clicking on the green button
will cause the window to take up the entire screen.
First Interaction.
A good place to get started is the world menu shown in
Figure 1.3 (a).
Click with the mouse on the background of the main window to show the world
menu, then choose Workspace to create a new workspace.
Smalltalk was originally designed for a computer with a three button
mouse. If your mouse has fewer than three buttons, you will have to press
extra keys while clicking the mouse to simulate the extra buttons. A two-
button mouse works quite well with Pharo, but if you have only a single-
button mouse, you should seriously consider buying a two-button mouse
with a clickable scroll wheel: it will make working with Pharo much more
pleasant.
6 A quick tour of Pharo
(a) The world menu (b) The contextual menu
(c) The morphic halo
Figure 1.3: The world menu (brought up by clicking), a contextual menu
(action-clicking), and a morphic halo (meta-clicking).
Pharo avoids terms like “left mouse click” because different computers,
mice, keyboards and personal configurations mean that different users will
need to press different physical buttons to achieve the same effect. Originally
Smalltalk introduced colours to stand for the different mouse buttons.
3
Since
many users will use various modifiers keys (control, ALT, meta etc.) to achieve
the same effect, we will instead use the following terms:
click:
this is the most often used mouse button, and is normally equivalent
to clicking a single-mouse button without any modifier key; click on
the image to bring up the “World” menu (Figure 1.3 (a)).
action-click:
this is the next most used button; it is used to bring up a contex-
tual menu, that is, a menu that offers different sets of actions depending
3
The button colours were red, yellow and blue. The authors of this book could never remember
which colour referred to which button.
The World menu 7
on where the mouse is pointing; see Figure 1.3 (b). If you do not have
a multi-button mouse, then normally you will configure the control
modifier key to action-click with the mouse button.
meta-click:
Finally, you may meta-click on any object displayed in the image
to activate the “morphic halo”, an array of handles that are used to
perform operations on the on-screen objects themselves, such as rotating
them or resizing them; see Figure 1.3 (c).
4
If you let the mouse linger
over a handle, a help balloon will explain its function. In Pharo, how
you meta-click depends on your operating system: either you must
hold SHIFT ctrl or SHIFT option while clicking.
Type
Time now
in the workspace. Now action-click in the workspace. Select
print it .
We recommend that right-handed people configure their mouse to click
with the left button, action-click with the right button, and meta-click with
the clickable scroll wheel, if one is available. If you are using a Macintosh
without a second mouse button, you can simulate one by holding down the
⌘
key while clicking the mouse. However, if you are going to be using Pharo
at all often, we recommend investing in a mouse with at least two buttons.
You can configure your mouse to work the way you want by using the
preferences of your operating system and mouse driver. Pharo has some
preferences for customising the mouse and the meta keys on your keyboard.
In the preference browser (
System . . . Preferences . . . Preference Browser. . .
),
the keyboard category contains an option swapControlAndAltKeys that switches
the action-click and meta-click functions. There are also options to duplicate
the various command keys.
1.2 The World menu
Click again on the Pharo background.
You will see the
World
menu again. Most Pharo menus are not modal; you
can leave them on the screen for as long as you wish by clicking the push pin
icon in the top-right corner. Do this.
The world menu provides you a simple means to access many of the tools
that Pharo offers.
Have a closer look at the World and Tools . . . menus. (Figure 1.3 (a))
4
Note that the morphic handles are inactive by default in Pharo, but you can turn them on
using the Preferences Browser, which we will see shortly.
8 A quick tour of Pharo
Figure 1.4: The Preference Browser.
You will see a list of several of the core tools in Pharo, including the
browser and the workspace. We will encounter most of them in the coming
chapters.
1.3 Sending messages
Open a workspace. Type in the following text:
BouncingAtomsMorph new openInWorld
Now action-click. A menu should appear. Select do it (d) . (See Figure 1.5.)
A window containing a large number of bouncing atoms should open in
the top left of the Pharo image.
You have just evaluated your first Smalltalk expression! You just sent
the message
new
to the BouncingAtomsMorph class, resulting in a new Bounc-
ingAtomsMorph instance, followed by the message
openInWorld
to this instance.
The BouncingAtomsMorph class decided what to do with the
new
message, that
Saving, quitting and restarting a Pharo session 9
Figure 1.5: “Doing” an expression
is, it looked up its methods for handling
new
message and reacted appropri-
ately. Similarly the BouncingAtomsMorph instance looked up its method for
responding to openInWorld and took appropriate action.
If you talk to Smalltalkers for a while, you will quickly notice that they gen-
erally do not use expressions like “call an operation” or “invoke a method”,
but instead they will say “send a message”. This reflects the idea that ob-
jects are responsible for their own actions. You never tell an object what to
do — instead you politely ask it to do something by sending it a message.
The object, not you, selects the appropriate method for responding to your
message.
1.4 Saving, quitting and restarting a Pharo session
Now click on the bouncing atoms window and drag it anywhere you like. You
now have the demo “in hand”. Put it down by clicking anywhere.
Select
World Save as . . .
, enter the name “myPharo”, and click on the
OK
button. Now select World Save and quit .
Now if you go to the location where the original image and changes
files were, you will find two new files called “myPharo.image” and
10 A quick tour of Pharo
Figure 1.6: A BouncingAtomsMorph. Figure 1.7: The save as . . . dialogue.
“myPharo.changes” that represent the working state of the Pharo image at the
moment before you told Pharo to
Save and quit
. If you wish, you can move
these two files anywhere that you like on your disk, but if you do so you may
(depending on your operating system) need to also move, copy or link to the
virtual machine and the sources file.
Start up Pharo from the newly created “myPharo.image” file.
Now you should find yourself in precisely the state you were when you
quit Pharo. The BouncingAtomsMorph is there again and the atoms continue to
bounce from where they were when you quit.
When you start Pharo for the first time, the Pharo virtual machine loads
the image file that you provide. This file contains a snapshot of a large
number of objects, including a vast amount of pre-existing code and a large
number of programming tools (all of which are objects). As you work with
Pharo, you will send messages to these objects, you will create new objects,
and some of these objects will die and their memory will be reclaimed (i.e.,
garbage-collected).
When you quit Pharo, you will normally save a snapshot that contains all
of your objects. If you save normally, you will overwrite your old image file
with the new snapshot. Alternatively, you may save the image under a new
name, as we just did.
In addition to the .image file, there is also a .changes file. This file contains
a log of all the changes to the source code that you have made using the
standard tools. Most of the time you do not need to worry about this file at all.
As we shall see, however, the .changes file can be very useful for recovering
from errors, or replaying lost changes. More about this later!
The image that you have been working with is a descendant of the original
Smalltalk-80 image created in the late 1970s. Some of these objects have been
around for decades!
You might think that the image is the key mechanism for storing and
managing software projects, but you would be wrong. As we shall see very
Workspaces and Transcripts 11
soon, there are much better tools for managing code and sharing software
developed by teams. Images are very useful, but you should learn to be very
cavalier about creating and throwing away images, since tools like Monti-
cello offer much better ways to manage versions and share code amongst
developers.
Using the mouse (and the appropriate modifier keys), meta-click on the Bounc-
ingAtomsMorph.
5
You will see a collection of colored circles that are collectively called the
BouncingAtomsMorph’s morphic halo. Each circle is called a handle. Click in the
pink handle containing the cross; the BouncingAtomsMorph should go away.
1.5 Workspaces and Transcripts
Close all open windows. Open a transcript and a workspace. (The transcript
can be opened from the World Tools submenu.)
Position and resize the transcript and workspace windows so that the workspace
just overlaps the transcript.
You can resize windows either by dragging one of the corners, or by meta-
clicking the window to bring up the morphic halo, and dragging the yellow
(bottom right) handle.
At any time only one window is active; it is in front and has its border
highlighted.
The transcript is an object that is often used for logging system messages.
It is a kind of “system console”.
Workspaces are useful for typing snippets of Smalltalk code that you
would like to experiment with. You can also use workspaces simply for
typing arbitrarily text that you would like to remember, such as to-do lists
or instructions for anyone who will use your image. Workspaces are often
used to hold documentation about a captured image, as is the case with the
standard image that we downloaded earlier (see Figure 1.2).
Type the following text into the workspace:
Transcript show: 'hello world'; cr.
Try double-clicking in the workspace at various points in the text you
have just typed. Notice how an entire word, entire string, or the whole text is
5
Remember, you may have to set the halosEnabled option in the Preferences Browser.
12 A quick tour of Pharo
selected, depending on whether you click within a word, at the end of the
string, or at the end of the entire expression.
Select the text you have typed and action-click. Select do it (d) .
Notice how the text “hello world” appears in the transcript window
(Figure 1.8). Do it again. (The
(d)
in the menu item
do it (d)
tells you that the
keyboard shortcut to do it is CMD–d. More on this in the next section!)
Figure 1.8: Overlapping windows. The workspace is active.
1.6 Keyboard shortcuts
If you want to evaluate an expression, you do not always have to action-
click. Instead, you can use keyboard shortcuts. These are the parenthesized
expressions in the menu. Depending on your platform, you may have to
press one of the modifier keys (control, alt, command, or meta). (We will
indicate these generically as CMD –key.)
Evaluate the expression in the workspace again, but using the keyboard shortcut:
CMD–d.
In addition to
do it
, you will have noticed
print it
,
inspect it
and
explore it
.
Let’s have a quick look at each of these.
Keyboard shortcuts 13
Type the expression
3 + 4
into the workspace. Now
do it
with the keyboard
shortcut.
Do not be surprised if you saw nothing happen! What you just did is send
the message
+
with argument
4
to the number
3
. Normally the result
7
will
have been computed and returned to you, but since the workspace did not
know what to do with this answer, it simply threw the answer away. If you
want to see the result, you should
print it
instead.
print it
actually compiles the
expression, executes it, sends the message
printString
to the result, and displays
the resulting string.
Select 3+4 and print it (CMD –p).
This time we see the result we expect (Figure 1.9).
Figure 1.9: “Print it” rather than “do it”.
3 + 4 −→ 7
We use the notation
−→
as a convention in this book to indicate that a
particular Pharo expression yields a given result when you print it .
Delete the highlighted text “
7
” (Pharo should have selected it for you, so you
can just press the delete key). Select 3+4 again and this time inspect it (CMD–i).
Now you should see a new window, called an inspector, with the heading
SmallInteger: 7
(Figure 1.10). The inspector is an extremely useful tool that will
allow you to browse and interact with any object in the system. The title tells
us that
7
is an instance of the class
SmallInteger
. The left panel allows us to
browse the instance variables of an object, the values of which are shown in
the right panel. The bottom panel can be used to write expressions to send
messages to the object.
Type self squared in the bottom panel of the inspector on 7 and print it .