Astm d 429 14
Bạn đang xem bản rút gọn của tài liệu. Xem và tải ngay bản đầy đủ của tài liệu tại đây (1015.41 KB, 22 trang )
Designation: D429 − 14
Standard Test Methods for
Rubber Property—Adhesion to Rigid Substrates1
This standard is issued under the fixed designation D429; the number immediately following the designation indicates the year of
original adoption or, in the case of revision, the year of last revision. A number in parentheses indicates the year of last reapproval. A
superscript epsilon (´) indicates an editorial change since the last revision or reapproval.
This standard has been approved for use by agencies of the U.S. Department of Defense.
1. Scope
2. Referenced Documents
2.1 ASTM Standards:2
B117 Practice for Operating Salt Spray (Fog) Apparatus
D395 Test Methods for Rubber Property—Compression Set
D412 Test Methods for Vulcanized Rubber and Thermoplastic Elastomers—Tension
D471 Test Method for Rubber Property—Effect of Liquids
D572 Test Method for Rubber—Deterioration by Heat and
Oxygen
D573 Test Method for Rubber—Deterioration in an Air
Oven
D1149 Test Methods for Rubber Deterioration—Cracking in
an Ozone Controlled Environment
E4 Practices for Force Verification of Testing Machines
G153 Practice for Operating Enclosed Carbon Arc Light
Apparatus for Exposure of Nonmetallic Materials
2.2 ASTM Adjuncts:
Holding Fixture Drawings3
1.1 These test methods cover procedures for testing the
static adhesional strength of rubber to rigid materials (in most
cases metals).
Method A—Rubber Part Assembled Between Two Parallel
Metal Plates.
Method B—90° Stripping Test—Rubber Part Assembled to
One Metal Plate.
Method C—Measuring Adhesion of Rubber to Metal with a
Conical Specimen.
Method D—Adhesion Test—Post-Vulcanization (PV) Bonding of Rubber to Metal.
Method E—90° Stripping Test—Rubber Tank Lining—
Assembled to One Metal Plate.
Method F—Rubber Part Assembled Between Two Parallel
Convex-Shaped Metal Plates
Method G—Measuring Bond Durability for Rubber-to-Metal
Bonded Components with a Double Shear Cylindrical Specimen
Method H—Measuring Bond Durability for Rubber-to-Metal
Bonded Components with a Quadruple Shear Specimen
3. Significance and Use
3.1 These test methods are designed primarily for specimens prepared in a laboratory under standardized conditions
such as may be used to provide data for development and
control of rubber compounds and methods of manufacture.
With slight modifications as indicated, Methods A, B, C, D,
and E are also used for obtaining comparative adhesion test
values of production parts whenever the design permits preparation of suitable test specimens. Methods A, B, C, and D are
applicable in the case of many products in which rubber is used
for controlling vibration.
1.2 While the test method may be used with a wide variety
of rigid materials, use of materials other than metals is the
exception. For this reason, we have used the word “metal” in
the text rather than “rigid materials.”
1.3 The values stated in SI units are to be regarded as the
standard. The values given in parentheses are for information
only.
1.4 This standard does not purport to address all of the
safety concerns, if any, associated with its use. It is the
responsibility of the user of this standard to establish appropriate safety and health practices and determine the applicability of regulatory limitations prior to use.
METHOD A—RUBBER PART ASSEMBLED
BETWEEN
TWO PARALLEL METAL PLATES
4. Adhesion Failure Terminology
4.1 R indicates the failure is in the rubber.
1
These test methods are under the jurisdiction of ASTM Committee D11 on
Rubberand are the direct responsibility of Subcommittee D11.25 on Rubber
Adhesive Systems.
Current edition approved May 1, 2014. Published May 2014. Originally
approved in 1935. Last previous edition approved in 2008 as D429 – 08. DOI:
10.1520/D0429-14.
2
For referenced ASTM standards, visit the ASTM website, www.astm.org, or
contact ASTM Customer Service at For Annual Book of ASTM
Standards volume information, refer to the standard’s Document Summary page on
the ASTM website.
3
Complete detail drawings of the fixture are available from ASTM International
Headquarters. Order Adjunct No. ADJD0429. Original adjunct produced in 1959.
Copyright © ASTM International, 100 Barr Harbor Drive, PO Box C700, West Conshohocken, PA 19428-2959. United States
1
D429 − 14
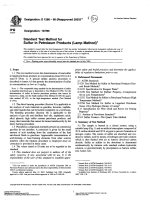
FIG. 1 An Example of an Adhesion Test Specimen Attached in a Testing Machine
6.2 Grips—The fixtures for holding the specimen in the
testing machine will depend on the type of specimen, but in all
cases shall be provided with ball seats, or another device, to
permit centering of the load during the test. A typical adhesion
test assembly is shown in Fig. 1. Specially molded laboratory
specimens shall be attached by means of threaded studs on the
metal parts as shown in Fig. 2. Specimens cut from production
parts may be clamped as illustrated in Fig. 3.
4.2 RC indicates the failure is at the rubber-cover cement
interface.
4.3 CP indicates the failure is at the cover cement-prime
cement interface.
4.4 M (can also be denoted as CM) indicates the failure is at
the metal-prime cement interface.
NOTE 1—Example—The percentages of the various types of failure
may be estimated as in the following examples:
R-50, RC-50 means that roughly one half or 50 % of the area showed
failure in the rubber and the other 50 % showed failure at the rubber cover
cement interface.
R-25, RC-25, M-50 means three types of failure were present with the
M indicating 50 % failure at the metal-primer interface. Determining the
locus of failure can normally be determined visually, but may require
analytical test methods.
7. Standard Test Specimens
7.1 After assembly, the standard test specimen shall consist
of a cylinder of cured rubber 3.2 6 0.1 mm (0.125 6 0.005 in.)
thick and with a diameter of 39.9 6 0.1 mm (1.597 6 0.005
in.), which results in a surface area of 1250 6 5 mm2 (2.00 6
0.01 in.2). This will be attached to the faces of two metal plates,
each at least 9.5 mm (0.37 in.) in thickness and of the same
diameter as the rubber cylinder. The metal plates shall have flat
faces that shall be parallel in the finished specimen. The
cylindrical shape is used to eliminate sharp corners and to give
uniform distribution of the pulling force.
5. Significance and Use
5.1 Method A is used to determine adhesion values in
instances where users feel this design is more reflective of an
actual product and where control tests have been set up as a
result. The sample also lends itself to testing the effectiveness
of different processing techniques and various adhesive systems.
NOTE 2—While a 1250 mm2 (2 in.2) area test specimen shall be
considered the standard for reference purposes, it shall be permissible to
use a specimen of only 625 mm2 (1 in.2) in area, when it is desirable to
prepare and cure a large number of test specimens at one time. The
diameter of this test specimen shall be 28.21 6 0.02 mm (1.129 6 0.001
in.) and the unvulcanized piece shall be cut to dimensions of approximately 24 mm (15⁄16 in.) in diameter and approximately 5 mm (3⁄16 in.) in
thickness (approximately 10 % volume excess).
6. Apparatus
6.1 Testing Machine—A tension testing machine conforming to the requirements of Practices E4 shall be used for
measuring the strength of adhesion. The moving head of the
machine shall travel at the uniform rate of 0.40 6 0.04 mm/s
(1.0 6 0.1 in./min). The machine shall be provided with a
recording device to give the total force in Newtons or poudsforce at the conclusion of the test. A machine with a capacity
no greater than 44.5 kN (10 000 lbf) will be found suitable in
most cases.
8. Laboratory Preparation of Standard Test Specimens
8.1 Prepare the standard test specimen to be used for
development and control purposes in the laboratory as described in 8.2 through 8.6. Methods other than those specified
in 8.2 to 8.6 may be applied and must be described in the test
report.
2
D429 − 14
FIG. 2 Views of a Typical Test Specimen Showing Individual Metal Parts and Rubber Cylinders
8.2 Machine circular metal parts of standard dimensions
from rolled bar steel SAE No. 10204 for standard reference
pieces. However, other metals may be used if in conformity
with the essential dimensions. Prepare smoothly machined test
faces of the metals in accordance with any test method for
securing adhesion that may be under investigation.
9.2 In routine production testing, it is sometimes necessary
to test specimens of different size and shape than those
specified as standard. In such cases, the test method of
preparation shall be similar to that given in 9.1, but the test
results secured shall not be compared with those obtained using
the standard test specimen.
8.3 Cut unvulcanized rubber pieces to dimensions of approximately 35 mm (1 3⁄8 in.) in diameter and approximately 5
mm (3⁄16 in.) in thickness so as to give maximum pressure of
the rubber against the metal surface during vulcanization (see
Fig. 2). Clean or treat surfaces to be adhered in accordance
with the method being investigated.
10. Procedure
10.1 Mount the vulcanized standard test specimen or the
specimen cut from a production part in the testing machine, as
shown in Fig. 1, so that the tension shall be uniformly
distributed. Test at a rate of 0.40 6 0.04 mm/s (1.0 6 0.1
in./min), or at 0.083 6 0.08 mm/s (2.0 6 0.2 in./min), until the
rubber either separates from the metal surface or ruptures.
Record the total force at the time of failure. Typically 3
specimens are tested per condition, but other sample sizes can
be used, if reported.
8.4 Assemble the metal parts and rubber pieces for vulcanization in the mold. A typical mold and test piece are shown
in Fig. 4. The assembly is illustrated in Fig. 2. After
vulcanization, approximately 0.039 mm (0.0015 in.) of rubber
should be over the edge of the metal substrate. Prior to
vulcanization, take great care to keep the surfaces to be
adhered clean and free of dust, moisture, or other foreign
material. Do not touch surfaces.
10.2 In case of rupture in the rubber, the strength of the
adhesion bond is obviously not measured, but is shown to be
greater than the strength of the rubber itself. Record the type or
types of failure, and express in accordance with the adhesion
failure terminology described in Section 4. Estimate and record
the percentages of the various types of failures.
8.5 Vulcanize by heating the mold for a definite time at a
controlled temperature in a hydraulic vulcanization press.
Choose the time and temperature of cure according to the
rubber compound used. Take care in removing the specimens
from the mold to avoid subjecting the adhered surfaces to stress
before the specimens have cooled.
11. Calculation
11.1 Express the adhesion value in pascals or pounds-force
per square inch. Calculate by dividing the tension force causing
failure by the original area of the adhered surface. In case of
rubber failure, the adhesion value is recognized as being higher
than that reported.
8.6 After vulcanization, store the specimens at a temperature of 23 6 2°C (73.4 6 3.6°F) at least 16 h prior to testing.
9. Test Specimens from Production Parts
12. Report
9.1 For comparative test of adhesion in production parts,
select a portion of the production-made part so that a specimen
consisting of a rubber piece sandwiched between two parallel
plates of metal may be cut. Hollow-mill a specimen out of the
production part and finish the piece either by turning or
grinding down to size in such a manner that the surfaces of the
rubber and metal shall be free of imperfections, which have a
tendency to start a tear in the rubber part during the application
of tension while testing.
12.1 The report shall include the following:
12.1.1 The result, calculated in accordance with Section 11,
12.1.2 All observed and recorded data including the number
of test pieces involved,
12.1.3 Notation of type or types of failure, and the estimated
percentages of the various types of failures (Section 10),
12.1.4 A description of the specimen and a notation indicating whether the specimen was molded in the laboratory or
prepared from a production part,
12.1.5 Dimensions of the test specimen (comparisons may
be made only among specimens of the same size and shape),
4
Supporting data have been filed at ASTM International Headquarters and may
be obtained by requesting Research Report RR:D11-1040.
3
D429 − 14
METHOD B—90° STRIPPING TEST—RUBBER
PART ASSEMBLED TO ONE METAL PLATE
14. Significance and Use
14.1 This test is intended to determine the adhesive strength
of rubber-to-metal bonding agents. The results are obtained by
measuring the force necessary to separate a rubber from a
metal surface. The data obtained indicates the strength of
adhesion along a line across the width of the rubber strip being
separated from a metal plate at a 90° angle. The test provides
valuable data for development and control of rubber compounds and test methods of bonding. It also serves as a
screening test for the evaluation of various bonding agents,
techniques, or both.
NOTE 3—It is permissible to use a 45° angle to bring about separation,
but if this is done, the same should be indicated on the form on which the
data are recorded. If this notation does not appear, it must be assumed that
the 90° angle has been used. The angle of pull, in this case 45°, merely
means that the equipment has been so designed that the angle made by that
face of the rubber being stripped from the metal and the metal to which it
has been adhered is 45°. Experience indicates a lower force is obtained for
the 45° angle than for the 90° angle, and also a break significantly closer
to the bond interface.
15. Adhesion Failure Terminology
15.1 R indicates the failure is in the rubber.
15.2 RC indicates the failure is at the rubber-cover cement
interface.
15.3 CP indicates the failure is at the cover cement-prime
cement interface.
15.4 M (can also be denoted as CM) indicates the failure is
at the metal-prime cement interface.
NOTE 4—Example—The percentages of the various types of failure
may be estimated as in the following examples:
R-50, RC-50 means that roughly one half or 50 % of the area showed
failure in the rubber and the other 50 % showed failure at the rubber-cover
cement interface.
R-25, RC-25, M-50 means that three types of failure are present with
the M indicating 50 % failure at the metal-primer interface.
16. Apparatus
16.1 Testing Machine—A power driven test machine
equipped to produce a uniform rate of grip separation shall be
used for measuring the strength of adhesion. The head of the
machine shall travel at the uniform rate of 0.83 6 0.08 mm/s
(2 6 0.2 in./min).
FIG. 3 Method of Testing Adhesion When Sample Section is
Taken from Production Parts
12.1.6 Test method used for determining adhesion specified
in this standard, including the test rate,
12.1.7 Surface finish of substrate, if known,
12.1.8 Date of manufacture or vulcanization, if known,
12.1.9 Time and temperature of vulcanization, if known,
12.1.10 Temperature and humidity of test room,
12.1.11 Date of test, and
12.1.12 Any deviations from this test method.
13. Precision and Bias4
16.2 Fixture—Any suitable fixture for holding the test
specimen to the upper head of the machine may be used
provided the direction of pull to cause separation is as
perpendicular as possible at all times during the test. This
means making a 90° angle with the top holding fixture. The test
fixture shown in operation in Fig. 5 complies with the above
and provides the ease and simplicity of testing.3
13.1 Precision and bias do not exist for this test method
because resources necessary for round-robin testing have not
been forthcoming.
16.3 Grips—Any suitable grip may be used, provided it
does not slip or rupture the rubber strip. The grip shown in Fig.
5 complies and provides ease and simplicity of operation.
4
D429 − 14
in.
1⁄16
1⁄ 8
3⁄16
3⁄ 8
1⁄ 2
5⁄ 8
3⁄ 4
1 1⁄ 2
2 1⁄ 8
2 1⁄ 4
2 7⁄ 8
3
6 1⁄ 2
8
0.375
0.125
1.597
1.600
±
±
±
±
mm
2
3
5
10
13
16
19
38
54
57
73
76
165
203
9.53
3.2
15.16
40.64
0.002
0.005
0.001
0.001
±
±
±
±
0.05
0.1
0.03
0.03
FIG. 4 Detailed Drawing of a Mold for Adhesion Test Pieces
adhesion that may be under investigation. Mask both ends with
pressure-sensitive tape so that only the area described in
Section 17 will be available for adhesion.
18.1.2 Cut unvulcanized rubber slabs approximately 8 mm
(0.3 in.) in thickness to dimensions of the required size for the
mold, so as to provide maximum pressure of the rubber against
the metal surfaces during vulcanization. (See Fig. 6 for suitable
mold design.) The inside mold dimensions parallel to the
longitudinal axis of the metal part shall be 125 mm for nominal
5 in. The dimension along the transverse axis of the metal part
can be altered according to the number of pieces required for
any one cure. This will leave sufficient length of rubber strip
for fastening in the grip shown in Fig. 5. Solvent-wash rubber
surface to be adhered or treat in accordance with the method
being investigated. Freshly milled rubber need not be solvent
wiped.
18.1.3 Assemble the metal parts and rubber pieces for
vulcanization as shown in Fig. 6, properly spacing the metal
parts along one edge of the rubber slab and then placing the
assembly, metal parts down, in the mold cavity. Cure the whole
17. Standard Test Specimen
17.1 The standard test specimen shall consist of a strip of
rubber 6.3 6 0.1 mm (0.250 6 0.005 in.) in thickness, 25 6
0.5 mm (1.000 6 0.02 in.) in width, and 125 mm (5 in.) in
length adhered to the face of a metal strip 1.6 6 0.1 mm (0.062
6 0.004 in.) in thickness, 25 6 0.5 mm (1.000 6 0.02 in.) in
width, and 60 6 1 mm (2.36 6 0.04 in.) in length. The test
specimen shall be so prepared that the bonded area of 25 by 25
mm (1 by 1 in.) is fixed approximately in the middle of the
metal member as shown in Fig. 6.
NOTE 5—In cases where the 1.6-mm (0.062-in.) thick metal is permanently deformed during testing, a thicker metal may be used when agreed
upon between the purchaser and the supplier.
18. Preparation of Standard Test Specimen
18.1 Prepare the standard test specimen as described in
18.1.1 to 18.1.6:
18.1.1 Rectangular metal parts of the standard dimensions
described in Section 17 shall have the area to be bonded
prepared in accordance with the test method for determining
5
D429 − 14
NOTE 7—This specimen lends itself to the determination of the relative
effect of environmental conditions on possible bond deterioration. Specimens may be exposed unstressed or under a constant, relatively low bond
stress. It is recommended that one of the standard ASTM environmental
exposure conditions be used. Among those applicable are the following:
Test Methods D471, D572, D573, D1149, Practice G153, and Practice
B117. If environments other than the above are used, they shall be
described completely. This should include the conditions of the exposure
such as time, temperature, etc.
20. Calculations
20.1 Express the adhesion value in newtons per millimetre
or pounds-force per inch of width.
21. Report
21.1 The report shall include the following, preferably
reported on an Adhesion Test Data Sheet illustrated in Table 1:
21.1.1 The results calculated in accordance with Section 20.
21.1.2 All observed and recorded data,
21.1.3 Notation of the type or types of failures and the
estimated percentages of the various types of failures (Section
15),
21.1.4 Description of the specimen including statement of
method of determining adhesion, if known,
21.1.5 Date of vulcanization, if known,
21.1.6 Time and temperature of vulcanization, if known,
21.1.7 Temperature of test room, and
21.1.8 Date of test.
FIG. 5 Adhesion Tensile Testing Fixture in Operation
assembly in accordance with the method being investigated.
Prior to assembly and vulcanization, take great care to keep the
surfaces to be adhered clean and free of dust, moisture, or other
foreign material.
18.1.4 Vulcanize by heating the mold under pressure for a
definite time at a controlled temperature in a hydraulic vulcanizing press. The time and temperature of cure shall be in
accordance with the system being investigated. At the conclusion of the cure, take care in removing the specimens from the
mold to avoid subjecting the adhered surfaces to stress before
the specimens have cooled.
18.1.5 After vulcanization, store the specimens at a temperature of 23 6 2°C (73.4 6 3.6°F) for at least 16 h.
18.1.6 Separate the specimens from each other in preparation for testing. This is done by cutting with a scissors,
handknife, or other suitable equipment. The edges of the
specimen may then be buffed on a belt sander to bring the edge
of the rubber flush with the edge of the metal strips (Note 6).
Take care not to overheat the metal parts or the rubber and not
to reduce the width of the sample being tested beyond the
tolerances described.
22. Precision and Bias4
22.1 Precision and bias do not exist for this test method
because resources necessary for round-robin testing have not
been forthcoming.
METHOD C—MEASURING ADHESION OF
RUBBER-TO-METAL WITH A CONICAL
SPECIMEN
23. Significance and Use
23.1 The test method is designed primarily to test pieces
prepared in the laboratory under standard conditions to provide
data for development and control of bonding systems and their
components, such as cements or special rubber compounds,
and of test methods of manufacture. While intended to be
applied where rubber is bonded to supporting rigid pieces, it
may not cover such cases where the support, a high modulus
material, has low rigidity due to small transverse dimensions,
as in the case of rubber bonded to metal wires, cords, or thin
sheets. The particular geometry of the test piece produces, in
most cases, an interfacial failure between the rubber and
conical part, because of a stress concentration at the tip of the
cone.
NOTE 6—Present experience indicates negligible differences in results
between samples buffed clean and samples tested without buffing, because
edges of metal parts are not specifically prepared for adhesion and the
edge contact area, given a metal part thickness of 1.6 mm (0.062 in.) is not
significant.
19. Procedure
24. Adhesion Failure Terminology
19.1 Place the test specimen (Note 7) symmetrically in the
jaws attached to the fixed grip with the separating edge toward
the operator, as shown in Fig. 5. Place the tab in the grip and
apply a steady load at the rate of 50 mm (2.0 in.)/min until
separation is complete. Use the autographic recorder in order to
show graphically the adhesion values over the full length of the
test specimen.
24.1 Express the type of adhesion failure as determined by
examination of broken test pieces by one or more of the
following symbols:
24.2 R indicates failure in the rubber.
24.3 RC indicates failure in the rubber-cover cement.
6
D429 − 14
in.
mm
0.06
1.5
Section A-A
0.12
0.31
3
7.9
1
25
1.5
38
2.38
60.5
5
127
6
152
7
178
8
203
FIG. 6 Adhesion Test Specimen Mold
TABLE 1 Example of Form for Reporting Adhesion test Results
Stock
Cure
Metal and Metal
Finishing Used
Pull
Sample,
lbf/in.
Type of Break, %
Average,
lbf/in.
R
Date___________
RC
CP
M
By________________________
25.2 Grips—The fixtures for holding the specimen in the
test machine will depend on the type of specimen but in all
cases shall be provided with ball seats to permit proper
centering of the applied load during the test. These grips can be
of two types: (1) a simple slip-in type which engages in the
grooved section of the conical specimen, or (2) a threaded stud
with a locknut. This could be a combination fixture.
24.4 CP indicates failure in the cover cement-prime cement.
24.5 M (can also be denoted as CM) indicates failure in the
prime cement-metal interface.
NOTE 8—Example—The percentages of the various types of failure
may be estimated as in the following examples:
R-50, RC-50 means that roughly one half or 50 % of the area showed
failure in the rubber and the other 50 % showed failure at the rubber-cover
cement interface.
R-25, RC-25, M-50 means three types of failure present with the M
indicating 50 % failure at the metal primer interface.
26. Standard Test Specimen
26.1 A standard test specimen shall consist of a rubber
compound bonded to two conical metal end pieces. The
diameter of the test specimen shall be 25 6 0.5 mm (1.00 6
0.2 in.). The distance between the opposed conical end pieces
shall be 11.5 6 1.2 mm (0.45 6 0.05 in.). For the test specimen
in Fig. 7, the height of each conical end piece shall be 23.4 6
0.5 mm (0.92 6 0.02 in.) (Note 9). The half-angle of the cone
vertex shall be 45 6 1° and the tip shall not be rounded to
radius greater than 0.8 mm (0.03 in.).
25. Apparatus
25.1 Testing Machine—A tension testing machine conforming to the requirements of Practices E4 shall be used for
measuring the strength of adhesion. The moving head of the
machine shall travel at the uniform rate of 0.83 6 0.08 mm/s
(2.06 0.2 in./min). The machine shall be provided with a
recording device to give the total force in newtons or poundsforce at the conclusion of the test. A machine with a capacity
no greater than 44.5 kN (10 000 lbf) will be found suitable in
most cases.
NOTE 9—Theoretically, the height of end pieces could be any length.
The end pieces in Fig. 7 have been the most practical size for molding and
testing.
7
D429 − 14
28. Procedure
28.1 Mount the test specimens in the grips of the test
machine using the appropriate fixtures. Take care in centering
and adjusting the test specimen so the tension is symmetrically
distributed in the cross section during the test. Apply the
tension load until the rubber either separates from the adhesive
surface or ruptures. Record the total load at the time of failure.
Record type or types of failure and express in accordance with
the standard adhesion failure terminology (see Section 24).
A
BA
C
D
E (radius)
A
mm
25.0 ± 0.5
23.5 ± 0.5
11.5 ± 1.2
45°± 1
0.8 max
29. Calculations
in.
1.00 ± 0.02
0.92 ± 0.02
0.45 ± 0.05
29.1 Express the adhesion value in Newtons or poundsforce required to produce failure. In cases where the failure is
in the rubber, the adhesion value is recognized as being higher
than that recorded.
0.03 max
Suggested dimension.
30. Report
FIG. 7 Test Specimens with Conical Adhesion Areas
30.1 The report shall include the following, preferably
reported on an Adhesion Test Data Sheet illustrated in Table 1:
30.1.1 Type and code number of the rubber compound,
30.1.2 Cure time and temperature,
30.1.3 Type of metal or rigid substrate used and surface
preparation,
30.1.4 Adhesive and dilution,
30.1.5 The adhesion value for each test piece,
30.1.6 Type and percentage of failure,
30.1.7 Date of vulcanization and date of test, and
30.1.8 Temperature of test room.
27. Laboratory Preparation of Standard Test Specimens
27.1 The standard test specimen is formed by two cylindrical rigid parts terminated by opposite conical ends, and a
cylinder of rubber bonded to the conical ends. Prepare in the
laboratory in accordance with 27.1.1 through 27.1.7.
27.1.1 Machine conical metal parts from rolled bar steel
SAE No. 10204 or SAE No. 1010 for standard reference pieces.
However, other rigid materials may be used if in conformity
with the essential dimensions to determine the effect of
adhesion on other rigid materials. Prepare the test face of the
cone in accordance with any test method for securing adhesion
that may be under investigation.
27.1.2 Vulcanize the specimens in a transfer mold. For the
six-cavity transfer mold shown in Fig. 8, the unvulcanized
rubber piece shall be approximately 20 mm (0.8 in.) in
thickness and approximately 110 mm (4.3 in.) in diameter.
Sufficient rubber stock should be used to fill the pot and
provide some excess after filling the mold cavities.
27.1.3 Clean or treat the surface of the conical ends in
accordance with the adhesion system under investigation. Coat
the treated metal surface with the adhesive over the conical
area only.
27.1.4 Place the rigid parts and the rubber compound in the
preheated mold for vulcanization.
27.1.5 Vulcanize with conditions of time, temperature, and
pressure being regulated by their interrelationship effect on
adhesion to be determined. It may be necessary to surround the
mold with an insulating shield to maintain proper temperature
during cure.
27.1.5.1 At the conclusion of the cure, take great care when
removing the test specimens from the mold to avoid subjecting
the bonded surfaces to undue stress before the test specimens
have cooled.
27.1.6 After vulcanization, store the specimens at a temperature of 23 6 2°C (73.4 6 3.6°F) for at least 16 h prior to
testing.
27.1.7 Fig. 8 shows a mold, unvulcanized rubber
compound, molded test specimens, and adhesive coated conical pieces.
31. Precision and Bias
31.1 Precision and bias do not exist for this test method
because resources necessary for round-robin testing have not
been forthcoming.
32. Salvaging of Bonded Metal Parts
32.1 Bonded metal parts may be salvaged by the usual
burning or chemical stripping techniques. Mechanical or
chemical surface treatments are used to re-establish a clean
bonding surface. The sharpness of the conical tip may be
reduced during salvaging. This affects reproducibility of the
test results and care must be taken to re-establish the sharpness
of this cone to 0.8-mm (0.03-in.) radius (maximum).
METHOD D—ADHESION TEST: POSTVULCANIZATION
(PV) BONDING OF RUBBER TO METAL
33. Significance and Use
33.1 Methods A, B, and C of this standard cover procedures
for testing the strength of adhesion of rubber to metal when the
bond is formed during vulcanization. Method D may be used to
determine the strength of adhesion of rubber to metal when the
bond is formed after the rubber has been vulcanized. In the
rubber industry, this is commonly referred to as postvulcanization (PV) bonding.
33.2 In the test, a vulcanized circular disk that has been
adhesive coated on both ends, is assembled between two
parallel metal parts. The rubber-metal assembly is then placed
8
D429 − 14
FIG. 8 Mold and Conical Test Specimens
35. Standard Test Specimens
in a fixture under compression and heated in an oven for a
specified time at a specified temperature.
35.1 Prepare the vulcanized rubber test specimen in accordance with the procedure given in Test Methods D395.
33.3 When tested to rupture in an axial direction, a measurement of rubber-to-metal adhesion is obtained. The rupture
force and type of failure are recorded.
35.2 The metal test specimen is identical to the standard
metal test specimen described in Section 6, Method A, of this
standard.
34. Apparatus
34.1 Testing Machine, A tension testing machine conforming to the requirements of Practices E4 shall be used for
measuring the strength of adhesion. The crosshead of the
machine shall travel at the uniform rate of 0.83 6 0.08 mm/s
(2.0 6 0.2 in.)/min. The machine shall be provided with a
device to record the maximum force in Newtons or poundsforce at the conclusion of the test. A machine of at least
44.5-kN (10 000-lbf) capacity is suitable.
36. Preparation of Standard Test Specimens
36.1 Soak lint-free paper towel in methyl ethyl ketone
(MEK), or another suitable cleaning solvent, and lay flat on a
clean surface. Wipe the rubber surfaces to be bonded several
times across the paper to remove any residual surface contaminants. Following air-drying for at least 15 min, post-dry the
cleaned rubber specimens for 10 min at 70°C in a circulating
air oven. Remove the rubber specimens from the oven and
allow to condition at Standard Laboratory Temperature (23 6
2°C) for at least 30 min prior to adhesive coating, preferably by
brush application.
34.2 Grips—The fixtures for holding the specimen in the
testing machine will depend on the type of specimen but in all
cases shall be provided with ball seats, or a suitable
mechanism, to permit proper centering of the load during the
test. These grips can be of the type described in 6.2 of Method
A and are illustrated in Fig. 1 and Fig. 3.
36.2 Dip each surface of the adhesive-coated specimen
alternately into a suitable assembly oil5 to a depth slightly
greater than the surface to be covered. Place the specimen on
its side and allow excess oil to drain off for about 5 min prior
to assembly.
34.3 Details of the apparatus used to hold and compress the
rubber metal bonded assembly during oven cure are shown in
Fig. 9 (outside plates) and Fig. 10 (center aligning plate). The
center aligning plate, which controls compression of the
bonded assembly to 10.0 6 0.1 %, is held to the outside plates
by means of two bolts, washers, and nuts. The bolts are
tightened until the metal pieces compress the rubber properly.
5
Rubber assembly oil—Ex. Seagul Type R, Clark Oil and Chemical Co.,
Cleveland, OH.
9
D429 − 14
in.
⁄
33/64
41/64
0.875
1.250
1.625
2.250
2.500
3.250
4.50
5.00
mm
12.7
13.10
16.27
22.23
31.75
41.28
57.15
63.50
82.55
114.30
127.0
12
FIG. 9 Outside Plates (Two Required) Low-Carbon Steel
36.3 Assemble the test unit in accordance with Fig. 11.
Required compression is automatically obtained by the spacer
as the unit is tightened.
until destruction of the bonded assembly is complete. Record
the type of failure, expressed in accordance with the adhesion
failure terminology described in Section 4 under Method A of
this standard.
36.4 Place the test unit in a circulating air oven at 150°C for
a period of 60 6 10 min, or at a time and temperature
recommended by the adhesive supplier. Remove the unit and
immediately cool in room temperature tap water for at least 20
min. Following cooling, disassemble the test unit and store the
individual test specimens at a temperature of 23 6 2°C at least
48 h prior to testing.
38. Calculations
38.1 Express the adhesion value in pascals (or kPa, MPa) or
pounds-force per square inch and calculate by dividing the
tension force by the original area of the adhered surface. In the
case of rupture of the rubber, the adhesion value is recognized
as being higher than the rupture strength that is calculated as
described above.
37. Procedure
37.1 Attach the bonded assembly to the tension testing
machine using the appropriate fixtures or grips. Apply a force
10
D429 − 14
in.
0.150
0.45
41/64
0.875
1 1⁄ 4
1.250
1.50
1.625
2.500
2.700
3.00
5.00
mm
3.81
11.40
16.27
22.23
31.75
31.75
38.10
41.28
63.50
68.58
76.20
127.00
FIG. 10 Center Aligning Plate (One Required) Low-Carbon Steel
PARTS LIST
No.
1
2
3
4
5
6
7
Description
5⁄8-16 UNC 3-in. long hex bolt
Fig. 9 – outside plate
Metal test specimen
Vulcanized rubber puck
Fig. 10 – center aligning plate
Washer
5⁄8-16 UNC nut
FIG. 11 Total Assembly
11
No.
Req’d
2
2
12
6
1
2
2
D429 − 14
39. Report
39.1 The report shall include the following, preferably
reported on an Adhesion Test Data Sheet illustrated in Table 1:
39.1.1 Type and code number of the rubber compound,
39.1.2 Bonded assembly preparation; cure time and
temperature,
39.1.3 Type of metal and surface preparation,
39.1.4 Adhesive and dilution,
39.1.5 Method of application,
39.1.6 Failure or rupture stress measured in pascals or
pounds-force per square inch,
39.1.7 Type of failure, and
39.1.8 Date of test.
40. Precision and Bias4
40.1 Precision and bias do not exist for this test method
because resources necessary for round-robin testing have not
been forthcoming.
METHOD E—90° STRIPPING TEST—RUBBER TANK
LINING—ASSEMBLED TO ONE METAL PLATE
41. Significance and Use
41.1 This test is intended to determine the adhesive strength
of rubber tank lining to tank wall. The results are obtained by
measuring the pull necessary to separate a rubber strip from a
metal surface. The data obtained indicate the strength of
adhesion along a line across the width of the rubber strip being
separated from a plate at a 90° angle. The test provides
valuable data for development and control of rubber compounds and methods of bonding. It also serves as a screening
test for the evaluation of various bonding agents, techniques, or
both.
FIG. 12 Test Apparatus For Static Mass Adhesion Test on Rubber Tank Lining
43.1.3 A photograph of a suitable support frame, together
with test specimen, clamp, mass carrier, and calibrated masses,
is shown in Fig. 12.
42. Adhesion Failure Terminology
42.1 R indicates the failure is in the rubber.
42.2 RC indicates the failure is at the rubber-cover cement
interface.
44. Standard Test Specimen
44.1 A standard test specimen is shown in Fig. 13 and the 25
6 0.05-mm (1.000 6 0.002-in.) wide strip of rubber is fixed
approximately in the center of the metal plate. Overall size of
the prepared test specimen from which the 25 mm wide strip is
taken is 150 6 3 mm (6.000 6 0.15 in.) square. One end of the
cemented plate is to be masked with approximately 25 mm (1
in.) wide pressure-sensitive tape.
42.3 CP indicates the failure is at the cover cement-prime
cement interface.
42.4 M (can also be denoted as CM) indicates the failure is
at the metal-prime cement interface.
NOTE 10—Example—The percentages of the various types of failure
may be estimated as in the following examples:
R-50, RC-50 means that roughly one half or 50 % of the area showed
failure in the rubber and the other 50 % showed failure at the rubber – cover cement interface.
R-25, RC-25, M-50 means that three types of failure are present with
the M indicating 50 % failure at the metal – primer interface.
45. Laboratory Preparation of Standard Test Pieces
45.1 The standard test specimens shall be as described in
45.1.1 to 45.1.4.
45.1.1 Prepare contact area of hot-rolled, mild black steel in
accordance with the method for securing adhesion that is
specified by supplier, or that may be under investigation. Size
of metal plate is approximately 150 mm2 (6 in.2) and at least
3.4 mm (0.13 in.) in thickness. Mask one end with approximately 25 mm (1.0 in.) wide pressure-sensitive tape.
43. Static-Mass Method (SM)
43.1 Apparatus:
43.1.1 The apparatus required for the adhesion test by the
static-mass test method consists of a supporting frame, testing
clamps, calibrated masses, and a mass carrier.
43.1.2 The frame has sufficient height to permit the mass
carrier to be suspended from the clamp holding the test
specimen and to hang freely during the progress of the test.
NOTE 11—In cases where the 3.18-mm (0.135-in.) thick metal is
permanently deformed during testing, a thicker metal plate may be used.
Likewise, a different grade of steel may be specified when agreed upon
12
D429 − 14
FIG. 13 Adhesion Test Specimen for Rubber Tank Lining
FIG. 14 An Example of a Rubber Tank Lining Adhesion Specimen in a Testing Machine
45.1.4 After vulcanization, store the specimens at a temperature of 23 6 2°C (73.4 6 3.6°F) at least 16 h. Cut a 25-mm
wide strip as shown in Fig. 9.
between the purchaser and the supplier.
45.1.2 Apply unvulcanized rubber slabs, 6.3 6 0.5 mm
(0.25 6 0.02 in.) thick to the prepared surface of the metal
plate.
46. Procedure
NOTE 12—Other thickness of rubber may be used to correspond to
actual ordered gage of tank lining stock if so noted on test report.
46.1 Separate the part to be tested by hand at the masked
area end and at a sufficient distance to permit jaws of the
testing clamp to be attached. Mount the plate on a support
frame, attach a clamp to the test specimen at separated end.
Suspend a mass carrier to the clamp and apply known masses
45.1.3 Vulcanize the rubber in the same manner as recommended by the rubber tank lining manufacturer; that is, cured
by exhaust steam, steam pressure, or chemical cure at the
recommended time, temperature, and procedure.
13
D429 − 14
51.2 Effect of Temperature—The results of this test are
affected by temperature. Elevating the temperature causes a
faster rate of stripping under a given load. The temperature
during test shall therefore be 23 6 2°C (73.1 6 3.6°F) and the
actual temperature shall be recorded.
to the carrier until the mass causes a constant rate of travel of
0.4 mm/s (1 in./min) throughout the test.
47. Machine Method (M)
47.1 Apparatus:
47.1.1 Testing Machine—Paragraph 6.1 of Test Methods
D412 describes the testing machine that shall be used for
measuring the strength of adhesion. The head of the machine
shall travel at the uniform rate of 50 mm (2.0 in.)/min.
47.1.2 Fixture—Any suitable fixture for holding the test
specimen to the upper head of the machine may be used
provided the direction of pull to cause separation shall be as
nearly perpendicular as possible at all times during the test, that
is, making a 90° angle with the top holding fixture. The test
fixture shown in operation in Fig. 5 complies with the above
and provides ease and simplicity of testing.
47.1.3 Grips—Any suitable grip may be used, provided it
does not slip or rupture the rubber strip. The grip shown in Fig.
5 complies and provides ease and simplicity of operation.
52. Calculations
52.1 For the static-mass test method, report the adhesion
valve as separation rate per unit width under a stated force, as
follows:
___ mm/s. for 25-mm width under___N force
___in./s for 1-in. width under___lbf
If a width other than 25 mm (1 in.) was used, correct the
separation by multiplying the rate by the quotient of actual
width per desired width as follows:
or ___mm/25 mm
___in./1 in.
Include both the rate and the actual width in the report.
For the machine test method, the autographic chart constitutes the report, but the value of the adhesion is determined by
drawing on the chart the best average line between the
maximum and minimum force values. The force so indicated,
expressed in Newtons per metre (or pounds-force per inch) is
divided by the width measured in 10.1 for separation at the rate
used and is reported as the adhesion value, as follows:
48. Standard Test Specimen
48.1 Refer to 44.1 (same as used for static-mass test
method).
49. Laboratory Preparation of Standard Test Pieces
N/m ~ lbf/in.! 5 force/actual width
49.1 Refer to 45.1 through 45.1.4. (Same as used for
static-mass test method).
(1)
Show both the force and actual width in the report.
53. Interpretation of Results
50. Procedure
53.1 In the static-mass test method, no stripping is started
unless a certain mass is used. Small increments in mass do not
progressively cause proportional increases in rate of separation. The rate initially increases slowly, but increases rapidly as
the mass increases. Rate of separation must therefore be
interpreted carefully. A specimen required to separate not more
than 0.4 mm/s (1 in./min) under a force of 90 N (20 lbf) might
be regarded as very inferior if the test result was 2 mm/s (5
in./min). The same specimen might not strip at all under a force
of 67 N (15 lbf) and might meet the requirement with a force
of 80 N (18 lbf).
50.1 Place the test specimen (Note 13) symmetrically in the
jaws attached to the fixed grip with the separating edge toward
the operator, as shown in Fig. 5. Place the tab in the grip and
apply a steady load at the rate of 50 mm (2.0 in.)/min until
separation is complete. Use the autographic recorder to show
graphically the adhesion values over the full length of the test
specimen.
NOTE 13—This specimen lends itself to the determination of the relative
effect of environmental conditions on possible bond deterioration. Specimens may be exposed unstressed or under a constant, relatively low bond
stress. It is recommended that one of the standard ASTM environmental
exposure conditions be used. Among those applicable are the following:
Test Methods D471, D572, D573, D1149, Practice G153, and Practice
B117. If environments other than the above are used, they shall be
described completely. This should include the conditions of the exposure
such as time, temperature, etc.
53.2 The true adhesion value is not determined in the case
where the specimens repeatedly tear. The test, however, indicates that the strength of adhesion exceeds the strength of the
material, and that the adhesion value is not less than the result
obtained. In cases of tearing, the results should be so designated.
51. Precautions
53.3 Adhesion values may differ between different plies of
the same article of plied construction and also at different
points along the same ply. The adhesion value of one ply to
another is taken as the average result of the test over a
reasonable distance of separation. When possible, a distance of
separation of at least 100 mm (4 in.) shall be used.
51.1 Tearing:
51.1.1 If, during a test, one of the parts begins to tear instead
of separating from the other part of the specimen, cut the
material being torn with a knife up to the surface of contact
between the two parts and start the test again.
51.1.2 If one of the parts repeatedly tears, instead of
separating it from the other part, a satisfactory result may be
secured in the static-mass test method by reducing the amount
of the mass used if this is permitted. In case of repeated tearing
when using the machine test method, take as the result of the
test the average load at which tearing occurs.
54. Report
54.1 The report shall include the following:
54.1.1 Results of the adhesion test expressed in accordance
with Sections 53 and 52,
14
D429 − 14
FIG. 15 Test Specimen
instances, interfacial failure(s) and thus is a discriminatory
screening test for the agents.
54.1.2 All observations and recorded data on which the
results are based,
54.1.3 Date of manufacture or vulcanization of rubber, if
known,
54.1.4 Date of test,
54.1.5 Statement of the test method used (static-mass or
machine),
54.1.6 Temperature of test room, and
54.1.7 Dimensions of the test specimen.
57. Adhesion Failure Terminology
57.1 Express the type of adhesion failure as determined by
examination of broken test pieces by one or more of the
following symbols:
57.2 R Indicates failure in the rubber (substrate failure).
55. Precision and Bias4
57.3 RC indicates failure in the rubber-cover cement (interfacial failure).
55.1 Precision and bias do not exist for this test method
because resources necessary for round-robin testing have not
been forthcoming.
57.4 CP indicates failure in the cover cement-prime cement
(interfacial failure).
57.5 M or CM indicates failure in the prime cement-metal
interface (interfacial failure).
METHOD F—RUBBER PART ASSEMBLED
BETWEEN TWO PARALLEL CONVEX–SHAPED
METAL PLATES
NOTE 14—Example–The percentage of the various types of failure may
be estimated as in the following examples:
R-60, RC40 means that 60 % of the bonded area showed failure in the
rubber and the other 40 % showed failure at the rubber-cover cement
interface.
R-25, RC-25, M-50 means that three types of failure are present with
R indicating 25 % failure in the rubber, RC, 25 % failure between the
rubber and the cement(adhesive)interface, and 50 % failure at the metalprimer interface, 25 % in the rubber.
56. Significance and Use
56.1 Method F is used for determining the adhesive strength
of rubber-to-metal bonding agents. The adhesion values are
obtained by measuring the force in an axial direction that is
necessary to separate the bonded rubber from the metal
component. The metal component is composed of two parallel
metal test specimens that have a convex shape on the bonded
side. (Fig. 15). This particular geometry produces in many
58. Apparatus
58.1 Testing Machine—A testing machine as described in
6.1 of Test Methods D412 shall be used for measuring the
15
D429 − 14
FIG. 16 Test Mold and Test Specimens
60.1.2 Prepare the test face of the specified convex specimen in accordance with any test method for securing adhesion
that may be under investigation (for example, phosphated
treated, mechanical blasted, etc.).
60.1.3 Coat the prepared metal surface with the adhesive
system to be tested in accordance to the manufacturers recommendations.
60.1.4 Place the dry adhesive coated specimens in the mold.
For compression or transfer molding, place the rubber preforms in the mold cavity. For injection molding, inject the
rubber into the mold.
60.1.5 Vulcanize with conditions of time, temperature, and
pressure in accordance with the system being investigated.
60.1.6 After a suitable vulcanization cycle, remove the
specimens with care to avoid subjecting the adhered surfaces to
stress before the specimens have cooled. Store the specimens at
a temperature of 23 6 2°C (73 6 4°F) for at least 16 h prior
to testing.
strength of adhesion. The head of the machine shall travel at
the uniform rate of 0.83 6 0.08 mm/s (2 6 0.2 in./min). The
machine shall be provided with a recording device to give the
force in newtons or pounds-force at the conclusion of the test.
58.2 Fixture—The fixtures for holding the specimen in the
test machine shall be threaded so the threaded studs of the test
specimen can be screwed into the grip. Fixtures may be
provided with ball seats, or a similar mechanism, to permit
proper centering of the load during the test.
59. Standard Test Specimen
59.1 A standard test specimen shall consist of a rubber
compound bonded to two convex-shaped metal end pieces. The
diameter of each test specimen shall be 28.70 6 0.76 mm. The
distance between the pieces shall be 25.00 6 0.76 mm, the
radius 41.3 6 0.25 mm. (see Fig. 15).
60. Laboratory Preparation of Test Specimens
60.2 Fig. 16 shows a photograph of a mold and inserts.
60.1 The standard test specimen is formed by vulcanizing
the desired type of rubber in a mold containing the adhesive
coated metal test parts. Injection molding, transfer molding, or
compression molding may be used. Prepare in the laboratory in
accordance with 60.1.1 – 60.1.6.
60.1.1 Machine the metal test part from rolled bar steel SAE
No. 1020 or SAE No. 1010 for standard reference pieces. Other
rigid materials may be used if in conformity with the essential
dimensions.
61. Procedure
61.1 Mount the test specimens in the threaded grips of the
test machine. Apply the tension load until the rubber either
separates from the adhesive surface or the rubber ruptures.
Record the total load at the time of failure. Observe the record
the type or types of failure and express in accordance with the
standard adhesion failure terminology (see Section 57).
16
D429 − 14
66. Adhesion Failure Terminology
66.1 Express the type of adhesion failure as determined by
the visual examination of the of the failed area using one or
more of the following symbols:
66.2 R indicates failure in the rubber.
66.3 RC indicates failure in between the rubber and the
adhesive.
66.4 CP indicates failure between the adhesive top coat and
the primer in the case of a two coat system.
66.5 M (or CM) indicates failure between the primer (or
adhesive in the case of a one coat system) and the substrate, for
example, metal.
FIG. 17 Double Shear Test Piece
NOTE 15—Example–The percentage of the various types of failure may
be estimated as in the following examples:
R-60, RC -40 means that 60 % of the bonded area showed failure in the
rubber and the other 40 % showed failure at the rubber-adhesive interface.
R-25, RC-25, M-50 means that three types of failures are present with
R indicating 25 % failure in the rubber, RC, 25 % failure between the
rubber and the cement (adhesive) interface, and 50 % failure at the
metal-primer interface.
62. Calculation
62.1 Express the adhesion value in newtons (N) or poundsforce (lbs) required to produce failure. In cases where the
failure is in the rubber, the adhesion value is recognized as
being higher than that recorded.
63. Report
67. Apparatus
63.1 The report shall include the following, preferably
reported on an Adhesion Test Data Sheet illustrated in Table 1:
63.1.1 Type and code number of the rubber compound,
63.1.2 Cure time and temperature,
63.1.3 Type of metal or rigid substrate used and surface
preparation,
63.1.4 Molding method used (compression, injection, etc.)
63.1.5 Adhesive used, dilution, and application method,
63.1.6 The adhesion value for each test piece,
63.1.7 Type and percentage of failure,
63.1.8 Date of vulcanization and date of test, and
63.1.9 Temperature of test room and humidity.
67.1 Test Specimens—Fig. 17 shows a molded test specimen. The diameter of the substrate component (for example,
steel, aluminum, plastic, etc.) shall be 25 6 0.1 mm and the
length 20 6 0.1 mm. The rubber sections shall be 23 6 0.1 mm
in diameter and 10 6 0.1 mm in length. A single- or
multi-cavity mold can be used to make the bonded specimen,
and it may be a mold for compression, transfer, or injection
molding.
67.2 Test Fixture—Fig. 18 shows the test fixture for holding
the bonded specimens in a strained position. The suggested
strain is 100 %, however, some elastomers may have an
ultimate shear strain less than 100 % and thus a fixture must be
made to accommodate the lower shear strain value. A guideline
is as follows:
64. Precision and Bias
64.1 Precision and bias do not exist for this test method
because resources necessary for round-robin testing have not
been forthcoming.
Ultimate Shear Strain (%)
>200
100 to 200
50 to 100
Test Strain (%)
100
50
25
While the test fixture frames may be steel, acetal plastic is
preferred. The plastic does not corrode or otherwise contribute
to bond failure. Tests have shown consistent results with acetal
frames. The positioning of the hole in the frame’s center piece
determines the percent strain.
METHOD G—MEASURING BOND DURABILITY
FOR RUBBER-TO-METAL BONDED COMPONENTS
WITH A DOUBLE SHEAR CYLINDRICAL SPECIMEN
65. Significance and Use
67.3 Test Apparatus—Fig. 19 shows one apparatus that may
be used for immersing the fixtured test specimens. While the
exposure conditions may be varied to suit individual programs,
the following have been used successfully:
65.1 Method G is used to determine relative bond durability
between various adhesives. The adhesives to be compared are
used to bond rubber-to-metal using a double shear cylindrical
specimen (see Fig. 17) which is then placed in a fixture to
impart a shear stress on the bond line. This assembly (see Fig.
18) is then placed in the prescribed test medium and the time
to obtain a failure depth of 5 mm at the rubber-metal bond
interface is noted. This test measures the durability of a specific
adhesive as a function of changes in the rubber formation.
Different adhesives may be examined to find the best for a
given rubber recipe. Also, different metal preparations and their
effect on bond durability may be investigated.
Media: 5 % sodium chloride solution in distilled water
Temperature: 35 ± 1°C
Dissolved Oxygen: 17 ± 1 mg/L
68. Laboratory Preparation of Test Specimens
68.1 Prepare the test face of the cylinders with any test
method for securing adhesion that may be under investigation,
for example, phosphate treated, mechanical blast, etc.
17
D429 − 14
FIG. 18 Test Specimen in a 100 % Strain Fixture (Frame)
FIG. 19 Test Samples in the Environmental Chamber
68.2 Coat the prepared metal surface with the adhesive
system to be tested in accordance with the manufacturer’s
recommendations, for example, film thickness, dry time.
68.5 After a suitable vulcanization cycle, remove the specimens. Store the specimens at a temperature of 23 6 2°C (73 6
4°F) for at least 16 h prior to testing.
68.3 Place the dry adhesive coated specimens in the mold.
Fig. 20 illustrates the basic mold design for a transfer mold. For
compression or transfer molding, place the rubber preform in
the mold cavity or transfer pot. For injection molding, inject
the rubber into the mold.
69. Procedure
68.4 The test specimens are formed by vulcanizing the
desired type of rubber in a mold containing the adhesive coated
metal cylinders. The cure conditions (temperature and time)
are determined by the elastomer compound being used.
69.2 Secure the bonded test specimens in the test fixture
with the chosen % strain.
69.1 Pull one testpiece of each molded batch to determine
that 100 % adhesion, for example 100R, is obtained prior to
immersion.
69.3 It is suggested that 5 samples (20 interfaces) are tested
for each experiment.
18
NOTE 1—All dimensions in mm unless otherwise noted.
FIG. 20 Basic Mold Design for Making Adhesion Test Pieces
D429 − 14
19
D429 − 14
NOTE 1—Prestrains 0, 50, and 100 % (left to right)
FIG. 21 Quadruple Shear Test Pieces
69.4 Immerse these fixtured parts into the test chamber
which has been prepared in terms of temperature and salt
content. Begin the oxygen bubbling at the selected rate. At
various time intervals, remove the fixtured samples, and using
a short steel ruler or other calibrated scale, measure the debond
depth. Continue the test until the debond depth of 5 mm is
noted for each bond.
71.9 The adhesive used, dilution, application method and
film thickness,
70. Calculation
72.1 Precision and bias do not exist for this test method
because resources necessary for round-robin testing have not
been forthcoming.
71.10 The type and percentage of bond failure, and
71.11 Date of vulcanization and date of failure measurement.
72. Precision and Bias
70.1 Measure the amount of debond in mm and the corresponding time.
METHOD H—MEASURING BOND DURABILITY OF
RUBBER-TO-METAL BONDED COMPONENTS WITH
QUADRUPLE LAP SHEAR SPECIMEN
71. Report
71.1 The report shall include the type and code number of
the rubber compound,
73. Significance and Use
71.2 Cure time and temperature,
73.1 This method has all the attributes of Method G except
that no fixture for imparting the shear stress is required, only a
simple block inserted into the test piece once the pre-strain has
been applied. The test piece dimensions are similar to an
existing standard adhesion test piece ISO 1827: 1991 (BS903:
A14: 1992(1998)). This results in a compact test piece,
pre-strained to a selected pre-strain, for exposure to prescribed
environments such as salt spray, elevated temperature and
humidity, boiling water, hot glycol or brine. See Fig. 21. Note
that the use of a pre-strain of 100 %, and immersion in boiling
water, has provided a highly accelerated test for aqueous
bonding agents subjected to water immersion at ambient
temperature.
71.3 Molding method (for example, compression, transfer,
injection),
71.4 Type of substrate and its surface preparation,
71.5 Test conditions (salt concentration, dissolved oxygen
level, temperature, test shear strain),
71.6 The failure criterion (for example, 5 mm of bond
failure),
71.7 The average time required by the replicate bonds to
meet the failure criterion, along with standard deviation and
95 % confidence interval,
71.8 Molding method used,
20
D429 − 14
NOTE 1—a.) Unstrained; b.) 100 % strain.
FIG. 22 Quadruple Shear Test Piece
shall travel at the uniform rate of 0.83 6 0.08 mm/s. (2 6 0.2
in./min.). The machine shall be provided with a recording
device to give the force in Newtons or pounds-force at the
conclusion of the test.
74. Adhesion Failure Terminology
74.1 Express the type of adhesion failure as determined by
the visual examination of the of the failed area using one or
more of the following symbols:
74.1.1 R indicates the failure is in the rubber.
74.1.2 RC indicates the failure is at the rubber-cover cement
interface.
74.1.3 CP indicates the failure is at the cover cement-prime
cement interface.
74.1.4 M indicates the failure is at the metal-prime cement
interface.
76. Laboratory Preparation of Test Specimens
76.1 Masking is required to ensure that the bonding agent is
applied only to the portion of the plates where bonding is
required. The bonding agent is applied and dried according to
the manufacture’s suggestions.
76.2 The bonding shall be done using compression molding,
transfer molding or injection molding of the rubber into a
suitable mold holding the adhesive coated samples.
NOTE 16—Example-The percentage of the various types of failure may
be estimated as in the following examples: R-60, RC -40 means that 60 %
of the bonded area showed failure in the rubber and the other 40% showed
failure at the rubber-adhesive interface. R-25, RC-25, M-50 means that
three types of failures are present with R indicating 25 % failure in the
rubber, RC, 25 % failure between the rubber and the cement (adhesive)
interface, and 50 % failure at the metal-primer interface.
76.3 A minimum of two replicates (eight interfaces) shall be
used for each prestrain and environmental condition, plus two
control replicates for each prestrain. In addition, one test piece
of each batch shall be prepared as a quality control for the
bonding procedure.
75. Apparatus
77. Procedure
75.1 Test pieces. Fig. 21 shows a photo of the molded test
piece.
77.1 Pull a quality control test piece from each molded
batch to determine that 100 % adhesion (100R) is obtained
prior to environmental exposure or laboratory storage with a
pre-strain.
75.2 The test piece consists of four identical rubber
elements, 4mm6 1mm thick, 20mm 6 5mm wide and 25 mm
6 5mm long. The rubber is bonded to rigid plates of the same
width and appropriate lengths to obtain a symmetrical doublesandwich arrangements. The central plates may have a hole at
each protruding end to accommodate pins to fixture the
assembly to the test machine. See Fig. 22.
77.2 Test pieces are pre-strained by pulling in a test machine
to just above the desired pre-strain and inserting a nylon block
of suitable dimensions (14 x 9 mm for 100 % strain) between
the central metal plates to maintain the prescribed prestrain.
75.3 Suitable blocks (for example, nylon) to maintain the
desired prestrain. The shape of the block shall be such that, in
addition to setting the prescribed prestrain, there is no contact
between the block and the strained rubber elements (see Fig.
22).
77.3 Subject the test pieces to the chosen environmental
conditions, for example, those shown in 67.3 (Method G).
Monitor these conditions to ensure they are stable (for
example, for aqueous immersion, the solutions should be
stirred adequately and the pH and oxygen concentration should
be checked regularly). Control test pieces are to be kept under
standard laboratory temperature and humidity.
75.4 Testing machine: To test the adhesion before/after an
immersion test, a power driven test machine equipped to
produce a uniform rate of grip separation shall be used for
measuring the strength of adhesion. The head of the machine
77.4 Inspect test pieces for signs of corrosion or incipient
bond failure at appropriate periods (for example, twice hourly
21
D429 − 14
78.7 The failure criterion (for example, 5 mm bond failure
during environmental exposure).
for eight h; twice daily for 1 week; weekly for 1 month then 4
weekly). Using a short steel ruler or other calibrated scale,
measure the de-bond depth.
78.8 An estimate of the time it would take to reach the
failure criterion under the prescribed environmental conditions.
Ideally this will be the average time taken by replicates to reach
the failure criterion, but for effective bonding agents extrapolation may be desirable to avoid unacceptably long test times.
77.5 After a predetermined period of time, pull to failure
each test piece which remains sufficiently intact, including
those exposed to the chosen environmental conditions and the
control test pieces, and record the peak force required to do
this.
78.9 Type and percentage of bond failure during final shear
test and of incipient bond failure during environmental exposure; shear load to failure of test pieces at the end of the
prescribed period of environmental exposure.
77.6 Measure the amount of de-bond in mm and classify the
loci of failure according to Section 74. Note that the loci may
be different according to whether the failure took place during
the environmental exposure or during the pull to failure.
78.10 Dates of vulcanisation, environmental exposure, incipient failure inspections and tensile machine pull to failure.
78. Report
78.11 As an option, load-deflection plots for all shear tests
to failure, and for the prestrain applied as in 77.2, may be
measured and reported.
78.1 The report shall include the type and code of the rubber
compound.
78.2 Cure time and temperature.
78.3 Molding method (for example, compression, transfer,
or injection).
79. Precision and Bias
79.1 Precision and bias do not exist for this test method
because resources necessary for round-robin testing have not
been forthcoming.
78.4 Type of substrate and surface preparation.
78.5 Bonding agent used, application method and film
thickness.
80. Keywords
78.6 Environmental test conditions (for example, immersion medium, temperature), prestrain(s) and maximum duration of exposure.
80.1 adhesion; adhesive; bond durability; double-shear test
piece; elastomer; metals; rubber; rubber-to-metal bonding
ASTM International takes no position respecting the validity of any patent rights asserted in connection with any item mentioned
in this standard. Users of this standard are expressly advised that determination of the validity of any such patent rights, and the risk
of infringement of such rights, are entirely their own responsibility.
This standard is subject to revision at any time by the responsible technical committee and must be reviewed every five years and
if not revised, either reapproved or withdrawn. Your comments are invited either for revision of this standard or for additional standards
and should be addressed to ASTM International Headquarters. Your comments will receive careful consideration at a meeting of the
responsible technical committee, which you may attend. If you feel that your comments have not received a fair hearing you should
make your views known to the ASTM Committee on Standards, at the address shown below.
This standard is copyrighted by ASTM International, 100 Barr Harbor Drive, PO Box C700, West Conshohocken, PA 19428-2959,
United States. Individual reprints (single or multiple copies) of this standard may be obtained by contacting ASTM at the above
address or at 610-832-9585 (phone), 610-832-9555 (fax), or (e-mail); or through the ASTM website
(www.astm.org). Permission rights to photocopy the standard may also be secured from the Copyright Clearance Center, 222
Rosewood Drive, Danvers, MA 01923, Tel: (978) 646-2600; />
22