Reuse existing C Code with Android NDK
Bạn đang xem bản rút gọn của tài liệu. Xem và tải ngay bản đầy đủ của tài liệu tại đây (773.3 KB, 42 trang )
Reuse existing C code with the Android NDK
Learn how to use the Android Native Developer's Kit
Skill Level: Intermediate
Frank Ableson
Entrepreneur
Navitend
12 Apr 2011
The Android Software Developer Kit (SDK) used by the majority of Android
application developers requires the use of the Java™ programming language.
However, there is a large body of C language code available online. The Android
Native Developer Kit (NDK) permits an Android developer to reuse existing C source
code within an Android application. In this tutorial, you will create an image
processing application in the Java programming language that uses C code to
perform basic image processing operations.
Section 1. Before you start
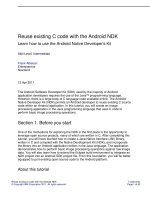
One of the motivations for exploring the NDK in the first place is the opportunity to
leverage open source projects, many of which are written in C. After completing this
tutorial, you will have learned how to create a Java Native Interface (JNI) library,
written in C and compiled with the Native Development Kit (NDK), and incorporate
the library into an Android application written in the Java language. The application
demonstrates how to perform basic image processing operations against raw image
data. You will also learn how to extend the Eclipse build environment to integrate an
NDK project into an Android SDK project file. From this foundation, you will be better
equipped to port existing open source code to the Android platform.
About this tutorial
Reuse existing C code with the Android NDK Trademarks
© Copyright IBM Corporation 2011. All rights reserved. Page 1 of 42
This tutorial introduces the Android NDK within the Eclipse environment. The NDK is
used to add functionality to an Android application using the C programming
language. The tutorial begins with a high-level look at the NDK and its common
usage scenarios. From there, the topic of image processing is introduced, followed
by an introduction and demonstration of this tutorial's application: IBM Photo Phun.
This application is a mix of SDK-based Java code and NDK-compiled C code. The
tutorial moves on to introduce the Java Native Interface (JNI), which is the
technology of interest when working with the NDK. A look ahead to the completed
project's source files provides a roadmap for the application constructed here. Then,
in a step-by-step manner, you will construct this application. The Java class and C
source files are explained. To conclude, the Eclipse build environment is customized
to integrate the NDK tool chain directly into the easy-to-use Eclipse build process.
Prerequisites
To follow this tutorial, you should be comfortable constructing Android applications
with the Android SDK and have a basic familiarity with the C programming language.
In addition, you will need the following:
• Eclipse and Android Developer Tools (ADT) — Primary code editor, Java
Compiler, and Android Development Tools Plug-in
• Android Software Developer Kit (SDK)
• Android Native Developer Kit (NDK)
• PNG Image — Image used for testing image processing operations
I created the code samples for this tutorial on a MacBook Pro with Eclipse V3.4.2
and Android SDK V8, which supports the Android release labeled 2.2 (Froyo). The
NDK release used in this tutorial is r4b. The code requires version r4b or later
because the image handling capabilities of the Android NDK are not available in
prior releases of the NDK.
See Resources for links to these tools.
Section 2. The Android NDK
Let's begin with a look at the Android NDK and how it can be used for enhancing the
Android platform. While the Android SDK provides a very rich programming
environment, the Android NDK broadens the horizons and can speed up the delivery
of desired functionality by bringing in existing source code, some of which may be
developerWorks® ibm.com/developerWorks
Reuse existing C code with the Android NDK Trademarks
© Copyright IBM Corporation 2011. All rights reserved. Page 2 of 42
proprietary and some of which may be open source code.
The NDK
The NDK is a software release available as a free download from the Android
website. The NDK includes all the components necessary to incorporate functionality
written in C into an Android application. The initial release of the NDK offered only
the most primitive of functionality with significant constraints. With each successive
release, the NDK has expanded its capabilities. As of r5 of the NDK application,
authors can write a significant portion of an application directly in C, including user
interface and event-handling capability. The features enabling the image handling
functionality demonstrated here were introduced with the r4b version of the NDK.
Two common uses of the NDK are to increase application performance and to
leverage existing C code by porting it to Android. Let's look first at performance
improvement. Writing code in C does not guarantee a significant increase in
performance. In fact, poorly written native code can actually slow down an
application when compared to a well-written Java application. Application
performance improvements are available when carefully crafted functions written in
C are leveraged to perform memory-based or computationally intensive operations
like those demonstrated in this tutorial. In particular, algorithms that leverage pointer
arithmetic are particularly ripe for use with the NDK. The second common use case
for the NDK is to port an existing body of C code written for another platform, such
as Linux®. This tutorial demonstrates the NDK in a manner that highlights the
performance and the re-use cases.
The NDK contains a compiler and build scripts, allowing you to focus on the C
source files and leave the build magic to the NDK installation. The NDK build
process is easily incorporated into the Eclipse development environment, which is
demonstrated in the section on Customizing Eclipse.
Before jumping into the application itself, let's take a brief detour to discuss some
fundamentals of digital image processing.
Fundamentals of digital imaging processing
An enjoyable aspect of modern computer technology is the advent and ubiquity of
digital photography. There is more to digital photography than simply catching your
kid doing something cute. Digital images are found everywhere from candid
cellphone shots to high-end wedding albums, deep-space images, and numerous
other applications. Digital images are easy to capture, exchange, and even alter.
Modifying a digital image is of interest to us here and represents the core
functionality of the tutorial's sample application.
ibm.com/developerWorks developerWorks®
Reuse existing C code with the Android NDK Trademarks
© Copyright IBM Corporation 2011. All rights reserved. Page 3 of 42
Digital image manipulation occurs in myriad ways, including but not limited to the
following operations:
• Cropping — Extracting a portion of an image
• Scaling — Changing the size of an image
• Rotating — Changing the orientation of an image
• Conversion — Converting from one format to another
• Sampling — Changing the density of an image
• Mixing/Morphing — Changing the appearance of an image
• Filtering — Extracting elements of an image, such as colors or
frequencies
• Edge detection — Used for machine vision applications to identify
objects within an image
• Compressing — Reducing the storage size of an image
• Enhancing an image through pixel operations:
• Histogram equalization
• Contrast
• Brightness
Some of these operations are performed on a pixel-by-pixel basis, while others
involve matrix math to work on small sections of the image at a time. Regardless of
the operations, all image processing algorithms involve working with raw image data.
This tutorial demonstrates the use of pixel and matrix operations in the C
programming language, running on an Android device.
Section 3. The application architecture
This section explores the architecture of the tutorial's sample application, beginning
with a high-level glance at the completed project, then progressing through each of
the major steps in its construction. You can follow along step by step to reconstruct
the application yourself or you can download the complete project from the
Resources section.
developerWorks® ibm.com/developerWorks
Reuse existing C code with the Android NDK Trademarks
© Copyright IBM Corporation 2011. All rights reserved. Page 4 of 42
The completed project
This tutorial demonstrates the construction of a simple image processing application,
IBM Photo Phun. Figure 1 shows a screenshot from the Eclipse IDE with the project
expanded to see the source and output files.
Figure 1. Eclipse project view
ibm.com/developerWorks developerWorks®
Reuse existing C code with the Android NDK Trademarks
© Copyright IBM Corporation 2011. All rights reserved. Page 5 of 42
developerWorks® ibm.com/developerWorks
Reuse existing C code with the Android NDK Trademarks
© Copyright IBM Corporation 2011. All rights reserved. Page 6 of 42
The application's UI is constructed with traditional Android development techniques,
using a single layout file (main.xml) and a single Activity, implemented in
IBMPhotoPhun.java. A single C source file, located in a folder named jni, beneath
the project's main folder, contains the image processing routines. The NDK tool
chain compiles the C source file into a shared library file named libibmphotophun.so.
The compiled library file(s) are stored in the libs folder. A library file is created for
each target hardware platform or processor architecture. Table 1 enumerates the
application's source files.
Table 1. The required application source files
File Comment
IBMPhotoPhun.java Extends the Android Activity class for UI and
application logic
Ibmphotophun.c Implements image processing routines
main.xml Home page of the application UI
AndroidManifest.xml Deployment descriptor for the Android application
sampleimage.png Image used for demonstration purposes (feel free
to substitute an image of your own)
Android.mk Makefile snippet used by the NDK to construct
the JNI library
If you don't have a working Android development environment, now is a great time to
install the Android tools. For more information on how to set up an Android
development environment, see Resources for links to the required tools, plus some
introductory articles and tutorials on developing applications for Android. Having a
familiarity with Android is helpful in understanding this tutorial.
Now that you have an overview of the architecture and the application, you can see
how it looks when running on an Android device.
Demonstrating the application
Sometimes it's helpful to begin with the end in mind, so before you dive into the
step-by-step process of creating this application, have a quick look at it in action.
The following screenshots were captured from a Nexus One running Android 2.2
(Froyo). The images were captured using the Dalvik Debug Monitor Service (DDMS)
tool, which installs as part of the Android Developer Tools Eclipse plug-in.
Figure 2 shows the home screen of the application with the sample image loaded.
One quick look at the image and you will understand how I wound up as a
programmer and not on the set of some television program, thanks to my "fit for
radio" face. Please feel free to substitute your own image when building the
application yourself.
ibm.com/developerWorks developerWorks®
Reuse existing C code with the Android NDK Trademarks
© Copyright IBM Corporation 2011. All rights reserved. Page 7 of 42
Figure 2. Home screen of the IBM Photo Phun application
developerWorks® ibm.com/developerWorks
Reuse existing C code with the Android NDK Trademarks
© Copyright IBM Corporation 2011. All rights reserved. Page 8 of 42
ibm.com/developerWorks developerWorks®
Reuse existing C code with the Android NDK Trademarks
© Copyright IBM Corporation 2011. All rights reserved. Page 9 of 42
The buttons across the top of the screen allow you to change the image. The first
button, Reset, restores the image to this original color image. Selecting the Convert
Image button converts the image to grayscale, as shown in Figure 3.
Figure 3. Grayscale image
developerWorks® ibm.com/developerWorks
Reuse existing C code with the Android NDK Trademarks
© Copyright IBM Corporation 2011. All rights reserved. Page 10 of 42
ibm.com/developerWorks developerWorks®
Reuse existing C code with the Android NDK Trademarks
© Copyright IBM Corporation 2011. All rights reserved. Page 11 of 42
The Find Edges button starts with the original color image, converts it to grayscale,
then performs a Sobel Edge Detection algorithm. Figure 4 shows the results of the
edge detection algorithm.
Figure 4. Detecting the edges
developerWorks® ibm.com/developerWorks
Reuse existing C code with the Android NDK Trademarks
© Copyright IBM Corporation 2011. All rights reserved. Page 12 of 42
ibm.com/developerWorks developerWorks®
Reuse existing C code with the Android NDK Trademarks
© Copyright IBM Corporation 2011. All rights reserved. Page 13 of 42
Edge-detection algorithms are often used in machine vision applications as a
preliminary step in a multi-step image processing operation. From this point, the final
two buttons allow you to make the image darker or lighter by changing the
brightness of each pixel. Figure 5 shows a brighter version of the grayscale image.
Figure 5. Increased brightness
developerWorks® ibm.com/developerWorks
Reuse existing C code with the Android NDK Trademarks
© Copyright IBM Corporation 2011. All rights reserved. Page 14 of 42
ibm.com/developerWorks developerWorks®
Reuse existing C code with the Android NDK Trademarks
© Copyright IBM Corporation 2011. All rights reserved. Page 15 of 42
Figure 6 shows the edges image a bit darker.
Figure 6. Decreased brightness
developerWorks® ibm.com/developerWorks
Reuse existing C code with the Android NDK Trademarks
© Copyright IBM Corporation 2011. All rights reserved. Page 16 of 42
ibm.com/developerWorks developerWorks®
Reuse existing C code with the Android NDK Trademarks
© Copyright IBM Corporation 2011. All rights reserved. Page 17 of 42
Now it is your turn.
Section 4. Creating the application
In this section, we will create the application by leveraging the tools provided in the
Eclipse ADT plug-in. Even if you aren't familiar with creating applications for Android,
you should be able to follow along quite readily and learn from this section. The
Resources section contains helpful articles and tutorials on the basics of creating
Android applications.
ADT new project wizard
Creating the application within the Eclipse IDE is very straightforward, thanks to the
ADT new project wizard, shown in Figure 7.
Figure 7. Creating a new Android project
developerWorks® ibm.com/developerWorks
Reuse existing C code with the Android NDK Trademarks
© Copyright IBM Corporation 2011. All rights reserved. Page 18 of 42
ibm.com/developerWorks developerWorks®
Reuse existing C code with the Android NDK Trademarks
© Copyright IBM Corporation 2011. All rights reserved. Page 19 of 42
When filling out the new project wizard, provide the following information:
1. Valid project name.
2. Build target. Note that for this project, you must use Android V2.2 or
Android V2.3 as the target SDK platform level.
3. Valid application name.
4. Package name.
5. Activity name.
Once you have populated the wizard screen, select Finish. Clicking the Next button
prompts for creating a "Test" project to accompany this project, which is a useful
step, but for another day.
Once the project is populated into Eclipse, you are ready to implement the source
files necessary for this application. You will begin with the UI elements of the
application.
Implementing the user interface
The UI for this application is rather straightforward. It contains a single Activity
with a handful of Button widgets and an ImageView widget to display the chosen
image. Like many Android applications, the UI is defined in the main.xml file, shown
in Listing 1.
Listing 1. UI layout file, main.xml
<?xml version="1.0" encoding="utf-8"?>
<LinearLayout xmlns:android=" />android:orientation="vertical"
android:layout_width="fill_parent"
android:layout_height="fill_parent"
android:background="#ffffffff"
>
<LinearLayout xmlns:android=" />android:orientation="horizontal"
android:layout_width="fill_parent"
android:layout_height="wrap_content"
android:gravity="center"
>
<Button
android:layout_width="wrap_content"
android:layout_height="wrap_content"
android:id="@+id/btnReset"
android:text="Reset"
android:visibility="visible"
developerWorks® ibm.com/developerWorks
Reuse existing C code with the Android NDK Trademarks
© Copyright IBM Corporation 2011. All rights reserved. Page 20 of 42
android:onClick="onResetImage"
/>
<Button
android:layout_width="wrap_content"
android:layout_height="wrap_content"
android:id="@+id/btnConvert"
android:text="Convert Image"
android:visibility="visible"
android:onClick="onConvertToGray"
/>
<Button
android:layout_width="wrap_content"
android:layout_height="wrap_content"
android:id="@+id/btnFindEdges"
android:text="Find Edges"
android:visibility="visible"
android:onClick="onFindEdges"
/>
<Button
android:layout_width="wrap_content"
android:layout_height="wrap_content"
android:id="@+id/btnDimmer"
android:text="- "
android:visibility="visible"
android:onClick="onDimmer"
/>
<Button
android:layout_width="wrap_content"
android:layout_height="wrap_content"
android:id="@+id/btnBrighter"
android:text=" +"
android:visibility="visible"
android:onClick="onBrighter"
/>
</LinearLayout>
<ImageView
android:layout_width="wrap_content"
android:layout_height="wrap_content"
android:scaleType="centerCrop"
android:layout_gravity="center_vertical|center_horizontal"
android:id="@+id/ivDisplay"
/>
</LinearLayout>
Note the use of two LinearLayout elements. The outer element controls the
vertical flow of the UI and the inner LinearLayout is set up for horizontal
management of its children. The horizontal layout element holds all of the Button
widgets across the top of the screen. The ImageView is set up to center the
contained image and has an id attribute, permitting you to manipulate its contents
during run time.
Each of the Button widgets has an onClick attribute. The value of this attribute
must correspond to a public void method within the containing Activity class,
which takes a single View argument. This approach is a quick and easy means of
setting up click handlers without the trouble of defining anonymous handlers or
getting access to the element during runtime. See Resources for more information
on this approach to handling Button presses.
Once the UI has been defined in the layout file, the Activity code must be written
to work with the UI. This is implemented in the file IBMPhotoPhun.java, where the
ibm.com/developerWorks developerWorks®
Reuse existing C code with the Android NDK Trademarks
© Copyright IBM Corporation 2011. All rights reserved. Page 21 of 42
Activity class is extended. You can see the code in Listing 2.
Listing 2. IBM Photo Phun imports and class declaration
/*
* IBMPhotoPhun.java
*
* Author: Frank Ableson
* Contact Info:
*/
package com.msi.ibm.ndk;
import android.app.Activity;
import android.os.Bundle;
import android.util.Log;
import android.graphics.BitmapFactory;
import android.graphics.Bitmap;
import android.graphics.Bitmap.Config;
import android.view.View;
import android.widget.ImageView;
public class IBMPhotoPhun extends Activity {
private String tag = "IBMPhotoPhun";
private Bitmap bitmapOrig = null;
private Bitmap bitmapGray = null;
private Bitmap bitmapWip = null;
private ImageView ivDisplay = null;
// NDK STUFF
static {
System.loadLibrary("ibmphotophun");
}
public native void convertToGray(Bitmap bitmapIn,Bitmap bitmapOut);
public native void changeBrightness(int direction,Bitmap bitmap);
public native void findEdges(Bitmap bitmapIn,Bitmap bitmapOut);
// END NDK STUFF
/** Called when the activity is first created. */
@Override
public void onCreate(Bundle savedInstanceState) {
super.onCreate(savedInstanceState);
setContentView(R.layout.main);
Log.i(tag,"before image stuff");
ivDisplay = (ImageView) findViewById(R.id.ivDisplay);
// load bitmap from resources
BitmapFactory.Options options = new BitmapFactory.Options();
// Make sure it is 24 bit color as our image processing algorithm
// expects this format
options.inPreferredConfig = Config.ARGB_8888;
bitmapOrig = BitmapFactory.decodeResource(this.getResources(),
R.drawable.sampleimage,options);
if (bitmapOrig != null)
ivDisplay.setImageBitmap(bitmapOrig);
}
public void onResetImage(View v) {
Log.i(tag,"onResetImage");
developerWorks® ibm.com/developerWorks
Reuse existing C code with the Android NDK Trademarks
© Copyright IBM Corporation 2011. All rights reserved. Page 22 of 42
ivDisplay.setImageBitmap(bitmapOrig);
}
public void onFindEdges(View v) {
Log.i(tag,"onFindEdges");
// make sure our target bitmaps are happy
bitmapGray = Bitmap.createBitmap(bitmapOrig.getWidth(),bitmapOrig.getHeight(),
Config.ALPHA_8);
bitmapWip = Bitmap.createBitmap(bitmapOrig.getWidth(),bitmapOrig.getHeight(),
Config.ALPHA_8);
// before finding edges, we need to convert this image to gray
convertToGray(bitmapOrig,bitmapGray);
// find edges in the image
findEdges(bitmapGray,bitmapWip);
ivDisplay.setImageBitmap(bitmapWip);
}
public void onConvertToGray(View v) {
Log.i(tag,"onConvertToGray");
bitmapWip = Bitmap.createBitmap(bitmapOrig.getWidth(),bitmapOrig.getHeight(),
Config.ALPHA_8);
convertToGray(bitmapOrig,bitmapWip);
ivDisplay.setImageBitmap(bitmapWip);
}
public void onDimmer(View v) {
Log.i(tag,"onDimmer");
changeBrightness(2,bitmapWip);
ivDisplay.setImageBitmap(bitmapWip);
}
public void onBrighter(View v) {
Log.i(tag,"onBrighter");
changeBrightness(1,bitmapWip);
ivDisplay.setImageBitmap(bitmapWip);
}
}
Let's break this down into a few notable comments:
1. There are a handful of member variables:
• tag — This is used in all logging statements to help filter the LogCat
during debugging.
• bitmapOrig — This Bitmap holds the original color image.
• bitmapGray — This Bitmap holds a grayscale copy of the image
and is only used temporarily during the findEdges routine.
• bitmapWip — This Bitmap holds the grayscale image that is
modified when brightness values are modified.
• ivDisplay — This ImageView is a reference to the ImageView
defined in the main.xml layout file.
ibm.com/developerWorks developerWorks®
Reuse existing C code with the Android NDK Trademarks
© Copyright IBM Corporation 2011. All rights reserved. Page 23 of 42
2. The "NDK Stuff" section includes four lines:
• The library containing our native code is loaded with a call to
System.loadLibrary. Note that this code is contained in a block
marked as "static." This causes the library to be loaded when the
application is started.
• Prototype declaration for convertToGray — This function takes two
parameters. The first is a color Bitmap and the second is a Bitmap
that is populated with a grayscale version of the first.
• Prototype declaration for changeBrightness — This function takes
two parameters. The first is an integer representing up or down. The
second is a Bitmap that is modified on a pixel by pixel basis.
• Prototype declaration for findEdges. This takes two parameters.
The first is a grayscale Bitmap and the second is a Bitmap that
receives the "edges only" version of the image.
3. The onCreate method inflates the layout identified by R.layout.main,
obtains a reference to the ImageView widget (ivDisplay), then loads
the color image from the resources.
• The BitmapFactory method takes an options parameter that
permits you to load the image in the ARGB format. "A" stands for
alpha channel and "RGB" stands for red, green, blue, respectively.
Many open source image processing libraries expect a 24-bit color
image, eight bits each for red, green, and blue, with each pixel
consisting of the RGB triplet. Each value ranges from 0 to 255.
Images on the Android platform are stored as a 32-bit integer as
alpha, red, green, blue.
• Once the image is loaded, it is displayed in the ImageView.
4. The balance of the methods in this class correspond to "click handlers" for
the Button widgets:
• onResetImage loads the original color image into the ImageView.
• onConvertToGray creates the target Bitmap as an 8-bit image and
calls the convertToGray native function. The resulting image
(bitmapWip) is displayed in the ImageView.
• onFindEdges creates two intermediate Bitmap objects, converts
the color image to a grayscale image and calls the findEdges native
function. The resulting image (bitmapWip) is displayed in the
ImageView.
• onDimmer and onBrighter each invoke the changeBrightness
developerWorks® ibm.com/developerWorks
Reuse existing C code with the Android NDK Trademarks
© Copyright IBM Corporation 2011. All rights reserved. Page 24 of 42
method to modify the image. The resulting image (bitmapWip) is
displayed in the ImageView.
That about wraps up the UI code. It is now time for you to implement the image
process routines, but first, we need to create the library itself.
Section 5. Creating the NDK files
Now that the Android application's UI and application logic are in place, you need to
implement the image processing functions. In order to do this, you need to create a
Java-native library with the NDK. In this case, you will use some public domain C
code to implement the image processing functions and package them into a library
usable by the Android application.
Building the native library
The NDK creates shared libraries and relies on a makefile system. To build the
native library for this project, you need to perform the following steps:
1. Create a new folder named jni beneath your project file.
2. Within the jni folder, create a file named Android.mk, which contains the
makefile instructions to properly build and name your library.
3. Within the jni folder, create the source file, which is referenced in the
Android.mk file. The name of the C source file for this tutorial is
ibmphotophun.c.
Listing 3 contains the Android.mk file contents.
Listing 3. Android.mk file
LOCAL_PATH := $(call my-dir)
include $(CLEAR_VARS)
LOCAL_MODULE := ibmphotophun
LOCAL_SRC_FILES := ibmphotophun.c
LOCAL_LDLIBS := -llog -ljnigraphics
include $(BUILD_SHARED_LIBRARY)
Among other things, this makefile (snippet) instructs the NDK to:
ibm.com/developerWorks developerWorks®
Reuse existing C code with the Android NDK Trademarks
© Copyright IBM Corporation 2011. All rights reserved. Page 25 of 42