Nguyenxuantruc 1513804 lab09
Bạn đang xem bản rút gọn của tài liệu. Xem và tải ngay bản đầy đủ của tài liệu tại đây (976.45 KB, 7 trang )
ARDUINO LAB
MANUAL
LAB 3: SERIAL COMMUNICATION
I.
Introduction
In data transmission, serial communication is the process of sending data one bit at a time, sequentially,
over a communication channel or computer bus. This is in contrast to parallel communication, where
several bits are sent as a whole, on a link with several parallel channels.
In this lab, a serial communication is used for data transmission between the Arduino board and a
computer or other devices. All Arduino boards have at least one serial port (also known as a UART or
USART) named Serial. It communicates on digital pins 0 (RX) and 1 (TX) as well as with the computer via
USB. Thus, if you use these functions, you cannot also use pins 0 and 1 for digital input or output.
Figure 1: Data transmission using Serial communication
The process of sending data using serial communication is demonstrated in Figure 1. It is worth noting
that the Tx pin of the transmitter must be connected to the Rx pin of the receiver.
Figure 2: Create an empty project on Arduino by clicking File/New
Figure 3: Serial connection between Arduino Robot and PC
II.
Serial Interface in Arduino Uno
In this section, a manual to send data from Arduino board to the computer is presented briefly. Firstly,
create a new project on Arduino by clicking on File and select New. An empty project is created as Figure
2. The first step in serial communication is set the speed of data transmission, which is expressed in
baud, or baud-rate. In computer communication, the baud rate and bits per second (bps) are
equivalent. An example bellow will set the speed of the serial to 9600 bps and send “Hello, I am Arduino
Uno” to the PC. In fact, the USB connection between your Arduino board and PC is the Serial connection
(see Figure 3).
void setup() {
// Set the speed to 9600bps
Serial.begin(9600);
//Send a sentence to PC
Serial.println("Hello, I am Arduino Uno");
}
Now, you can save your project and then, click on Tools/Port, chose a correct USB port which is used to
connect to the board before uploading the code.
Figure 4: Select Serial Monitor to open the PC terminal
Figure 5: PC terminal: The speed is set to 9600 baud
Finally, click on Tools, select Serial Monitor as showed Figure 4 and then, a PC terminal will be opened as
depicted in Figure 5. Please make sure that the speed of the terminal is set to 9600 baud. Then, you can
see the result on the terminal!!!
III.
Receive a Character from PC Terminal
From PC terminal, you can send some data to the Arduino board by pressing any charater on your PC
keyboard and the click buttion Send. However, some code need to be implemented in the Arduino
board as following: the board keep checking if there is a character sent to it. If there is a character, it will
read this character and send it back to the PC terminal.
void loop() {
if(Serial.available())
{
char temp = Serial.read();
Serial.print("I received: ");
Serial.println(temp);
}
}
Figure 6: The result when typing letter A in the box, then click on Send button
After uploading to the board, you can open the terminal again by clicking on Tools/Serial Monitor. The
results can be found in Figure 6
IV.
Exercise
1. Implement a short program to make the LED connected to pin 13 turn on if a character O is
received. Other characters, the LED is turned off.
Hint: Use the if statement: if(temp == ‘O’){ …. } else {….}
BÀI GIẢI
void setup() {
Serial.begin(9600);
pinMode(13, OUTPUT);
}
void loop() {
if (Serial.available()) {
char temp = Serial.read();
if (temp == 'O') {
digitalWrite(13, HIGH);
}
else {
digitalWrite(13, LOW);
}
delay(1000);
}
}
2. Implement a short program to make the LED connected to pin 13 turn on if a character O is
received. However, the LED is turned off only when receiving character F
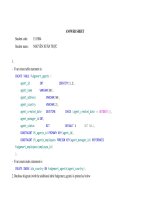
BÀI GIẢI
void setup() {
Serial.begin(9600);
pinMode(13, OUTPUT);
}
void loop() {
if (Serial.available()) {
char temp = Serial.read();
if (temp == 'O') {
digitalWrite(13, HIGH);
}
else if (temp == 'F') {
digitalWrite(13, LOW);
}
delay(1000);
}
}
V.
Extra exercise
Implement a short program to make the LED connected to pin 13 turn on if a sequence of
characters ON is received. However, the LED is turned off only when receiving a sequence OFF
BÀI GIẢI
void setup() {
Serial.begin(9600);
pinMode(13, OUTPUT);
}
void loop() {
if (Serial.available()) {
String strTemp = Serial.readString();
if (strTemp == "ON") {
digitalWrite(13, HIGH);
}
else if (strTemp == "OFF") {
digitalWrite(13, LOW);
}
delay(1000);
}
}