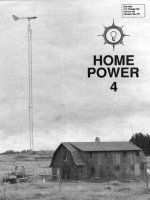
home power magazine - issue 053 - 1996 - 06 - 07
Bạn đang xem bản rút gọn của tài liệu. Xem và tải ngay bản đầy đủ của tài liệu tại đây (16.72 MB, 113 trang )
Cruising Equipment
Visit our Web page at:
6315 Seaview Ave. N.W. Seattle, WA 98107 usa Phone: (206) 782-8100 Fax: (206) 782-4336
Simple and Reliable Solutions
For Global Power Problems!
Millions of people loose AC power daily. Earthquakes, floods, hurricanes, ice storms,
tornados, and other disasters can cause the grid to fail. In many countries the grid is so
unreliable that there are a dozen power outages a day. The result systems crash and
business stops. A back up power system is the only insurance. Our system is simple: A
Freedom Inverter/Charger supplies reliable AC power during outages and quickly re-
charges the battery when power is restored. The Link 2000, or the popular E-Meter, is used
to monitor the system so you know exactly how much energy you have consumed and how
long your battery will last.
Inverter Features Instrumentation Features
UL Listed Models750 - 2500 Watts Volts, Amps, Ahrs, and Time Remaining
Charging rates from 25-130 amps Learns Charging Efficiency
120V & 230V, 50 & 60 HZ Models Simple to Use and Install
Typical Back Up Power System
World Leader in Back Up Power
TM
21440 68th Ave. S. Kent WA 98032 (206) 872-7225 Outside WA (800) 446-6180 Fax (206) 872-3412
Heart
Inverter / Charger
-
+
Auxiliary
Battery Bank
Main AC Panel
In
Out
Outlets
Outlets
heart interface
Grid Power In
In
Out
Main AC Panel
Auxiliary
Battery Bank
+
-
Heart
Inverter / Charger
14.25
E-Meter
E
F
Ah
A
V
t
SEL SET
Things that Work!
tested by
Home Power
60 Voltsrabbit Continued
The final installment in the
series following Chuck
Hursch’s conversion of a
Volkswagen to electric
power. This article explores
the performance of, and
satisfaction with, the
completed car.
64 Solar Driven Learning
Tina Sorenson describes a
fun learning project for 6th,
7th, & 8th graders put on by
the University of Dubuque.
HOME POWER
THE HANDS-ON JOURNAL OF HOME-MADE POWER
6 Just Plain Crazy
Daniel & Lori Whitehead
power their home and shop
in rural Illinois with a grid
intertied wind electric system
and photovoltaic electric
system.
12 On the Water
Gebroeders is over 100
years old but has plenty of
20th century technology.
Martin & Ali Cotterell get the
electric power for their live
aboard sailboat from the
wind and sun.
20 Solar Ice
Steven Vanek and friends
built an icemaker that works
by the ammonia absorption
method and is powered by
the heat of the sun. It makes
ten pounds of ice a day!
38 Series & Parallel
The basics of circuit
configuration and how this
stuff relates to Ohm’s law
44 Basics of Alternating
Current, part 2
A continuation of the
exploration of alternating
current focusing on phase
shift and its effects on
power.
Features
Features
GoPower
Fundamentals
Issue #53 June / July 1996
53 Electric Tractor!
Bruce Johnson
accomplishes his garden
tasks with the help of an
electric conversion David
Bradly walking tractor
charged by the wind. The
unit also acts as portable
power for other tools.
16 Passive Solar is Energy
Too
Harold Sexson details his
owner-built addition: a
beautiful passive solar room.
It creates a comfortable
space that saves energy.
Access Data
Home Power Magazine
PO Box 520,
Ashland, OR 97520 USA
Editorial and Advertising:
916-475-3179 voice and FAX
Subscriptions and Back Issues:
800-707-6585 VISA / MC
Computer BBS:
707-822-8640
Internet E-mail:
World Wide Web:
/>Paper and Ink Data
Cover paper is 50% recycled (10%
postconsumer and 40% preconsumer)
Recovery Gloss from S.D. Warren Paper
Company.
Interior paper is recycled (30%
postconsumer) Pentair PC-30 Gloss
Chlorine Free from Niagara of Wisconsin
Paper Corp.
Printed using low VOC vegetable based
inks.
Printed by
St. Croix Press, Inc.,
New Richmond, Wisconsin
Legal
Home Power (ISSN 1050-2416) is
published bi-monthly for $22.50 per year
at PO Box 520, Ashland, OR 97520.
International surface subscription for $30
U.S. Second class postage paid at
Ashland, OR, and at additional mailing
offices. POSTMASTER send address
corrections to Home Power, PO Box 520,
Ashland, OR 97520.
Copyright ©1996 Home Power, Inc.
All rights reserved. Contents may not be
reprinted or otherwise reproduced without
written permission.
While
Home Power Magazine
strives for
clarity and accuracy, we assume no
responsibility or liability for the usage of
this information.
Regulars
Columns
Access and Info
Recycled Paper
Cover: Ali Cotterell at the helm of Gebroeders, her live-aboard sailboat with PV and wind power. Story on page 12.
4 From Us to You
80
HP’
s Subscription form
81
Home Power’
s Biz Page
83 Happenings — RE events
88 Letters to Home Power
96 Q&A
98 Micro Ads
101 Index to Back Issues
112 Index to Advertisers
68 Independent Power
Providers
Net metering policies are
changing for the better, and
worse. Get the update.
72 Code Corner
John Wiles discusses
disconnects—what they are,
where to use them, and how
to properly use them.
Recyclable Paper
24 Solar on Wheels
Rob Magleby runs tools and
toys with the photovoltaic
system mounted on the roof
of his ’70 schoolbus. All the
comforts of home on the
road.
76 Power Politics
Lest we forget the real costs
of our energy options
Michael Welch lays out the
straight scoop on the 10
year effect of the Chernobyl
accident.
78 Home & Heart
The performance reports
are in on Kathleen’s new
“non-extravagant time-
saving kitchen tool”.
86 the Wizard speaks…
Grab Bag
30 A DC Nightlight
William Raynes gives
the details needed to build
this efficient DC-powered
nightlight.
32 An AC Nightlight
This LED nightlight design
by Robert Morris, Jr. runs off
of 120 vac power. Build it
yourself for cheap.
34 DC Battery Charger
Dick Linn has worked out the
details for charging NiCd
batteries from a 24 VDC
system.
Homebrew
4
Home Power #53 • June / July 1996
From Us to You
Sam Coleman
Martin Cotterell
Mark Green
Michael Hackleman
Kathleen Jarschke-Schultze
Bruce Johnson
Stan Krute
Dick Linn
Don Loweburg
Rob Magleby
Robert Morris, Jr.
Karen Perez
Richard Perez
Shari Prange
William Raynes
Benjamin Root
Mick Sagrillo
Bob-O Schultze
Harold Sexson
Tina Sorenson
Jaroslav Vanek
Steven Vanek
Michael Welch
Daniel Whitehead
John Wiles
Myna Wilson
People
“ Think about it…”
“The way I see it,
if you want the
rainbow you gotta
put up with the rain”
Dolly Parton
What’s it worth?
What is electrical energy produced by renewable resources worth? I guess
it depends on who you are. For us (the Home Power Crew on Agate Flat)
renewable energy is worth quite a bit. RE gives us the freedom to live and
work where we want—beyond the power lines. It means we don’t have to
operate a smelly, noisy, and expensive generator all the time. RE gives us
the satisfaction of knowing where our power comes from. For us, these
freedoms are worth far more than we paid for the RE hardware.
America’s utilities, however, place a far lower value on renewable energy.
For example, see the article about Dan and Lori Whitehead which begins
on page 6 of this issue. Dan and Lori have a utility intertied wind electric
system. They can buy power from the utility at a rate of 10.5 cents per
kiloWatt-hour. The utility pays Dan and Lori 1.7 cents per kiloWatt-hour for
their surplus wind electricity. This means that for every kiloWatt-hour of
energy that Dan and Lori buy from the utility they must generate 6 kiloWatt-
hours in order to break even. Basically the utility is telling Don and Lori,
“Our energy is six times more valuable than your wind-generated
electricity.”
Is utility-supplied energy really worth six times more than renewable
energy? I think not. RE is produced using clean, nonpolluting sources such
as sunshine, wind, and falling water. Utility-supplied energy comes from
combustion (coal and natural gas), from nuclear reactors, and to a limited
extent, hydroelectric on dammed rivers. To be sure, utilities have their
operating costs—about half their money goes into power transmission. But,
with the exception of hydro, the utilities’ energy comes from non-renewable
resources and pollutes our environment with everything from acid rain to
radioactive waste (and how much is this pollution worth?). And yet utility-
supplied energy is, at least in the eyes of the utility, worth six times more
than renewable energy. Why?
Well, I’d hazard a guess that greed may have something to do with the
utilities’ inflated evaluation of their energy. After a hundred year monopoly
on electric power production, utilities don’t want any competition. They are
happy with the status quo—they make the power and you rent it. Solar,
wind and hydro are forms of energy which are democratically delivered
everywhere—a gift of nature. These natural energy resources don’t fit into
the utilities’ monopolistic mode of operation. How can they rent you power
which is freely and naturally delivered to you each day? Well, they can talk
you into a grid intertied system where they pay you a pittance for your
power. Then the utility can turn around and sell your RE to someone else
or even back to you—thus ensuring their monopoly and their profits.
The time has come for us to demand a fair price for our power. If we don’t
get it, then pull the plug on utility power. We are not required to buy their
polluting energy. We are not required to sell our renewable energy to
utilities for less than it is worth. We are not required to fatten the utilities’
coffers by allowing them to profit from our renewable energy.
While universal cooperation and sharing of RE is obviously the way of the
future, utilities cling to the way of the past—they make the power and you
rent it. We know a better way….
Times they are a changin’
Richard Perez for the Home Power Crew
We Also Distribute System Components:
Solarex PV Modules, Batteries, Regulators,Trace Inverters, DC Switchgear
Check out our web site:
We Also Distribute System Components:
Solarex PV Modules, Regulators,Trace Inverters, DC Switchgear
Check out our web site:
• Complete Functional Solar Electric Generators •
• Pre-assembled, Pre-tested, Code-compliant Systems •
• Standardized Designs for Easy Deployment and Troubleshooting •
• Transportable Design for Easy Removal and Redeployment •
• Lockable Enclosures to Limit Unauthorized Access •
• Optional Back-up Engine Generators with Automated Controls •
• 10 Year Module Warranty, 2 Year System Warranty (5 Yr. Optional) •
• Optional System Performance Data Logger with Remote Phone Access •
• Many Models and Sizes for Commercial & Residential Applications •
San Rafael, CA 94903
61 Paul Drive
Phone: 415-499-1333
800-822-4041
Fax: 415-499-0316
Sacramento, CA 95826
8605 Folsom Blvd.
Phone: 916-381-0235
800-321-0101
Fax: 916-381-2603
Qualified Dealer Inquiries Welcome. Hands on Training Seminars for New Dealers
6
Home Power #53 • June / July 1996
Solution: Move to the Country
In 1992 we bought 32 acres in the quiet countryside of
Morrison, Illinois. We spent the first year building a
1600 sq foot log home that we designed. The home has
a large south facing side that is mostly glass. I installed
two 450 Watt Winco wind generators out at my shop
building to run some lights and to check out the wind
potential of our site. The wind at our site proved to be
very good. I was pleased with the results so the next
year we started looking for a used 17.5 kW Jacobs for
the first part of our renewable energy venture. After
talking with the local utility (Common Wealth Edison)
and checking on local codes and variances, the project
was a go. We pay 10.5 ¢/KWH for the power we buy
and get paid 1.7 ¢/KWH for power we sell to our utility.
We located a rebuilt machine with a 120 foot angle-iron
tower. My creative wife, Lori, put together an impressive
presentation for a local bank and they agreed to finance
the project. When the machine and tower arrived my
yard looked like a giant erector set. We dug three holes
for the footings 8 foot square by 8 foot deep. The 20
foot bottom section was assembled complete with
anchors and stood up in the holes. We used a transit to
level the base then assembled the rebar cage around
the legs. The cement was poured in two phases. The
first was the 8 by 8 by 2 foot thick pads. After these had
set we built 2 foot square piers that came up level with
the top of the holes. The cement trucks came back and
poured these piers around the legs and the cement
Alternative Energy
…or Just Plain
I
started experimenting with alternative energy back in the late 1970s. I built hot air
solar panels from 2 by 4s and empty beer cans cut in half. They worked well but
had quite an odor until the smell burned out of them. I installed my first wind
generator in 1984. This was a 450 Watt Winco charging a 12 Volt battery bank. After
this I was hooked. The next year I installed a 12.5 kiloWatt Jacobs on a 100 foot
tower in the middle of the city. Public acceptance was not favorable, to say the least.
The machine did not produce well because of the surrounding terrain. I let my
enthusiasm overrule better judgement. Never put up a wind generator within the city
limits. Between the fight with neighbors and the city fathers it is not worth it.
Daniel Whitehead ©1996 Daniel Whitehead
7
Home Power #53 • June / July 1996
Systems
work was done. We backfilled the holes and let it set up
for a couple of days.
The tower is hinged at the base so we simply lowered
the 20 foot base section using a pickup truck and a
cable. Next we assembled the rest of the tower on the
ground and finally mounted the generator on the top
section. The governor, blades, and tail were all installed
with the tower still on the ground. We dug a trench to
the house and connected the wiring from the tower to
the basement where the inverter would be housed.
Up, Up and Away!
We hired a local crane operator to lift the tower into
position. This was his first job with a wind generator and
he was very excited. We went over the details of the
raising. He would lift the tower and generator together
to about a 50-60˚ angle then a large winch truck would
pull it the rest of the way. When we were both satisfied
with the details it was time to go to work. Lori video
taped the lift and all the neighbors within a couple of
miles were there to watch.
I was a nervous wreck during the lift but all went very
smooth, just as planned, with no problems. What a
relief it was when the tower was standing upright and I
put that first bolt in to secure the leg to the base.
Make Some Electricity
This makes the fifth wind generator that I have installed
and there is no other feeling like the moment you first
take the brake off and let your machine start running.
This time was no exception. My heart raced as I
cranked the brake off and waited for the wind to take
over. Within moments the blades started to spin and we
were on line producing about 5 kW in the light breeze.
We just stood and watched it for awhile. It has a
hypnotic effect like watching a campfire in the night. It
was a beautiful sight indeed.
Time for an Upgrade.
The machine ran well for the first two years. This year
we installed a set of carbon fiber blades made by
Advanced Aero Technologies. These blades will
increase the annual output by about 30%. They are
remarkable blades that resist icing in the winter and will
last for many years without needing to be refinished.
Since we installed these blades in September we have
been making record production every month. It looks
like the expected annual increase will easily be made.
What’s Next? Solar, of Course.
After attending the Midwest Renewable Energy Fair in
Amherst, Wisconsin in 1994, I was ready to try solar
again. The wind machine produces three times more
electricity than we use but you can never have too
Left: Dan Whitehead shows off the
inside of the Jacobs intertie inverter
which converts 3-phase wild ac into
single-phase 240vac.
Below: Lori Whitehead monitors
wind system data on her personal
computer.
8
Home Power #53 • June / July 1996
Systems
much power. I have a 40 by 80 foot shop that I wanted
to use for the solar installation. I found a set of 840 Ah
used telephone company batteries that would work for
this project. After moving 48 batteries at over 300 lbs
each, I was tired at the end of the day.
I designed the system and then faxed it to Bob-O
Schultze of Electron Connection for his input. After he
made a few changes and suggestions, I ordered the
parts. We went with the Trace DR2424 inverter and four
Siemens 75 W PC4 modules, to be expanded to eight
modules this year. I went with a fixed mount system and
the Heliotrope CC60E controller. I also used the
Cruising E-Meter to monitor system performance.
The panels are wired in series-parallel for 24 Volts and
18 Amps. #10 wire connects them all together with
plastic weatherproof conduit and #4 wire from the
combiner box to the controller in the shop. I constructed
a 10 by 10 foot room to house the batteries and
controls. I use a hydrogen collection system that I saw
in HP#6 in an article by Gerald Ames. I used cups
covering the battery vents and plastic tubing to connect
them all to the main PVC pipe to vent the hydrogen
outside the battery room. The room
is insulated and I run a small heater
in the winter to keep things at 60˚F.
After mounting and wiring the
system we were ready to test it out.
It is always a tense moment when
you first power up electrical
equipment. All went well and I
started wiring my shop equipment
into the breaker box from the Trace.
I am currently running nine
fluorescent shop lights, a drill press,
a band saw, two lathes, a grinder, a
1 hp door opener, and anything else
that gets plugged into the wall
outlets. I still have a 220 volt air
compressor and welder that runs
from the grid or the Jacobs when
the wind blows. I have a 1000 W
Whisper wind generator that I am
installing into this system to help
with the load demands of the shop.
This will give me four wind
generators and a PV system.
KWH
Jacobs
Intertie
Inverter
KWHKWH
Converts
3 phase
wild AC
into 240 VAC
single phase
Measures
Wind
Energy
Output
To All
Household
120/240 VAC
Loads
Wind
Energy
Sold
Utility
Energy
Bought
17.5 kW.
Jacobs
Wind
Generator
Utility Power
120 / 240 vac
175A
200A
Main
Service
Panel
The Whitehead’s Jacobs Grid Intertie System
Above: Dan & Lori on the porch of their renewable energy-powered home in
Morrison, Illinois. A 17.5 kW Jacobs on a 120 foot tower provides power.
9
Home Power #53 • June / July 1996
Systems
I am very happy with the outcome of the project.
Thanks to Bob-O Schultze for the technical support and
Lori for maintaining her sense of humor through these
projects.
What’s in the Works After All This? An Electric
Vehicle, of Course.
Like I asked earlier, “Alternative energy, or just plain
crazy?” I think all of us that are involved with
renewables are a little crazy. It takes a little more effort
on your part to have one of these systems, but the
rewards are well worth the effort. If it was easy,
Below: The control board for the
photovoltaic system. Notice the rack
that keeps documentation for the
components organized and handy.
J-Box
(outside)
Charge Controller
Heliotrope CC-60E
27.5
Twenty-four Batteries
2 Volt Gould Telephone
1680 Amp-hours
@ 24 Volt
Inverter
Trace DR2424
Utility Mains Panel
120 / 240 vac
120 vac
Panel
To Inverter-Powered
ac Loads
To Utility-Powered
ac Loads
Power Center
(homemade)
Utility Power
120 / 240 vac
The Whitehead’s Photovoltaic System
Left: Twenty-four Gould lead-acid
cells make up the 24 Volt,
1680 Amp-hour battery bank.
Each cell weighs over 300 lbs.
10
Home Power #53 • June / July 1996
Systems
everyone would do it. It must be the satisfaction of
doing something truly good for yourself and the
environment that drives us. Sitting back watching the
wind and sun produce clean, free energy is my idea of
fun in the country.
Access
Author, Dan Whitehead, Illowa Windworks, 12197
Nelson Rd. Morrison, IL 61270 • 815-772-4403
Whitehead Wind System Cost
System Component Cost %
Rebuilt 17.5 kW Jacobs $12,000.00 75.1%
Concrete & rebar $1,577.60 9.9%
Wire and Miscellaneous $867.01 5.4%
Angle Iron $410.52 2.6%
Utility Company Fee $300.00 1.9%
Misc. Electrical Parts $291.00 1.8%
Crane $216.00 1.4%
Backhoe w/ Operator $175.00 1.1%
Anchors $150.00 0.9%
Total
$15,987.13
Whitehead PV System Cost
System Component Cost %
4 Siemens PC4JF Panels $1,580.00 37.0%
Trace DR2424 Inverter $900.00 21.1%
Zomeworks Panel Mount $416.60 9.8%
Heliotrope CC60E Control $361.25 8.5%
Trace T-220 Transformer $265.00 6.2%
Cruising Equip. E-Meter $179.00 4.2%
Miscellaneous $176.00 4.1%
30 feet 0000 Cable $122.00 2.9%
24- 840 A-h Batteries $100.00 2.3%
PVC Pipe and Ground Rod $52.27 1.2%
Lightning Arrestor $45.00 1.1%
24 Plastic Battery Boxes $44.81 1.1%
70 feet #4 Wire $23.00 0.5%
Total
$4,264.93
Above: Two 450 Watt Winco generators provide power
for the shop. The PV mount has room for four more
Siemens PC4 photovoltaic panels.
Whitehead Wind System Performance
Time Period KWH per Year
October 1993 to October 1994 15,460
October 1994 to October 1995 16,090
October 1995 to April 1996
(7 Months)
15,290
Note: AAT carbon glass fiber blades installed in September 1995
SHURflo Pumps
on negative
four color
3.4 wide
4.9 high
Introducing Trace Engineering’s New
POWER PANEL SYSTEMS
©
Now, buying a fully engineered, professionally assembled alternative energy system is easy as calling your
TRACE dealer.You can be assured of code compliance and quality components since its factory built and
tested by the people who build the world’s most advanced and reliable inverters.
Trace Engineering!
SW SERIES POWER PANEL SYSTEMS
©
:
• Sine wave AC power inverter with high efficiency operation and
bidirectional operation (inverting, charging or utility interactive).
• Up to 16 kW of continuous AC power (120/240 vac systems).
• Up to 60 amps of AC input from a generator or utility grid.
• Three stage, temperature compensated, battery charging
• Utility interactive and generator support operating modes.
• Can regulate up to 5.6 kW of solar or other DC charging sources.
• Available outputs of 105, 120, 230 or 120/240 vac at 50 or 60 Hz.
• Available for 12, 24 or 48 volt DC systems voltages.
• Sizes 120 VAC-60Hz - 2.5 / 4.0 / 5.0 / 5.5 / 8.0 / 11.0 kW.
120 / 240 VAC-60Hz - 5.0 / 8.0 / 11.0 / 16.0 kW.
230 VAC-50Hz - 3.3 / 4.2 / 6.0 / 7.5 / 9.0 / 11.0 kW.
DR SERIES POWER PANEL SYSTEMS
©
:
• Modified Sine wave AC power inverter with high efficiency
operation and battery charging ability.
• Up to 7.2 kW of continuous AC power (120/240 vac systems).
• 30 amps of AC pass through power at 120 or 120/240 vac from a
generator or utility grid to your loads in addition to the charger
draw.
• Three stage, temperature compensated, battery charging — up to
240A @ 12 VDC, 140A @ 24 VDC.
• Can regulate up to 2.8 kW of solar or other DC charging sources.
• Available outputs of 105, 120, 230 or 120/240 vac at 50 or 60 Hz.
• Available for 12 or 24 volt DC systems voltages.
• Sizes 1.5 / 2.4 / 3.0 / 3.6 / 4.8 / 7.2 kW.
ALL POWER PANEL SYSTEMS INCLUDE
©
:
• Powdercoated steel backplate prewired with all NEC/UL required AC & DC overcurrent protection and disconnects—
Simply connect to the battery and AC loads and your system is operational.
• Single or dual C40 charge controllers can be used with solar, wind or hydro DC
charging sources. Up to 1.4 kW @ 12 VDC, 2.8 kW @ 24 VDC or 5.6 kW @ 48 VDC. 60A
disconnect is included for each controller.
• 60 amp AC system bypass allows servicing or removal of the inverter while keeping
AC loads connected to the generator or utility grid.
• Optional non-metallic battery enclosure which doubles as a shipping enclosure —
Measures 43.8” (112 cm) wide, 48” (122 cm) long & 29.3” (75 cm) high.
• Flexible conduit for connection of the system to the battery enclosure.
• Up to 16 kW Available Soon !
Trace Engineering 5916 - 195th Northeast Arlington WA 98223 (360) 435 - 8826 Fax (360) 435 - 2229
®
12
Home Power #53 • June / July 1996
G
ebroeders is 117 years old, yet was built with
renewable energy firmly in mind. What could be
more renewable than using the wind to propel
her iron frame to deliver her cargoes. Long since out of
commercial service, Gebroeders is now my home—
moored in a small tidal estuary in southeast England.
Over the years the energy used to
power Gebroeders became less
renewable with the addition of an
engine and electrical system. I like
to think that I am now reversing that
process. Rather than using dirty
diesel I sail her whenever I can, and
Gebroeders’ rigging is now also
capturing the wind to generate
electricity.
Wind on the Water
Part of my desire to live afloat was
driven by the potential to be
independent of the grid. Within a
week or so of buying the boat I was
installing my Ampair wind generator.
I wanted it to be high, but did not
want to mount it on the beautifully
varnished mast and clearly it had to
be out of the way of the sails. The
solution I adopted was to hoist the
generator up the forestay. This
meant that it has to come down
every time I sail, but that seemed
the best solution. I spliced three
rope stops which are attached to
bolts on the Ampair. These are hung
from the forestay via a galvanized
anchor swivel to allow the machine
to yaw. A short section of pole
beneath the generator is secured to
three guys. Raising and lowering the
machine is easy—I simply clip it
onto the foresail sheet and pull until
the three guy ropes become taut,
holding the generator firmly in place
and away from the mast and any
ropes. This has proven to be a very
reliable system and has survived
many a gale.
A Splash of Solar
With the introduction of a new
source of power, a few horrors of her
previous modernization began to
emerge. Lights dimmed and
flickered as I turned on appliances.
Although I found cables to be
comfortingly thick throughout most
of the boat, these were bridged by
small sections of thin cable with
alarming twisted wire junctions.
Lurking in the depths of the bilge,
hidden by insulation tape, I found an
appalling junction of thin wire
Martin Cotterell ©1996 Martin Cotterell
Above: Gebroeders is a home under sail for Martin and Ali
(photo prior to the installation of PV modules).
Wind & Solar
Wind & SolarWind & Solar
Power
on the Water
Power
on the Water
Power
on the Water
13
Home Power #53 • June / July 1996
coming from the batteries. This turned out to be the
battery connection for most of the boat’s wiring. Over
time, I have had to rewire most of the boat.
I survived for a while with just my Ampair, but electricity
demand soon drove me to buy a solar panel. The
electrical installation was straight forward but again
mounting was awkward. Although there is plenty of
space on the boat, when she is sailing most parts are
crossed by flying sails, ropes and shackles, or shaded
by the rigging. I tried simply laying the panel on the
deck, moving it out of the way when sailing, as I did
with the wind genny. However, I soon abandoned this
plan when I nearly lost it overboard at sea.
There were three problems to overcome in positioning
the solar panel. The first was shading caused by so
much mast and rigging towering over the boat. The
second was the need to protect the panel from moving
sails and ropes when sailing. The third was how to
maintain the aesthetics of a beautiful and historic boat.
The answer I came up with was to mount the panel on
a pole attached to the rudder. This position does not
detract too much from the appearance of the boat and
is well out of the way of ropes and rigging. It also has
the added benefit that by turning the wheel I can
manually track the sun, although this is not
recommended practice while out sailing!
I have found that the combination of the Ampair and
now two solar panels generates all the power that I
need. For storage, I started off with some second-hand
telephone exchange gel-cell batteries but eventually
had to give up on them as the lights began to pulse in
brightness with the wind. I now have four 70 Ampere-
hour wet cell lead acids.
I had previously avoided wet cells as the thought of acid
leaking out when the boat pitched and eating away at
the hull was unattractive, to say the least. However, a
good battery box, safely secured, has alleviated these
fears. I still have not fully secured all items in the boat,
and the fridge is wont to wonder across the kitchen on
occasion. But then, work on a boat is never done.
Above: The Kyocera modules are mounted on the
rudder post keeping them out of the way of lines and
other activity on deck.
Above: Martin hoists the Ampair into position.
14
Home Power #53 • June / July 1996
Systems
I use a voltmeter, homebrew Ah
meter, and a couple of ammeters to
monitor the system. The ammeter for
the wind generator has a dual
function—10 Amperes means it is
not a day for sailing and I think twice
about going out! The Ah meter was
built from a
Home Power Magazine
circuit.
The load on the boat is mostly
lighting and the water pump. A
Powerstar 700 watt inverter is used
to run various 240 vac loads
including my computer and TV. It
also powers my old valve amplifier
for the stereo. I know that valves are
hopelessly inefficient but I wouldn’t
change it for the world. I would
rather switch off some lights.
Living off the grid and away from
normal services, even if they are just
up the creek, feels good, as I’m sure
every remote boat or cabin dweller
knows. I could have chosen to plug
into the mains onshore but I am
happy with the knowledge that all
that ties me to the shore is a couple
of knots.
Access
Author: Martin Cotterell, Sunpower,
c/o Mill Cottage, Seisdon Road,
Trysull, UK, WV5 7JF
Ammeter
Ammeter
Voltmeter
To
DC Loads
Inverter
Powerstar UPG-700
To
Shore Mains
Ampair 100 Watt
Two Kyocera
48 Watt Modules
Amp-Hour
Meter
Shunt (in)
Shunt
(out)
To
ac Loads
DC Load
Panel
ac Load
Panel
Shunt
Regulator
Shunt
Regulator
Double Pole
Switch
-29.5
Blocking
Diode
Blocking
Diode
Fuse
Fuse
Disconnect
Four Batteries
280 A-hr @ 12 Volt
Fuse
Fuse
Switch
Above: The Ampair hoisted into
“flying” position hangs from the
foresail sheet in the triangle
between the mast and the forestay.
Above: The PV modules, and the
harbour itself, reflect the setting sun
in a placid scene of Gebroeders at
its mooring.
Gebroeder’s Energy System
ANANDA POWER TECHNOLOGIES
four color on film negatives
full page
This is page 15
16
Home Power #53 • June / July 1996
Architecture
I
f you have a south facing side of your
home that will accommodate a solar
room, you can have years of
enjoyment and energy savings. Ours
includes tile floors, ceiling fans, and
seating areas. Here’s how to build one.
Solar Room Pointers
• A south facing patio or open unshaded area is the
start for a solar room addition to any house. The
longer the room, the more solar gain in the winter
months and the more tolerant it can be of fluctuations
in the weather.
• The more rooms of the house that open into the solar
room, the more heat can be used in the house
without fans or blowers. Cutting a door or two into the
home where windows exist may help.
• Flooring should be reasonably dark to absorb most of
the sun’s warmth.
• The better insulated the room is, the longer the heat
will stay.
• Added thermal storage in the room will help during
longer periods without sun.
Length of Our Room
This house already had a 36 foot long south facing
patio with 3 foot tall railings all around. The first thing I
did was remove the railings and extend the patio length
another 14 feet to include the last bedroom on the end
of the house. This also improved access to two
bedrooms and the living room and, after adding a door,
to the family room.
Roof Line
Having the roof line match was a challenge since the
foam roof (polyurethane, common in the Phoenix area)
Harold Sexson ©1996 Harold Sexson
Above: Harold poses in his newly completed solar room with its beautiful terra cotta floor
South Facing Passive Solar Room
South FSouth Facinacing Pg Passive Soassive Solar Roomlar Room
South Facing Passive Solar RoomSouth Facing Passive Solar Room
17
Home Power #53 • June / July 1996
Architecture
should look the same as the existing
roof. This was done by having the
same company that replaced the
roof a year before add the foam to
the new section.
Eves
The existing eves on the house
were one foot wide which was
perfect for the ten foot width of the
room. In the heart of winter the sun
shines on the entire tile floor and my
thermal storage (adobe bancos).
This makes it enjoyable to walk on
the warm floor in the evening when
it is cold outside. In the summer the
sun does not shine on the floor at all
and the floor is cool.
Sliding Doors
The eight double pane sliding glass
doors were purchase used. All of
them look the same for aesthetics.
Since the posts for the original patio
were not placed for even spacing,
they were moved by a few inches to
accommodate the doors. Each door is a standard six
foot door, with two placed between each post.
Insulation
Insulating the ceiling and end walls was next. Before
installing the insulation, aluminum foil was pressed up
against the existing ceiling and walls to add additional
radiant heat barrier. The insulation is Celotex
“Blackore,” one inch thick with foil on both sides. These
were cut to the width between the 2X6 studs and force
fitted. Three layers were added making sure there was
an air gap between each sheet to add to the thermal
reflection. Each sheet has a 7.2 R value, making the
5.5 inch (a 2X6 is really only 5.5 inches) space a
respectable R-21.6. This would not be possible with
standard fiberglass insulation. Although cheaper, R-14
would be the limit.
End Windows
One window was added in each end. Double paned
sliders were used here, as well.
Flooring
Saultio tile was used because it fit the style of the
house and it was a less expensive option. Patterns
were made in the flooring to add some “homey”
atmosphere and get away from the hall-like appearance
of the long room. A tile saw was necessary for the cuts
to make the patterns. After laying out all the whole tiles,
the tile saw cut all the other tiles in one day.
Banco
The seats for most of the solar room are made of adobe
brick. They were made from the dirt in the back yard.
Although brick making is a long process, it provides
excellent thermal storage, provides nice seating for the
room, and fits the decor of the home. They were
covered with expanded metal and plastered with an
elastomeric stucco made by Sto that will not crack if
movement in future years occurs.
Ceiling Fans
Three ceiling fans were added to increase lighting and
the circulation of the air when sitting in the room. By
running the fans in opposite directions we get a circular
flow in the room.
Paint
An insulating paint was used that was made by
Insulating Coating Corporation (Aztec #300 interior
paint). It acts as a sound deadener and insulates to R-
20 in the summer and R-5 in the winter. Although more
expensive per gallon, the paint lasts ten years and can
be made in any color.
Summer
Summer months in the solar room are not as hot as
would be expected. A high efficiency evaporative cooler
is in one end of the room. Using a thermostat, the
cooler not only keeps the solar room cool, but also the
rest of the house. On high humidity days the doors to
the house are closed and the windows are opened in
Above: Harold finishes the installation of foam board insulation on the ceiling
18
Home Power #53 • June / July 1996
Architecture
the solar room to let the heat out. The house is also
cooled by standard refrigeration during this time.
Transition Months
In the transition months the sliding doors are open to
either let the heat out or capture cool evening air. By
opening the house doors we can maintain comfortable
temperatures without heating or cooling. Occasionally
the blower in the cooler is used to blow out the warm air
in the house for a few minutes.
Savings
The cost savings to heat the house in the winter is
dramatic. When Phoenix had 20˚ mornings in January
and 50-55˚ highs during the day, the total heating bill
was only 14 dollars over the normal gas hot water and
dryer. The typical temperature of the room in the winter
is 80˚ in the daytime and 68-70˚ in the morning.
There are other basic assumptions that must be
considered when figuring how much savings there are
with the room. First is how much the doors are left open
or continuously opened and closed. This is a big factor
in the winter if traffic is present. We do not leave the
doors open in winter except to pass through.
Second is your personal comfort zone. If you are cold
or hot with only a couple of degrees fluctuation in
temperature, the savings will be minimal. We have a
summer maximum in-house temperature of 80˚ if the
humidity is low, and 65˚ in winter. We wear winter
clothes.
Total Cost
I built the entire room myself, except for the foam on the
roof and the drywall hanging and finishing. The total
cost was about $4,000 and about six to nine months of
working evenings and weekends. I figure the pay-back
time to be about five to eight years.
Conclusions
Based loosely upon a green house, the solar room is
not a new concept. An excellent book on greenhouses
is Bill Yanda and Rick Fisher’s The Food and Heat
Producing Solar Greenhouse.
The room is a useful area for gatherings and children’s
play area. It added value to the home and gave us
energy savings. Adapting a design to your particular
home is a challenge that should start with a sketch of
the south facing side of your home. Make pencil
sketches so they can be changed easily. Even letting
things sit for a while can help break through a block in
the design. And remember, the sun’s heat is free.
Access
Author: Harold L. Sexson, 5445 East Caron Street,
Paradise Valley, AZ 85253 • 602-998-9055 • FAX 602-
998-9067
The Food And Heat Producing Solar Greenhouse by
Bill Yanda and Rick Fisher, ISBN 0-912528-20-6
Below: Covering the adobe bancos with expanded
metal prior to the application of the stucco.
Installers!
.
19
Home Power #53 • June / July 1996
Solar
Electric
Systems
From a Company
Powered by Solar!
Our shop utilizes its own 2.5 kw array and 35 kw battery
bank for daily power needs and testing of new products.
Whether you are looking for one module or a 90-
module state of the art, turn key system — Sunelco
can be of help.
Sunelco puts the customer first. We offer fast service,
factory trained technicians, personal assistance and
answers to your questions.
Our large inventory and factory direct
distributorships allow us to provide our customers
with good pricing and excellent service. We stand
behind the products we sell!
• Comprehensive selection of solar and system
related components
• Experienced, professional technical assistance
• Support unsurpassed in the solar industry
• Largest inventory and the fastest shipping
department in the industry allows shipping in 24
hours if not the same day.
For the home owner who is working with an
Architect or Contactor, we can work directly with
your technical people. As well, our installation crew
can handle the complete job, just like your plumber
or roofer.
order line 1-800-338-6844
technical assistance line 1-406-363-6924
Free to
Home Power
Readers
P.O. Box 1499HP • Hamilton, MT 59840
124 pages of
Answers
Our publication begins with basic
load analysis and sizing
information and includes case
histories, design guidelines and
useful in depth data required for
system layout. It offers detailed
descriptions of solar components
and packages, paying little
attention to consumer products.
A must for every energy library.
3971 E. Bluebird Rd.,
Forestville, WI 54213
414-837-2267
FAX 414-837-7523
“Wind generators & parts made with
wind-generated electricity”
• BWC 850
BWC 1500
10 kW Excel
from
Bergey
Windpower Co.
• Wind Baron
750
from
Wind Baron
• Rutland
Windcharger
from
Marlec
Engineering
• Jacobs 29-20
from
Wind Turbine
Industries
• Whisper 600
1000, & 3000
from
World Power
Technologies
• Windseeker
500 & “AIR”
from
Southwest
Windpower
• Towers for
Wind
Generators
Because we’ve flown
them all!
Write or call
for the world’s best prices on
SPECIALIZING IN WIND/PV
HYBRID SYSTEMS & DESIGN
WIND & SUN
L
A
K
E
M
I
C
H
I
G
A
N
We sell them all…
Do you want to start business in renewable energy?
Do you want to find distribution for your products?
SOLAR ELECTRICITY TODAY !
Lists 550+ Current Dealers, Manufacturers, Mail Order Dealers and Information
Sources. It Costs $10 in the U.S., $12 to Canada/Mexico. Dealers List on Mailing
Labels Available.
$15 inside USA, $17 Canada & Mexico, $20 Worldwide
THE PV NETWORK NEWS
2303 Cedros Circle, Santa Fe, NM 87505
THE PV NETWORK NEWS
SOLAR ELECTRICITY TODAY !
E
verywhere in our world, refrigeration is a major energy user. In poor areas, “off-
grid” refrigeration is a critically important need. Both of these considerations
point the way toward refrigeration using renewable energy, as part of a
sustainable way of life. Solar-powered refrigeration is a real and exciting possibility.
20
Home Power #53 • June / July 1996
Working with the S.T.E.V.E.N. Foundation (Solar
Technology and Energy for Vital Economic Needs), we
developed a simple ice making system using ammonia
as a refrigerant. A prototype of this system is currently
operating at SIFAT (Servants in Faith and Technology),
a leadership and technology training center in Lineville,
Alabama. An icemaker like this could be used to
refrigerate vaccines, meat, dairy products, or
vegetables. We hope this refrigeration system will be a
cost-effective way to address the worldwide need for
refrigeration. This icemaker uses free solar energy, few
moving parts, and no batteries!
Types of Refrigeration
Refrigeration may seem complicated, but it can be
reduced to a simple strategy: By some means, coax a
refrigerant, a material that evaporates and boils at a low
temperature, into a pure liquid state. Then, let’s say you
need some cold (thermodynamics would say you need
to absorb some heat). Letting the refrigerant evaporate
absorbs heat, just as your evaporating sweat absorbs
body heat on a hot summer day. Since refrigerants boil
at a low temperature, they continue to evaporate
profusely — thus refrigerating — even when the milk or
vaccines or whatever is already cool. That’s all there is
to it. The rest is details.
One of these details is how the liquid refrigerant is
produced. Mechanically driven refrigerators, such as
typical electric kitchen fridges, use a compressor to
force the refrigerant freon into a liquid state.
Heat-driven refrigerators, like propane-fueled units and
our icemaker, boil the refrigerant out of an absorbent
material and condense the gaseous refrigerant to a
liquid. This is called generation, and it’s very similar to
Above: Steven Vanek with his machine which uses solar thermal energy to make ice.
Jaroslav Vanek,
Mark “Moth” Green
Steven Vanek
©1996 Jaroslav Vanek, Mark “Moth” Green, Steven Vanek
21
Home Power #53 • June / July 1996
Refrigeration
the way grain alcohol is purified through distillation.
After the generation process, the liquefied refrigerant
evaporates as it is re-absorbed by an absorbent
material. Absorbent materials are materials which have
a strong chemical attraction for the refrigerant.
This process can be clarified using an analogy: it is like
squeezing out a sponge (the absorbent material)
soaked with the refrigerant. Instead of actually
squeezing the sponge, heat is used. Then, when the
sponge cools and becomes “thirsty” again, it reabsorbs
the refrigerant in gas form. As it is absorbed, the
refrigerant evaporates and absorbs
heat: refrigeration!
In an ammonia absorption
refrigerator, ammonia is the
refrigerant. Continuously cycling
ammonia refrigerators, such as
commercial propane-fueled
systems, generally use water as the
absorbent, and provide continuous
cooling action.
The S.T.E.V.E.N. Solar Icemaker
We call our current design an
icemaker. It’s not a true refrigerator
because the refrigeration happens
in intermittent cycles, which fit the
cycle of available solar energy from
day to night. Intermittent absorption
systems can use a salt instead of
water as the absorbent material.
This has distinct advantages in that
the salt doesn’t evaporate with the
water during heating, a problem
encountered with water as the
absorber.
Our intermittent absorption solar icemaker uses calcium
chloride salt as the absorber and pure ammonia as the
refrigerant. These materials are comparatively easy to
obtain. Ammonia is available on order from gas
suppliers and calcium chloride can be bought in the
winter as an ice melter.
The plumbing of the icemaker can be divided into three
parts: a generator for heating the salt-ammonia mixture,
a condenser coil, and an evaporator, where distilled
ammonia collects during generation. Ammonia flows
back and forth between the generator and evaporator.
Parabolic Trough Collectors:
7 X 20 feet total collecting area
West – East
Generator Pipe:
filled with calcium-chloride-ammonia mixture
Condenser Coil:
in water bath
Evaporator / Collecting Tank:
in insulated ice-making Box
Condenser Coil: 1/4" pipe
shaped by wrapping around form
Valves: stainless steel
1/4" or 1/8" pipe thread
3" Black Iron Cap
1/4" nipple & coupling
tapped & welded in
Collector Suspended by U-bolt
into 1-1/2" angle iron bracket
Condenser Tank:
half of a 55 gallon drum
Icemaker Box:
scrap chest freezer
or wood/metal box
Storage Tank:
welded from 1/4" steel plate
& 3" pipe
Union: 1/4" stainless steel or black iron
(optional union at base of condenser coil)
Plumbing Detail All plumbing is ungalvanized steel (black iron) unless indicated
Layout of the Solar Thermal Icemaker
22
Home Power #53 • June / July 1996
Refrigeration
The generator is a three-inch non-galvanized steel pipe
positioned at the focus of a parabolic trough collector.
The generator is oriented east-west, so that only
seasonal and not daily tracking of the collector is
required. During construction, calcium chloride is
placed in the generator, which is then capped closed.
Pure (anhydrous) ammonia obtained in a pressurized
tank is allowed to evaporate through a valve into the
generator and is absorbed by the salt molecules,
forming a calcium chloride-ammonia solution (CaCl
2
-
8NH
3
).
The generator is connected to a condenser made from
a coiled 21 foot length of non-galvanized, quarter-inch
pipe (rated at 2000 psi). The coil is immersed in a water
bath for cooling. The condenser pipe descends to the
evaporator/collecting tank, situated in an insulated box
where ice is produced.
Operation
The icemaker operates in a day/night cycle, generating
distilled ammonia during the daytime and reabsorbing it
at night. Ammonia boils out of the generator as a hot
gas at about 200 psi pressure. The gas condenses in
the condenser coil and drips down into the storage tank
where, ideally, 3/4 of the absorbed ammonia collects by
the end of the day (at 250 degrees Fahrenheit, six of
the eight ammonia molecules bound to each salt
molecule are available).
As the generator cools, the night cycle begins. The
calcium chloride reabsorbs ammonia gas, pulling it
back through the condenser coil as it evaporates out of
the tank in the insulated box. The evaporation of the
ammonia removes large quantities of heat from the
collector tank and the water surrounding it. How much
heat a given refrigerant will absorb depends on its “heat
of vaporization,” — the amount of energy required to
evaporate a certain amount of that refrigerant. Few
Above: Detail of the condenser bath, containing the
condenser coil, and the icemaker box below.
Above: About ten pounds of ice are created in one cycle
of ammonia evaporation / condensation.
materials come close to the heat of vaporization of
water. We lucky humans get to use water as our
evaporative refrigerant in sweat. Ammonia comes close
with a heat of vaporization 3/5 that of water.
During the night cycle, all of the liquefied ammonia
evaporates from the tank. Water in bags around the
tank turns to ice. In the morning the ice is removed and
replaced with new water for the next cycle. The ice
harvesting and water replacement are the only tasks of
the operator. The ice can either be sold as a
commercial product, or used in a cooler or old-style ice-
box refrigerator.
Under good sun, the collector gathers enough energy to
complete a generating cycle in far less than a day,
about three hours. This allows the icemaker to work
well on hazy or partly cloudy days. Once generating
has finished, the collector can be covered from the sun.
The generator will cool enough to induce the night cycle
and start the ice making process during the day.
23
Home Power #53 • June / July 1996
Refrigeration
Future Design
A refrigerator, which is able to absorb heat at any time
from its contents, is more convenient than our current
intermittent icemaker. To enable constant operation, a
future design will include several generator pipes in
staggered operation as well as a reservoir for distilled
ammonia. Staggered operation will allow the
refrigerator to always have one or more of the
generators “thirsty” and ready to absorb ammonia, even
during the day when generation is simultaneously
happening. Generation will constantly replenish the
supply of ammonia in the storage reservoir. We are
currently in the first stages of making these
modifications to the icemaker.
Caution: Safety First!
Working with pure ammonia can be dangerous if safety
precautions are not taken. Pure ammonia is poisonous
if inhaled in high enough concentrations, causing
burning eyes, nose, and throat, blindness, and worse.
Since water combines readily with ammonia, a supply
of water (garden hose or other) should always be on
hand in the event of a large leak. Our current unit is a
prototype. We will not place it inside a dwelling until
certain of its safety. Unlike some poisonous gases,
ammonia has the advantage that the tiniest amount is
readily detectable by its strong odor. It doesn’t sneak up
on you!
For the longevity of the system, materials in contact
with ammonia in the icemaker must resist corrosion.
Our unit is built with non-galvanized steel plumbing and
stainless steel valves, since these two metals are not
corroded by ammonia. In addition, during operation the
pressure in the system can go over 200 psi. All the
plumbing must be able to withstand these pressures
without leaks or ruptures.
Would-be solar icemaker builders are cautioned to seek
technical assistance when experimenting with ammonia
absorption systems.
Conclusion
The S.T.E.V.E.N. icemaker has both advantages and
disadvantages. On the down side, it’s somewhat bulky
and non-portable, and requires some special plumbing
parts. It requires a poisonous gas, albeit one which is
eco- and ozone- friendly in low concentrations, so
precautions must be taken. In its favor, it has few
moving parts to wear out and is simple to operate. It
takes advantage of the natural day/night cycle of solar
energy, and eliminates the need for batteries, storing
“solar cold” in the form of ice.
Access
Authors: c/o S.T.E.V.E.N. Foundation, 414 Triphammer
Rd. Ithaca, NY 14850
SIFAT, Route 1, Box D-14 Lineville, AL 36266
Solar Ice Maker: Materials and Costs
Quan Material Cost
4 Sheets galvanized metal, 26 ga. $100
1 3" Black Iron Pipe, 21' length $75
120 Sq. Ft. Mirror Plastic @$0.50/sq. ft. $60
2 1/4" Stainless Steel Valves $50
Evaporator/Tank (4" pipe) $40
Freezer Box (free if scavenged) $40
1 Sheet 3/4" plywood $20
6 2x4s, 10 ft long $20
Miscellaneous 1/4" plumbing $20
2 3" caps $15
1 1/4" Black Iron Pipe, 21' length $15
4 78" long 1.5" angle iron supports $15
Other hardware $15
15 Lbs. Ammonia @ $1/lb $15
10 Lbs. Calcium Chloride @ $1/lb $10
Total
$510
MORNINGSTAR
four color
camera ready
3.5 wide
4.5 high
24
Home Power #53 • June / July 1996
System
Like many of the residents of this tourist town, I live in a
vehicle, a 1970 Dodge school bus. Unlike most, I enjoy
the use of power tools, musical equipment, radio and
lights thanks to two 85 watt Solavolt modules, an
inverter and battery bank. While many people living in
buses or motorhomes resort to the use of a generator,
the thought of destroying the tranquil silence here with
the noise of a generator pains me. After many months
of candles and flashlights, I realized that my homemade
cabin on wheels would be the perfect test subject for an
experiment in solar electricity.
My interest in the project was inspired by the desert
itself, where the bright power of the sun is so forcefully
felt, even in winter. Keeping in mind my plans to build a
more permanent dwelling someday, I began to learn as
much as possible about electricity and solar power.
Moab is a town located about two hours from the
nearest big city. I soon discovered that I would have to
send away by mail for much of the solar equipment.
Even items that would be commonplace in some towns,
such as wire, were unavailable locally. I collected
catalogs, which became my main source of information.
Many companies that sell equipment include a lot of
information in their catalogs, I was still left with a lot of
questions.
From the catalogs I ordered three books which proved
extremely helpful in answering questions. Each book
covers different aspects of solar electricity. Sources I
found the most valuable are listed at the end of this
article.
Requirements
My most pressing needs for electricity were night
lighting and the use of my radio. I also wanted to run a
drill and a skil saw. I did not want to run the battery in
my bus so low that it would not start the engine, leaving
me stranded at a remote campsite. This fear motivated
my use of candles and flashlights to a large extent. The
bus has a series of dome lights that light up the whole
interior. My use of the interior lights was very frugal. I
installed toggle switches in each of the lights so that
they could be turned on and off individually. My rule
was: no more than one light on at a time, and left on for
the minimum amount of time necessary. This strategy
worked, as I never did become stranded.
Rob Magleby
©1996Rob Magleby
T
he desert
around Moab,
Utah is vast
and breathtakingly
beautiful. Sunny days
are a frequent blessing
in this red rock
landscape, making
southern Utah a choice
area for the use of
solar modules.
25
Home Power #53 • June / July 1996
System
I considered the advice of a fellow
desert dweller, who advised me to
use two 6 Volt deep cycle batteries
in series. This fellow had done so in
his van. He claimed that with one or
two trips to town a week he was
keeping his batteries charged and
running lights and radio. I didn’t
think this was a good set-up for me,
as I didn’t want to be running the
bus engine that much. My lifestyle
was centered around driving to a
new spot every week or so.
As I learned more about batteries, I
realized that a deep cycle battery
was not very appropriate for starting
an engine as big as my bus engine.
Instead I decided to go with a dual
battery system: a separate deep
cycle battery for auxiliary use, and a
conventional starting battery. My first
purchase was a heavy heavy duty
starting battery. This battery was
more appropriate for starting the big engine than the
truck battery I was using. My new battery has higher
cold cranking amps and also more reserve capacity. My
old battery was recycled by using it in my girlfriend’s
truck. If I did it over again I would get an isolator switch
and use my old battery for an auxiliary battery. This way
I would be able to use the radio and interior lights right
away with less anxiety.
When planning my solar system I was undecided about
which kind of lights to use. I wound up trying different
kinds to see which provided the best illumination and
efficiency. The light that worked the best would be used
in my future dream house. I ordered an 8 watt Thin Lite
fixture for mounting under the cabinet in my kitchen
area, a 13 watt compact fluorescent for general lighting,
and an aircraft style 12 VDC incandescent spotlight for
my bedroom (I like to read in bed).
To run power tools and other toys, I needed an inverter.
I chose the Trace 812SB because of its large surge
capacity, two year warranty, and built-in protection
features. My only concern with this inverter was the
possible interference the modified sine wave might
have on my radio reception or the performance of my
variable speed drill. I had read of so many different
experiences that I didn’t know what to expect, so I just
crossed my fingers.
I ordered all my equipment through catalogs. The three
companies I dealt with were all helpful with planning
and ordering over the telephone. All of my equipment
arrived within one month and none of it was damaged.
The equipment was for the most part represented
accurately in the catalogs of these three companies. I
recommend all three. My sources are listed at the end
of this article.
Batteries
The space available for batteries was pretty limited. I
decided to take out the engine-run space heaters in the
front of the bus to make space for a battery
Below: Rob easily runs his power tools
from the PV system in his bus
Above: Two Solavolt PV modules tilt and rotate on a homemade frame
mounted on the roof of Rob’s bus