Toyota RAV4 1994 2000 cooling system hệ thống làm mát động cơ trên xe toyota RAV4 đời 1994 2000
Bạn đang xem bản rút gọn của tài liệu. Xem và tải ngay bản đầy đủ của tài liệu tại đây (698.89 KB, 25 trang )
CO0BD−01
−COOLING COOLANT
CO−1
1996 RAV4 (RM447U)
COOLANT
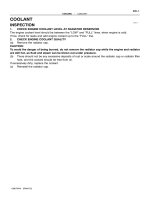
INSPECTION
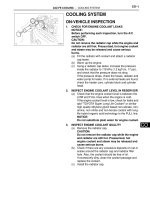
1. CHECK ENGINE COOLANT LEVEL AT RADIATOR RESERVOIR
The engine coolant level should be between the ”LOW” and ”FULL” lines, when engine is cold.
If low, check for leaks and add engine coolant up to the ”FULL” line.
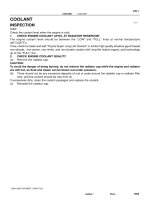
2. CHECK ENGINE COOLANT QUALITY
(a) Remove the radiator cap.
CAUTION:
To avoid the danger of being burned, do not remove the radiator cap while the engine and radiator
are still hot, as fluid and steam can be blown out under pressure.
(b) There should not be any excessive deposits of rust or scale around the radiator cap or radiator filler
hole, and the coolant should be free from oil.
If excessively dirty, replace the coolant.
(c) Reinstall the radiator cap.
CO0BE−01
S01292
Drain Plug
CO−2
−COOLING COOLANT
1996 RAV4 (RM447U)
REPLACEMENT
1. DRAIN ENGINE COOLANT
(a) Remove the radiator cap.
CAUTION:
To avoid the danger of being burned, do not remove the ra-
diator cap while the engine and radiator are still hot, as fluid
and steam can be blown out under pressure.
(b) Loosen the radiator drain plug (on the left side of the ra-
diator lower tank) and engine drain plug (on the left rear
of the cylinder block), and drain the coolant.
(c) Close the drain plugs.
Torque: Engine drain plug
25 N·m (250 kgf·cm, 18 ft·lbf)
2. FILL ENGINE COOLANT
(a) Slowly fill the system with coolant.
S Use a good brand of ethylene−glycol base coolant
and mix it according to the manufacture’s direc-
tions.
S Using coolant which includes more than 50 % ethyl-
ene−glycol (but not more than 70 %) is recom-
mended.
NOTICE:
S Do not use an alcohol type coolant.
S The coolant should be mixed with demineralized wa-
ter or distilled water.
Capacity (w/ Heater):
M/T: 8.0 liters (8.5 US qts, 7.0 lmp. qts)
A/T: 7.7 liters (8.1 US qts, 6.8 lmp. qts)
(b) Install radiator cap.
(c) Start the engine, and bleed the cooling system.
(d) Refill the radiator reservoir with coolant until it reaches the
”FULL” line.
3. CHECK ENGINE COOLANT FOR LEAKS
CO0BF−03
S06209
No.3 ABS Actuator Bracket
Engine Wire
Generator
Generator
Drive Belt
PS Pump
Drive Belt
Ground Strap
Connector
Generator
Bracket
PS Reservoir Bracket
PS Reservoir
RH Engine Mounting Insulator
RH Engine Mounting Bracket
RH Engine
Under Cover
N·m (kgf·cm, ft·lbf)
: Specified Torque
37 (380, 27)
52 (530, 38)
52 (530, 38)
52 (530, 38)
52 (530, 38)
52 (530, 38)
52 (530, 38)
−COOLING WATER PUMP
CO−3
1996 RAV4 (RM447U)
WATER PUMP
COMPONENTS
CO−4
−COOLING WATER PUMP
1996 RAV4 (RM447U)
CO0BG−02
S01613
P15462
P15546
1
3
2
P15463
Disconnect
−COOLING WATER PUMP
CO−5
1996 RAV4 (RM447U)
REMOVAL
1. REMOVE RH ENGINE UNDER COVER
2. DRAIN ENGINE COOLANT
3. REMOVE TIMING BELT (See page EM−15)
4. DISCONNECT LOWER RADIATOR HOSE FROM
WATER INLET
5. REMOVE TIMING BELT TENSION SPRING AND NO.2
IDLER PULLEY
6. REMOVE GENERATOR DRIVE BELT ADJUSTING
BAR
(a) Disconnect the crankshaft position sensor connector
clamp.
(b) Remove the bolt and adjusting bar.
7. REMOVE WATER PUMP AND WATER PUMP COVER
ASSEMBLY
(a) Remove the 2 nuts holding the water pump to the water
bypass pipe.
(b) Remove the 3 bolts in the sequence shown.
(c) Disconnect the water pump cover from the water bypass
pipe, and remove the water pump and water pump cover
assembly.
(d) Remove the gasket and 2 O−ring from the water pump
and water bypass pipe.
N00918
CO−6
−COOLING WATER PUMP
1996 RAV4 (RM447U)
8. REMOVE WATER PUMP FROM WATER PUMP COVER
Remove the 3 bolts, water pump and gasket.
CO0BH−02
CO0877
−COOLING WATER PUMP
CO−7
1996 RAV4 (RM447U)
INSPECTION
INSPECT WATER PUMP
(a) Visually check the drain hole for coolant leakage.
If leakage is found, replace the water pump.
If engine coolant has leaked onto the timing belt, replace the
timing belt.
(b) Turn the pulley, and check that the water pump bearing
moves smoothly and quietly.
If necessary, replace the water pump.
CO0BI−03
P13480
New O−Ring
New Gasket
P15547
New O−Ring
P15464
Connect
Z16489
3
1
2
CO−8
−COOLING WATER PUMP
1996 RAV4 (RM447U)
INSTALLATION
1. INSTALL WATER PUMP TO WATER PUMP COVER
Install a new gasket and the water pump with the 3 bolts.
Torque: 8.8 N·m (90 kgf·cm, 78 in.·lbf)
2. INSTALL WATER PUMP AND WATER PUMP COVER
ASSEMBLY
(a) Install new O−ring and gasket to water pump cover.
(b) Install a new O−ring to the water bypass pipe.
(c) Apply soapy water to the O−ring on the water bypass
pipe.
(d) Connect the water pump cover to the water bypass pipe.
Do not install the nuts yet.
(e) Install the water pump with the 3 bolts. Tighten the bolts
in the sequence shown.
Torque: 8.8 N·m (90 kgf·cm, 78 in.·lbf)
(f) Install the 2 nuts holding the water pump cover to the wa-
ter bypass pipe.
Torque: 9.3 N·m (95 kgf·cm, 82 in.·lbf)
3. INSTALL GENERATOR DRIVE BELT ADJUSTING BAR
(a) Install the adjusting bar with the bolt.
Torque: 27 N·m (275 kgf·cm, 20 ft·lbf)
(b) Connect the crankshaft position sensor connector clamp.
4. INSTALL NO.2 IDLER PULLEY AND TIMING BELT
TENSION SPRING
5. CONNECT LOWER RADIATOR HOSE
6. INSTALL TIMING BELT (See page EM−20)
7. FILL WITH ENGINE COOLANT
8. START ENGINE AND CHECK FOR COOLANT LEAKS
9. INSTALL RH ENGINE UNDER COVER
CO0BJ−01
S01641
Thermostat
z Gasket
Water Inlet
Oil Filter
N·m (kgf·cm, ft·lbf)
: Specified torque
z Non−reusable part
8.8 (90, 78 in.·lbf)
−COOLING THERMOSTAT
CO−9
1996 RAV4 (RM447U)
THERMOSTAT
COMPONENTS
CO0BK−01
S01348
CO−10
−COOLING THERMOSTAT
1996 RAV4 (RM447U)
REMOVAL
HINT:
Removal of the thermostat would have an adverse effect, caus-
ing a lowering of cooling efficiency. Do not remove the thermo-
stat, even if the engine tends to overheat.
1. DRAIN ENGINE COOLANT
2. REMOVE OIL FILTER (See page LU−2)
3. REMOVE WATER INLET AND THERMOSTAT
(a) Remove the 2 nuts, and disconnect the water inlet from
the water pump cover.
(b) Remove the thermostat.
(c) Remove the gasket from the thermostat.
CO0BL−03
P13560
P00436
CO1233
Valve Lift
−COOLING THERMOSTAT
CO−11
1996 RAV4 (RM447U)
INSPECTION
INSPECT THERMOSTAT
HINT:
The thermostat is numbered with the valve operating tempera-
ture.
(a) Immerse the thermostat in water and gradually heat the
water.
(b) Check the valve opening temperature.
Valve opening temperature:
80 − 84°C (176 − 183°F)
If the valve opening temperature is not as specified, replace the
thermostat.
(c) Check the valve lift.
Valve lift:
At 95°C (203°F): 8 mm (0.31 in.) or more
If the valve lift is not as specified, replace the thermostat.
(d) Check that the valve is fully closed when the thermostat
is at low temperatures (below 40°C (104°F)).
If not closed, replace the thermostat.
CO0BM−02
P13611
Protrusion
Jiggle
Valve
5°5°
CO−12
−COOLING THERMOSTAT
1996 RAV4 (RM447U)
INSTALLATION
1. PLACE THERMOSTAT IN WATER PUMP
(a) Install a new gasket to the thermostat.
(b) Align the jiggle valve of the thermostat with the protrusion
of the water inlet, and insert the thermostat in the water
inlet.
HINT:
The jiggle valve may be set within 5° of either side of the pre-
scribed position.
2. INSTALL WATER INLET AND THERMOSTAT
Install the water inlet and thermostat with the 2 nuts.
Torque: 8.8 N·m (90 kgf·cm, 78 in.·lbf)
3. INSTALL OIL FILTER (See page LU−2)
4. FILL WITH ENGINE COOLANT
5. START ENGINE AND CHECK FOR LEAKS
6. CHECK ENGINE OIL LEVEL
CO0BN−01
−COOLING RADIATOR
CO−13
1996 RAV4 (RM447U)
RADIATOR
ON−VEHICLE CLEANING
Using water or a steam cleaner, remove any mud or dirt from the radiator core.
NOTICE:
If using a high pressure type cleaner, be careful not to deform the fins of the radiator core. (i.e. Main-
tain a distance between the cleaner nozzle and radiator core.)
CO0BO−02
Z00570
Radiator Cap Tester
Radiator Cap
30° or More
S01265
Radiator Cap Tester
CO−14
−COOLING RADIATOR
1996 RAV4 (RM447U)
ON−VEHICLE INSPECTION
1. REMOVE RADIATOR CAP
CAUTION:
To avoid the danger of being burned, do not remove the ra-
diator cap while the engine and radiator are still hot, as fluid
and steam can be blown out under pressure.
2. INSPECT RADIATOR CAP
NOTICE:
S If the radiator cap has contaminations, always rinse
it with water.
S When performing steps (a) and (b) below, keep the ra-
diator cap tester at an angle of over 30°above the hor-
izontal.
(a) Using a radiator cap tester, slowly pump the tester and
check that air is coming from the vacuum valve.
Pump speed:
1 push/(3 seconds or more)
NOTICE:
Push the pump at a constant speed.
If air is not coming from the vacuum valve, replace the radiator
cap.
(b) Pump the tester and measure the relief valve opening
pressure.
Pump speed:
1 push within 1 second
NOTICE:
This pump speed is for the first pump only (in order to close
the vacuum valve). After this, the pump speed can be re-
duced.
Standard opening pressure:
74 − 103 kPa (0.75 − 1.05 kgf/cm
2
, 10.7 − 14.9 psi)
Minimum opening pressure:
59 kPa (0.6 kgf/cm
2
, 8.5 psi)
HINT:
Use the tester’s maximum reading as the opening pressure.
If the opening pressure is less than minimum, replace the radia-
tor cap.
3. INSPECT COOLING SYSTEM FOR LEAKS
(a) Fill the radiator with coolant and attach a radiator cap tes-
ter.
(b) Warm up the engine.
(c) Pump it to 118kPa (1.2 kgf/cm
2
, 17.1 psi), and check that
the pressure does not drop.
If the pressure drops, check the hoses, radiator or water pump
for leaks. If no external leaks are found, check the heater core,
cylinder block and cylinder head.
4. REINSTALL RADIATOR CAP
CO0BP−02
S01819
Lower Radiator
Hose
No.2 Cooling
Fan Connector
(w/ A/C)
Radiator
Assembly
Upper Radiator
Support
ECT Switch
Connector
Radiator
Upper Radiator
Support
No.1 Cooling Fan
No.2 Cooling Fan
(w/ A/C)
Radiator Cap
Upper Radiator Hose
Engine Wire
Radiator Reservoir Hose
A/T Oil Cooler Hose
z O−Ring
No.1 Cooling
Fan Connector
Lower Radiator
Support
Cooler Condenser
RH Engine
Under Cover
LH Engine
Under Cover
LH Engine
Under Cover
z Non−reusable part
M/T
A/T
Drain Plug
−COOLING RADIATOR
CO−15
1996 RAV4 (RM447U)
COMPONENTS
CO0BQ−03
S01355
S01278
w/ A/C
S01293
CO−16
−COOLING RADIATOR
1996 RAV4 (RM447U)
REMOVAL
1. REMOVE ENGINE UNDER COVERS
2. DRAIN ENGINE COOLANT
3. w/ A/C:
REMOVE COOLER CONDENSER (See page AC−47)
4. REMOVE RADIATOR ASSEMBLY
(a) Disconnect the No.1 cooling fan connector.
(b) w/ A/C:
Disconnect the No.2 cooling fan connector.
(c) Disconnect the ECT switch connector for electric cooling
fan.
(d) Disconnect the engine wire clamp from No.1 cooling fan
shroud.
(e) Disconnect the upper radiator hose from radiator.
(f) Disconnect the lower radiator hose from radiator.
(g) Disconnect the radiator reservoir hose from radiator.
(h) Disconnect the 2 A/T oil cooler hoses from oil cooler
pipes.
(i) Remove the 2 bolts and 2 upper radiator supports.
Torque: 13 N·m (130 kgf·cm, 9 ft·lbf)
(j) Remove the radiator assembly.
HINT:
At the time of installation, plaese refer to the following items. Af-
ter installation, check that the rubber cushion (A) of the support
is not depressed.
(k) Remove the 2 lower radiator supports.
5. w/ A/C:
REMOVE NO.2 COOLING FAN FROM RADIATOR
Remove the 3 bolts and cooling fan.
Torque: 5.0 N·m (50 kgf·cm, 43 in.·lbf)
6. REMOVE NO.1 COOLING FAN FROM RADIATOR
Remove the 4 bolts and cooling fan.
Torque: 5.0 N·m (50 kgf·cm, 43 in.·lbf)
CO18K−01
−COOLING RADIATOR
CO−17
1996 RAV4 (RM447U)
INSTALLATION
Installation is in the reverse order of removal (See page CO−16).
S01294
CO0BS−03
S01279
Disconnect
S01277
93°C
S01290
Ammeter
Battery
S01291
Ammeter
Battery
CO−18
−COOLING ELECTRIC COOLING FAN
1996 RAV4 (RM447U)
ELECTRIC COOLING FAN
ON−VEHICLE INSPECTION
1. CHECK COOLING FAN OPERATION WITH LOW TEM-
PERATURE (Below 83°C (181°F))
(a) Turn the ignition switch ON.
(b) Check that the cooling fan stops.
If not, check the cooling fan relay and ECT switch, and check
for a separated connector or severed wire between the cooling
fan relay and ECT switch.
(c) Disconnect the ECT switch connector.
(d) Check that the cooling fan rotates.
If not, check the fan main relay, cooling fan relay, cooling fan,
fuses, and check for short circuit between the cooling fan relay
and ECT switch.
(e) Reconnect the ECT switch connector.
2. CHECK COOLING FAN OPERATION WITH HIGH TEM-
PERATURE (Above 93°C (199°F))
(a) Start the engine, and raise coolant temperature to above
93°C (199°F).
(b) Check that the cooling fan rotates.
If not, replace the ECT switch.
3. INSPECT NO.1 COOLING FAN
(a) Disconnect the cooling fan connector.
(b) Connect battery and ammeter to the cooling fan connec-
tor.
(c) Check that the cooling fan rotates smoothly, and check
the reading on the ammeter.
Standard amperage: 10.9 − 13.9 A
(d) Reconnect the cooling fan connector.
4. INSPECT NO.2 COOLING FAN
(a) Disconnect the cooling fan connector.
(b) Connect battery and ammeter to the cooling fan connec-
tor.
(c) Check that the cooling fan rotates smoothly, and check
the reading on the ammeter.
Standard amperage: 9.1 − 11.1 A
(d) Reconnect the cooling fan connector.
CO0BT−02
S01818
Radiator
No.1 Cooling Fan
Lower Radiator Hose
No.2 Cooling
Fan Connector
(w/ A/C)
Upper Radiator
Support
Radiator Cap
Upper Radiator Hose
Engine Wire
Radiator Reservoir Hose
A/T Oil Cooler Hose
Drain Plug
z O−Ring
LH Engine
Under Cover
ECT Switch
Connector
Radiator
Assembly
Cooler Condenser
Lower Radiator
Support
No.1 Cooling
Fan Connector
RH Engine
Under Cover
z Non−reusable Part
A/T
M/T
Upper Radiator
Support
LH Engine
Under Cover
NO.1 COOLING FAN
−COOLING ELECTRIC COOLING FAN
CO−19
1996 RAV4 (RM447U)
COMPONENTS
S01820
Upper Radiator Support
No.2 Cooling Fan Connector
No.2 Cooling Fan
Cooler Condenser
RH Engine
Under Cover
NO.2 COOLING FAN
x 6
CO−20
−COOLING ELECTRIC COOLING FAN
1996 RAV4 (RM447U)
CO18L−01
S01356
(A)
S01433
−COOLING ELECTRIC COOLING FAN
CO−21
1996 RAV4 (RM447U)
REMOVAL
1. REMOVE NO.1 COOLING FAN (See page CO−16)
2. REMOVE NO.2 COOLING FAN
(a) Remove the RH engine under cover.
(b) w/ A/C:
Remove the cooler condenser (See page AC−47).
(c) Remove the upper radiator supports.
Torque:13 N·m (130kgf·cm, 9 ft·lbf)
HINT:
At the time of installation, plaese refer to the following items. Af-
ter installation, check that the rubber cushion (A) of the support
is not depressed.
(d) Remove the No.2 cooling fan.
(1) Disconnect the cooling fan connector.
(2) Push the radiator toward the front bumper.
(3) Remove the 3 bolts.
(4) Push the No.2 cooling fan toward radiator and pull
it upward.
CO0BV−02
CO−22
−COOLING ELECTRIC COOLING FAN
1996 RAV4 (RM447U)
DISASSEMBLY
1. DISASSEMBLE NO.1 COOLING FAN
(a) Remove the nut and fan.
(b) Disconnect the wire and connector from the fan shroud.
(c) Remove the 3 screws and fan motor.
2. DISASSEMBLE NO.2 COOLING FAN
(a) Remove the 3 screws and fan.
(b) Remove the 2 screws and motor cover.
(c) Disconnect the wire and connector from the fan shroud.
(d) Remove the 3 screws and fan motor.
CO18M−01
−COOLING ELECTRIC COOLING FAN
CO−23
1996 RAV4 (RM447U)
REASSEMBLY
S No. 1 Cooling Fan:
Reassembly is in the reverse order of disassembly (See page CO−22).
S No. 2 Cooling Fan:
Reassembly is in the reverse order of disassembly (See page CO−22).
CO18N−01
CO−24
−COOLING ELECTRIC COOLING FAN
1996 RAV4 (RM447U)
INSTALLATION
S No. 1 Cooling Fan:
Installation is in the reverse order of removal (See page CO−21).
S No. 2 Cooling Fan:
Installation is in the reverse order of removal (See page CO−21).
S01280
ECT Switch
CO0BY−01
P05962
Ohmmeter
−COOLING ENGINE COOLANT TEMPERATURE (ECT) SWITCH
CO−25
1996 RAV4 (RM447U)
ENGINE COOLANT
TEMPERATURE (ECT) SWITCH
INSPECTION
1. DRAIN ENGINE COOLANT
2. REMOVE ECT SWITCH
3. INSPECT ECT SWITCH
(a) Using an ohmmeter, check that there is no continuity be-
tween the terminals when the coolant temperature is
above 93°C (199°F).
(b) Using an ohmmeter, check that there is continuity be-
tween the terminals when the coolant temperature is be-
low 83°C (181°F).
If continuity is not as specified, replace the switch.
4. REINSTALL ECT SWITCH
5. REFILL WITH ENGINE COOLANT
6. START ENGINE AND CHECK FOR COOLANT LEAKS