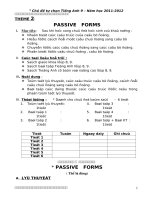
1690 assignment 2 (pass)
Bạn đang xem bản rút gọn của tài liệu. Xem và tải ngay bản đầy đủ của tài liệu tại đây (1.51 MB, 28 trang )
ASSIGNMENT 2 FRONT SHEET
Qualification
TEC Level 5 HND Diploma in Computing
Unit number and title
Unit 43: Internet of Things
Submission date
12/12/2022
Re-submission Date
Date Received 1st submission
Date Received 2nd submission
Student Name
DAO VINH KHANG
Student ID
GCS200222
Class
GCS0905B
Assessor name
HO VAN HAI
Student declaration
I certify that the assignment submission is entirely my own work and I fully understand the
conseq that making a false declaration is a form of malpractice.
uences of plagiarism. I understand
Student’s signature
Grading grid
P5
P6
P7
M5
1
M6
D3
D4
2
Summative Feedback:
Grade:
Resubmission Feedback:
Assessor Signature:
Date:
Internal Verifier’s Comments:
Signature & Date:
3
Table of Contents
Introduction ................................................................................................................................................................. 6
Task 1: Develop the IoT application ............................................................................................................................. 6
I. Give out for your selection an appropriate set of tools, frameworks, devices for your solution ......................... 6
II. Develop your solution, write down your sketch and upload it on your devices ................................................ 14
III. Testing results ................................................................................................................................................... 17
Task 2: Test and evaluate the user feedback ............................................................................................................. 20
I. User feedback...................................................................................................................................................... 20
II. Critical review and compare............................................................................................................................... 25
III. Give out the plan for next version..................................................................................................................... 25
Conclusion .................................................................................................................................................................. 25
References.................................................................................................................................................................. 26
4
List of Figures
Figure 1: NodeMCU ......................................................................................................................................................
7
Figure
2:
Soil
moisture
sensor....................................................................................................................................... 8
Figure 3: Relay Arduino .................................................................................................................................................
9
Figure 4: Breadboard ..................................................................................................................................................
11
Figure 5: Arduino IDE ..................................................................................................................................................
12
Figure 6: Block Diagram ..............................................................................................................................................
13
Figure 7: Realistic circuit .............................................................................................................................................
14
Figure
8:
Blynk
server.................................................................................................................................................. 15
Figure 9: Blynk App .....................................................................................................................................................
15
Figure 10: Automatic watering system based on soil moisture ................................................................................. 16
Figure 11: Result 1 ......................................................................................................................................................
16
Figure
12:
Result
2
...................................................................................................................................................... 17
Figure 13: Survey question .........................................................................................................................................
19
Figure
14:
Survey
question
......................................................................................................................................... 19 Figure 15: Survey
question ......................................................................................................................................... 20
Figure 16: Survey result ..............................................................................................................................................
20
Figure
17:
Survey
result
.............................................................................................................................................. 21 Figure 18: Survey
result .............................................................................................................................................. 21 Figure 19:
Survey result .............................................................................................................................................. 22 Figure
20: Survey result .............................................................................................................................................. 22
5
Introduction
In agriculture today, there has been a development, but there are still not many scientific and technical
applications applied in practice. Many technical processes of cultivation and care are conducted
subjectively, and do not guarantee the correct requirements. It can be said that in agronomy, in addition
to cultivation and care techniques, watering and increasing the photosynthetic time of plants is one of
the most important stages of cultivation to ensure normal growth and development of plants. Proper and
sufficient irrigation according to the agronomic requirements of the crop will not tolerate pests and
diseases, limit pesticides for safe products, achieve high productivity and efficiency.
Automatic watering system combined with remote monitoring via phone is the best auxiliary equipment
system to meet the growth needs of plants, being widely applied in developing countries. The system has
also become more popular with rural farmers along with the process of rural modernization and
industrialization but has not yet dared to put it into use because of its high cost.
Understanding the above urgent need and wanting to contribute their efforts to reduce the burden on
farmers, the group decided to choose: “Build an automatic irrigation system based on soil moisture and
monitor from remotely via phone” to do the group's topic.
Task 1: Develop the IoT application
I. Give out for your selection an appropriate set of tools, frameworks, devices for your solution
We planned to develop an automatic watering device based on soil moisture. This is a smart sensor circuit
device that is plugged directly into the ground. Users can set when the soil is dry, the sensor will
automatically activate the relay, and at this time the water pump will work to pump water for the plants,
when there is enough water, the sensor will automatically be activated to stop the pump. motion. With
a soil moisture sensor that controls automatic watering, users will be extremely reassured that their
vegetable garden and garden will always be taken care of and watered regularly without losing water due
to too high temperature. The product works extremely stable and is the choice to replace the watering
timer device.
1. Hardware
On the basis of analyzing the system requirements, we will choose the appropriate hardware components
such as:
6
7
a NodeMCU
NodeMCU V1.0 is developed based on ESP8266EX WiFi Chip inside Module
With a few touches, ESP-12E quickly establishes a WiFi connection. Additionally, the board incorporates
IC CP2102, which makes it simple to control the board via Micro USB. Additionally, there are buttons and
LEDs at your disposal to make the process of learning and research easier (Dutta and Khurana, 2021).
Flexible boards are easily connected to peripheral devices because to their small size, allowing projects
and product samples to be created fast.
Figure 1: NodeMCU
SPECIFICATIONS ESP8266 NodeMCU V1 WIFI Transceiver BOARD
•
Chip: ESP8266EX Wifi SoC
•
WiFi band: 2.4 GHz 802.11 b/g/n standard
•
Firmware version: NodeMCU V1.0
•
•
Operating voltage: 3.3V
Input voltage: 5V
)
•
Number of I/O pins: 11 (all I/O pins have Interrupt/PWM/I2C/One-wire, except D0)
•
Number of Analog Input pins: 1 (maximum input voltage 3.3V)
•
Flash Memory: 4MB
8
•
UART communication chip: CP2102
•
Interface: Micro USB Cable
•
Security support: WPA/WPA2
•
Built-in TCP/IP protocol
•
Programming on languages: C/C++, Micropython, NodeMCU – Lua
b. Soil moisture sensor
One type of inexpensive electrical sensor used to measure soil moisture is a soil moisture sensor. The
volumetric content of water in the soil can be determined with this sensor. The Sensing Probs and the
Sensor Module are the two primary components of this sensor.
Figure 2: Soil moisture sensor
Specifications:
•
Operating voltage: 3.3V ~ 5V
•
With power indicator (red) and digital switching output indicator (green)
•
Has LM393 comparator chip, stable
•
PCB board size: Approx. 3 cm x 1.5 cm
9
•
Soil Probe Size: Approx. 6cm x 3cm
•
Cable length: Approx. 21cm
•
Interface description (4 wires):
•
Vcc: 3.3V-5V
•
Gnd: GND
•
Do: digital output interface (0 and 1)
•
Ao: analog output interface
c. Relay
Relay is electromechanical switches that are preeminent for high-voltage or low-voltage switching. They
can also be used to control high-voltage devices using microcontrollers like the Arduino.
Figure 3: Relay Arduino
Specifications
•
Input control signal 5VDC
•
Output signal AC up to 10A 250VAC and for DC up to 10A 30VDC
•
Dimensions 2.7cm x 3.4cm [1.063in x 1.338in]
•
The DC pin of the board has 3 pins for signal (S), power and ground (+ and -).
•
The AC pin has 3 contacts, NC (Normally Closed), COM and NO (Normally Open).
10
d. Submersible pumps
3V-5V super small submersible pump, powerful and quiet pump, 96 liters per hour - LK0084.
Parameter
•
Voltage: 3V - 5V, can use USB port or phone charger
•
Current: 100 - 200 mA
•
Flow: 1.2 - 1.6 liters/min
•
Weight: 28g
e. Breadboard
According to Ayoub (2022) Arduino is a platform, project, and user community for open-source digital
electronics hardware and software. The platform creates single-board microcontrollers that are simple
to use and their accompanying development kits.
11
Figure 4: Breadboard
Parameter:
•
830 Holes
•
With dual power rails
•
Hole Size: 2.54mm
•
Double-sided tape on the reverse side
•
Interlocking for larger accessories
•
Dimensions: 165x55 mm
•
Weight: 77g
2. Software
a. Arduino IDE
According to Banzi (2009) The Arduino software (IDE), developed by arduino.cc, is an integrated
development environment that is open source and used to program the Arduino boards. Permit
programming and uploading to Arduino boards. It also included a number of libraries and a collection of
sample mini projects.
12
Figure 5: Arduino IDE
b. Blynk
Blynk is an application running on iOS and Android platforms to control and monitor devices via the
internet (Seneviratne, 2018). Blynk is not tied to specific hardware, instead, it supports hardware of your
choice such as Arduino, Raspberry Pi, ESP8266 and many other popular hardware modules.
There are three main components in the platform:
•
Blynk App - allows to create the interface of your product by dragging and dropping different
widgets that the supplier has designed.
•
Blynk Server - responsible for central data processing between phones, tablets and hardware. You
can use Blynk's provided Blynk Cloud or create your own Blynk server. Since this is open source,
you can easily. Integrate into devices and can even use Raspberry Pi as your server.
13
•
Library Blynk – support for almost all popular hardware platforms – allows to communicate with
the server and process all incoming and outgoing commands.
Functions:
Provides the same API & UI for all supported devices and hardware
Connect to the server using Wifi for our project.
The utilities on the interface are easy to use by the provider
Direct drag and drop interface without writing code
Easily integrate and add new functionality using the virtual gateways built into the blynk app Data
history tracking
Device-to-device communication using Widgets
II. Develop your solution, write down your sketch and upload it on your devices
Block Diagram:
14
Figure 6: Block Diagram
Working principle:
Auto mode
•
The sensor receives the humidity signal on the NodeMCU's A0 pin => Displayed on Blynk
•
via Value Display (V1)
•
Then send signal to NodeMCU to execute bound commands
Mode Manual
•
Control the relay on and off via BlinkApp with button (V9)
•
On: Output HIGH signal to pin D2 on NodeMCU to close relay to open machine
•
pump
•
Off: Output LOW signal to pin D2 on NodeMCU to close the shutdown relay pump.
Realistic circuit
15
Figure 7: Realistic circuit
Blynk interface on server
Figure 8: Blynk server
Blynk interface on app
16
Figure 9: Blynk App
Figure 10: Automatic watering system based on soil moisture
III. Testing results
The system is controlled through the Blynk app, the soil moisture is displayed on the app, when the
humidity is low, the pump will turn on to automatically water the plants. When the hiddenness is
satisfactory, the pump turns off. Thus, the plant is absorbed enough water, helping the healthy growth
process.
17
Figure 11: Result 1
When the device works, the soil moisture sensor measures low soil moisture, the sensor activates the
relay, and at this time the water pump will work to pump water for the plants.
18
Video demo:
Advantage
The use of automatic watering systems to care for and water the garden, indoor green space brings a lot
of benefits. Garden care becomes easier and more convenient:
•
Save water: automatic irrigation systems can help reduce water up to 60% compared to manual
irrigation. This helps users cut down on their monthly water bills significantly.
•
Helps plants absorb enough water to grow normally, bringing high yields.
•
Create value for the work: you may not know, the landscape of a building accounts for 20% of the
total value of the work. A good and correct irrigation system makes the landscape more attractive
and thereby creates value.
•
Save time: Time is money, and time is precious. An automatic irrigation system will take care of
the
plants in your yard for you, at that time you can take care of your family or implement creative)
ideas.
•
Significant labor savings compared to manual irrigation.
•
The system is a fixed investment, ensuring a long life for the equipment used in irrigation.
Disadvantage
•
It is easy to clog the nozzle if the filter is not cleaned regularly.
•
The soil moisture sensor is prone to rust after a period of time, affecting the accuracy of the soil
moisture measurement process.
•
The type of plant watering device that delivers water to each plant, watering directly to the surface
of the soil, not the leaves, so it is suitable for irrigation:
o Plants with strong roots and absorbing water and nutrients through their roots such as
perennial fruit trees, citrus trees, woody industrial plants such as cashew, coffee, pepper
...
o Ornamental plants grown in the family's home or garden or terrace, can be used in the
standard form of this high-end genuine drip irrigation system.
o Plant lines with high drought tolerance and planting in the dry season.
19
o Plants grown on infertile lands such as typical mountain slopes and hillsides such as
custard apple, plum or apple trees, etc.
•
Requires large and large water flow.
Task 2: Test and evaluate the user feedback
I. User feedback
To help automatic watering system based on soil moisture, we conducted a survey. The survey aims to
collect the best information about the system, thereby serving as a basis for analyzing and building a new
system to solve the system's shortcomings. So, the required survey includes the following objectives:
-
Access to professional expertise and operating environment of automatic watering systems.
-
Learn the roles, functions, tasks and how the system works
-
Point out the limitations and inadequacies of the system that need to be changed problems of the system that need to be studied and changed.
20
Identify the
Figure 13: Survey question
Figure 14: Survey question
21
Figure 15: Survey question
We conducted the survey and got the results from everyone:
The majority of surveyors found that automatic watering through soil moisture is a useful system, a
product that brings a lot of value to consumers.
Figure 16: Survey result
22
The benefits of an automatic watering system are appreciated by everyone, the most obvious one is
Improving crop productivity by always taking the initiative and providing adequate and timely water and
fertilizer for crops reaching 72 .7%, followed by Water Saving: this is the highlight that is easy to see from
this technology due to water with 54.5% and finally Reduce labor to minimum for watering and fertilizing
for crops with 36.4%.
Figure 17: Survey result
Seeing the practicality and accuracy of this system is also appreciated during use
Figure 18: Survey result
23