adobe photoshop cs type effects
Bạn đang xem bản rút gọn của tài liệu. Xem và tải ngay bản đầy đủ của tài liệu tại đây (17.87 MB, 265 trang )
This page intentionally left blank
© 2004 by Thomson Course Technology PTR. All rights reserved.
No part of this book may be reproduced or transmitted in any
form or by any means, electronic or mechanical, including pho-
tocopying, recording, or by any information storage or retrieval
system without written permission from Thomson Course
Technology PTR, except for the inclusion of brief quotations in a
review.
The Thomson Course Technology PTR logo and related trade
dress are trademarks of Thomson Course Technology PTR and
may not be used without written permission.
SVP, Thomson Course Technology PTR: Andy Shafran
Publisher: Stacy L. Hiquet
Senior Marketing Manager: Sarah O’Donnell
Marketing Manager: Heather Hurley
Manager of Editorial Services: Heather Talbot
Senior Acquisitions Editor: Kevin Harreld
Senior Editor: Mark Garvey
Associate Marketing Managers: Kristin Eisenzopf
and Sarah Dubois
Project Editor/Copy Editor: Cathleen D. Snyder
Technical Reviewer: John Freitas and Burt LaFontaine
Thomson Course Technology PTR Market Coordinator: Amanda
Weaver
Interior Layout Tech: Bill Hartman
Cover Designer: Mike Tanamachi
CD-ROM Producer: Brandon Penticuff
Indexer: Sharon Shock
Adobe, the Adobe logo, and Photoshop are either registered
trademarks or trademarks of Adobe Systems Incorporated in the
United States and/or other countries. All other trademarks are
the property of their respective owners.
Important: Thomson Course Technology PTR cannot provide
software support. Please contact the appropriate software man-
ufacturer’s technical support line or Web site for assistance.
Thomson Course Technology PTR and the author have
attempted throughout this book to distinguish proprietary
trademarks from descriptive terms by following the capitaliza-
tion style used by the manufacturer.
Information contained in this book has been obtained by
Thomson Course Technology PTR from sources believed to be
reliable. However, because of the possibility of human or
mechanical error by our sources, Thomson Course Technology
PTR, or others, the Publisher does not guarantee the accuracy,
adequacy, or completeness of any information and is not
responsible for any errors or omissions or the results obtained
from use of such information. Readers should be particularly
aware of the fact that the Internet is an ever-changing entity.
Some facts may have changed since this book went to press.
Educational facilities, companies, and organizations interested
in multiple copies or licensing of this book should contact the
publisher for quantity discount information. Training manuals,
CD-ROMs, and portions of this book are also available individu-
ally or can be tailored for specific needs.
ISBN: 1-59200-363-x
Library of Congress Catalog Card Number: 2003115723
Printed in the United States of America
04 05 06 07 08 BU 10 9 8 7 6 5 4 3 2 1
Thomson Course Technology PTR, a division of Thomson Course Technology
25 Thomson Place
■ Boston, MA 02210 ■
Contents
Adobe Photoshop CS Type Effects
v
Effect 1
Kinetic Flash Type 1
Effect 2
Mosaic Type 15
Effect 3
Road Sign Type 23
Effect 4
Creative Wave 37
Effect 5
Playing a Magnifier 47
Effect 6
Spiral CD Title 57
Effect 7
Painted on the Bark 71
Effect 8
Stone-Like Type 83
Effect 9
Grunge Type 95
Contents
vi Adobe Photoshop CS Type Effects
Effect 10
Smoky Type 111
Effect 11
Caught in a Net 125
Effect 12
Blur Effect Type 137
Effect 13
Simple Glass Type 151
Effect 14
Fire Shock 165
Effect 15
Universal Light 179
Effect 16
Neon Effect Type 193
Effect 17
Irregular Cracks 201
Effect 18
Punched Holes Array 211
Contents
Adobe Photoshop CS Type Effects
vii
Effect 19
A Grotesque Monster 221
Effect 20
Water Drop Type 231 Index 243
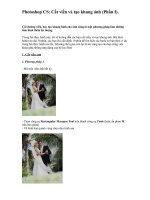
Effect 1: Kinetic Flash Type
In our fast-paced society, the flashing signs we see all around
us are more than just words. The slightly offset and partially
flashing words create a modern feel.
Effect 1: Kinetic Flash Type
2 Adobe Photoshop CS Type Effects
Kinetic Flash Type
Effect 1: Kinetic Flash Type
Adobe Photoshop CS Type Effects
3
Total Steps
STEP 1. Creating a New Work Window
STEP 2. Creating the Text Field
STEP 3. Entering the Text
STEP 4. Creating an Alpha Channel
STEP 5. Applying Noise to the Alpha Channel
STEP 6. Creating a Horizontal Stripe Alpha
Channel
STEP 7. Magnifying the Stripes
STEP 8. Selecting in the Shape of the
Completed Channel
STEP 9. Adding a Text Layer Mask
STEP 10. Copying the Text Layer
STEP 11. Overlapping the Mask Image
STEP 12. Setting the Text Color
STEP 13. Creating the Third Text Layer
STEP 14. Editing the Alpha Channel
STEP 15. Darkening the Alpha Channel Image
STEP 16. Blurring the Alpha Channel Image
STEP 17. Selecting in the Shape of the
Completed Alpha Channel
STEP 18. Applying a Text Layer Mask
STEP 19. Flashing Text
STEP 20. Strengthening the Flashing Effect
STEP 21. Setting Up the Gradient
STEP 22. Partial Flashing Text
STEP 23. Setting Up the Gradient Again
STEP 24. Applying the Gradient to the
Background
STEP 25. Slanting the Text
STEP 26. Entering a Title
Effect 1: Kinetic Flash Type
STEP 1. Creating a New Work Window
Press Ctrl+N to create a new work window.
Click on the Preset box and choose 640×480
to create a 640×480-pixel workspace. Set the
Background Contents parameter to
Background Color.
Effect 1: Kinetic Flash Type
4 Adobe Photoshop CS Type Effects
STEP 2. Creating the Text Field
In the toolbox on
the left, first click
on the Default
Foreground and
Background
Colors button to
set up the default
color and then
click on the Switch
Foreground and
Background Colors button
to set the foreground
color to white and the
background color to black.
Choose the
Horizontal Type
Tool from the
toolbox, and
then, in the
Character
Palette, set the
font to Tahoma,
the font size to 45 pt, and the lead-
ing to 69.62. If you can't see the
Character Palette, choose Window >
Character from the menu at the top.
Then, drag the mouse over the work
window to create a text field the size
of the entire work window.
STEP 3. Entering the Text
Type in the text as shown here.
STEP 4. Creating an Alpha Channel
Open the Channels
Palette and click on
the Create New
Channel button at the
bottom to create a
new channel. Click on
the new alpha channel
(Alpha 1) to select it.
This will make the
work window black.
STEP 5. Applying Noise to the Alpha Channel
Choose Filter > Noise > Add Noise from the menu at
the top and set the Amount to 80% and the
Distribution to Gaussian, Monochromatic. This will
create noise particles on the work window.
Effect 1: Kinetic Flash Type
Adobe Photoshop CS Type Effects
5
STEP 6. Creating a Horizontal Stripe Alpha Channel
Choose Filter > Blur > Motion Blur from the menu at
the top and set the Angle to 0 and the Distance to 999
pixels. This will convert the noise into horizontal
stripes. As you can see, the stripes are stronger at the
ends, but blurry in the middle.
STEP 7. Magnifying the Stripes
Choose the Rectangular Marquee
Tool from the toolbox and use it to
select the top-right of the image,
as shown here.
Then, press Ctrl+T to apply the Free Transform
command. Drag the handles on the image to
fit the size of the image to the screen. This
completes the horizontal stripes. Click on the
Move Tool, and then click on Apply to apply
the transformation.
Choose Image > Adjustments >
Auto Levels to make the image
sharper and more focused.
STEP 8. Selecting in the Shape of
the Completed Channel
Choose Filter > Texture > Grain from the
menu at the top and set the Intensity to
82, the Contrast to 50, and the Grain Type
to Horizontal. This adds a grainy texture to
the horizontal stripes. You have now com-
pleted editing the channel image.
Click on the Alpha 1 channel in the
Channels Palette while holding down the
Ctrl key to create a selection frame in the
shape of the alpha channel.
Effect 1: Kinetic Flash Type
6 Adobe Photoshop CS Type Effects
STEP 9. Adding a Text Layer Mask
Click on the Layers Palette to open the palette, and click on
the text layer to select it. The edited image will appear in
place of the alpha channel image. With the selection frame (in
the shape of the alpha channel) selected, click on the Add a
Layer Mask button at the bottom of the Layers Palette. This
will create a layer mask in the shape of the selection frame on
the text layer. Areas that are not selected will be covered and
made transparent. Looking at the Layers Palette, you will see a
mask icon appear to the right of the text layer icon.
STEP 10. Copying the Text Layer
In the Layers Palette, drag and drop the text layer on
the Create a New Layer button at the bottom. Clicking
on the mask icon of the copied text layer will create a
mask edit icon in front of the copied text layer, indicat-
ing that the mask image can be now be edited. Press
Ctrl+I to invert the color of the mask image. This will
invert the hidden and visible areas in the copied text
layer.
STEP 11. Overlapping the Mask Image
In the Layers Palette, click on the layer icon of the original text
layer to select the layer, and then click on the link icon between
the layer icon and the mask icon to break the link. This will
allow you to move the two layers independently of each other.
Hold down the Ctrl key and press the ? key on the keyboard
two to three times to create the slightly offset and overlapping
text image shown here.
Effect 1: Kinetic Flash Type
Adobe Photoshop CS Type Effects
7
STEP 12. Setting the Text Color
In the Layers
Palette, click on
the layer icon of
the first text
layer to select it.
Then, click
on the Set
the Text
Color but-
ton in the
Character
Palette.
Color the selected text layer
orange (RGB=253, 109, 11).
Next, click on the second text layer
in the Layers Palette and again click
on the Set the Text Color button in
the Character Palette to color the
selected text layer brown (RGB=94,
30, 0).
STEP 13. Creating the Third Text Layer
Effect 1: Kinetic Flash Type
8 Adobe Photoshop CS Type Effects
STEP 14. Editing the Alpha Channel
Click on the Channels
Palette to open the palette,
and then click on Alpha 1 to
select the alpha channel.
In the Layers Palette, drag
and drop the first text
layer onto the Create a
New Layer button to copy
the layer.
Then, drag and drop the
mask icon on the right
side of the copied text
layer onto the Delete
Layer button.
In the warning dialog
box that appears,
click on Discard to
delete the selected
layer mask.
The text image will disappear,
leaving behind the horizontal
stripes alpha channel. Press
Ctrl+I to invert the colors of
the alpha channel.
STEP 16. Blurring the Alpha Channel Image
Choose Filter >
Blur > Gaussian
Blur from the
menu at the top
and set the
Radius to 2 pixels.
This will blur the
alpha channel
image.
Effect 1: Kinetic Flash Type
Adobe Photoshop CS Type Effects
9
STEP 15. Darkening the
Alpha Channel Image
Choose Image > Adjustments > Levels from
the menu at the top. Move the black and
white tabs at the bottom of the histogram as
shown here. This will further darken the dark
areas of the image.
STEP 17. Selecting in the Shape of the Completed Alpha Channel
Choose Image > Adjustments >
Levels from the menu at the top
and move the black and white
tabs at the bottom of the his-
togram as shown here. This will
make the black areas of the
image wider and the white
stripes narrower.
Choose Alpha 1 from the
Channels Palette while holding
down the
Ctrl key to
create a
selection
frame in the
shape of
the alpha
channel.
STEP 18. Applying a Text Layer Mask
Select the text layer at the very top of the
Layers Palette and click on the Add a Layer
Mask button to create a layer mask in the
shape of the selection frame. Areas that
are not selected will be covered and made
transparent.
Click on the layer icon of the text layer at
the top of the Layers Palette, go to the
Character Palette, click on the Set the Text
Color button, and choose white. Only the top part of the text will appear white.
Effect 1: Kinetic Flash Type
10 Adobe Photoshop CS Type Effects
STEP 19. Flashing Text
Select the text
layer at the very
top of the Layers
Palette and click
on the Add a
Vector Mask but-
ton. Double-click
on the vector
mask, and then
choose Outer
Glow in the Layer
Style Panel.
Set up the Outer Glow, as shown here. Set the Blend Mode to Linear Dodge,
the Opacity to 75%, the Noise to 0%, the color to light yellow (RGB=255, 255,
190), the Spread to 14%, and the Size to 16 px. The white part of the text
makes the text look like it’s flashing.
STEP 20. Strengthening the Flashing Effect
Choose Drop Shadow from the list on
the left side of the Layer Style Panel and
set up the values as shown here. Set the
Blend Mode to Linear Dodge, the color
to white, the Opacity to 100%, the
Distance to 0 px, the Spread to 6%, and
the Size to 4 px. This makes the flashing
effect stronger.
Effect 1: Kinetic Flash Type
Adobe Photoshop CS Type Effects
11
STEP 21. Setting Up the Gradient
Choose the Gradient Tool from
the toolbox, click on the
Foreground Color button, and
set the color to black. In the
option bar at the top, click on the Radial
Gradient button and set the Mode to Color
Burn and the Opacity to 60%, and check
Reverse.
Click on the Gradient Picker arrow toward
the left side of the option bar to open the
Gradient Preset Panel, and choose the Foreground to
Transparent gradient, as shown here. If you can't see
the icon, click on the Option button on the top-right
of the Preset Panel and choose Reset Gradients.
STEP 22. Partial Flashing Text
Select the text layer at the very top of the
Layers Palette. The mask edit icon in front of
the layer indicates that the mask image can
now be edited.
Click on the top-right part of the image, as
shown here, and drag it down to the bot-
tom-left corner to apply the gradient color
to the layer mask image. The black color of
the gradient gets darker the farther away
you get from the point where the mouse
was first clicked, and the image becomes more transparent. The
glow effect also gets weaker the farther away you get.
STEP 23. Setting Up the Gradient Again
In the toolbox, set the foreground color to dark brown
(RGB=104, 23, 0) and the background color to black.
Choose the Gradient Tool, click on the Gradient Picker arrow,
and choose the first gradient icon (Foreground to
Background). Click on the Linear Gradient button on the left
to create a linear gradient. Then, set the Mode to Normal
and the Opacity to 100%, and check Reverse.
Effect 1: Kinetic Flash Type
12 Adobe Photoshop CS Type Effects
STEP 24. Applying the Gradient to the Background
Choose the Background
layer, which is located
at the very bottom of
the Layers Palette.
Click the mouse on the
top-right of the work
window and drag it
down to the bottom-
left corner to apply the
gradient to the back-
ground, as shown here.
STEP 25. Slanting the Text
Click on the layer icon
of the text layer at the
very bottom of the
Layers Palette and click
on the link icon so that
it is visible again. This
will allow you to edit
the layer image and the
mask at the same time.
Click on the link icon in
front of the two
remaining layers to link the three text layers together. Press Ctrl+T to apply the Free Transform command.
Hold down the Ctrl key and drag the handles on the corners of the image to slant the image, as shown here. This will
apply the effects to all three text layers and their masks.
Effect 1: Kinetic Flash Type
Adobe Photoshop CS Type Effects
13
STEP 26. Entering a Title
Choose the Horizontal
Type Tool from the
toolbox and type in
the title.
Choose the font, font
size, and font color in
the Character Palette,
as shown here.
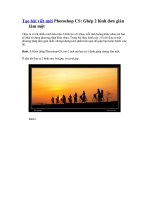
Effect 2: Mosaic Type
The slightly offset characters of this mosaic-type text allow
you to create a slightly irregular rhythm from an otherwise
uniform mosaic. For viewers, this type of text is reminiscent
of fun puzzles.
Effect 2: Mosaic Type
16 Adobe Photoshop CS Type Effects
Mosaic Type