outlook 2003 Part I
Bạn đang xem bản rút gọn của tài liệu. Xem và tải ngay bản đầy đủ của tài liệu tại đây (1.26 MB, 101 trang )
Outlook 2003: Part I
Stephen Moffat, The Mouse Training Company
Download free books
at
S
t
ephen
Moffa
t
,
The Mouse Training
C
ompan
y
Outlook 2003
P
ar
t
I
Download free eBooks at bookboon.com
2
Outlook 2003:
P
ar
t
I
©
2012
S
t
ephen
Moffat & boo k
boon. c om
ISBN
978-87-403-0038-3
C
on
t
en
ts
Introduction 10
1 Understanding Outlook 2003 12
1.1 What is Microsoft Outlook 2003? 13
1.2 Getting started with Outlook 2003 13
1.3 The Outlook 2003 Screen 14
1.4 Shortcut menus 16
1.5 Outlook Shortcuts 18
1.6 Reading Pane 21
1.7 Reading pane options 23
1.8 Microsoft Outlook Help 24
1.9 Ask a Question Box 25
1.10 The Help Window 26
2 Mail Messages 28
2.1 Mail Messages 29
2.2 Composing mail messages 29
2.3 Addressing Messages 31
360
°
t
h
in
k
in
g
.
D i
s
c
o v er
t
h e
t
r
u t
h
at
ww
w
.
d e
l
o
i
t
t e
.
c
a
/
c
a
r
e
e r
s
©
Deloitte
&
T ouche
LLP
and affiliated
entities.
Outlook
2003:
P
ar
t
I
C
on
t
en
ts
Download free eBooks at bookboon.com
4
Click on the ad to read more
2.4 Editing
Message
Text 33
2.5 Formatting text 34
2.6
Spelling
and Grammar Checker 37
2.7 Sending Messages 39
2.8
Saving
unsent messages 39
2.9
Receiving
and reading mail messages 40
2.10 Moving between messages 43
2.11
Replying
to and forwarding messages 43
2.12 Forwarding Messages 44
2.13 Inserting data into a message 45
2.14 E-Mail Accounts 50
2.15 Change an e-mail account name 55
3
Message
Options 57
3.1
Message
Options 58
3.2 Importance 58
3.3 Sensitivity 59
3.4 Ask others to vote in a message 59
3.5 Read and
Delivery
Receipts 60
3.6 Have replies sent to 60
3.7 Do not deliver before 61
3.8 Expiry Date 61
0845 606 9069
r a f .m o
d .uk/ r af r ese r
v es
3.9
Flagging
Messages 61
3.10 AutoSignature 64
3.11
Message
Icons 68
4 Organising your mail 71
4.1 Organising Mail Messages 72
4.2 Deleting Messages 72
4.3 Working with Folders 73
4.4 Moving Messages 77
4.5 Public Folders 79
4.6 Sorting items 82
4.7 Finding Items 84
4.8 Filtering Items 86
4.9 Mailbox Cleanup 88
4.10 Out of Office 88
4.11 Marking
Messages
as Read and Unread 91
4.12 Printing Messages 92
4.13
Recalling
Sent Messages 92
4.14 Changing Column Headings 94
Bring
your
talent
and
passion
to a
global
organization
at
the forefront
of
business, technology
and
innovation.
Discover how
great
you
can
be.
V
i
s
i
t
a
cc
e
n
t
u
r
e
.
c
o
m
/
boo
k
boo
n
©
2013
Accen
tur
e.
All
rights
r
eserv
ed.
5
Address
Books
&
Contacts Part II
5.1 Address Books and
C
o
nt
ac
ts Part
II
5.2 Global Address Book Part
II
5.3 Personal Address Book Part
II
5.4 Creating a personal distribution list Part
II
5.5 Editing a Personal Distribution List Part
II
5.6
C
o
nt
ac
ts Part
II
5.7
Viewing
C
o
nt
ac
ts Part
II
5.8 E-mailing a
C
o
nt
ac
t
Part
II
5.9 Locating
C
o
nt
ac
ts Part
II
6 Using the Calendar Part II
6.1 Using the
C
a
len
d
a
r
Part
II
6.2 Moving
Between
Dates Part
II
6.3 Scheduling
A
pp
o
in
t
m
en
ts Part
II
6.4 Recurring
A
pp
o
in
t
m
en
ts Part
II
6.5 Booking Meetings Part
II
6.6 Group Schedules Part
II
6.7 Using the TaskPad Part
II
6.8 Using Categories Part
II
6.9 Calendar
C
o
lo
ur
in
g
Part
II
6.10
Viewing
the
C
a
len
d
a
r
Part
II
G O
T
-
T
H
E
-
ENE R
G
Y
-
T
O
-
L
E
A
D
.
C
OM
W e beli e v e
t h at
energy supplie r
s should
be renewabl e ,
t o o .
W e are there f ore
loo k
i ng
fo r
ent h
u s
i
a
s
tic
new
c o ll e agues with
plen t
y
o f
id e a s who
want
t o
joi n
R W E
in
c h anging
the
wo r
l d .
Vi s it
us online
t o find
out
w h at
w e are o f
f e r i ng
and
h o w
w e are w o rk
ing
t ogether t o
en s ure the
energy o f
the
fu t
u
r e
.
6.11 Printing the
C
a
len
d
a
r
Part
II
6.12 Customising the Appearance of
C
a
len
d
a
r
Part
II
7
The Task
L
ist
Part II
7.1 The Tasks List Part
II
7.2 Working with Tasks Part
II
7.3 Editing Tasks Part
II
7.4 Deleting a Task Part
II
7.5
Viewing
Tasks Part
II
7.6 Marking Tasks as
C
o
m
p
let
e
Part
II
7.7 Assigning Tasks Part
II
8
N
o
t
es
Part II
8.1
No
t
es
Part
II
8.2 Creating, Editing and Deleting
No
t
es
Part
II
8.3 Changing the
View
of
n
o
t
es
Part
II
8.4 Changing Notes Defaults Part
II
9
Sharing
Folders Part II
9.1 Sharing Folders Part
II
9.2 Delegate
Access
p
ermi
s
sio
n
s
Part
II
9.3 Sharing Private Folders Part
II
10 Defining Views Part
II
10.1 Define Views Part
II
11 Routing Slips Part
II
11.1 Routing Slips Part
II
11.2 To route a file Part
II
11.3
Review
tracked changes and
co
mm
en
ts Part
II
12
Work
Offline Part
II
12.1 Work Offline Part
II
12.2 Remote Mail Part
II
12.3
Offline
folders Part
II
12.4 Work
offline
using Exchange Server Part
II
Introduction
Outlook
’2003
is a powerful Information management application that
allows
you to co-ordinate projects using a variety
of different tools.
These
range from E-mail for communication, to the Calendar, which can be used for time
m
a
n
a
g
em
en
t.
All
graphics related to Microsoft in this book is in compliance with Microsoft guidelines and thus permitted by
Microsoft.
How
to
use
this guide
This manual should be used as a point of reference following attendance of the Outlook
’2003
training course. It
covers all the topics taught and aims to act as a support aid for any tasks carried out by the user after the course.
The manual is divided into sections, each section covering an aspect of the course. The table of contents lists the page
numbers of each section and the table of figures indicates the pages containing tables and diagrams.
Objectives
Sections begin with a list of objectives each with its own check box so that you can mark off those topics that you
a
r
e
familiar with following the
t
rainin
g
.
Instructions
Those
who have already used a similar application before may not need to read explanations on what each command
does, but would rather skip straight to the instructions to find out how to do it. Look out for the hand icon Fwhich
precedes a list of
in
s
t
r
uc
t
io
n
s.
Keyboard
Keys
are referred to throughout the manual in the following
wa
y
:
[ENTER] – denotes the return or enter key,
[DELETE]
– denotes the Delete key and so
o
n.
Where a command requires two keys to be pressed, the manual displays this as
follows: [CTRL][P] – this means press the letter “p” while holding down the Control key.
C
ommands
When a command is referred to in the manual, the following distinctions have been made:
When menu commands are
referred
to, the manual will
refer
you to the menu
bar
– “Choose File from the menu
b
a
r
and then
P
r
in
t
”
.
Outlook
2003:
P
ar
t
I
I
n
tr
oduc
tion
Download free eBooks at bookboon.com
10
When dialog box options are
referred
to, the following style has been used for the text – “In the Page Range
s
ec
t
io
n
of the Print dialog, click the
Current
Page
opt
i
o
n
”
Notes
Within each section, any items that need further explanation or extra attention devoted to them are denoted by
s
h
adin
g
.
For example:
“
O
u
t
l
oo
k
will not let you
close
a mail
message
that you
h
a
v
en
’
t
already saved without prompting you to
s
a
v
e
.
”
1
Understanding Outlook
2003
Objec
tiv
es:
By
the end of this section you will be able to:
• Understand the uses of Microsoft Outlook
• Get started
• Recognise Outlook screen elements
• Access Help
Outlook
2003:
P
ar
t
I Understanding Outlook 2003
1.1
W
ha
t
is Microsoft Outlook
2003?
Outlook
’2003
is an information management application that helps the user to co-ordinate
messages,
calendar
activities, contacts and tasks. It comprises a mailbox, a calendar, a contact list, notes and a journal. Outlook is
designed for
b
o
t
h
stand-alone computers and personal computer networks. If the user is connected to a network
they can share
their
information with
o
t
h
er
s.
Outlook comes with a transport application known as
Exchange.
A transport application enables the
flow
of
inf
o
r
m
a
t
io
n
and must be installed to use
O
u
t
lo
o
k
’
s
e-mail feature. E-mail is sent in and out of mailboxes in the same
way as physical mail goes through a postal
service. Mailboxes
can be set up for individual users or for multiple users.
All
networked users with mail accounts can share information by using Outlook and a transport application such as
Exchange.
1.2
Getting
star
t
ed
with
Outlook
2003
When Outlook 2003 is installed, the Setup program looks for the
u
s
er
’
s
user
profile.
A user profile is a group of
settings that define the setup of Outlook for a particular user. Only one user
profile
is needed to
access
Outlook,
however,
m
u
l
t
i
p
le
user profiles can be set up each with their own unique settings,
e.g.
if there is more than one person
using Outlook, each user should have their own user profile set up. The
u
s
er
’
s
administrator usually creates user
profiles.
When setting up user
profiles,
certain information
services
can be included. An information
service
is a group of
settings that enables the user to send, store and receive messages and items, and indicates where to store addresses,
e.g. in a Personal Address Book.
When Outlook 2003 is launched, depending on the configuration, the user may be asked to enter a password.
To enter a
p
ass
w
o
rd:
Keyboard
• Type the relevant password
• Press [ENTER]
When Outlook is started, the
Office
Assistant
displays
a dialog box welcoming the user and
offering
help on certain
topics
1.3
The Outlook 2003
S
creen
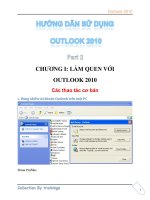
When Outlook 2003 is first started, the user is presented with the following screen:
Title
bar
The Title Bar appears at the top of the Outlook window, registering the title of the application and the selected
O
u
t
lo
o
k
folder. If the Outlook window is not maximised, by positioning the mouse over the title bar and clicking and
dragging, you can move the window to a new location on the screen.
M
enus
The
menu bar contains menus
giving access
to
all
the commands that can be carried out in Outlook.
There
are two
m
et
h
o
d
s
for
accessing
menus and their options - the menu bar and the shortcut
m
en
u
.
Menu Bar
The menu bar displays all options available within Outlook. You can access a menu by clicking its name with the
left mouse
b
u
tt
o
n.
To select a menu bar menu:
Mouse
• Click on the menu title. A pull-down menu will appear listing all options
available.
To reveal the rest of
t
h
e
menu click on the arrows at the bottom of the
m
en
u
.
• Click the required menu
o
p
t
io
n.
Or
Keyboard
• Hold down the [ALT] key and press the underlined letter of the menu title.
• Type the underlined character of the required
o
p
t
io
n.
With
us you
can
shape
the
future.
Eve r
y
single
da
y
.
For more
information
go
to:
ww w .eon- c
a r ee r .com
Your energy
shapes
the future.
Download free eBooks at bookboon.com
Outlook
2003:
P
ar
t
I Understanding Outlook 2003
15
Click on the ad to read
more
Outlook
2003:
P
ar
t
I Understanding Outlook 2003
1.4
Shor
t
cut
menus
The shortcut menus can only be accessed when the mouse is positioned over a message or another item and you click
the right mouse button. The options that appear on the shortcut menus may differ depending on what you have
selected.
To select a shortcut menu option:
Mouse
• Click with the right mouse button over an item. A pull-down menu will appear listing all options available.
• Click the required menu
o
p
t
io
n.
T
oolbars
Outlook has three different toolbars that can be displayed on the screen, the Standard toolbar, the Advanced toolbar
a
n
d
the Web
toolbar.
The
Standard toolbar contains buttons for commonly carried out operations such as creating new
messages,
a
pp
o
in
t
m
en
ts and actioning the selected items, whereas Advanced toolbar buttons are devoted to navigation,
automation
a
n
d
customisation of Outlook. When you hover your mouse over any toolbar button, Outlook will
display a description of what the button does.
Show and
hide toolbars
You can call up many more toolbars while you are working with Word giving you
access
to buttons that relate to
specific tasks.
Download free eBooks at bookboon.com
17
To show a
t
oo
l
b
a
r
:
Mouse
• Click the right mouse button anywhere over a displayed
toolbar.
• From the resulting menu, click the toolbar you want to show.
• To hide a
t
oo
l
b
a
r
:
Mouse
• Click the right mouse button anywhere over a displayed
toolbar.
• The resulting menu will show you the currently displayed toolbars with a tick symbol next to them. Click
t
h
e
toolbar you want to hide.
Viewing Information in Outlook
Default
Outlook
Folder
Description
Outlook
T
oda
y
Enables
the
user
to
keep track
of your
appointments and
tasks
in one windo
w
along
with
keeping
you informed of the
you
ha
v
e
.
Inbox
Receives
your incoming
messages,
enabling
the
user
to
send and
receive
messages
.
C
alendar
Enables
the
user
to
schedule appointments and
ev
en
ts
.
C
on
tac
ts
Enables
the
user
to
enter and keep track
of
business and personal
c
on
tac
ts
.
T
asks
Enables
the
user
to
cr
ea
t
e
and manage
tasks
.
Journal
Records
all
items
as
they
oc
cur
,
such as accessing an office
file
,
sending an
e-
mail message
Notes
Electronic “sticky
not
es
”
,
storing text information that
enables
the
user
to
quickly
record
r
eminders
.
Deleted
items
Contains any items
that the
user deletes
in
Outlook before
they
are
permanently
delet
ed
.
S
en
t
Items
Keeps copies
of
messages
that
have been
sen
t
by the
user
.
Outbox
Temporarily contains message
that the
user sends
until they
are
deliv
er
ed
.
Drafts
S
t
or
es
incomplete
messages enabling
the
user
to go
back
to them to complete
and send
later
on.
View
P
ane
To
view
and work with the items of information stored in a particular folder, you need to open that folder. Outlook
will then display the
f
o
lder
’
s
items in the View pane of the Outlook window and the Outlook menu commands and
t
oo
l
b
a
r
buttons will change to provide the commands you need to manage the type of information kept in that folder.
1.5
Outlook
Shor
t
cuts
One of the
fastest ways
to open an Outlook folder is to use Shortcuts. Users can add shortcut groups that
quickly
open
their
favourite and most frequently used folders. The user can add, remove or change the size of the shortcuts. The
S
h
o
r
t
c
u
ts section in the Navigation pane can be divided into groups to help organise the
u
s
er
’
s
information. These
groups
co
nt
a
in
related shortcuts. Users can also create their own
g
r
o
u
ps.
To switch to shortcuts and
Groups: Mouse
•
C
lic
k
t
h
e
S
h
o
r
t
c
u
ts
ico
n
a
t
t
h
e
b
o
tt
o
m
o
f
t
h
e
n
a
v
iga
t
io
n
• The navigation pane will display hyperlinks allowing you to set up a shortcut to a particular item, or a
g
r
o
u
p
heading under which you can store a collection of
s
h
o
r
t
c
u
ts.
K
e
ybo
a
r
d
• Press [CTRL] 7
SMS
SMS
from
from
your
your
computer
computer
Sync'd
Sync'd
with
with
your
your
Android
Android
phone
phone
&
&
number
number
Go
to
Browser T
exting.com
and
start
texting
from
your
computer!
BrowserT
exting
Download free eBooks at bookboon.com
18
Click on the ad to read
more
Outlook
2003:
P
ar
t
I Understanding Outlook 2003
To set up shortcuts:
Mouse
• Click the Add New Shortcut hyperlink from the Navigation Pane.
• Choose the item you wish to make a shortcut for from the Add to Navigation Pane dialog box.
• Click OK. The shortcut will appear under the heading “Outlook shortcuts” at the top of the Navigation Pane.
To set up Groups:
Mouse
• Click the Add New Group hyperlink from the Navigation Pane.
• Type in a heading that best describes the group of shortcuts you will assign to the group – e.g.
Messages
a
n
d
schedule.
• The Group will appear in alphabetical order in the top half of the Navigation Pane.
If the Navigation pane is not
displayed, choose
the View, Navigation
Pane
command from the menu bar.
To add shortcuts to
groups: Mouse
• Right-click over the group name and choose Add New
S
h
o
r
t
c
u
t.
•
Select
the required shortcut from the resulting dialog box.
Or
• If the shortcut already exists drag and drop it over the group
n
a
m
e
.
Download free eBooks at bookboon.com
20
To remove a
shortcut: Mouse
• Right-click over the shortcut and choose Delete shortcut from the
menu
To remove a group:
Mouse
• Right-click over the group name and choose Remove Group from the
m
en
u
.
Removing
a
group
will
also delete
all
shortcuts belonging
to that
g
ro
u
p
To move a shortcut within the same
group: Mouse
• Click and drag the shortcut required to a new location in the Navigation Pane.
•
Release
the
mo
u
s
e
.
To move a shortcut to a different
group: Mouse
• Click and drag the shortcut onto the required group. The group expands to display its
co
nt
en
ts.
• Drag the shortcut to the required location within the
g
r
o
u
p
.
•
Release
the
mo
u
s
e
.
To rename a group on the Outlook
b
a
r
:
Menu
• Click the right mouse button on the group to rename, choose Rename
G
r
o
u
p
.
• Type a new name for the group and press [ENTER].
Previewing
Items
You can view the contents of an Outlook item without having to open it in a
f
o
r
m.
AutoPreview
AutoPreview allows you to see the first three lines of messages in the main Outlook window.
To use AutoPreview
Mouse
• On the View menu, click AutoPreview or click the AutoPreview icon on the advanced
toolbar.
• To hide the AutoPreview, repeat the above step.
To
preview
the first three
lines
of unread
messages
only, on the View menu, point to
Arrange
By, Current View, and then
click
Customize Current View.
Click
Other
Settings,
and then
click Preview
unread
i
t
ems.
1.6
R
eading
P
ane
In the Reading pane, you can read the content of an item, open attachments,
follow
a hyperlink, and respond to
m
e
et
in
g
requests without having to open it in a separate
f
o
r
m.
To use Reading
p
a
ne
Mouse
• Click the Reading pane icon on the advanced
toolbar.
Who
is y our ta r g et
g r oup?
And h o w
can w e
r ea c h them?
At
B ookboon, y ou can segment
the
e xact
right
audience f or
y our ad v ertising campaign.
Our e B ooks o f f er
in-book ad v ertising spot
to
rea c h
the
right
candidate.
Con t
act us to
hear
more
Download free eBooks at bookboon.com
21
Click on the ad to read
more
Outlook
2003:
P
ar
t
I Understanding Outlook 2003
• To hide the Reading pane, repeat this step.
To position the Reading pane
Mouse
• Choose,
View,
Reading Pane from the menu
b
a
r
.
• Choose the Right or Bottom from the
s
u
b-m
en
u
.
Download free eBooks at bookboon.com
23
1.7
R
eading
pane
options
You can set options to determine how
messages
are treated when
viewed
in the Reading Pane – for example, do you
wa
nt
them to appear as read or stay
unr
e
ad
.
To set Reading Pane
o
p
t
i
o
ns
Mouse
• Choose Tools, Options from the menu
b
a
r
.
• Click the Other
t
a
b
• Click the Reading Pane…
b
u
tt
o
n.
• Set the options you require and click OK.
1.8
Microsoft Outlook
Help
Outlook
offers several
quick
ways
to get help when performing particular
tasks. You
can
select
from a
list
of topics
p
r
o
v
ide
d
by
Help, or you can
even
type a help request in plain
English,
and Outlook
will
supply the answer using the
Answer
W
iz
a
r
d.
The Office
Assistant
In Outlook 2003, you can use the Assistant to get help quickly by typing plain English questions or phrases.
Download free eBooks at bookboon.com
24
Click on the ad to read
more
Outlook
2003:
P
ar
t
I Understanding Outlook 2003