Paint a bird pot
Bạn đang xem bản rút gọn của tài liệu. Xem và tải ngay bản đầy đủ của tài liệu tại đây (65.05 KB, 6 trang )
Paint a bird
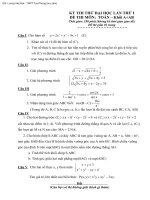
Our subject for this exercise is this Whistling Kite.
All you will need for this exercise are two tubes of paint and two brushes
plus a sheet of watercolor paper and a pencil.
Materials
Indigo
Burnt Sienna
1" flat brush
#2 liner brush
HB lead pencil
Watch this demonstration on RealPlayer
Step 1
The first step is to loosely draw the basic shapes. The idea is not to carefully
draw every detail then fill it in, but to get a rough guideline for the major
shapes. Don't worry about accurate details, but concentrate on accurate
proportions.
(HB lead pencil)
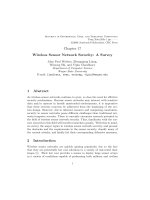
Step 2
Once you are satisfied with your drawing, a very pale wash of Burnt Sienna
mixed with a tiny amount of Indigo can be splashed over the body. Into this
damp wash place a little Burnt Sienna and a grey mixture to slightly model
the form. A darker grey forms the beak - a little lighter on top.
(1" Flat brush) Finer detailed areas such as the beak may at first seem
awkward to paint with the 1" brush but with practice you can do amazing
things with the corner of one of these
(greys in this painting are mixed from the two colours)
Step 3
Some more detail can be added with a warm grey - shadows under, and at
the back of the head and the suggestion of feathers on the wing. Add the eye
with the liner brush and a dark mixture of the two colours. Dont forget to
leave a couple of small white patches for reflections.
(1" Flat brush and liner brush)
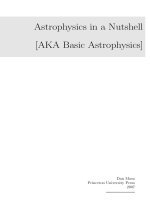
Step 4
Further modelling with Burnt Sienna and a warm grey give the bird a nice
solid form. Feather textures add interest to the wing. The liner brush can be
used to suggest feathers around the beak eye and head. Splashing some
warm grey below the chest area makes a nice random transition from white
paper to the body of the bird.
(1" Flat brush and liner brush)
Step 5
The final step is to add the background. Because the bird is very warm a
cool Indigo background will give more impact. Although the background
looks simple and accidental, a fair amount of thought must go into arranging
tonal contrast in the right places.
In order to draw attention to the area around the eye and beak, the darkest
part of the background is placed behind the lightest part of the head. Below
the dark beak and behind the shadow on the back of the neck the background
is much lighter. Putting a slight diagonal thrust / through the background
also helps draw attention to the head and balance the opposing diagonal of
the bird \.
(1" Flat brush) softening the edges on this background wash is made much
easier when you place an old towel under your work. It allows you to
quickly and simply adjust the amount of water in your brush.
Good luck and have fun with this little exercise