Adobe Dreamweaver CS3 Unleashed- P8 pptx
Bạn đang xem bản rút gọn của tài liệu. Xem và tải ngay bản đầy đủ của tài liệu tại đây (690.16 KB, 50 trang )
Tip
If you're having trouble setting the guides at the exact positions, you can double-click
the guide. Doing this opens the Move Guide dialog, which allows you to precisely position
the guide based on a pixel value you set.
3.
With the guides now set, place your cursor on the page and then select the Layout Table icon within
the Insert bar's Layout category. Your cursor will change to a crosshair.
4.
Using the new tool, draw a square by clicking, holding, and dragging from the top left-most edge,
moving down and right until the table's width spans the 697 pixel width and 227 pixel height,
consuming the first rectangular area outlined by the guides. Although Dreamweaver doesn't allow you
to set an ID for a table in Layout mode, we'll assume this is the Header table. Later, we'll explore the
Autostretch option to make this table span 100% of the browser region. The result will resemble Figure
5.39.
Figure 5.39. Draw a new table on the page that spans 697 pixels wide and 227 pixels
high.
[View full size image]
Note
To make it easier to draw tables, hit Ctrl+Shift+I ( +Shift+I) to hide all visual aids
that seem to get in the way and prevent you from drawing a new table under the
existing one. After you've finished drawing all your tables, you can select Ctrl+Shift+I (
+Shift+I) again to redisplay all the visual aids.
5.
Draw another table below the Header table. To do this, select the Draw Layout Table icon again, then
click, hold, and drag from the top left-most edge (below the existing Header table), moving down and
right until the table's width snaps to the guide set at 697 pixels and snaps to the guide at 383 pixels.
The result will resemble Figure 5.40.
Figure 5.40. Draw a new table on the page that spans 697 pixels wide and reaches
the 383 pixel guide.
[View full size image]
6.
With your table now in place, switch to Standard mode to see the table transformation. You can
temporarily hide the guides by choosing View, Guides, Show Guides. As you can see from Figure 5.41,
the table looks exactly as it would had you added it using the Table dialog. The difference, in this case,
is that the drawing tools are a bit friendlier to use—and much more flexible to manipulate—than tables
would be in Standard mode.
Figure 5.41. Even though it doesn't look like much of a table in Layout mode, the
transformation is exact within Standard mode.
[View full size image]
7.
Switch back to Layout mode to continue the editing process for the new table.
Note
If you draw a layout table in the middle of an empty document, Dreamweaver will create it as a table
nested inside a larger table. If this isn't what you intended to happen, undo, and try redrawing.
With the new table drawn and firmly in place, manipulating properties like width and height in Layout mode
are effortless and much more straightforward than they are in Standard mode. For instance, to change the
width or height, we would simply click, hold, and drag from the table's selection handles until we've reached
the desired width or height. Although this is certainly simple enough, it's even much more precise when you
use the features outlined within the Property inspector. As you can see from Figure 5.42, these properties
are slightly different from those provided when the table is in Standard mode.
Figure 5.42. The Property inspector supports basic table formatting options while in Layout
mode.
[View full size image]
The following list outlines the properties shown in callouts within Figure 5.42 in more detail:
Fixed Width and Height— Sets a width and height in pixels for your table. The table is considered a
fixed width and remains the specific width and height even if the user expands the page within the
browser.
Autostretch— Autostretch is the term given to tables in Layout mode that are set to percentage
values. Our Header table (the layout table we created first), for instance, could be considered an
autostretch table because it will stretch the width of the browser window regardless of browser width.
Again, we'll autostretch this table soon.
Background Color— Sets the background color of the table.
Cell Padding and Cell Spacing— Sets the table's cell padding or cell spacing based on a pixel value
entered within these text boxes. To make our table consistent with the Content table we inserted
within the index.html page, select the second layout table and enter values of 3 for cell padding and
5 for cell spacing.
Clear Row Heights— Enables you to quickly remove the height of the table. This option is also
available from the Table Widths Visual Aid's submenu.
Make All Widths Consistent— If you have fixed-width cells in your layout, choosing this option
makes the cell widths match their apparent width on the screen. When you enable the Make All Widths
Consistent option, Dreamweaver resets the width specified in the HTML for each cell in the table to
match the width of the content within that cell.
Remove All Spacer Images— Choosing this option removes spacer images from your layout table.
Used specifically with autostreched tables, spacer images are transparent images that are used to
control the spacing in your layout.
Remove Nesting— Removes a nested table without losing its contents. When the nested table is
removed, the layout cells (mentioned in the next section) become part of the outer table.
Class— You can apply CSS styles to your tables by selecting from a created class within this menu.
CSS is covered in more detail in the next chapter.
Now that you have an idea as to how tables are inserted into the page, let's move on to adding cells.
Drawing Cells
After you've drawn your table on the page, you're ready to begin structuring the overall layout of the table
by drawing cells. To draw cells within your table, follow these steps:
1.
Select a table to draw a layout cell into. Now select the Draw Layout Cell icon from the Insert bar. Your
cursor will immediately change to the crosshair when you mouse over the layout table.
2.
Draw a cell within the first Header table that spans 697 pixels wide by 227 pixels high. Again, the
layout cell will snap to the guides. The result will appear similar to Figure 5.43.
Figure 5.43. Draw a layout cell that covers the header table.
[View full size image]
3.
Draw a cell within the Content table that spans from the top left all the way over to the far right and
down to the first guide set at 254 pixels. This cell will hold the subheader_welcome.gif image.
4.
Draw another cell that spans a square of about 100 pixels wide and reaches the bottom of the Content
table. This cell will eventually hold the employee's headshot image.
5.
Draw a third cell to consume the final area of our Content table. This cell will hold the bio text for the
employee. When you've finished, the result of drawing three new cells within the Content table will
resemble Figure 5.44.
Figure 5.44. Draw three new cells within the drawn Content table.
[View full size image]
You'll begin to notice a few interesting aspects when drawing cells. First, the cells attempt to snap
themselves to the border of the layout table when you're within eight pixels of the border. Second, the cell
can't be resized past the boundary of its containing table. Also, you'll notice that a cell is highlighted in white
whereas areas not defined as cells are highlighted gray. (You may or may not see the gray areas. It
ultimately depends on how you drew the cells within the table.) This gray area is part of the layout table and
cannot have content added to it within Layout mode. In general, keep these points in mind when drawing
cells within a Layout Table:
Cells and nested tables will automatically snap to existing cells when within eight pixels of an existing
cell or guide.
A layout table cannot be resized so that it would be smaller than the cells it contains.
A layout cell cannot be resized beyond the borders of its containing table.
No overlapping is allowed.
A layout cell is always at least as large as the content it contains.
After the cells have been added to the Layout Table, you can select them to modify their properties within
the Property inspector. To select a cell within a layout table, hold down the Ctrl ( ) key and select the cell
you want to make modifications to. You'll notice that after you select the cell, the cell highlights from the
blue border (represents the drawn cell) to the red border (represents the selected cell). With the cell
selected, the Property inspector will change to accommodate property modifications, also shown within
callouts in Figure 5.45.
Figure 5.45. The Layout Cell Property inspector supports various property modifications while in
Layout mode.
[View full size image]
A complete list of the properties supported by the Layout Cell Property inspector in Layout mode is given
next:
Fixed Width and Height— Sets a width and height in pixels for your cell. The cell is considered a
fixed width and remains the specific width and height even if the user expands the page within the
browser.
Autostretch— Assign a value within this text box to have the cell span a width of 100% within its
layout table.
Background Color— Sets the background color of the cell.
Horizontal and Vertical Alignment— Sets the horizontal alignment (Left, Center, Right) and the
vertical alignment (Top, Middle, Bottom, Baseline) of the content within the cell. Layout cells always
default to a vertical alignment of Top.
No wrap— Check this box to prevent text within a cell from wrapping to the next line.
Class— You can apply CSS styles to your cells by selecting from a created class within this menu. CSS
is covered with more detail in the next chapter.
With your cells now created, you're ready to begin adding content.
Adding Content to Layout Cells
Adding content to layout cells is just as easy as it would be if the table were in Standard mode. To add
content such as images, select the image from the Site Files panel and drag it into the cell. For instance, I'll
drag the header_withnav.gif image into the Header cell. Next, I'll drag the subheader_welcome.gif image
into the first cell of the Content table. Finally, I'll drag the head_adatheadminassistant.gif into the second
cell. When finished, your design should resemble Figure 5.46.
Figure 5.46. You can add images to your layout cells by dragging them over from the Files panel.
[View full size image]
Adding text is just as easy. For instance, you can open the companydirectory.txt file located within the
Assets folder, copy Ada's bio, and then paste it into the cell next to her picture. You can format the content
after it's in the cell as well. When you're finished, your design should resemble mine, pictured in Figure 5.47.
Figure 5.47. Adding text into a layout cell is a matter of copying and pasting.
[View full size image]
Of course, Ada isn't the only employee within our directory. The problem becomes adding more rows to our
layout table. In Standard mode, we had numerous options for adding a new row within our table. For
instance, we could place our cursor into the last cell and press Tab to create a new row; we could access the
Insert Row option from the Table submenu in both the context and Modify menus; and we could also use the
Insert Rows or Columns dialog available from both the context and Modify menus.
The Layout mode, however, doesn't support these options. Instead, we must use the Insert Row Above or
Insert Row Below buttons located within the Layout category of the Insert bar. Clicking one of these
effectively creates a new row within our layout table. To use this feature, place your cursor in the last cell
and click the Insert Row Below button. A new row with the same dimensions as the previous row will be
added directly underneath (see Figure 5.48).
Figure 5.48. Use the Insert Row Below button within the Layout category of the Insert bar to
create a new row within a layout table.
[View full size image]
Now repeat the same process, adding Agnes's picture and her bio. When you're done with Agnes, add a new
row and continue the process until you have all the bios added to the page. When you're finished, you can
switch to Standard mode and format the cells to your liking.
Tip
Aside from just adding new rows above or below the existing layout cell, you can also use the Insert
Column to the Left and Insert Column to the Right buttons to create new columns within your layout
table.
Working with Autostretch Tables
As I mentioned earlier, Dreamweaver refers to tables and cells that span a width of 100% as Autostretch
tables in Layout mode. Although tables and cells are assigned fixed widths when they're drawn on the page,
you can always convert a fixed width table or cell to Autostretch by selecting the Autostretch option button
within the Property inspector when either the layout table or layout cell is selected. A second option is to
choose the Make Column Autostretch option from the Column Widths Visual Aid's menu.
To demonstrate the use of Autostretch, select the Header layout table. Next, click the Autostretch option
button within the Property inspector. The Choose Spacer Image dialog will appear (see Figure 5.49).
Figure 5.49. Selecting the Autostretch option button in the Property Inspector opens the Create
Spacer Image dialog.
Spacer images are generally 1 pixel by 1 pixel transparent GIF images and can be inserted into a table cell
and given a fixed width attribute in pixels. This stabilizes the column containing that cell, preventing it from
shrinking any smaller than the dimensions of the spacer. If you define a column as autostretch, and other
columns in the table don't have some sort of content in them propping them open, the stretching column
will shrink them down to nothing, regardless of what their fixed pixel widths are. If your table's fixed
columns contain content, such as images, this will keep them from shrinking. But in case they don't, this is
the time to use a spacer image. As you can see from Figure 5.49, the Choose Spacer Image dialog contains
the following options:
Create a spacer image file— Choose this option to have Dreamweaver automatically create the 1
pixel by 1 pixel transparent GIF image for you. Dreamweaver places this image within the Default
Images folder or if one is not defined, within the root of your project.
Use an existing spacer image file— Choose this option if you've created a spacer image already
and would prefer to use it.
Don't use spacer images for autostretch tables— Choose this option when you'd prefer not to use
spacer images. This option is handy when you already have an image within a table or cell that is
marked as autostretch.
You can also add a spacer image by selecting the Add Spacer Image option from the Column Widths Visual
Aid's menu. If you'd prefer to remove existing spacer images from all columns in a table, you can select the
Remove All Spacer Images option from the Table Widths Visual Aid's submenu or select the Remove All
Spacer Images icon from the Property inspector.
You can set Dreamweaver to automatically add spacer images when working with autostretch tables by
opening the Layout Mode category within the Preferences window. Remember from Chapter 4, "Defining
Preferences," the Layout Mode category contains options for setting color preferences in Layout mode as
well as various spacer image preferences, including an option button that enables you to tell Dreamweaver
to always use a spacer image when working with autostretch tables. Refer to the previous chapter for more
information.
To round out our design, choose the Don't Use Spacer Images for Autostretch Tables option and click OK.
You'll notice the Header layout table now stretches to consume 100% of the Document window. To add the
background image to the table, switch to the Standard mode, select the table, and use the point-to-file icon
within the Bg Image text box of the Property inspector to point to the header_bg.gif image file within the
Files panel. The result will resemble Figure 5.50.
Figure 5.50. Add the header_bg.gif image as a background to the header table of our design.
[View full size image]
That's it! You've effectively created a table-based structure for your site using the Layout mode.
Importing Tabular Data
Earlier in the chapter, we built a table within index.html to hold the company's solution offerings.
Remember that we created a table with six rows and three columns and then manually added solutions
images and descriptive text. Numerous options exist for making this solution more dynamic. One solution,
using a database to feed solution offerings to a table within the main page, will be discussed in Part V,
"Dynamic Web Page Development." For now, let's discuss a simple alternative, the Import Tabular Data
feature, available within Dreamweaver's Insert menu.
The Import Tabular Data option, available by choosing Insert, Table Objects, Import Tabular Data, enables
you to quickly build an HTML table based on preformatted tab-, comma-, semicolon-, or colon-delimited
files. This means that Mike over in Marketing can maintain a spreadsheet of the company's solution
offerings. When he's ready to have a set of new offerings posted on the website, he can export his
spreadsheet to one of the delimited options, and then send it to Wally the webmaster for quick import via
the Import Tabular Data feature.
For our example, we'll use a tab-delimited file located within the Assets folder called
solutions_delimited.txt. Opening the file reveals that the text within the file is, in fact, separated by
tabs similar to Figure 5.51.
Figure 5.51. A tab-delimited file contains text separated by tabs.
[View full size image]
Dreamweaver, recognizing that the file is separated by tabs, will pick apart all text elements within this file
and place them into their own cells within a new table. To see this feature for yourself, first open
index.html, remove the existing company events table, leaving your cursor within the cell, and choose
Insert, Table Objects, Import Tabular Data. The Import Tabular Data dialog box will appear (see Figure
5.52).
Figure 5.52. The Import Tabular Data dialog allows you to import a file based on a delimiter
option and then format the table that will be created for the content.
Looking at the dialog, you'll notice that it contains options for importing the file to use, choosing a delimiter
option, and then formatting the table that will be created for the content. The complete list of functionality
exposed by the dialog is outlined next:
Data file— Click the Browse button from this file field to look for and select the file to use. For our
example, browse to the solutions_delimited.txt file located within the Assets folder.
Delimiter— Choose a delimiter option. Options include Tab, Comma, Semicolon, Colon, and Other.
Choosing Other enables a text box allowing you to type in the delimiter symbol. For our example
choose Tab.
Table width— Choose the Fit to Data option button to have the newly generated table added to the
page with no widths specified. Because no widths will be specified, the table will be as wide as the
longest text element within the cells. You can also choose the Set option to manually specify a width in
either pixels or a percentage. For example, choose the Set to Radio button, type the value 100 into
the text box, and choose the Percent option from the menu.
Cell padding and Cell spacing— Assigns a cell padding or cell spacing or both to your table. For our
example, enter 2 for cell padding and 0 for cell spacing.
Format top row— Select an option from this menu to format the top row of your table if you have
one. Options in this list include Bold, Italic, and Bold and Italic. For our example, leave this as is.
Border— Enter a value within this text box to assign a border to your table. For our example, enter 0.
When you've finished reviewing the options and have made the appropriate additions and selections, click
OK. The new table will be added to your page. The page should look like Figure 5.53.
Figure 5.53. The new table is created based on the content within our tab-delimited file.
[View full size image]
The final task is to format the table, add a new column in front of the existing content, and then add the
logos to the cells within the new column. When you're finished, the table will resemble Figure 5.54.
Figure 5.54. Format the table, add a new column before the content, and add the product icons to
the cells within the new column.
[View full size image]
Sorting Tables
In the previous section, we imported data that created a table with three rows of content. Imagine that
instead, you imported data that created hundreds of rows within a table. Even worse, imagine that all your
rows were unsorted within the table. Trying to manually sort a table that contained hundreds of rows could
take hours. Instead, you can use the Sort Table command to have Dreamweaver automatically sort the
table based on a column that you choose. To use this feature, select the newly created solutions table and
choose the Sort Table command available from the Commands menu. The Sort Table dialog will appear
similar to Figure 5.55.
Figure 5.55. The Sort Table command allows you to sort a table based on a prespecified column.
[View full size image]
As you can see from Figure 5.55, the Sort Table command allows you to sort the table based on a primary
and secondary column. A complete list of features is outlined next:
Sort by and Order lists— Choose an option from the Sort list to specify which column from the table
the sort will be performed on. Furthermore, you can select options from the Order menus to specify
how the sort should be performed. You can perform alphabetic and numeric sorts and then choose
whether to sort the values in the column in an ascending or descending order.
Then by and Order lists— Choose a column from the Then By list when you want to perform a sort
on a second column after the primary sort has been complete. Again, you can set the order of the sort
on the secondary column.
Sort includes the first row— Generally the first row of a table contains a header describing the
content within the columns. If your table doesn't, you can include the first row in the sort by choosing
this check box.
Sort header rows— Check this option to sort all the rows in the table's <thead> section (if it exists)
using the same criteria as the body rows.
Sort footer rows— Check this option to sort all the rows in the table's <tfoot> section (if it exists)
using the same criteria as the body rows.
Keep all row colors the same after the sort has been completed— Check this option so that the
table row attributes (such as color) remain associated with the same content after the sort. For
instance, if your table rows are formatted with two alternating colors, do not select this option to
ensure that the sorted table still has alternating-colored rows.
For our example, choose the Column 2 option from the Sort By list and click OK. Immediately the dialog
closes and the table is sorted based on the solution name.
Tracing Images
Many times, our design prototypes become so complex that it becomes difficult to figure out exactly how to
structure the page with tables using Dreamweaver. To aid you with this obstacle, Dreamweaver allows you
to include a tracing image. Tracing images allow you to build your page prototype within your favorite
image-editing program, save the prototype as a GIF or JPG image, and then lay it down as a temporary
background to your page so that you can build your page structure over it. To demonstrate the use of
tracing images, follow these instructions:
1.
Create a new blank page by choosing File, New or by pressing Ctrl+N ( +N). When the New
Document dialog appears, choose the HTML page type from the Blank Page category, choose the
<none> option from the Layout category, and click Create. A new blank page is created.
2.
With the page now open, select the Page Properties option from the Modify menu or by pressing Ctrl+J
( +J). The Page Properties dialog appears.
3.
Enter 0 for each of the Left Margin, Top Margin, Margin Width, and Margin Height text boxes within the
Appearance category.
4.
Switch to the Tracing Image category. As you can see, the Tracing Image category outlines two
options. First, a file field that allows you to select the tracing image to use, and second, a transparency
slider to select the opacity of the tracing image within the Document window.
5.
In the Tracing Image text box, browse to the prototype.gif image located within the Assets folder.
6.
Slide the Transparency slider to 30% and click Apply. As you can see from Figure 5.56, the prototype
design is faintly visible in the background.
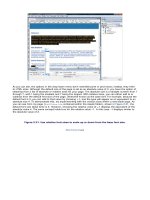
Figure 5.56. The tracing image is faintly visible in the background of the page.
[View full size image]
7.
Click OK to close the Page Properties dialog.
With the prototype faintly visible in the background, you can switch to Layout mode and begin developing
the table structure using Layout Tables and Layout Cells over the image as if you were working with tracing
paper. As you can see from Figure 5.57, layout tables have been drawn on the page, using the tracing
image as a reference.
Figure 5.57. Layout tables are drawn on the page using the tracing image as a reference.
[View full size image]
When you've finished creating the structure based on the tracing image, you can revisit the Tracing Image
category within the Page Properties dialog and remove it.
Summary
As you have seen, tables provide flexibility when working with your page designs in Dreamweaver. In
Chapter 2, we used simple page-formatting techniques such as line breaks, paragraph and heading
formatting, paragraph breaks, lists, and so on to create designs that were limited in the layout and
placement of elements within the page.
In this chapter, tables and layout structuring using tables were introduced. As you saw, tables provide a rich
and welcome approach to layout design using a myriad of options available within Standard, Expanded, and
Layout modes. In the next chapter, we'll explore other options for structuring and formatting our designs
using Cascading Style Sheets, more commonly referred by its acronym, CSS. As you will see, CSS provides
tremendous flexibility for creating rich layouts and clean page designs.
Chapter 6. Page Formatting Using Cascading Style Sheets
IN THIS CHAPTER
An Introduction to CSS
CSS Versus HTML
Browser Support for CSS
Designing CSS Using Dreamweaver and the CSS Styles Panel
Designing CSS Styles by Redefining HTML Tags
Working with Pseudoclasses
Designing CSS Styles by Using IDs
Attaching a Style Sheet
Tips and Tricks for Using CSS
As you have seen, HTML is extremely restrictive when it comes to web page formatting, but this is by no
means a fault of the language. Unfortunately, many beginning developers who are expert designers in the
print industry jump to web development thinking that visual web editors function much the same way as
popular print design programs such as InDesign and Quark. They think visually rather than practically, which
results in "hacked" code, mediocre page structures, and in general, poorly designed pages that leave many
people with a sour attitude toward Web development and HTML in general.
A better solution is available. Cascading Style Sheets (CSS) provide what many designers and developers
have asked for over the years: more control, more flexibility, and more pizzazz to the overall look of their
pages. How? CSS has endless support for font styles, sizes, and weights. It supports tracking, leading, text
indenting, and paragraph spacing. Tables don't have to have cell padding and cell spacing around the entire
table; instead, tables can contain cell padding and spacing on just one side of the table, independent of the
other sides. Form elements can contain background colors, borders, and styles. With CSS you can now use
your own custom images for bullets. Additionally, you can even control the structure of your page using
various positioning attributes outlined through CSS. All this is combined with various extensions that allow
you to set custom cursors. CSS is also packed with an assortment of filters. With increasing browser support
for the newest CSS specifications, CSS makes a huge difference in the way developers create web pages
now and in the future.
An Introduction to CSS
Imagine for a moment that our fictitious Vecta Corp website used the same font, color, and size consistently
throughout the site. Also imagine for one moment that the Vecta Corp site consists of 300 pages and you
needed to change the fonts from Arial to Verdana and the color from black to gray throughout the site. You
can imagine how frustrating it would be to open every single one of those 300 files and have to manually
change every place where you had a font applied to a section of text. At its foundation, CSS solves this
dilemma. With CSS you could create one file (styles.css) and apply style rules within that CSS file that
dictate how the text within your website should look. If the time ever came to change the font properties,
you would do it in that one CSS file, and your changes would appear throughout the entire site.
But how does this work? Style sheets are usually contained within an external CSS file (but they don't have
to be) and are linked in to every web page that you are working with that uses the <link> tag within the
<head> tag of your document. Therefore, any and all styles from that CSS file can be applied to the web
pages that you are working with, ultimately providing you with the flexibility to quickly and easily modify
one CSS file that propagates changes to all web pages that share the CSS file.
Although I've mentioned one way of creating style sheets (external CSS file), there are in fact, three ways of
creating them:
External File— Arguably the most popular and time-efficient way to create style sheets is using an
external CSS file. By creating an external style sheet, you can link this file to any and all of your web
pages using the <link> tag and placing it within the <head> tag of your web pages. Later, when the
time comes to make changes, you make modifications on the one CSS file and all the pages of your
website change accordingly.
Document Wide— Another efficient way to create styles is by adding them straight to your web page
using the <style> tag and placing it within the <head> tag of your page. Using a documentwide style
sheet doesn't afford you a global repository for styles within your site, but it does allow you to create
styles that can be used throughout the page.
Inline— Inline styles allow for quick additions of styles within a tag. An example of an inline style
could look similar to this:
<input type="text" style="border-style:groove" />
This would effectively add a border to a form element on your web page. The downside to using inline
styles, however, is that they are difficult to manage and are ultimately specific to a tag rather than the
page or the site.
Now that you have an idea as to how style sheets can be created, let's take a look at how styles are defined
within style sheets. A Cascading Style Sheet, or a CSS file, consists of numerous parts working together to
form rules in an effort to enhance the look of your web pages. These rules can consist of font properties,
positioning properties, border properties, and more. Figure 6.1 shows what a typical CSS file can look like.
Figure 6.1. A typical CSS file.
As you can see from the callouts, a typical CSS file contains selectors, declaration blocks, properties, and
values, all organized to form style rules. These rules are typically structured within an external file or
documentwide <style> tag to form a style sheet.
Note
Throughout the chapter I may refer to the terms CSS, Cascading Style Sheets, Style Sheets, and
Styles. Don't be confused by the different terms; they are all synonymous.
In detail, there are four ways of defining style rules in Dreamweaver:
Classes— Arguably the most popular way of defining styles within a style sheet, classes allow you to
set up a custom style and use the class name as an attribute value later in the tag. For instance, if you
were to set up a class named .myclass and give it the appropriate properties and values, you could
later add the class as a style reference to a paragraph of text as follows:
<head>
<style>
.myclass {font:Arial;}
</style>
</head>
<body>
<p class="myclass">Vecta Corp</p>
</body>
In this case, the rule is defined (as a documentwide style sheet) so that a class is set with the font
property. The property value is set to Arial. The <span> tag uses the class, accessing it with the class
attribute, and renders the text Vecta Corp as Arial within the browser.
Pseudoclasses— Pseudoclasses are similar to classes in that they define rules for use on your web
pages. The difference between classes and pseudoclasses, however, is that pseudoclasses aren't
applied to elements in your web pages as classes are. For the most part, pseudoclasses are reserved
for modifying links, visited links, active links, and hover states for links. Here is an example of
pseudoclasses in use:
<head>
<style>
a.link {font:Arial; color:blue;}
a.hover {color:Red;}
</style>
</head>
<body>
<a href="index.html">Home</a>
</body>
In this case, the link and hover pseudoclasses are used to define the font and color of all hyperlinks
on the page. Pseudoclasses are discussed in greater detail later in the chapter.
ID— Generally used for JavaScript purposes, an ID allows you to set up a custom style as well as
reference the uniquely named element from JavaScript. For instance, if you were to set up an ID
named #myclass and give it the appropriate properties, you can later add the ID to your code and
have it referenced within JavaScript as follows:
<head>
<script>
function alertme() {
window.alert(document.form1.mytextbox.value);
}
</script>
<style>
#mytextbox {background-color:silver;}
</style>
</head>
<body>
<form name="form1">
<input type="text" id="mytextbox" />
<input type="button" id="btnSubmit" value="Click Me" onClick="alertme()" />
</form>
</body>
In this example, I've created a text box with an ID named mytextbox. This uniquely identifies the
element, and it also allows me to set its style using the # identifier within the documentwide style
sheet. Even better, I can reference the same ID within JavaScript to extract the value and present it
within an alert dialog box when the button is clicked. It's safe to say that by using IDs, you are
effectively "killing two birds with one stone."
Tag Redefinitions— Tag redefinitions are an excellent way of redefining the properties of HTML tags
as they are defined within the browser. For instance, Heading 1, represented by the <h1> tag, is
generally defined by the browser as having a font size of 7, a Times New Roman font (depending on
user settings within the browser), and a color of black. You could change the way the tag appears in