Lập trình Androi part 48 docx
Bạn đang xem bản rút gọn của tài liệu. Xem và tải ngay bản đầy đủ của tài liệu tại đây (549.64 KB, 6 trang )
315
315
Chapter
Development Tools
The Android SDK is more than a library of Java classes and API calls. It also includes a
number of tools to assist in application development.
Much of the focus has been on the Eclipse plug-in, to integrate Android development
with that IDE. Secondary emphasis has been placed on the plug-in’s equivalents for use
in other IDEs or without an IDE, such as adb for communicating with a running emulator.
This chapter will cover other tools beyond those two groups.
Hierarchical Management
Android comes with a Hierarchy Viewer tool, designed to help you visualize your layouts
as they are seen in a running activity in a running emulator. So, for example, you can
determine how much space a certain widget is taking up, or try to find where a widget
that does not appear on the screen is hiding.
To use Hierarchy Viewer, you first need to fire up your emulator, install your application,
launch your activity, and navigate to spot you wish to examine. Note that you cannot
use Hierarchy Viewer with a production Android device (e.g., T-Mobile G1). For
illustration purposes, we’ll use the ReadWrite demo application introduced back in
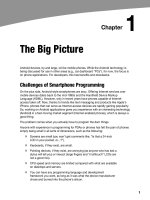
Chapter 23, as shown in Figure 35–1.
You can launch Hierarchy Viewer via the hierarchyviewer program, found in the tools/
directory in your Android SDK installation. This brings up the main Hierarchy Viewer
window, as shown in Figure 35–2.
35
CHAPTER 35: Development Tools
316
Figure 35–1. ReadWrite demo application
Figure 35–2. Hierarchy Viewer main window
CHAPTER 35: Development Tools
317
The list on the left shows the various emulators you have opened. The number after the
hyphen should line up with the number in parentheses in your emulator’s title bar.
When you click an emulator, the list of windows available for examination appears on
the right, as shown in Figure 35–3.
Figure 35–3. Hierarchy Viewer list of available windows
Notice how there are many other windows besides our open activity, including the
Launcher window (i.e., the home screen), the Keyguard window (i.e., the “Press Menu to
Unlock” black screen you get when first opening the emulator), and so on. Your activity
will be identified by application package and class (e.g.,
com.commonsware.android.files/ ).
Things get interesting when you choose a window and click Load View Hierarchy. After
a few seconds, the details spring into view, in a perspective called the Layout view, as
shown in Figure 35–4.
CHAPTER 35: Development Tools
318
Figure 35–4. Hierarchy Viewer Layout view
The main area of the Layout view shows a tree of the various views that make up your
activity, starting from the overall system window and driving down into the individual UI
widgets. You will see, on the lower-right branch of the tree, the LinearLayout, Button,
and EditText shown in the preceding code listing. All of the remaining views, including
the title bar, are supplied by the system.
Clicking one of the views adds more information to this perspective, as shown in
Figure 35–5.
CHAPTER 35: Development Tools
319
Figure 35–5. Hierarchy Viewer view properties
Now, in the upper-right region of the viewer, you see properties of the selected widget—
in this case, the Button. Alas, these properties do not appear to be editable.
Also, the widget is highlighted in red in the wireframe of the activity, shown beneath the
properties (by default, views are shown as white outlines on a black background). This
can help you ensure you have selected the correct widget, if, say, you have several
buttons and cannot readily tell from the tree what is what.
If you double-click a view in the tree, you will see a pop-up pane showing just that view
(and its children), isolated from the rest of your activity.
Down in the lower-left corner, you will see two toggle buttons, with the tree button
initially selected. Clicking the grid button puts the viewer in a whole new perspective,
called the Pixel Perfect view, as shown in Figure 35–6.
CHAPTER 35: Development Tools
320
Figure 35–6. Hierarchy Viewer Pixel Perfect view
On the left, you see a tree representing the widgets and other views in your activity. In
the middle, you see your activity (the Normal view), and on the right, you see a zoomed
edition of your activity (the Loupe view).
What may not be initially obvious is that this imagery is live. Your activity is polled every
so often, controlled by the Refresh Rate slider. Anything you do in the activity will then
be reflected in the Pixel Perfect view’s Normal and Loupe views.
The hairlines (cyan) overlaying the activity show the position being zoomed. Just click a
new area to change where the Loupe view is inspecting. And, of course, there is another
slider to adjust how much the Loupe view is zoomed.