The Black Art of Xbox Mods- P2 potx
Bạn đang xem bản rút gọn của tài liệu. Xem và tải ngay bản đầy đủ của tài liệu tại đây (1.18 MB, 30 trang )
16
CHAPTER
1 Welcome
to
the
Xbox Scene
WAREZ ARE
FOR
PATHETIC
LOSERS
If
your
desire
with
this
book
is
to
learn
how
to
pirate games,
you'll
be
disappointed
because I am
absolutely
opposed
to
this illegal
activity!
People
who
traffic
in
warez
do
much
to
harm
the
game
industry.
If
you
find
yourself
making
excuses
to
pirate
games, at least you have a conscience;
many
don't
even have
that
much
concern,
believing
that
the
entire
world
owes
them
a favor. It's all
about
making
excuses
for
bad behavior. The
ironic
thing
about
software
pirates
is
that
they
really
don't
enjoy
playing games
at
all. It's all
about
inventory,
not
about
having
fun! The
warez
groups
on IRe, the Web, and in
newsgroups
are made
up
primarily
of
adolescents, still
living
at home
off
Mom
and Dad's
bill,
with
far
too
much
free
time
on
their
hands.
If
soft-
ware pirates cared
more
about
playing
games
than
their
pathetic
geekfest
warez
list-
ings,
they
would
find
that
they
are entirely
missing
the
point.
Pirated games ("warez") are
almost
always
of
very poor quality because games are
torn
apart, resampled, reduced in size, and reassembled
before
distribution
among
warez circles. I have a
suggestion
for
you,
if
you
have
trafficked
in warez: Buy used
games. There is a
very
strong
and
vibrant
used
video
game
market
now
thriving
in
the retail channels,
with
many
games
not
even a
month
old
going
for
half
the retail
price
or
less. Why waste all
of
your
time
going
through
the
whole
process
of
tracking
down
warez and
downloading
them
when
you can
buy
a
game
for
10
to
15 bucks?
What
is
10 bucks, anyway? When I was younger,
that
was an average
day
at the
arcade, back
when
console games retailed
for
70
to
75 bucks.
Stop
wasting
your
time
(and
bandwidth)
on warez! It's
dumb.
It
hurts
the
very
thing
that
supposedly
brings
you
enjoyment. It
is
stealing. It takes
away
from
developers
who
are
working
their
butts
off
for
you
to
come
up
with
innovative
and creative
new
games. They
won't
keeping
doing
that
kind
of
work
forever;
many
give
up
and
go
into
IT,
which
pays
better
and
offers
better
benefits.
You
will
find
that
buying
a
new
or
used game once a
week
is
far
more
rewarding
and
enjoyable,
and
you
will
appreciate
the game more.
So
What's
the
Spiel?
Here
is
a list
of
significant things
that
you will learn to do with your Xbox
in
this book:
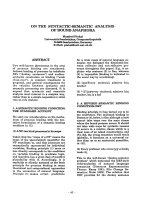
1. Install a
mod
chip. This is, first and foremost, the most significant step you will take
toward madding your Xbox.
All
others are irrelevant (adding LEDs to the case, and so
on). The
mod
chip
is
perfectly legal to purchase
and
install
in
your Xbox, and
is
analo-
gous to buying
and
installing a turbo for your car. A
mod
chip unlocks the potential
of
the Xbox, boosting its capabilities. Figure
1.7
shows the Xenium
mod
chip installed
in
an
Xbox motherboard. With a
mod
chip, you will be able to install a larger hard drive
and
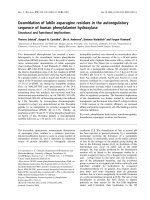
load custom software. Figure
1.8
shows the Xenium OS, which allows you to
run
custom
software
on
the Xbox. Because Xbox
is
so well equipped, it would make a perfect media
center for your living room, able to play music and
home
movies just for starters.
So What's
the
Spiel? 17
FIGURE
1.7
The Xenium mod chip has been installed on the Xbox motherboard.
FIGURE
1.8
The Xenium
0/5
2.0
(built
into
the mod chip's
BIOS)
is
used
to
run custom Xbox software.
2.
Install a new hard drive (see Figure 1.9). The Xbox hard drive varies from
8GB
to 10GB,
depending on the assembly line and date
of
manufacture. A
few
years ago that would
have been unprecedented,
but
today, a
few
gigs
are nothing.
So
it
is
very helpful to swap
out
the original Xbox hard drive for a larger one. This will allow you to store more
18
CHAPTER
1 Welcome
to
the
Xbox Scene
soundtracks, saved games, and custom software. My Xbox has 250 gigs, and I will show
you how you can expand yours too.
FIGURE
1.9
You
can replace the stock
Xbox
hard drive
with a new model with
30
times the capacity.
3.
Install custom Xbox software. This
is
the whole purpose
of
the
mod
chip and new hard
drive, to allow you to use the Xbox more like a small, powerful, portable
Pc.
Using the
mod
chip's built-in
0/5
or
using a custom dashboard, you can
host
web and FTP servers
on
your Xbox, connected to your
LAN.
How
about a storage backup where you can send
files
from your PC for safekeeping? The Xbox
is
a great little server for hosting
file
back-
ups
or
for
running
your entire website! Since the Xbox already has a LAN port, it's ready
for action.
Summary
This chapter presented a high-level overview
of
the Xbox
and
its place in the consumer electronic
and video game industries.
You
learned how Xbox compares to
other
modern
consoles,
and
a lit-
tle
about
what you can and can't do with Xbox. After a little history to
put
the Xbox's life cycle
into perspective, you learned
about
some
of
the key issues that make Xbox such a great piece
of
hardware for hackers and what Xbox mods you'll be able to perform in the coming chapters.
2
Disassembling
Your Xbox
This
chapter
is
an
introduction
to
and
overview
of
the
Xbox hardware.
You
will
learn
how
to
completely
dis-
assemble
your
Xbox
down
to
the last
component
so
you
will
be
familiar
with
the various parts inside
your
Xbox.
You
shouldn't
feel nervous
about
opening
your
Xbox because it's
very
much like a simple
PC,
and I'm
sure you've opened
your
PC's
case before. The Xbox
comes
with
a gO-day warranty,
so
be
aware
that
open-
ing
your
Xbox will
void
the
warranty
(negligible
that
it
is).
You
will
be
opening
your
Xbox many, many times
over
the course
of
reading this book, so here
is
your
chance
to
become acquainted
with
it.
By
learning about the inner configuration
of
your Xbox, you
will be better prepared before you purchase a mod chip.
(Chapter
4,
"Introduction to Xbox Modding:' talks in detail
about choosing the best
mod
chip for your needs.) This
chapter will show you how to perform the very important
task
of
identifying the version
of
your Xbox because it has
been changed significantly since November 2001.
Getting
to
Know
the
Xbox
Hardware
The Xbox
is
simple in design, really, mimicking a PC in
many
ways.
There
is
a motherboard
(of
course, all video
Here are the key points
covered in this chapter:
• Getting
to
know the
Xbox hardware
• Removing the cover
• Removing the hard
drive
• Removing the
DVD-
ROM
drive
• Removing the
motherboard
20
CHAPTER
2 Disassembling Your Xbox
game consoles have that!), a DVD-ROM drive, a hard drive, a familiar Intel processor, an equally
familiar Nvidia graphics chip, and even a standard IDE cable. Let's look at these components
before you actually start disassembling your Xbox
so
that you'll know what to expect.
Did you know there are currently seven versions
of
the Xbox
out
in the gaming public? That's
right, I said seven! Microsoft did
not
stop working
on
Xbox design when the first version was
released in late 2001.
As
is
always the case
in
mass-produced consumer electronic devices, the
manufacturing process
is
streamlined, improved, and made more efficient, so the products are
cheaper to manufacture. Xbox
is
no exception, and there
is
evidence that the most recent versions
of
Xbox have been produced simply to thwart the
use
of
mod chips!
As
you will learn
in
Chapter
4, some Xbox versions are more difficult to modify (with a mod chip). But I'll reserve
that
dis-
cussion for later.
FIGURE
2.2
The standard Xbox console
at
the
time
of
launch has changed
only
internally,
not
externally.
At
the retail level, four versions
of
Xbox were actually available at one
time or another. Figure
2.1
shows the
basic, stock Xbox packaging
as
it
appeared in 2001, followed
by
Figure
2.2, showing the original console
(which has basically not changed).
Then the Halo Special Edition Xbox
came out in late 2003 and soon
FIGURE
2.1
became a collectible among die-hard
Xbox fans. Figure
2.3
shows this spe-
cial edition Xbox.
The aftermarket for Xbox
is
truly
amazing, considering
that
tlus
is
just
a video game console. Garners grow
quite fond
of
their little boxes
of
joy,
swapping cases, applying skin kits,
adding lighting kits, and performing
other tasks that are at the forefront
of
content coverage
in
this book.
In addition to these models, a special
edition Mountain Dew case that
was
painted
in
Dew green was offered
as
a promotional item.
Original
packaging
for
the
first
version
of
Xbox at launch.
Getting
to
Know
the
Xbox
Hardware
21
FIGURE
2.3
The clear, green Halo case
is
unique and attractive.
The
Case
The Xbox
case
is
similar to the many small"Micro
ATX"
cases that you might use
as
a media cen-
ter PC, and it betrays the roots
of
Xbox
as
much
as
any
other
component
(see
Figure 2.4).
FIGURE
2.4
The Xbox case.
22
CHAPTER
2 Disassembling Your Xbox
The
Motherboard
The Xbox motherboard
is
what defines the version
of
the console that you own. Figure 2.5 shows
the revision
1.3
motherboard. Although all
of
the motherboards have the same basic shape, there
are differences in the electronics from one revision to the next.
FIGURE
2.5
The Xbox motherboard.
The
Power
Supply
The Xbox power supply
is
exposed within the case and
is
therefore a considerable hazard if you
operate your Xbox with the cover removed.
You
can very easily brush the components
of
the
power supply if you tinker with your Xbox with the cover off, so be extremely cautious because
you could ruin your Xbox at best
or-worst-case
scenario-electrocute
yourself. In addition to
the danger
of
exposing
yOll
to electric shock, the power supply components get very
hot
while in
operation. Figure 2.6 shows the power supply.
The
DVD-ROM
Drive
The Xbox DVD-ROM drive
is
a standard DVD-ROM drive that
yOll
might find in any standard
PC, except that it has a slightly different type
of
power connector. Figure 2.7 shows a typical
DVD-ROM drive for an Xbox. (Some revisions used different DVD-ROM models; the one shown
here
is
a revision 1.3.)
Getting
to
Know
the
Xbox
Hardware
23
FIGURE
2.6
The Xbox
power
supply.
FIGURE
2.7
The Xbox DVD-ROM
drive
allows
you
to
play
games
as
well
as
DVD movies.
24
CHAPTER
2 Disassembling Your Xbox
The
Hard
Drive
'.
L
)mllU:
!i!~
i.~~~
·fITT~.::.:·~
::::.=: :.::"
: : : : ,
~""
11>::£1*8
~.:'0lC\·,-!
S',CO!,,,,\!
.U
05H
Dm~1
e.I~
.11'1
'VA
The Xbox hard
drive
(typically
8GB).
Dto~
MODEl
ST3100t,f,ACE
(E.~l~
tS!8§'
1,-iu-m:TtllOr::tiltt17ti"i'16X5
I'
fh
~
dnve
Is
manufaClUred
by
Se30ale
lor
oeM
II
trlbullon.
For
producllnlormallon
or
teChnical
,ppor!,
pl.m
contact
your
'Y'IOm
OEM,
FIGURE
2.8
FIGURE
2.9
The Xbox central processor.
The Xbox hard drive has a capacity
of
8GB,
although there are reports
that some Xboxes were equipped
with
10GB
drives. Figure 2.8 shows a
typical Seagate 3.5" hard drive used
in the Xbox.
The
Central
Processing
Unit
(CPU)
AtX
the heart
of
the Xbox are two
processors that work in tandem to
produce the
stunning
visuals in
modern games that you enjoy. The
central processor
is
an Intel Celeron
733MHz, based on the Pentium 3
core.
If
this seems like a meager
processor
to
power a next-generation
console, remember that a console
is
a custom-built machine with hardware specifically tuned for
games, utilizing a hard-coded set
of
hardware drivers and a highly optimized software develop-
ment kit. For the most part, the graphics processor handles all
of
the rendering, so the CPU need
not be extraordinarily fast. Remember that recent revisions to the Xbox no longer have an active
cooling system,
just
a passive
heatsink; a faster processor (such
as
the typical 2GHz chip available at
the time
of
the Xbox launch) would
require active cooling.
Note that the thermal compound
is
still present in the photo shown in
Figure
2.9.
Because this
is
a working
motherboard,
I did
not
want
to
remove the material just for the
photo opportunity.
Getting
to
Know
the
Xbox
Hardware
25
The
Graphics
Processing
Unit
(GPU)
The Xbox graphics processor
is
a custom-built Nvidia GeForce 3 chip.
As
a matter
of
fact, Xbox
was ahead
of
the game in 2001 by incorporating the very first programmable shader technology,
available before the consumer version
of
the GeForce 3 became available. The graphics processor
(shown in Figure 2.10) handles
all
of
the graphics (2D and 3D) in an Xbox game, while the video
processing (which sends
output
to your television)
is
handled by the chipset integrated in the
motherboard. This XGPU, also known
as
the NV2X, has a clock speed
of
250MHz, giving Xbox
the rendering horsepower to draw about
125
million polygons per second.
Figure 2.10 shows the thermal com-
pound still present on the chip. A
dash
of
Artic Silver thermal com-
pound
will be applied before the
heatsink
is
reattached,
and
this
motherboard
will continue to be
used.
FIGURE
2.10
The
Xbox
graphics processor.
Front-Side Bus (FSB)
The Xbox motherboard contains a front-side bus
as
well
as
a back-side bus, just like a PC
moth-
erboard. The front-side bus
(FSB,
also called the North Bridge) connects the CPU to the system
and includes the Advanced Graphics Port (AGP), which
is
built into the motherboard on the
Xbox.
As
a single incorporated motherboard, the XGPU (Nvidia GeForce
3)
chip
is
mounted
directly on the bus, although this
is
equivalent to including an AGP card slot and plugging in a
video card. Obviously, the Xbox doesn't need to be upgraded, although that would be intrigu-
ing The
FSB
also includes the
memory
controller that provides Xbox with access to the 64MB
of
double-data rate (DDR) memory. The
FSB
chip runs at 133MHz, providing a bus transfer rate
of
about 1
GB
per second.
Media
Control
Processor
(MCPX)
The media control processor (MCP)
is
the second half
of
the motherboard chipset that handles
device I/O, handling the IDE
port
(for the DVD-ROM and hard drive)
as
well
as
the controller
ports (which are oddly shaped
USB
ports). This chip, custom-designed for Xbox
by
Nvidia, runs
at 200MHz and handles the 100Mb
LAN
port
as
well
as
the sound electronics (see Figure 2.11),
and
is
equivalent to the South Bridge on a
pc.
26
CHAPTER
2
Disassembling
Your Xbox
FIGURE
2.11
The Xbox
MCP
chip.
Removing
the
Cover
If
you are at
all
intimidated by the thought of getting to know the insides
of
your Xbox, you will
soon overcome that phobia (it's irrational anyway!). Not only
is
the Xbox easy
to
disassemble, it
is
made up
of
all-too-familiar components (which cannot be said
of
GameCube
or
PS2).
If
you
have ever taken apart a Game Boy Advance, you'll
be
surprised to learn that Xbox
is
simpler than
the
GBA.
For starters, let's see what you'll need to crack open the case.
Removing
the
Rubber
Feet
Take
your Xbox, unplug everything (obviously), and turn it over. Remove the four rubber feet
on
the corners to reveal the four main screws,
as
shown in Figure 2.12.
You
will need
to
use a Torx (star-shaped) wrench,
not
to
be confused with a hex wrench. Torx
wrenches have five-point heads (see Figure 2.13).
Removing
the
Six Case Screws
Using the appropriate Torx wrench (Xbox screws are typically Torx-10
or
Torx-20), remove the
four screws.
You
will also
fll1d
two screws beneath labels
on
the
bottom
of
your Xbox.
You
don't
need to remove the entire label; just use your fingernail or a small Torx to scrape around the screw
head
to
punch a hole over the screw. Figure 2.14 shows one
of
the screws you will find behind a
label.
Removing
the
Cover
27
FIGURE
2.12
The
bottom
of
the
Xbox.
FIGURE
2.13
A
typical
Torx
wrench
tool.
28
CHAPTER
2
Disassembling
Your Xbox
FIGURE
2.14
Two screws are
hidden
behind labels.
See
Figure 2.15 for help locating
all
of
the screws.
FIGURE
2.15
Only
six
Torx screws protect
your
Xbox
from
the
machinations
of
a
curious
mind.
After you have removed all six
screws, keep them
in
a safe place
because they are
all
required to keep
the components within the Xbox
from moving
around
during trans-
port (see Figure
2.16).
Lifti
ng
the
Case
Now
that
the screws have been
remove9, you can lift off the top
of
the case. Lifting the case can be a bit
tricky because it isn't obvious where
the top part
of
the case separates
from the bottom part. Take a look at
Figures
2.17, 2.18, and 2.19, which
show the front, side,
and
back
of
the
Xbox, respectively.
Removing
the
Cover
29
NOTE
For some reason,
many
folks are concerned
about
voiding
the Xbox
warranty.
Given
that
it's
only
a gO-day period, I
don't
consider
that
to
be
a
good
enough reason
to
keep
my
Xbox invio-
late,
so
neither
should
you.
However,
if
you
do
have a new Xbox, you
will
encounter
some
diffi-
culties
with
installing
a
mod
chip
because the
newest Xbox revisions have been adjusted
to
thwart
the
efforts
of
the
mod
chi p makers (or
perhaps
just
to
reduce costs using new manufac-
turing
methods
or
cheaper components).
After
you have examined the
inner
sanctum
of
your
Xbox in this chapter, you
will
learn
how
to
iden-
tify
which
Xbox revision you
own
in the
next
chapter.
FIGURE
2.16
The
six Torx-head
screws
that
keep
the
Xbox
together.
30
CHAPTER
2 Disassembling Your Xbox
FIGURE
2.17
The
front
of
the Xbox.
FIGURE
2.18
The side
of
the Xbox.
FIGURE
2.19
The back
of
the Xbox.
Examining
the
Main
Deck
Finally, Figure 2.20 shows the case after it has been lifted
up
and
off
the main deck
of
the Xbox.
You
will immediately see the huge DVD-ROM drive
mounted
beside the standard 3.5" hard
Removing
the
Cover
31
drive, and both are enclosed in plastic frames that prevent movement inside the case (a very good
thing!).
FIGURE
2.20
The
top portion of the
Xbox
case
has
been removed.
Figure
2.21
shows the components up close. Note the standard IDE drive cable connecting the
DVD-ROM and hard drive to the motherboard. This example
is
an Xbox revision 1.4 (see the
"MAY
2003" on the DVD-ROM bar code sticker in the lower right?). Revision
1.5
was
manufac-
tured in the
fall
of
2003, while revision
1.6
came out in the spring
of
2004.
The parts almost look like they belong together,
all
tight and snug inside the case
like
that (when,
in fact, they are just PC components). Too bad we're going to tear the thing completely apart and
ruin the nice
consistent-perhaps
even aesthetic?-packaging
of
components! The first rule
of
hacking: Know everything.
So,
let's carefully disassemble this bad boy and see what it's made of.
You
will follow through with a complete Xbox identification and
mod
chip installation in the
next
few
chapters, so this isn't
all
just for educational purposes.
32
CHAPTER
2 Disassembling Your Xbox
FIGURE
2.21
The
drives
are connected
to
the
motherboard
with
a standard
IDE
cable!
Removing
the
Hard
Drive
The hard drive tray sits atop the DVD-ROM tray stands,
so
it must be removed first. Take a close
look at the IDE cable shown in Figure 2.22.
You
will find three Torx screws
that
need to be
removed before the hard drive and DVD-ROM drive will come out. Let's get the IDE cable out
of
the way first.
Lift
up the cable so you can get to the connectors
as
well
as
a screw hidden beneath
the IDE cable,
as
shown in Figure 2.23.
FIGURE
2.22
The
IDE
cable
is
routed care-
fully
underneath
the
cover.
FIGURE
2.23
Lifting
up
the
IDE
cable reveals
a screw
that
must
be
removed.
Removing
the
Hard
Drive
33
Removing
the
Hard
Drive
Tray
Screw
Figure 2.24 shows how to remove the screw. This typical Torx screw
is
the same type
and
size
of
screw you will find in other areas
of
the Xbox case.
FIGURE
2.24
Removing the single screw holding down the hard drive frame.
Removing
the
Cables
After you have removed this single screw from the hard drive frame, you will
then
need to disen-
gage the IDE
and
power connectors from the hard drive. The
hard
drive uses a standard power
connector that
is
compatible with PC power connectors, meaning
that
you can use a Y-splitter to
add standard PC accessories to your case (such
as
lights and other cosmetic items).
If
you have a
hard time removing the power connector, try using a screwdriver
on
either side
of
it to lightly
pry
it loose,
as
shown in Figure 2.25.
It
doesn't take much effort.
The power connector
is
fed along the top left edge
of
the hard drive frame (or tray), so you will
need to disconnect the wire from the two hooks built into the
hard
drive frame to loosen it (see
Figure 2.26).
Removing the IDE cable
is
a cinch, using either your fingers
or
a screwdriver to gently pry the
ends
of
the cable
out
of
the IDE connector on the hard drive using a side-to-side motion (see
Figure 2.27).
34
CHAPTER
2
Disassembling
Your Xbox
FIGURE
2.25
Removing
the
power
connector
from
the hard
drive.
FIGURE
2.26
Freeing the
power
connector
from
the hard
drive
frame.
Removing
the
Hard
Drive
35
FIGURE
2.27
Unplugging
the
IDE
cable
from
the hard drive.
Lifting
the
Hard
Drive
Tray
You
will then be able
to
lift the hard drive frame
out
of
the Xbox case. If you have difficulty lift-
ing it, first make sure you have removed the bolt.
You
can use a screwdriver to pry up the edge
of
the tray,
as
shown in Figure 2.28.
After you have managed to raise the hard drive tray, you can easily lift it
out
of
the Xbox case,
as
shown in Figure 2.29.
You
can remove the hard drive from the tray by removing four small Torx screws
on
either side
of
the hard drive tray (see Figures 2.30 and 2.31).
You
may want to do this
if
you plan
to
replace
the hard drive with a higher capacity drive (which
is
featured in Chapter 12, "Upgrading the Xbox
Hard Drive").
See
Figure 2.32 for the final result.
36
CHAPTER
2 Disassembling Your Xbox
FIGURE
2.28
Removing
the
hard
drive
tray
may
require
the
help
of
a
screwdriver
to
pry
it
up.
FIGURE
2.29
Lifting
the
hard
drive
tray
out
of
the Xbox case.
Removing
the
Hard
Drive
37
FIGURE
2.30
The hard drive screws on the left side
of
the tray.
FIGURE
2.31
The hard
drive
screws on the
right
side
of
the tray.
38
CHAPTER
2 Disassembling Your Xbox
FIGURE
2.32
Removing the hard drive from the tray.
Removing
the
DVD-ROM
Drive
The DVD-ROM drive
is
mounted to the case with two Torx screws. Figure 2.33 shows where
those screws are located (in the DVD-ROM frame).
The
DVD-ROM
Screws
For a closer look at the DVD-ROM screws, take a look at Figures 2.34 and 2.35.
Removing
the
IDE
and
Power
Cables
Before you lift
out
the hard drive, it's a good idea to first remove the IDE and power connectors.
You
can just
as
easily remove them after lifting
out
the DVD frame,
so
it's up to you. Figure 2.36
shows the rear
of
the DVD-ROM drive with the IDE cable disconnected.
Figure 2.37 shows the power connector on the back
of
the DVD-ROM drive. Loosening it can be
a bit tricky, so you may want to carefully
pry
each side
of
the connector with a screwdriver. This
technique
is
better than yanking
on
it with your fingers in such a narrow space. After you have
disconnected both cables,
put
them aside so they won't get in the
way
of
the tray
as
you lift it
out
(see Figure 2.38).
Removing
the
DVD-ROM
Drive
39
Part
No'
X00603-005
•
FIGURE
2.33
The
two
screws
holding
down
the DVD-ROM frame.
FIGURE
2.34
The
left
screw
holding
down
the DVD-ROM drive.
Pulling
the
DVD-ROM
Drive
You
can now lift the DVD-ROM drive and tray
out
of
the Xbox case.
It
should just lift right out,
no
prying required. Don't be hesitant to handle the equipment,
but
at the same time,
if
something
40
CHAPTER
2 Disassembling Your Xbox
doesn't come loose easily,
don't
force it because it
is
easy to forget to loosen a screw here
and
there
(see Figure 2.39).
FIGURE
2.35
The
right
screw
holding
down
the DVD-ROM drive.
1I1!11I1111\l1111I
\I
II
1\1\
I
~
FIGURE
2.36
The back
of
the
DVD-ROM drive,
showing
the
IDE
and
power
cables.