JQuery: Novice to Ninja- P13 pdf
Bạn đang xem bản rút gọn của tài liệu. Xem và tải ngay bản đầy đủ của tài liệu tại đây (475.63 KB, 15 trang )
Licensed to
Menus, Tabs, Tooltips, and Panels 157
<p id="about">
StarTrackr! was founded in early 2009 when a young …
</p>
<p id="disclaimer">
Disclaimer! This service is not intended for the those …
</p>
</div>
Next, we need to create our tab navigation bar. As with so many controls and effects,
it’s the overall illusion that’s important. An unordered list of links will do nicely,
but we’ll style them to look tab-like:
chapter_05/11_simple_tabs/index.html (excerpt)
<ul id="info-nav">
<li><a href="#intro">Intro</a></li>
<li><a href="#about">About Us</a></li>
<li><a href="#disclaimer">Disclaimer</a></li>
</ul>
We’ve styled the links with CSS to have a tab-like appearance, but there are dozens
of different ways of accomplishing this, so use whatever you’re familiar with or
what seems most sensible. We’ve opted for extremely basic styles, since what we
want to focus on is the functionality.
The first task we’ll do (after our document’s ready) is hide all of the tabs except the
first one—this will be our default tab. We could do this by hiding all the panes, and
then showing the first one, like this:
$('#info p').hide().eq(0).show();
But this makes jQuery do more work than is necessary; we want to avoid hiding a
tab only to show it again straight away. Instead, we can be more specific with our
selector; we can combine filters to select everything except the first element:
chapter_05/11_simple_tabs/script.js (excerpt)
$('#info p:not(:first)').hide();
Licensed to
Licensed to
158 jQuery: Novice to Ninja
The important point is that once the page loads, only one tab content pane is dis-
played to the user. The code to switch tabs is straightforward, and quite similar to
the other hide/show controls we’ve built so far:
chapter_05/11_simple_tabs/script.js (excerpt)
$('#info-nav li').click(function(e) {
$('#info p').hide();
$('#info-nav .current').removeClass("current");
$(this).addClass('current');
var clicked = $(this).find('a:first').attr('href');
$('#info ' + clicked).fadeIn('fast');
e.preventDefault();
}).eq(0).addClass('current');
There’s one peculiar aspect worth pointing out: to select the content pane corres-
ponding to the clicked link, we’re joining the href attribute of the link directly to
our selector using the JavaScript + operator. This only works because anchor links
use the hash symbol (#) to identify their targets, and jQuery also uses the hash
symbol to select elements by id. This is pure coincidence, but it’s very fortunate
for us as there’s no need to parse the text or use regular expressions to create our
selector.
After we’ve attached the click handler, we filter our navigation list to just the first
element using the eq selector and add the current class to it. In our example the
first tab is the default tab; if you want a different tab to be first, you need to change
the 0 (as it’s a zero-based index) to the one you’d prefer.
jQuery UI Tabs
While our basic tab solution provides a good foundation for us to build on, we’re
by no means the first people to attempt to build a tabbed content pane using jQuery.
Enough people have demanded tabbed interfaces for the jQuery UI library to include
a very feature-rich tab widget as part of its control collection.
Before you throw away our basic tabs in favor of the shiny jQuery UI tabs, think
about what you want your tabs to do. With the jQuery knowledge you’ve acquired
so far you should have no problems implementing many of the features yourself
Licensed to
Licensed to
Menus, Tabs, Tooltips, and Panels 159
—tasks like changing tabs on mouseover instead of on click, programmatically
changing tabs, or collapsing a tab’s content when you double-click on the tab itself.
One feature that would take us significantly more work to implement (at least for
the moment) is the ability to load content via Ajax. We’ll be looking at Ajax in a lot
more detail in Chapter 6, but for the meantime we can have a look at the simplest
possible use of it: loading content from the server into our page without refreshing.
By now you’re probably accustomed to including jQuery UI functionality. Make
sure you build a download that includes the Tabs component, then include the CSS
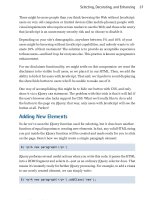
and JavaScript files into your HTML. You can have a look at what our jQuery UI
tabs will look like in Figure 5.7.
Figure 5.7. jQuery UI tabs
With the UI library and CSS styles in place, adding the content is easy. Content
loaded via Ajax has no requirement for a container to be preset—the plugin auto-
matically generates the required DOM elements:
chapter_05/12_jquery_ui_tabs/index.html (excerpt)
<div id="info">
<ul id="info-nav">
<li><a href="#intro">Intro</a></li>
<li><a href="about.html">About StarTrackr!</a></li>
<li><a href="disclaimer.html">Disclaimer</a></li>
</ul>
<div>
<p id="intro">
Welcome to <strong>StarTrackr!</strong> the planet's premier …
</p>
</div>
</div>
Licensed to
Licensed to
160 jQuery: Novice to Ninja
As we did before, we first create a tab navigation list. For static content, you need
to specify an anchor name that corresponds to the id of the element containing the
related content (#intro in our example). The next two tabs are our Ajax tabs; they
simply point to HTML files on the server (or in our case, on the hard disk). In a real
web application, they’d point to server-side scripts that generate dynamic content;
for the sake of illustrating how jQuery UI’s Ajaxy tabs work, we’ll stick with a few
static HTML files. These can contain whatever content you’d like to load into your
tabs.
The functionality we’ll implement will degrade gracefully in the absence of Java-
Script; those tabs will simply act as links to the referenced files. When JavaScript
is enabled, however, jQuery will load the content of the target page into the tab
content pane without refreshing the page. There’s no need to worry about it pulling
in the whole HTML page—it’s smart enough to only include the content between
the opening and closing <body> tags.
To turn the above markup into an Ajax-enabled tab interface, all you need to write
is:
chapter_05/12_jquery_ui_tabs/script.js (excerpt)
$('#info').tabs();
Try it out in your browser to confirm that it works. If this is not “Write less, do
more,” we don’t know what is!
Tab Options
The tab control comes with reams of customization options that you can find on
the jQuery UI tab demo page.
4
We’ll explore a few of the juicy ones now:
4
Licensed to
Licensed to
Menus, Tabs, Tooltips, and Panels 161
chapter_05/13_jquery_ui_tab_options/script.js (excerpt)
$('#info').tabs({
event: 'mouseover',
fx: {
opacity: 'toggle',
duration: 'fast'
},
spinner: 'Loading ',
cache: true
});
As part of the control’s initialization, we’ve passed a JavaScript object containing
a collection of options: event, fx, spinner, and cache. The event option lets you
choose the event that changes tabs—here we’ve replaced the default click with
mouseover. To change tabs now, the user need only hover over the desired tab.
Next, we’ve added some animation options to specify a fast fade transition when
we switch between tabs. The fx option works exactly like the animate command,
letting you tweak the transition in whichever way you need.
The last two options are for our Ajax tabs. spinner specifies the HTML to display
while the content is being loaded. With all your pages sitting on your local machine,
you’re likely to never see this text—but you’ll certainly notice the delay (and
therefore the spinner text) when you put your pages up on a real web server. It’s
called spinner as it’s often used to display an animated GIF image of a spinning
icon, which is meant to indicate loading and almost always named spinner.gif.
The cache option instructs the browser to hold on to a copy of the tab content after
it’s loaded. This way, if a user is clicky on your tabs—switching repeatedly back
and forth—the browser won’t need to download a fresh copy of the data each time.
Tab Control Methods
There are also a host of methods for interacting with the tabs programmatically.
You can add, remove, and reload tabs, and change the open tab automatically. For
example:
chapter_05/14_jquery_ui_tab_control/script.js (excerpt)
$('#info').tabs().tabs('rotate', 3500);
Licensed to
Licensed to
162 jQuery: Novice to Ninja
The first tabs call sets up our tab pane, and the second one instructs jQuery to cycle
through the tabs every 3,500 milliseconds (or 3.5 seconds). There’s a lot more you
can do with your tabs, so have a look at the documentation to see what’s possible.
The last item we’ll have a look at is selecting a tab programmatically. You can find
the currently selected tab by using the selected option:
$('#tabs').tabs('option', 'selected');
Of course, you can also set the current tab. This is handy if you want links in your
content to simply change the open tab rather than linking to a new page. For this
example, we’ve inserted a link to the About Us page in the content of the first tab.
We can hijack that link and have it open the About Us tab instead:
chapter_05/14_jquery_ui_tab_control/script.js (excerpt)
$("#info p a[href=about.html]").click(function() {
$('#info').tabs('select', 1);
return false;
});
Panels and Panes
Panels and panes are nothing more than controls that just hold other controls! When
used correctly they help organize a page into logical areas, minimizing complexity
for the user. This lets seasoned users take advantage of all your site or application’s
features without having your newbies drown in a sea of buttons and widgets. Panels
are most effective when they provide contextual tools and controls that users can
work with while documents are open or in focus.
Slide-down Login Form
One increasingly popular method of reducing visible clutter is a hidden menu that
rests at the very top of the screen. A small button or link reveals to the user that
more information is available. Clicking the button causes a panel to slide into view,
and moving away from the panel causes it to slide right back.
A convenient and practical space saver for sure, but what kind of information should
be stored there? The most popular use for slide-down panels is to display the login
fields for the site. Most users know that these features are generally displayed to
Licensed to
Licensed to
Menus, Tabs, Tooltips, and Panels 163
the top right of a site’s browser window, so a well-placed icon or link will catch
the attention of those looking to log in. The login form we’ll create can be seen in
Figure 5.8.
Figure 5.8. Slide-down login form
This will be an easy addition to our site, as we already know most of the jQuery
commands that will be involved. We’ll throw some quick CSS styles on the control,
but, as always, it’s up to you to style it in a way that’s consistent with your site.
Then comes the by-now-familiar refrain—hide the form on pageload, then capture
the click event to toggle it into and out of sight:
chapter_05/15_login_panel/script.js (excerpt)
$('#login form').hide();
$('#login a').toggle(function() {
$(this)
.addClass('active')
.next('form')
.animate({'height':'show'}, {
duration:'slow',
easing: 'easeOutBounce'
});
}, function() {
$(this)
.removeClass('active')
.next('form')
.slideUp();
});
Licensed to
Licensed to
164 jQuery: Novice to Ninja
The only difference between this code and the expandable menu from the beginning
of the chapter is that here we’re using a CSS class to control the position of our
background image, rather than the jQuery css action. Because these classes are only
really used when JavaScript is available (as otherwise we’ll be presenting a control
that’s always open), neither solution is necessarily better, and the one you choose
will depend more on your preference.
This was a bit too easy, so we’ll finesse it a touch. If our login form were to submit
via Ajax (without triggering a page refresh), we’d want the panel to disappear after
the form was submitted. Actually, even if we’re loading a new page, having the
menu slide up after clicking is a nice flourish:
chapter_05/15_login_panel/script.js (excerpt)
$('#login form :submit').click(function() {
$(this)
.parent()
.prev('a')
.click();
});
We start by capturing the click event on the form’s submit button, and then move
back up the DOM tree looking for the containing element. We could just perform
our hide here, but given that we’ve already written code to handle the hiding in our
original handler, we can just step back through the DOM using the prev method,
and click on our hide/show link.
Sliding Overlay
Translucent sliding overlays have been popping up all over the place of late: from
message dialogs, to shopping cart summaries, to navigation controls, and more. The
reason for their popularity is simple: they look incredibly cool—like the highly
questionable interfaces from action movie computer scenes—except that they’re
actually useful!
The most important factors to consider in the creation of the sliding overlay are
where you want the contents to slide from, and how the overlay will be triggered.
The choices will affect how the user interacts with the control and how they expect
it to act. This type of control is fairly new to the Web—so there are no conventions
Licensed to
Licensed to
Menus, Tabs, Tooltips, and Panels 165
you need to adhere to—but you can look for analogies on the desktop for how they
should perform. Perhaps you’ll create a version of it that actually sets some rules!
For example, you might like to include a content panel that slides out when the
user moves the mouse close to the edge of the page—like the auto-hide taskbar or
dock on many operating systems. Or perhaps moving over the bottom edge of the
content area could cause a Next/Previous control to slide into view.
Our overlay will be triggered by moving the mouse over a Shopping Cart link.
Mousing over the link will cause a menu to slide down from under the header, over
the page, informing the user of the number of items currently in the shopping cart,
and providing links to checkout or view the cart. As illustrated in Figure 5.9, the
shopping cart icon that acts as the trigger is located in the top-right corner of the
content area.
Figure 5.9. A sliding shopping cart overlay
As always, styling provides the real base of our effect. This will determine what
our trigger will look like, and where our sliding commences. Our trigger will be
absolutely positioned in the top-right corner of the page contents:
chapter_05/16_sliding_overlay/panel.css (excerpt)
.cart a {
position: absolute;
width: 32px;
height: 32px;
right: 15px;
top: -10px;
background: transparent url(shoppingcart.png) no-repeat 0 0;
text-indent: -9999px;
}
Licensed to
Licensed to
166 jQuery: Novice to Ninja
.cart a:hover, .cart-hover {
background-position: 0 -32px;
}
#overlay {
position: absolute;
width: 100%;
height: 100px;
top: 0;
left: 0;
color: #fff;
background-color: #000;
display: none;
text-align: center;
}
#overlay a {
font-size: 130%;
font-weight: bold;
}
Because the overlay will only be triggered by jQuery, it stands to reason that it
should be added to the page markup with jQuery as well. The overlay is set up to
be 100% width of the page, and have a height of 100 pixels. We want the overlay
to slide down from the top, so we set the top position to 0. Of course, we also hide
it so that it’s absent from the page when it loads.
The first step is to add the overlay to the markup. We will give it a hover handler,
because when it slides into the page we want it to remain visible for as long as the
user keeps the mouse over it. We give it a class of active as long as it’s open, and
use that class to determine when it needs to be closed. When the user mouses away
from it, we remove the class, and set a timer, which will look for an overlay without
the class class and close it after a little less than a second. This way, if the user
re-opens the overlay while the timer is running, the timer method will do nothing:
Licensed to
Licensed to
Menus, Tabs, Tooltips, and Panels 167
chapter_05/16_sliding_overlay/script.js (excerpt)
$('<div></div>')
.attr('id', 'overlay')
.css('opacity', 0.65)
.hover(function() {
$(this).addClass('active');
}, function() {
$(this).removeClass('active');
setTimeout(function() {
$('#overlay:not(.active)').slideUp(function() {
$('a.cart-hover').removeClass('cart-hover');
});
}, 800);
}).appendTo('body');
We’re using the opacity CSS property to make our overlay semi-transparent. opacity
values range from 0 to 1, with 1 being completely opaque and 0 being invisible.
Accessibility
Be careful when creating semi-transparent controls that there’s sufficient color
contrast between your content and the background. Maybe it’s easy for you to
read, but always consider that some of your visitors may have less than perfect
vision. When in doubt, err on the side of caution, with higher contrasts than you
think are necessary.
Now let’s add the event listener to our trigger link:
chapter_05/16_sliding_overlay/script.js (excerpt)
$('.cart a').mouseover(function() {
$(this).addClass('cart-hover');
$('#overlay:not(:animated)')
.addClass('active')
.html('<h1>You have 5 items in your cart.</h1>
➥<a href="#">View Cart</a> <a href="#">Checkout</a>')
.slideDown();
});
There’s a new filter in our selector here: :animated, which allows us to select ele-
ments that are currently being animated (or, as in this case, combined with the :not
filter to select elements which are not mid-animation.) We add some static markup
Licensed to
Licensed to
168 jQuery: Novice to Ninja
to our overlay, but in a real application, you’d want to obtain the number of cart
items in order to display it here.
We are also adding a class to the trigger link to style it, as its hover style would
otherwise switch off when the overlay came between it and the cursor.
Of course, this is only one example of this sort of functionality; you can likely think
of many others. Transparency is remarkably easy to manipulate in jQuery, and really
makes interface components feel a lot slicker.
Tooltips
A tooltip is an interface component that appears when a user hovers over a control.
They’re already present in most browsers; when you provide a title attribute for
a link or an alt attribute for an image, the browser will usually display it as a tooltip
when the user hovers over that element.
JavaScript tooltips have a bit of a bad rap. They tend to be implemented in an ob-
noxious manner, acting more like an ad popup than a useful information tool.
However, there are situations in which a tooltip can provide just the right touch to
your application, helping to inform your users in a contextual fashion without
cluttering the rest of your interface.
First, we’ll have a go at replacing the browser’s default tooltips with ones we can
style and animate. Then we’ll look at extending this to create a much more versatile
tooltip, which can contain HTML and be attached to any element on the page.
Simple Tooltips
Tooltips typically appear when the user hovers over a hyperlink—to provide addi-
tional information about where the link will take them. Of course, there’ll be other
places you’ll want to use tooltips, but this is a good place to start. We’ll look at re-
placing the browser’s default tooltips with our own custom-styled, animated ones,
as illustrated in Figure 5.10.
Licensed to
Licensed to
Menus, Tabs, Tooltips, and Panels 169
Figure 5.10. Our custom tooltips
For our simple control, we’ll use the title attribute of the links. This is great for
our ever-vigilant efforts to maintain acceptable functionality for users without
JavaScript support; depending on their browser, they’ll most likely see the text as
a basic browser tooltip:
chapter_05/17_simple_tooltips/index.html (excerpt)
<a href="#" title="Check out all the … ">New York</a>
Using the title attribute can be a bit limiting: you’re unable (technically or reliably)
to have HTML nested inside your tooltip, and you’ll need to be careful with special
characters that might break the tag. There are a few alternate techniques for storing
the tooltip’s text. We’ll have a look at another method when we make our advanced
tooltip—but it’s important to note that any method will have upsides and downsides,
and you’ll need to decide which is best in each particular circumstance.
Being able to style the tooltip is the main reason for implementing a custom control
in the first place—so go nuts with your styles! However, for our example, we’ll
define some very basic styles for our tooltips:
chapter_05/17_simple_tooltips/tooltips.css (excerpt)
.tooltip {
display: none;
position: absolute;
border: 1px solid #333;
background-color: #ffed8a;
padding: 2px 6px;
}
The tooltip control is positioned absolutely, which will allow us to move it around
as required. Next, we’ll set up some stubs for our code to sit in, which lets you see
Licensed to
Licensed to
170 jQuery: Novice to Ninja
the general structure: a simple hover function, followed by a chained mousemove
function. We want the tooltip to turn on and off with the hover event, and update
its position whenever the mouse is moved:
chapter_05/17_simple_tooltips/script.js (excerpt)
$('.location').hover(function(e) {
// Hover over code
}, function() {
// Hover out code
}).mousemove(function(e) {
// Mouse move code
});
Starting with the overall structure and then filling in the details is a great way to
plan out your code, ensuring you know what’s going on before diving in. It helps
when writing code to always have a contextual understanding of where that piece
sits in the larger picture.
Let’s start filling in those stubs. The hover over code is the most interesting, so we’ll
start with that. Notice that we’re passing the optional parameter e into the hover
code. This is important, as we’ll need to access the X and Y coordinates of the event
in order to position the tooltip:
chapter_05/17_simple_tooltips/script.js (excerpt)
// Hover over code
var titleText = $(this).attr('title');
$(this)
.data('tipText', titleText)
.removeAttr('title');
$('<p class="tooltip"></p>')
.text(titleText)
.appendTo('body')
.css('top', (e.pageY - 10) + 'px')
.css('left', (e.pageX + 20) + 'px')
.fadeIn('slow');
First we need to grab the title from the link, which will be the text we want our
tooltip to display.
Licensed to
Licensed to
Menus, Tabs, Tooltips, and Panels 171
The next part of the code is a touch peculiar: it saves the tooltip text using the data
method that we saw in the section called “Smarter Scrolling with the data Action”
in Chapter 4. We need to do this because we’ll be removing the title from the link,
in order to prevent the browser from displaying its default tooltip that will conflict
with our custom one. By storing the text using the data command, we can recover
and replace the link title later.
We now have everything we need to create our tooltip control. We’ll create a new
paragraph element with a class of tooltip, in order to hook into the styles we
created earlier. Then we use the text method to set the tooltip’s contents. We could
use html instead of text here, but according to W3C standards, the title attribute
should not contain HTML. The advanced tooltip we’ll be looking at shortly will
allow us to include HTML, but for the moment we’ll stick with plain text.
A Question of Style
We could’ve specified the paragraph’s id with jQuery like this:
$('<p></p>').attr('id', 'tooltip'). Likewise, we could’ve used JavaScript
string concatenation to populate the element’s content: $('<p>' + titleText
+ '</p>'). Both methods result in the same DOM objects, and they’re both fairly
clear and readable, so it’s up to your personal coding style whether you prefer
doing more with jQuery chaining or with plain JavaScript.
After we add our new node to the page (using appendTo) we set a few inline styles,
using the event object (e) to obtain the position where we need to place the tooltip.
pageX and pageY are properties of the event object that allow you to find out where
the event took place on the page. This can be tremendously useful in a lot of different
situations; you’ll often find yourself needing to position an element on the screen
based on an event which just fired:
chapter_05/17_simple_tooltips/script.js (excerpt)
// Hover out code
$(this).attr('title', $(this).data('tipText'));
$('.tooltip').remove();
The hover out code couldn’t be simpler: we just reverse what we did in the hover
over code, restoring the title attribute and removing the tooltip:
Licensed to