OBJECT-ORIENTED PHP Concepts, Techniques, and Code- P9 doc
Bạn đang xem bản rút gọn của tài liệu. Xem và tải ngay bản đầy đủ của tài liệu tại đây (345.14 KB, 10 trang )
Using the PageNavigator Class 61
}
else{
//then calculate offset
$totaloffset = $offset *
PERPAGE;
}
If no query string is passed into the page, you want to begin displaying
images at the beginning of your list, so you set
$totaloffset to 0. If $offset
does have a value, multiplying it by
the PERPAGE value calculates the start
position within the array of image filenames.
The name of the directory you want to use is assigned to the variable
$directory:
$directory = "graphics";
$di = new DirectoryItems($directory);
Listing 8-1: Hard-coded directory name
Because you want to display the directory of images in the graphics
directory, pass the value
graphics to the constructor of the DirectoryItems
class.
The
imagesOnly method filters out all non-images, and the method
naturalCaseInsensitiveOrder ignores case and orders numerically where
appropriate.
$di->imagesOnly();
$di->naturalCaseInsensitiveOrder();
In Chapter 6, when you displayed all the thumbnails on one page, you
retrieved the entire list of filenames from the
DirectoryItems class instance.
Since the page navigator controls the starting position and since you can
retrieve a slice of the array, you need only retrieve a specific number of items
here. Do this by passing the
getArraySlice method a start position and the
number of items you wish to display.
//get portion of array
$filearray = $di->getFileArraySlice($totaloffset, PERPAGE);
Displaying an Array Slice
You retrieve each filename and pass it to the getthumb.php file so it can serve
as the file source for an
img tag. You don’t need to make any changes to
the version of the
getthumb.php file you used in Chapter 6—it includes the
ThumbnailImage class and uses it to create a reduced image.
The code to loop through the thumbnail images hasn’t changed from
Chapter 6 either. For ease of reference, it’s reproduced in Listing 8-2.
OOPHP_02.book Page 61 Friday, May 5, 2006 2:25 PM
62 Chapter 8
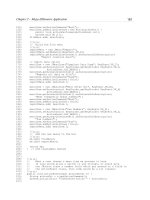
echo "<div style=\"text-align:center;\">";
echo "Click the file name to view full-sized version.<br />";
$path = "";
//specify size of thumbnail
$size = 100;
foreach (
$filearray as $key => $value){
$path = "$directory/".$key;
/*errors in getthumb or in class will result in broken links
- error will not display*/
echo "<img src=\"getthumb.php?path=$path&size=$size\" ".
"style=\"border:1px solid black;margin-top:20px;\" ".
"alt= \"$value\" /><br />\n";
echo "<a href=\"$path\" target=\"_blank\" >";
echo "Title: $value</a> <br />\n";
}
echo "</div><br />";
Listing 8-2: Code to loop through thumbnail images
This code differs from the code in Chapter 6 only in that the $filearray
variable that contains the image filenames is the portion of the total array
retrieved by the
getArraySlice method and not all the filenames.
Creating the PageNavigator Object
In order to create the page navigator, you need the current page name and
also the total number of image files; the global
$_SERVER array supplies the
name of the current page and
getCount the total number of images.
$pagename = basename($_SERVER["PHP_SELF"]);
$totalcount = $di->getCount();
You only need to create the navigator if there is more than one page, so
calculate that number first, as shown in the code in Listing 8-3.
$numpages = ceil($totalcount/PERPAGE);
//create if needed
if($numpages > 1){
//create navigator
$nav = new PageNavigator(
$pagename, $totalcount, PERPAGE, $totaloffset);
//is the default but make explicit
$nav->setFirstParamName(OFFSET);
echo
$nav->getNavigator();
}
Listing 8-3: Creating the navigator if there’s more than one page
OOPHP_02.book Page 62 Friday, May 5, 2006 2:25 PM
Using the PageNavigator Class 63
When constructing the PageNavigator instance, you pass it the four
required parameters and let the two additional parameters—
$maxpagesshown
and
$params—default to 4 and an empty string, respectively. This means that
the navigator will show links to a maximum of four pages and that there are
no additional name/value pairs for the query string. (As promised in Chap-
ter 7, you’ll learn more about
$params in Chapter 9. However, you may already
have surmised that this variable can be used to replace the hard-coded
directory name given in Listing 8-1.)
You do not need to set
the first parameter name; it has a default value
of
offset. However, by setting the name here, you make it clear that this is the
name of the one required name/value pair, and that it can be changed if
desired.
Finally, the HTML code that makes up
the navigator is returned and
displayed in the web page.
Where to Go from Here
Using the PageNavigator class solves two problems: it alleviates the demand on
server resources and it improves the aesthetics of the web page display. Only
a limited number of images are displayed at any one time, thus reducing the
demands on the server. Aesthetic requirements are satisfied by reduced web
page length.
As noted on many occasions, the real value of objects is in their reusability.
Through the use of CSS, you’re able to adjust the appearance of the page
navigator to match it to a variety of situations. By using
span and div tags,
you can manipulate the look and feel of the navigator so that it blends easily
with any design. The number of items shown on each page and the number
of pages accessible at any one time can be set to any number desired.
We’ve seen that the
PageNavigator class’s design is adaptable and that
you can use it to step through an array of images, but what about its use in
other situations? A navigator is much more commonly required with database
queries that return a large number of records. In the next chapter, we’ll
develop a database class and then see how well the
PageNavigator class can
handle a large result set. The ability to reuse the navigator class in various
and different circumstances will be a true test of its robustness.
OOPHP_02.book Page 63 Friday, May 5, 2006 2:25 PM
OOPHP_02.book Page 64 Friday, May 5, 2006 2:25 PM
9
DATABASE CLASSES
The last chapter ended by saying we would
create a database class in order to test the
versatility of the page navigator. That’s what
we’re going to do in this chapter. I noted earlier
that it’s sometimes difficult to identify objects, because
often what’s needed is something conceptual rather than something physical
and concrete. The database class or classes that we are going to create in this
chapter are definitely of this nature. We can probably determine some of the
requirements by looking at the
DirectoryItems class—after all, as you learned
in Chapter 5, this class is similar to a database table.
Using What You Know
Pursuing this line of thought, you need to:
Filter and order records
Know the total number of records
Be able to extract sequential subsets of the total
OOPHP_02.book Page 65 Friday, May 5, 2006 2:25 PM
66 Chapter 9
In the context of database classes, the description of the requirements
immediately suggests the use of the SQL
ORDER BY, WHERE, and LIMIT clauses to
order, filter, and extract subsets respectively. You had to create this kind of
functionality for the
DirectoryItems class, but why recreate what’s already
available in SQL?
Just as PHP’s built-in image manipulation functions helped create the
ThumbnailImage class, look also for assistance from the existing MySQL-related
functions. If you’ve used these functions before, you’ll immediately know
which ones are the most important and the most commonly required. Obvi-
ously, you’ll need
mysql_connect to create a connection to a specific server.
Creating a connection is a prerequisite for using
mysql_select_db to select
a database and
mysql_query to execute a query and return a result set of rows.
One Lump or Two?
There are two distinct classes that can be built around these existing PHP
MySQL functions, depending upon your preferences: a connection class and
a result set class. First, you’ll create a database connection class, as you might
imagine, making use of the
mysql_connect function. A connection is server-
specific and can be used to create any number of result sets taken from any
database on that server. It simply sets up communication between a web page
and a database server. A result set makes use of a connection in order to
update or display data. You’ll build a MySQL result set class around the
mysql_select_db and mysql_query functions.
You will develop fairly skeletal versions of these two classes, emphasizing
any unexplored areas of object-oriented programming (OOP). Nevertheless,
these classes will be perfectly fit for the task of testing the versatility of the
PageNavigator class.
In this chapter, we’ll take a slightly different approach to the code. I’ll
show the data members and the methods of the class, but I’ll only reproduce
code that requires comment. As usual, the complete code is available at the
companion website, so don’t hesitate to download it and refer to it if you find
this helpful.
The MySQLConnect Class
The MySQLConnect class is a fairly modest class with only two data members and
four public methods.
//data members
private $connection
private static $instances = 0
//methods
public function __construct($hostname, $username, $password)
public function __destruct()
public function createResultSet($strSQL, $databasename)
public function close()
OOPHP_02.book Page 66 Friday, May 5, 2006 2:25 PM
Database Classes 67
What is immediately noteworthy about this class is the use of the keyword
static to modify a data member. Identifying a variable as static means that it
is shared among all instances of a class. If one instance changes the value of
a static variable, it is changed for all instances. Unique variables are created
each time a class is instantiated, and they belong to that specific instance.
Not so with static variables—they belong to the class as a whole (and for
this reason are sometimes referred to as class variables). Let’s look at the
code for the constructor and see how this can be useful.
A Class-Conscious Variable
The parameters passed to the constructor are those necessary to make a
database connection using the built-in PHP function,
mysql_connect. Again,
this method is a wrapper method but with a few additional bells and whistles.
public function __construct($hostname, $username, $password){
if(
MySQLConnect::$instances == 0){
$this->connection = mysql_connect($hostname,$username,$password) or
die ( mysql_error(). " Error no:".mysql_errno());
MySQLConnect::$instances = 1;
}else{
$msg = "Close the existing instance of the ".
"MySQLConnect class.";
die($msg);
}
}
This class won’t be instantiated if there is already an existing instance.
If the
$instances variable has a value of 0, a connection is made to the server,
and the value of
$instances is set to 1. Checking the value of this static variable
makes sense because it is shared among all instances, it’s available to all
instances, and its value is the same for all instances.
The syntax for referencing a static variable (
) is different from that used
to reference a normal data member. It would not make sense to use the
pseudo-variable
$this with $instances, since $this refers to the current object
and by definition, static variables belong to the class rather than a specific
instance. Quite sensibly, the class name is used instead, and the arrow operator
is replaced by a double colon—the scope resolution operator.
The scope resolution operator is principally used when referencing static data
members or static methods. In Chapter 10 you’ll see the two other occasions
when this operator is used, but for now you need only concern yourself with
its use with static data members. When referencing a static variable from
within its class, you also have the option of replacing the class name with
the keyword
self. In this case, the expression self::$instances is equivalent
to
MySQLConnect::$instances. Static members referenced outside the confines
of their class must use the class name. You don’t need to worry about that
here, since
$instances is private and cannot be referenced outside the
MySQLConnect class.
OOPHP_02.book Page 67 Friday, May 5, 2006 2:25 PM
68 Chapter 9
At this point you may be thinking, “That’s all well and good, but why
would I want a class that I can only create one instance of?” Creating a
database connection is an expensive operation so restricting creation of
connections conserves resources.
NOTE By restricting the connection class to a single instance, we are mimicking the built-in
mysql_connect function. Its default behavior is to reuse a connection resource rather
than create a new one.
However, there are some circumstances where a new connection is a
necessity.
Making Other Connections
Two different connection objects are required if a single script needs to con-
nect to two different servers. The
close method makes it possible to connect
to a different server.
public function close(){
MySQLConnect::$instances = 0;
if(isset($this->connection)){
mysql_close($this->connection);
unset($this->connection);
}
}
Two instances of the MySQLConnect class can exist, but not simultaneously.
If you want to create a connection to another server, you must first close the
existing connection. The
close method closes the current connection and
resets the static variable
$instances to 0. Manipulating the $instances variable
in this way allows you to create a new connection, but only after the current
one is closed.
Explicitly closing a connection and unsetting it makes for clearer error
messages should you accidentally call a result set method after closing its
connection. The requirement to close the current connection also serves
as a reminder that a result set is a dependent object.
To make this even clearer, let’s look at how a result set is created.
You Can Only Get There from Here
The following method serves as a very strong reminder that you first need a
connection in order to create a result set:
public function createResultSet($strSQL, $databasename){
$rs = new MySQLResultSet($strSQL, $databasename, $this->connection );
return $rs;
}
The creation of a MySQLResultSet requires a reference to the connection data
member of the
MySQLConnect class. This data member is private and does not
have an accessor method, so it’s only available from within the
MySQLConnect
OOPHP_02.book Page 68 Friday, May 5, 2006 2:25 PM
Database Classes 69
class. Short of reverting to procedural programming to create a connection
resource, you cannot create an instance of the
MySQLResultSet class except by
using this method of the
MySQLConnect class. This makes it very clear that a
result set is a dependent object. You can’t create one without first having a
connection to a server. Instantiating an object of the
MySQLResultSet class from
within the
MySQLConnect class serves not only to remind you of this dependency,
but it enforces it programmatically. To understand the connection class,
you’ve had to look ahead at the constructor for the result set class.
Let’s examine the rest of this class in detail.
The MySQLResultSet Class
Not surprisingly, the MySQLResultSet class (shown in Listing 9-1) has more data
members and methods than the
MySQLConnect class. However, in many ways,
it’s a much simpler class and requires much less explanation. To get an
overview of this class, find all its data members and methods listed here:
//data members
private $strSQL
private $databasename
private $connection
private $result
// public methods
public function __construct($strSQL, $databasename, $connection)
public function __destruct()
//return current record
public function getRow()
//accessor method for returning database name
public function getDatabaseName()
public function getNumberColumns()
public function getNumberRows()
//get id of most recently inserted record
public function getInsertId()
//find total number without a LIMIT clause
public function getUnlimitedNumberRows()
public function getFieldNames()
public function findVersionNumber()
//private methods
//make sure the sql is a SELECT
private function checkForSelect()
//close result set and unset
private function close()
//version specific count methods
private function countVersionFour()
private function countVersionThree($tempsql, $end)
Listing 9-1: The
MySQLResultSet class
You’ve already seen the constructor for this class, but a few general
comments are in order before looking at any of the methods in more detail.
One notable absence from the list of methods is a method equivalent to the
OOPHP_02.book Page 69 Friday, May 5, 2006 2:25 PM
70 Chapter 9
getArraySlice method of the DirectoryItems class. You could have created
something equivalent by selecting all the required records and then using
the built-in function
mysql_data_seek to reposition the record pointer as
necessary, but the price to pay for this relatively easy implementation would
be poor performance. Imagine paging through 1,000 records 10 records at a
time and for each page, bringing over all 1,000 records. The more scalable
solution is to restrict the number of records selected by using a
LIMIT clause
in the SQL that creates the result set.
However, in order for your page navigator to function, you also need to
know the total number of records without a
LIMIT clause. With MySQL versions
4.0 and higher, there is an easy way of doing this using
SQL_CALC_FOUND_ROWS,
followed by a call to the
FOUND_ROWS function. For MySQL version 3, you can
use the
COUNT function without a LIMIT clause.
This is a fairly easy process to automate, so to make things easier on
yourselves and your client programmers, you create the
getUnlimitedNumberRows
method. Briefly, the
getUnlimitedNumberRows method confirms that the query is
a
SELECT, determines the MySQL version number, and discovers the total
number of records that would be returned without a
LIMIT clause by calling
the private method
countVersionThree or countVersionFour.
Most of the remaining methods are simply wrapper methods for exist-
ing MySQL functions, or they make use of these functions to perform fairly
straightforward tasks. You won’t actually be using some of these methods—
getNumberColumns, for instance—but they give you an idea of how this class
could be expanded.
This isn’t the last you’ll see of the
MySQLResultSet class. We’ll return to
it again in Chapter 10 because it provides an ideal opportunity for further
exploring OO programming. Right now though, your primary concern is to
see how it functions with the
PageNavigator class.
Using the Page Navigator
In order to use the page navigator to page through a result set, you’ll need a
database and a table. Almost any database will do; feel free to use one that
you have at hand, but for your convenience, the following SQL statement
creates the table used with the code example:
CREATE TABLE `tblbooks` (
`inventorynumber` int(11) NOT NULL auto_increment,
`cat` char(3) NOT NULL default '',
`title` varchar(150) NOT NULL default '',
`author` varchar(100) NOT NULL default '',
`publisher` varchar(4) NOT NULL default '',
`sold` tinyint(1) default 0,
PRIMARY KEY (`inventorynumber`),
KEY `authidx` (`author`)
)
OOPHP_02.book Page 70 Friday, May 5, 2006 2:25 PM