WebSphere Studio Application Developer Version 5 Programming Guide part 7 doc
Bạn đang xem bản rút gọn của tài liệu. Xem và tải ngay bản đầy đủ của tài liệu tại đây (202.48 KB, 10 trang )
34 WebSphere Studio Application Developer Version 5 Programming Guide
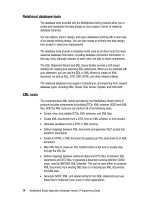
Figure 2-9 Classpath variables preferences
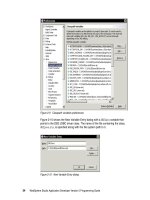
Figure 2-10 shows the New Variable Entry dialog with a DB2Java variable that
points to the DB2 JDBC driver class. The name of the file containing the class,
db2java.zip, is specified along with the file system path to it.
Figure 2-10 New Variable Entry dialog
Chapter 2. Setting up your Workbench and workspace preferences 35
Appearance of Java elements
The page
Java -> Appearance
provides a dialog with some settings regarding the
appearance of Java elements in viewers. Here you can change the following
options:
Show method return types
, methods in views display their return types.
Show override indicators in outline and hierarchy
displays an indicator for
overridden and implemented methods in the Outline and the Type Hierarchy
views.
Show members in Package Explorer
, if enabled, displays Java elements
below the level of Java files and Class files as well
Compress package name segments
, if enabled, compresses package names
according to the compression pattern
Stack views vertically in the Java Browsing perspective
stacks the views in the
Java Browsing perspective vertically rather than horizontally
Code formatter
The Java editor in the Workbench can be configured to format code in
conformance with personal preferences or team standards. When setting up the
Workbench you can decide what formatting should be applied.
To modify the default code formatting select
Windows -> Preferences -> Java ->
Code Formatter
as shown in Figure 2-11.
Use the tabs at the top of the page to modify various aspects of the code
formatting. The sample code in the bottom right pane shows you a preview of the
effects of changes that you make.
The code formatting options are almost self explaining. However, a detailed
description of each option is provided in Application Developer’s help manual.
Note: To apply the formatting rules defined here, select
Format
from the Java
editor context menu. Some formatting, for example indenting of braces, will be
done on the fly while you are editing the source code.
36 WebSphere Studio Application Developer Version 5 Programming Guide
Figure 2-11 Code Formatter preferences
Compiler options
Problems detected by the compiler are classified as either warnings or errors.
The existence of a warning does not affect the execution of the program. The
code executes as if it had been written correctly. Compile-time errors (as
specified by the Java Language Specification) are always reported as errors by
the Java compiler.
For some other types of problems you can, however, specify if you want the Java
compiler to report them as warnings, errors or to ignore them. To change the
default settings, use the
Window > Preferences > Java > Compiler
preferences
page (Figure 2-12).
Chapter 2. Setting up your Workbench and workspace preferences 37
Figure 2-12 Java compiler preferences dialog
Java Editor settings
By default the Java editor will use the standard Workbench font. If you want to
change the font, click
Windows -> Preferences -> Java -> Editor
and click
Change
in the Editor dialog.
Note: The Java compiler can create .class files even in presence of
compilation errors. In the case of serious errors (for example, references to
inconsistent binaries, most likely related to an invalid build path), the Java
builder does not produce any .class file.
38 WebSphere Studio Application Developer Version 5 Programming Guide
Besides the font, the following Java editor preferences can be set on this page:
Appearance
Syntax
Code Assist
Problem Indication
Figure 2-13 shows the Java editor preferences dialog.
Figure 2-13 Java editor preferences
There are a number of options for the code assist feature, which specify the
behavior and appearance of code assist. A description of how to use the code
assist feature is provided in “Code assist” on page 118. Also Application
Developer’s help manual contains a detailed description of each option of the
code assist feature.
Chapter 2. Setting up your Workbench and workspace preferences 39
Installed JREs
Application Developer allows you to specify which Java Runtime Environment
(JRE) should be used by the Java builder. By default the standard Java VM that
comes with Application Developer is used, but if you have special requirements
you may want to add another JRE to be used as default or for special projects.
Select
Window -> Preferences -> Java -> Installed JREs
to display the dialog as
shown in Figure 2-14.
Figure 2-14 Installed JREs
By default, the JRE used to run the Workbench will be used to build and run Java
programs. It appears with a check mark in the list of installed JREs. You can add
another JRE and indicate whether it should be the default JRE or not.
When setting up the project you can also choose which of the JREs you would
like to use. If you do not explicitly specify the JRE for the project, the default JRE
is used.
40 WebSphere Studio Application Developer Version 5 Programming Guide
You can either add, edit or remove a JRE by using this dialog. To add a new JRE
click
Add
. This brings up a new dialog (Figure 2-15).
Figure 2-15 Add JRE dialog
In the JRE type field, select the type of JRE you want to add from the drop-down
list and enter a unique name in the JRE name field. In the JRE home directory
field, type or click
Browse
to select the path to the root directory of the JRE
installation (usually the directory containing the bin and lib directories for the
JRE). This location is checked automatically to make sure it is a valid path.
In the Javadoc URL field, type or click
Browse
to select the URL location. The
location is used by the Javadoc export wizard as a default value. If you want to
use the default libraries and source files for this JRE, select the
Use default
system libraries
check box. Otherwise, clear it and customize as desired. Source
can be attached for the referenced JARs as well.
Javadoc documentation
Application Developer supports the creation of Javadoc documentations.
Javadoc is the tool from Sun Microsystems for generating API documentation in
HTML format from doc comments in source code.
Chapter 2. Setting up your Workbench and workspace preferences 41
For more information regarding Javadoc, see this Web site:
/>The JDT uses the Javadoc command (typically available in JDK distributions) to
generate Javadoc documentation from source files. Before you create Javadoc
documentation, you have to set the location of the Javadoc command.
Select
Window -> Preferences -> Java -> Javadoc
to open the Javadoc
preferences page (Figure 2-16).
Figure 2-16 Javadoc preferences
In the Javadoc command field you have to enter the absolute path to the Javadoc
command. A javadoc.exe file is located any JDK installed on your system, for
example, the JDK within the built-in WebSphere Application Server:
<wsadhome>\runtimes\base_v5\java\bin\javadoc.exe
42 WebSphere Studio Application Developer Version 5 Programming Guide
Once you have set the Javadoc command, you can start creating Javadoc
documentation. Therefore, select the set (containing one or more elements) of
packages, source folders or projects for which you want to generate Javadoc
documentation. Then open the Export wizard by selecting
File -> Export
from the
menu bar and
Javadoc
and click
Next
. Now you have to go through three pages
of a wizard to customize the Javadoc export:
In the first page of the wizard, select the types for which Javadoc will be
generated and the members with visibility. Also specify the destination folder
where the documentation should be created.
In the second page of the wizard, you can specify a style sheet, the document
title, document tags and basic options as well as the referenced classes to
which Javadoc should create links.
In the third page of the wizard you can specify some extra Javadoc options
and save the settings of the export as an Ant script.
For an example of Javadoc generation see “Javadoc” on page 133.
Organize imports
You can specify how you want the Java editor to handle imports when using the
automatic import generation feature. For more information on this feature see
“Import generation” on page 120.
In the Organize Imports preferences (Figure 2-17) you can specify the order of
the import statements. You can also control at what stage <package name>.*
import statements should be generated rather than fully qualified import
statements. The default number of fully-qualified import statements that are
allowed from the same package before <package>.* is 99.
Use the
Up
and
Down
buttons to change the order to imports. You can also add,
edit and remove imports. To add a new import entry, click
New
.
In the new dialog, simply type the package name or the package name prefix you
would like a add to the import statements list and confirm the dialog with
OK
.
Tip: You can also save and load your import statements settings by using the
Load
and Save
buttons
. This might be a good idea when working in a team
where you have to apply coding standards.
Chapter 2. Setting up your Workbench and workspace preferences 43
Figure 2-17 Organize Imports preferences
Refactoring
Refactoring refers to the process of moving or renaming Java elements. A more
detailed description about Application Developer’s refactoring capabilities and
the refactoring preferences is provided in “Refactoring” on page 122.
Templates
Application Developer also provides templates. Templates are often reoccurring
source code patterns. The JDT of Application Developer offers support for
creating, managing, and using templates.
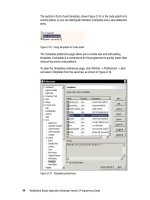
You can use a template in the Java editor by pressing Ctrl-Space (see “Code
assist” on page 118 for more information) and the templates appear in the
presented list. Note that the list is filtered as you type, so typing a few first
characters of a template name will reveal it.
