WebSphere Studio Application Developer Version 5 Programming Guide part 14 pdf
Bạn đang xem bản rút gọn của tài liệu. Xem và tải ngay bản đầy đủ của tài liệu tại đây (240.13 KB, 10 trang )
104 WebSphere Studio Application Developer Version 5 Programming Guide
Executing the CustomerListing class should result in an error. The Console view
will display the following error message:
Customer Listing for CUSTOMER
Exception: COM.ibm.db2.jdbc.app.DB2Driver
Exception: null
The exception information indicates that there was a problem locating a class
required to run the program. To correct the error you have to add the JAR file with
the DB2 JDBC driver code to the classpath.
Adding a JAR file to the classpath
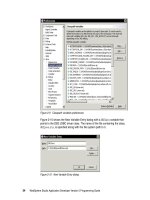
We have to update the Java build path that was previously defined. Select the
ItsoProGuideJava project and
Properties
from the context menu. Then you
select the
Java Build Path
entry and the
Libraries
tab (Figure 5-12).
Figure 5-12 Java Build Path settings for the ItsoProGuideJava project
There are two ways you can specify access to the required classes:
Select
Add External JARs
and locate the db2java.zip file in the file system.
Select
Add Variable
to add a variable that refers to the db2java.zip file.
It is recommended to use the second option because you are not directly
referencing a physical path that could be different for another developer within a
team.
Chapter 5. Developing Java applications 105
For this sample it is assumed that a variable DB2JAVA has been defined. If DB2 is
installed on your system, Application Developer predefines this variable.
To add this variable to the Java build path for the project, select
Add Variable
to
display the New Variable Classpath Entry dialog (Figure 5-13).
Figure 5-13 Adding a variable to the classpath
Select the DB2JAVA variable and close the dialog with
OK
.
If the DB2JAVA variable is not available in the dialog, you have to create a new
variable. Click the
New
button to display the New Variable Entry dialog
(Figure 5-14). Enter DB2JAVA in the name field and select the file db2java.zip
from the file system by clicking the
File
button and confirm the dialog with
OK
.
Figure 5-14 New Variable Entry dialog
The sample code can now be executed again and the list of customers in the
database table should be displayed in the Console view.
Note: The EJBBANK database must be defined for this example. See “Installing
the EJBBANK database” on page 811 for instructions.
DB2JAVA
c:\sqllib\java\db2java.zip
106 WebSphere Studio Application Developer Version 5 Programming Guide
Exporting code and running outside Application Developer
If you would like to run this sample application outside of Application Developer
you can export the class file to the file system and run it from there:
Select
File -> Export
. The Export dialog is displayed (Figure 5-15).
Figure 5-15 Export dialog
This dialog allows you to select the destination of the export. In this example
we will do a simple export to the file system. If the code would have been in
several class files, or if there would have been other resources required to run
the program, you could have chosen to export the sample project as a JAR
file instead.
When you have made your selection—in this case select
File system
—click
Next
to specify the resources to export (Figure 5-16).
Chapter 5. Developing Java applications 107
Figure 5-16 Export to File System dialog
Expand the project which is shown in the left pane and select the
CustomerListing.class file in the right pane. You can specify the directory
where you would like to export the file. In this example we use C:\ as the path
and check the
Create directory structure for files
check box. This option
creates the directory path ItsoProGuideJava\itso\java for the file.
To run the application, open a command prompt window, switch to the
ItsoProGuideJava directory and enter the command:
java -cp ".;c:\sqllib\java\db2java.zip" itso.java.CustomerListing
The db2java.zip file is already added to the classpath after DB2 has been
installed. Therefore the following command should also execute the sample
application:
java itso.java.CustomerListing
After running this program, the customer list is displayed in the command
window.
108 WebSphere Studio Application Developer Version 5 Programming Guide
Locating compile errors in your code
All compile errors in your Java code are shown in the Tasks view. An example of
such an entry in the CustomerListings.java file is displayed in Figure 5-17. The
entry in the Tasks view is marked with this symbol . Double-clicking the entry
in the task list will navigate to the line in the source editor, where the error was
detected.
The line where the error occurs is also indicated by a yellow light bulb. If you
move the mouse over the light bulb, the error message is shown.
Figure 5-17 Identifying errors in Java code
To more easily find the errors in the file you are working in, you can filter the
Tasks view to only show errors related to the current resource. To do this, click
the Filter icon in the Tasks view and select the entry
On selected resource
only
(or
On any resource in same project
) in the Filter Tasks dialog (Figure 5-18).
Note: The command may be different on your system, depending on where
DB2 has been installed.
You also need to ensure that the file java.exe is accessible in the path. In the
Application Developer installation folder you will find a copy of java.exe
located in the <wsadhome>\eclipse\jre\bin directory.
Chapter 5. Developing Java applications 109
Figure 5-18 Filter Tasks dialog
Debugging your code
How to debug Java applications in Application Developer is described in detail in
Chapter 16, “Testing and debugging” on page 553. In this section we will only
take a quick look at how to debug the simple Java application we have just
created.
Setting a breakpoint in a method causes the Debug perspective to open. A
breakpoint is a temporary marker in your code to tell the debugger to suspend
executing your program at a given point.
To set a breakpoint in the code, double-click in the grey area left of the statement
in the Java editor where you want to set the breakpoint. You can also open the
context menu and select
Add Breakpoint
(Figure 5-19).
Typical setting:
resources in
the same
project
110 WebSphere Studio Application Developer Version 5 Programming Guide
If you want to see all breakpoints that are currently set, select
Window -> Show
View -> Other
and select the
Breakpoints
view located in the
Debug
tree.
Figure 5-19 Setting a breakpoint
To debug the CustomerListing class, you can start the program in debug mode
by clicking the
Debug
icon in the toolbar .
This opens the Debug perspective and run the program until the first breakpoint
has been reached. Within the Debug perspective you can view, inspect, and
modify variables, and can trace your code (Figure 5-20).
Figure 5-20 Debug perspective
Step through
the code
Watch the variables
Breakpoint
Chapter 5. Developing Java applications 111
Step through the code line by line using the icon in the toolbar of the
Debug view. Other icons let you step into methods, or step to the return of a
method.
Watch the variable values in the Variables view.
Run the program to the end using the icon.
Close the Debug perspective and any open editors.
Preparing a utility project
Utility projects are Java projects containing code that should be available to
multiple modules of an enterprise application.
J2EE 1.3 provides support for utility JAR files at the enterprise application level.
Such JAR files are then made available to Web and EJB modules as JAR file
dependencies.
Banking model
Later in this book, when we implement an enterprise application with a Web
module in Chapter 7, “Developing Web applications” on page 179, we will use a
banking model that we define in the Java project. Figure 5-21 shows the types
used in the banking model.
Figure 5-21 Banking model
TransRecord
Customer
Account
Banking
Test
Façade
Business
Model
Bank
1:m
Customer
JSP
Servlet
Front-end
1:m
m:m
1:m
112 WebSphere Studio Application Developer Version 5 Programming Guide
Customer A customer of the bank.
Account A bank account. A customer may have multiple bank accounts
and an account may be owned by multiple customers.
TransRecord A transaction record that is generated for each banking
transaction, such as a deposit, withdrawal, or transfer of money
between two accounts. A bank account may have many
transaction records.
Bank The mediator. Mediators act as coordinators, encapsulating the
other objects and how they interact. The bank class holds the
customer, account, and transaction record objects, and
methods to work with them.
In Chapter 12, “Developing EJB applications” on page 373 we
replace the Bank class with a EJB session bean that provides
the same functions. The session bean interacts with entity
beans that map to relational tables.
BankingTest The facade. The intent of facades is to provide a simple and
unified interface to the otherwise complex model that lies
behind it. By doing so, we reduce the dependencies between
the model classes and its clients. Less dependencies mean
more freedom to adapt to new requirements.
The BankingTest facade is for testing purposes only. We will
implement the real facade in the front-end modules, for
example, in Web applications.
Design considerations
This design with separation of front-end and backend enables us to implement
multiple front-ends and multiple business models that work with each other.
In Chapter 7, “Developing Web applications” on page 179, we implement a
front-end Web application using basic servlets and JSPs.
In Chapter 10, “Developing Struts applications” on page 293, we implement a
front-end Web application using the Struts framework.
In Chapter 12, “Developing EJB applications” on page 373, we implement the
business model as enterprise beans (EJBs). With a small change to the
facade bean we can then run both Web applications against the EJB business
model.
Note: Both mediator and facade are documented design patterns. Refer to
Design Patterns: Elements of Reusable Object-Oriented Softwar
e.
Chapter 5. Developing Java applications 113
Implementation
We use an implementation in regular JavaBeans with data in memory for the
model. Additional services like persistence, distribution, security, or transaction
management were not considered. We wanted to keep the model layer as simple
as possible, not to add to the complexity natural to this kind of application.
However, we can redesign the model with the use of an underlying database at
any time.
Packages and classes
The model is implemented in these packages and classes:
itso.bank.model Model classes: Bank, Customer, Account, TransRecord
Customer: id, title, firstname, lastname
Account: id, balance, type
TransRecord: timeStamp, transType, transAmt
itso.bank.facade The facade for banking operations is the BankingTest
class. This is the initial implementation of the facade.
itso.bank.exception Application exceptions: AccountDoesNotExistException,
CustomerDoesNotExistException, ZeroAmountException,
InvalidAmountException, BankException,
InsufficientFundsException
itso.bank.util Converter of amounts between numeric and character
representations: AmountConverter
itso.bank.main Test program: BankMain
The Bank class initializes the data in memory. Instances of customers and
accounts are kept as java.util.Map. The customer-account relationship is held
as a java.util.Vector for each customer within a java.util.Map. The
transaction records of an account are held as a java.util.TreeSet for each
Account within a java.util.Map.
All amounts are kept as java.math.BigDecimal, which provide accurate
calculations of amounts.
Business logic
All classes provide getter and setter methods for the attributes. To work with the
model the following business logic methods are provided:
The Customer class provides no special methods.
The Account class provides deposit and withdraw methods to perform
banking transactions.
