Xây dựng ứng dụng cho Android với HTML, CSS và javascript - part 9 potx
Bạn đang xem bản rút gọn của tài liệu. Xem và tải ngay bản đầy đủ của tài liệu tại đây (3.66 MB, 10 trang )
id
A unique identifier for the element in the context of the entire page.
autocapitalize
Allows you to control the autocapitalization feature in Mobile Safari on the
iPhone. Has no effect on Android.
autocorrect
Allows you to control the spelling correction feature in Mobile Safari on the
iPhone. Has no effect on Android.
autocomplete
Allows you to control the autocomplete feature in Mobile Safari on the iPhone.
Has no effect on Android.
The class attribute of the submit input button needs explanation. The Android
phone will display a keyboard whenever the user’s cursor is in a field. The keyboard
has a Go button in the bottom right-hand corner that submits the form when clicked.
When you are hijacking the submit function as we are doing here, submitting from
the Go button on the keyboard does not remove the cursor from the active field and
therefore, the keyboard does not slide out of view. To remedy this, jQTouch offers
a convenience method that automatically removes the cursor from the active field
when a form is submitted. To take advantage of this feature, add the submit class to
the submit element of the form.
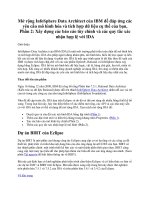
Figure 4-6. The jqt theme does a nice job styling form elements
Figure 4-7
shows
the
New Entry form in action. At this point, we’ve done nothing to
actually save the entry when the user clicks Save Entry. We’ll cover that in Chapter 5.
Adding the New Entry Panel | 63
Download from www.eBookTM.com
Adding the Settings Panel
We
haven’t
yet
created a button that will allow users to navigate to a Settings panel, so
let’s add one to the toolbar on the Home panel. All it takes is a single line of HTML,
shown in bold:
<div id="home">
<div class="toolbar">
<h1>Kilo</h1>
<a class="button flip" href="#settings">Settings</a>
</div>
<ul class="edgetoedge">
<li class="arrow"><a href="#dates">Dates</a></li>
<li class="arrow"><a href="#about">About</a></li>
</ul>
</div>
remaining HTML not shown
This is the line of HTML that adds the button (Figure 4-8).
Notice that we’ve as-
signed the flip class to the link. The flip class instructs jQTouch to transition from
the Home panel to the Settings panel by rotating the page on its vertical axis. To
give an added dimension to the process, the page actually zooms out a bit during
the animation. Fancy, no?
Unfortunately, support for 3D animations is spotty across mobile
platforms, including Android.
Therefore flip, swap, cube, and any
other 3D animations will failover to 2D animations when 3D is not
supported.
Figure 4-7. Keyboard data entry with the New Entry form
64 | Chapter 4: Animation
Download from www.eBookTM.com
Figure 4-8. The Settings button added to the toolbar on the Home panel
After
working
on the New Entry panel, the HTML for the Settings panel is going to
look pretty similar (Example 4-6). There is one more text input and some of the
attributes have been omitted or have different values, but conceptually they are iden-
tical. Add this to your HTML document just as you’ve done with the HTML for the
other panels.
As with the New Entry form, the Settings form does not currently save any of the
information associated with it (see Figure 4-9). Its submission handler will be described
in the next chapter.
Example 4-6. The HTML for the Settings Panel
<div id="settings">
<div class="toolbar">
<h1>Settings</h1>
<a class="button cancel" href="#">Cancel</a>
</div>
<form method="post">
<ul class="rounded">
<li><input placeholder="Age" type="text" name="age" id="age" /></li>
<li><input placeholder="Weight" type="text" name="weight" id="weight" /></li>
<li><input placeholder="Budget" type="text" name="budget" id="budget" /></li>
<li><input type="submit" class="submit" name="action"
value="Save Changes" /></li>
</ul>
</form>
</div>
Adding the Settings Panel | 65
Download from www.eBookTM.com
Putting It All Together
So,
there
you have it. With fewer than 100 lines of code, we’ve created a native-style
UI for a five-panel application complete with three different page transition animations.
See Example 4-7 for a complete listing of the final HTML. Not too shabby, right?
Example 4-7. The complete HTML listing for the five-panel UI
<html>
<head>
<title>Kilo</title>
<link type="text/css" rel="stylesheet" media="screen" href="jqtouch/jqtouch.css">
<link type="text/css" rel="stylesheet" media="screen"
href="themes/jqt/theme.css">
<script type="text/javascript" src="jqtouch/jquery.js"></script>
<script type="text/javascript" src="jqtouch/jqtouch.js"></script>
<script type="text/javascript">
var jQT = $.jQTouch({
icon: 'kilo.png'
});
</script>
</head>
<body>
<div id="home">
<div class="toolbar">
<h1>Kilo</h1>
<a class="button flip" href="#settings">Settings</a>
</div>
<ul class="edgetoedge">
<li class="arrow"><a href="#dates">Dates</a></li>
<li class="arrow"><a href="#about">About</a></li>
</ul>
</div>
<div id="about">
Figure 4-9. The Settings panel
66 | Chapter 4: Animation
Download from www.eBookTM.com
<div class="toolbar">
<h1>About</h1>
<a class="button back" href="#">Back</a>
</div>
<div>
<p>Kilo gives you easy access to your food diary.</p>
</div>
</div>
<div id="dates">
<div class="toolbar">
<h1>Dates</h1>
<a class="button back" href="#">Back</a>
</div>
<ul class="edgetoedge">
<li class="arrow"><a id="0" href="#date">Today</a></li>
<li class="arrow"><a id="1" href="#date">Yesterday</a></li>
<li class="arrow"><a id="2" href="#date">2 Days Ago</a></li>
<li class="arrow"><a id="3" href="#date">3 Days Ago</a></li>
<li class="arrow"><a id="4" href="#date">4 Days Ago</a></li>
<li class="arrow"><a id="5" href="#date">5 Days Ago</a></li>
</ul>
</div>
<div id="date">
<div class="toolbar">
<h1>Date</h1>
<a class="button back" href="#">Back</a>
<a class="button slideup" href="#createEntry">+</a>
</div>
<ul class="edgetoedge">
<li id="entryTemplate" class="entry" style="display:none">
<span class="label">Label</span>
<span class="calories">000</span>
<span class="delete">Delete</span>
</li>
</ul>
</div>
<div id="createEntry">
<div class="toolbar">
<h1>New Entry</h1>
<a class="button cancel" href="#">Cancel</a>
</div>
<form method="post">
<ul class="rounded">
<li><input type="text" placeholder="Food" name="food" id="food"
autocapitalize="off" autocorrect="off" autocomplete="off" /></li>
<li><input type="text" placeholder="Calories" name="calories"
id="calories" autocapitalize="off" autocorrect="off"
autocomplete="off" /></li>
<li><input type="submit" class="submit" name="action"
value="Save Entry" /></li>
</ul>
</form>
</div>
<div id="settings">
<div class="toolbar">
Putting It All Together | 67
Download from www.eBookTM.com
<h1>Settings</h1>
<a class="button cancel" href="#">Cancel</a>
</div>
<form method="post">
<ul class="rounded">
<li><input placeholder="Age" type="text" name="age" id="age" /></li>
<li><input placeholder="Weight" type="text" name="weight"
id="weight" /></li>
<li><input placeholder="Budget" type="text" name="budget"
id="budget" /></li>
<li><input type="submit" class="submit" name="action"
value="Save Changes" /></li>
</ul>
</form>
</div>
</body>
</html>
Customizing jQTouch
You can customize
the
jQTouch default behavior by sending a variety of property set-
tings into the constructor. You saw this previously with the icon property, but there
are several others that you should be aware of (Table 4-1).
Table 4-1. jQTouch customization options
Property Default Expects Notes
addGlossToIcon true true or false If set to true, gloss will be added to the
home screen icon on iPhone. Has no ef-
fect on Android.
backSelector '.back, .cancel,
.goback'
Any valid CSS selector;
separate multiple values
with a comma
Defines elements that will trigger the
“back” behavior of jQTouch when
tapped. When the back behavior is
invoked, the current panel moves off
screen with a reverse animation and is
removed from history.
cacheGetRequests true true or false If set to true, automatically caches GET
requests, so subsequent clicks reference
the already-loaded data.
cubeSelector '.cube' Any valid CSS selector;
separate multiple values
with a comma
Defines elements that will trigger a cube
animation from the current panel to the
target panel.
dissolveSelector '.dissolve' Any valid CSS selector;
separate multiple values
with a comma
Defines elements that will trigger a dis-
solve animation from the current panel
to the target panel.
fadeSelector '.fade' Any valid CSS selector;
separate multiple values
with a comma
Defines elements that will trigger a fade
animation from the current panel to the
target panel.
68 | Chapter 4: Animation
Download from www.eBookTM.com
Property Default Expects Notes
fixedViewport true true or false If set to true, prevents users from
being able to zoom in or out of the page.
flipSelector '.flip' Any valid CSS selector;
separate multiple values
with a comma
Defines elements that will trigger a flip
animation from the current panel to the
target panel.
formSelector 'form' Any valid CSS selector;
separate multiple values
with a comma
Defines elements that should receive the
onsubmit handler.
fullScreen true true or false iPhone only; has no effect on Android.
When set to true, your app will open in
full-screen mode when launched from
the user’s home screen. Has no effect on
the display if the app is running in Mobile
Safari.
fullScreenClass 'fullscreen' String iPhone only; has no effect on Android.
Class name that will be applied to the
body when the app is launched in full-
screen mode. Allows you to write
custom CSS that only executes in full-
screen mode.
icon null null or a relative or
absolute path to a .png
image file
The home screen icon for your app. This
is the image that will be displayed when
a user adds a bookmark for your app to
his home screen.
popSelector '.pop' Any valid CSS selector;
separate multiple values
with a comma
Defines elements that will trigger a pop
animation from the current panel to the
target panel.
preloadImages false An array of image paths Defines images that will be loaded be-
fore the page loads. For example:
['images/link_over.png',
'images/link_select.png']
slideInSelector 'ul li a' Any valid CSS selector;
separate multiple values
with a comma
Defines elements that will trigger a slide
left animation from the current panel to
the target panel.
slideupSelector '.slideup' Any valid CSS selector;
separate multiple values
with a comma
Defines elements that will cause the tar-
get panel to slide up into view in front
of the current panel.
startupScreen null null or a relative or ab-
solute path to an image
file
iPhone only; has no effect on Android.
Pass a relative or absolute path to a
320px × 460px startup screen for full-
screen apps. Use a 320px × 480px
image if you set statusBar to
black-translucent.
Customizing jQTouch | 69
Download from www.eBookTM.com
Property Default Expects Notes
statusBar 'default' default, black-
translucent, black
iPhone only; has no effect on Android.
Defines the appearance of the 20-pixel
status bar at the top of the window in an
app launched in full-screen mode.
submitSelector '.submit' Any valid CSS selector;
separate multiple values
with a comma
Selector that, when clicked, will submit
its parent form (and close keyboard if
open).
swapSelector '.swap' Any valid CSS selector;
separate multiple values
with a comma
Defines elements that will cause the tar-
get panel to swap into view in front of
the current panel.
useAnimations
true true or false Set to false
to disable all animations.
What You’ve Learned
In this chapter, you’ve learned how to add native-looking animations to a web app
using jQTouch. In the next chapter, you’ll learn how to use the new local storage and
client-side database features of HTML5 to add persistent data storage to your app.
70 | Chapter 4: Animation
Download from www.eBookTM.com
CHAPTER 5
Client-Side Data Storage
Most software applications need to store data in some sort of persistent fashion in order
to be useful. When it comes to web apps, this task has traditionally been handled with
either a server-side database or cookies set in the browser. With the advent of HTML5,
web developers now have a couple more options: Web Storage, and Web SQL
Database.
Web Storage
Web Storage comes in two flavors—localStorage and sessionStorage—and are very
similar to cookies in that they allow you to use JavaScript to set name/value pairs that
you can retrieve across multiple page reloads.
Unlike cookies, however, Web Storage data is not sent across the wire with the browser
request—it lives entirely in the client. Therefore, it’s feasible to store much more data
than you would want to with cookies.
At the time of this writing, browser size limits for Web Storage are still
in flux. However, my most recent tests indicate that the limit is right
around 2.5 MB.
Functionally, localStorage and sessionStorage are the same. They differ only in terms
of persistence and scope:
localStorage
Data is saved even after the window is closed and is available to all windows (or
tabs) that are loaded from the same source (must be the same domain name, pro-
tocol, and port). This is useful for things like application preferences.
71
Download from www.eBookTM.com
sessionStorage
Data is stored with the window object. Other windows/tabs are not aware of the
values, and the data is discarded when the window/tab is closed. Useful for
window-specific state like active tab highlight or the sort order of a table.
In any of the following examples, you can substitute sessionStorage
anywhere you see localStorage, but remember that sessionStorage goes
away when you close the window or tab.
Setting a value is as simple as the following:
localStorage.setItem('age', 40);
Accessing a stored value is equally simple:
var age = localStorage.getItem('age');
You can delete a specific key/value pair from storage like so:
localStorage.removeItem('age');
Or, you can delete all key/value pairs like so:
localStorage.clear();
Assuming your keys are valid JavaScript tokens (e.g., no spaces, no punctuation other
than underscores) you can use this alternate syntax:
localStorage.age = 40 // Set the value of age
var age = localStorage.age; // Get the value of age
delete localStorage.age; // Remove age from storage
The localStorage and sessionStorage
keys are stored separately. If you
use the same key name for each, they will not conflict with each other.
Saving User Settings to Local Storage
On to a practical example. Let’s update the Settings panel of the example app you
started working on in Chapter 4 so that it stores the form values in localStorage.
We are going to be writing a fair amount of JavaScript in this chapter, and I don’t want
to jam it all in the head section of our HTML document. To keep our code organized,
create a file called kilo.js in the same directory as your HTML document, and update
the head of your HTML document with a reference to kilo.js:
<head>
<title>Kilo</title>
<link type="text/css" rel="stylesheet" media="screen"
href="jqtouch/jqtouch.css">
72 | Chapter 5: Client-Side Data Storage
Download from www.eBookTM.com