The Best Damn Windows Server 2003 Book Period- P8 potx
Bạn đang xem bản rút gọn của tài liệu. Xem và tải ngay bản đầy đủ của tài liệu tại đây (446.45 KB, 10 trang )
Table 2.2 Management Snap-Ins in Computer Management
Computer
Management Node Management Snap-In Use
System Tools Event Viewer Display event logs
Shared Folders View shared folders, open files,
and active sessions
Local Users and Groups Manage local user and group
accounts
Performance Logs and Alerts Configure performance data logs
Device Manager Manage computer hardware
Storage Removable Storage Manage devices with removable
media
Disk Defragmenter Defragment local disks
Disk Management Configure disk partitions and
volumes
Services and Applications DHCP (if installed) Configure the DHCP service for
allocating IP addresses
Services Manage services
WMI Control Configure Windows
Management Instrumentation
Indexing Service Configure the Indexing Service to
provide fast searches
Routing and Remote Access
(if installed) Manage routing and remote
access
DNS (if installed) Configure the DNS service
36 Chapter 2 • Using Server Management Tools
Figure 2.5 Computer Management MMC
301_BD_W2k3_02.qxd 5/12/04 10:54 AM Page 36
Which Tool To Use?
In this section we’ve seen a variety of tools for remotely managing servers. How do you decide
which one to use in a given situation? It really depends on what you are trying to do and in cases
where you can accomplish the same thing with different tools, you might have your favorite tools
for administering a server.
■
Remote Assistance is really a tool for end users and you are unlikely to use it for remote
server management.You should, however, be aware that Remote Assistance invitations can
be sent from a Windows Server 2003 computer, and you should know how to turn off
Remote Assistance.
■
The Remote Desktop tool is useful when you need to have full control of a single server.
Because you are effectively at the server, you can administer any function. With the
Remote Desktop snap-in, or using RD from the command line, you can even connect to
the server console session remotely.
■
The Web Interface for Remote Administration is useful in situations where you need to
carry out basic tasks when you are away from the corporate network, but still have access
to the Internet. It is limited, however, as to which administrative tasks you can carry out.
■
The administration tools pack and computer management in conjunction with custom
MMCs are likely to be among the tools you use the most, especially if you have to admin-
ister a large number of servers.You can put together customized MMCs that contain the
snap-ins for tools that you use the most often and for the servers that you have to regularly
manage.
Using Emergency Management Services
Emergency Management Services is a new feature in Windows Server 2003 that enables you to
remotely manage a server when normal network connectivity has failed. Under normal conditions,
you use the tools described in this and other chapters to manage your server either by being physi-
cally present at the server or over the network. However, what happens if the network crashes or the
server doesn’t boot properly?
Providing the server has the appropriate hardware and firmware, you can remotely manage it
without the presence of a local keyboard, mouse, or display.This is called out-of-band or “headless”
operation. A key aim of out-of-band management is to get a server that is not working properly
back to a normal operating state.
A number of situations might require you to resort to out-of-band management:
■
The server has stopped responding to normal network management commands.
■
The network card in the server has failed.
■
The server hasn’t booted properly.
■
The server has been shut down and you need to bring it up again.
Using Server Management Tools • Chapter 2 37
301_BD_W2k3_02.qxd 5/12/04 10:54 AM Page 37
The extent to which you can use out-of-band management depends on the hardware of your
server.At the very least, on a server with Windows Server 2003, a serial port and Emergency
Management Services enabled, you can connect a VT100-type terminal or a computer with a ter-
minal emulator to the serial port and perform certain tasks using the Special Administration
Console (SAC). However, the server must be up and running to be able to manage it in this way.
If you need to be able to manage the server remotely when it has crashed or even switched off,
you need special hardware and firmware on the motherboard that provide features such as firmware
console redirection.This means that you can monitor the server via the serial port right from the
moment it starts up and even check out BIOS settings.
Emergency Management Services is not enabled by default, but can be enabled during an instal-
lation, an upgrade, or after setup has been completed.
Managing Printers and Print Queues
Managing printing, which involves many tasks, is a routine part of almost every administrator’s job
and in this section we will examine the tools that you can use to manage your printers.
Windows Server 2003 offers a variety of methods for managing printers; these include the
Control Panel, the Manage Your Server tool, and command-line tools.
Printer management tasks include the following:
■
Creating a printer
■
Sharing a printer
■
Adding printer drivers for earlier operating systems
■
Setting permissions
■
Managing print queues
■
Creating printer pools
■
Scheduling printers
■
Setting printing priorities
You can carry out all these tasks using graphical or command-line tools. First, we’ll cover how
to carry out these tasks using the graphical interface.
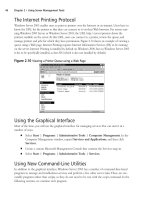
Using the Graphical Interface
The Graphical Interface for managing printers and print queues includes a number of tools:
■
Control Panel | Printers and Faxes folder
■
Add Printer Wizard
■
Add Printer Driver Wizard
■
Manage Your Server
38 Chapter 2 • Using Server Management Tools
301_BD_W2k3_02.qxd 5/12/04 10:54 AM Page 38
The Printers and Faxes folder is where printers defined on the computer are stored.
Configuring the properties of printers in this folder carries out nearly all printer tasks.
The Manage Your Server tool enables you to configure various server roles, including the
print server role, by using the Configure Your Server Wizard. We cover roles later in this chapter.
Here, we’ll examine the key printer management tasks using the graphical interfaces.
Creating a Printer
Use the Add Printer Wizard to create a printer by selecting Start | Settings | Printers and
Faxes and clicking the Add Printer icon.
The wizard asks you a series of questions about which port to use, the driver to use, what name
to give the printer, whether it should be shared, optional location and comment information, and
whether to print a test page.
The port to choose depends on how the printer is physically connected to the computer. It
might be connected to a serial port, parallel port, or USB port. If the printer is connected directly
to the network, you need to use a TCP/IP port and specify the IP address of the printer. Usually, if
you connect a printer to a USB port, Windows uses Plug and Play to automatically install the
printer for you.
Printer drivers are used to convert a print job to the specific commands that a print device
understands. Print devices vary in the command languages that they use; for example, most HP
printers use PCL. It is therefore very important that you select the correct driver for your printer.
Often a new printer comes with an installation CD or disk that contains the driver.
After you’ve created a printer, it appears in the Printers and Faxes folder and you can double-
click the printer to change its properties.
Sharing a Printer
If you do not share a printer, only the computer on which you create the printer can use it. Sharing
a printer makes it available over the network to other computers.
To share a printer: highlight it, right-click, and then click Sharing. In the Properties dialog
box, select Share this printer and choose a share name.This is the name by which the printer will
be known over the network.
You need to consider the operating system that the computers using the printer share will be
running. When you share a printer on a Windows Server 2003 computer, the installed driver is also
suitable for Windows XP and Windows 2000 clients. When a computer running Windows 2000 or
Windows XP connects to the share, it automatically downloads the driver. If you have client com-
puters running Windows NT 4.0 or Windows 95/98 or Windows Millennium Edition (ME), install
additional drivers.
Adding Printer Drivers for Earlier Operating Systems
To make a shared printer available to users of computers with earlier operating systems, install the
appropriate driver on the server computer.To do this, select the Sharing tab for the printer and
click the Additional Drivers button to load the drivers for earlier operating systems.The benefit
of doing this is that when a computer running, for example, Windows 98 connects to the shared
Using Server Management Tools • Chapter 2 39
301_BD_W2k3_02.qxd 5/12/04 10:54 AM Page 39
printer, it downloads the appropriate driver automatically rather than asking the user for the location
of the printer driver.
Setting Permissions
Printer permissions control who can print to a printer and whether a user can manage the printer.
There are three permissions for printers (refer to Table 2.3) and these can be applied to users and
groups.As with file and folder permissions, printer permissions are cumulative, so if a user has permis-
sions to a printer and is also a member of a group that has permissions, the user will have the cumula-
tive effect of the user and group permissions.The exception to this is that if any of the printer
permissions have been denied, the user can never have that permission regardless of any groups that he
belongs to. Figure 2.6 shows the default permissions on a Windows Server 2003 computer.
The Special Permissions permission enables you to fine-tune the security by specifying who
is allowed to read what the permissions are, who can change the permissions. and who can take
ownership.The person that created it owns a printer and that person can always change permissions
on the printer.To make someone else the owner of a printer, give that user the Take Ownership
permission and then get the other user to exercise the Take Ownership option.The user will then
own the printer and can change permissions.
Table 2.3 Printer Permissions
Permission Use
Print Users can print and delete their own jobs.
Manage Documents Users can pause, resume, restart, delete, and change the
print order of documents submitted by other users. However,
this permission does not, by itself, enable a user to print to
the printer.
Manage Printers Users have complete control over the printer and can change
any of its characteristics.
40 Chapter 2 • Using Server Management Tools
Figure 2.6 Default Printer Permissions
301_BD_W2k3_02.qxd 5/12/04 10:54 AM Page 40
Managing Print Queues
You will often need to see what jobs are waiting to print and perhaps to delete some.You accom-
plish this via the print queue for a printer.To look at the queue, double-click the printer of interest.
In the dialog box that appears you will see a list of jobs waiting to be printed.You can delete or
cancel a job by highlighting it and then pressing delete or by highlighting it and then right-clicking
and selecting Cancel.
To cancel all jobs in a queue, highlight the printer, right-click, and select Cancel All
Documents. If you have the dialog box for the printer queue open, you can also select Cancel All
Documents from the Printer pull-down menu.
Pausing a print job prevents it from printing but won’t delete it from the queue.You might do
this if someone has submitted a very large print job and you want to hold it back until all the other
jobs have printed.To pause a print job, highlight the job, right-click, and then select Pause.To
release the job for printing, highlight the job, right-click, and then select Resume.
You can also pause the entire queue, perhaps because the printer has failed or jammed and you
want to stop a flood of error messages.To pause a printer, highlight it, right-click, and then select
Pause Printing.To restart printing, highlight the printer, right-click, and then select Resume
Printing.
Managing Printer Pools
Imagine your printer has become very busy and long queues develop. In this situation, rather than
replacing the printer with a much more powerful one, you could purchase another identical printer
(perhaps saving money). Connect the printer and, instead of creating a new printer queue on the
server, modify the properties of the existing queue on the Ports tab, select Enable Printer Pooling,
and choose the new port that you used to connect the printer (this could be a TCP/IP port).
Whenever a user prints to this queue, the print job is sent to the first printer that is not busy,
thus pooling the jobs.You must ensure that the printers you connect are identical, because users
cannot control which printer will service their jobs. Differences in capabilities between the printers
might mean that a job fails to print properly.You should also locate the printers physically close to
each other, because users will not know which printer has printed their job.
Using Server Management Tools • Chapter 2 41
Figure 2.7 The Windows Server 2003 Add Printer Wizard
301_BD_W2k3_02.qxd 5/12/04 10:54 AM Page 41
Scheduling Printers
As well as controlling which users can use a printer, you can also control when they print by using
scheduling. By setting a schedule, users can still submit jobs at any time, but the jobs will only be
printed during the scheduled hours.
Consider a scenario where some users print large reports to a printer that is shared by other
users. With a single printer queue, printing the large report holds up printing for other users.To
resolve this, create a second printer queue that points to the same port as the first queue, change the
availability time to out-of-office hours and advise users to use the second printer for the large
reports and the first queue for shorter jobs.
To set a schedule for a printer, highlight it, right-click and select Properties, and then select
the Advanced tab.The default is for a printer to be available at all times. Figure 2.8 shows an
example of a printer with restricted availability.
Setting Printing Priorities
You can use priorities to control the order in which print jobs are processed. Normally, jobs are
printed in the order in which they are received.All printers and print jobs have a priority setting
that can be changed.The default priority is 1 but can range from 1 to 99, with 99 being the highest.
When a print job arrives, its priority setting is the same as the priority of the printer. Once in the
queue, the priority setting can be changed by anyone with the Manage Documents permission.
Typically, the priority of a print job will be increased to make it print next despite its position in the
queue. Note that by changing the default priority of the printer to 50, for example, it is possible to
reduce the priority of a job.
You can also use priorities to give certain users preferential access to a printer. For example, you
have a group of managers whose print jobs need to be dealt with before other users.To achieve this,
create two print queues pointing to the same printer. Let’s say they are called A4 and A4Mgrs.
Remove the Print permission for the Everyone group from A4Mgrs and add the Print permission
42 Chapter 2 • Using Server Management Tools
Figure 2.8 Example of Restricted Printing Hours
301_BD_W2k3_02.qxd 5/12/04 10:54 AM Page 42
to the Managers group.This means that only the managers can use this queue.The final step is to
increase the priority on the A4Mgrs print queue, so that the managers’ print jobs get serviced first.
Using New Command-Line Tools
Windows Server 2003 introduces a number of command-line-based scripts to manage printers. If
you have large numbers of printers on your network with many servers, using these new command-
line scripts in batch files can save you a lot of time, compared with using the graphical interface.
The scripts are written in Visual Basic and have to be run in a command window using cscript,
as in this example: cscript prncnfg.vbs.
It isn’t necessary to include the .vbs extension. But using cscript is necessary because the default
scripting host is wscript (which is for graphical windows-based scripts) and the printer management
scripts have been written for the command line.You can change the default scripting host to cscript
by using the command cscript //h:cscript.
If you change the default scripting host, you can run the command-line tools without having to
type cscript each time (however, you will then have to type wscript before any windows-based scripts
you run).You might also like to set the option that suppresses the cscript logo.This prevents a couple
of extra lines appearing in the output. Figure 2.9 shows the output of the prnjobs script with and
without the logo and using the cscript command to suppress the appearance of the logo lines.
Most of the scripts can also be used to manage printers on a remote computer by using the –s
computername option. If you want to use a script to connect to a remote computer, you might also
need to use the –u username and –w password options to connect as a user who has administrative
privileges on the remote computer.
Each script has many options, so use Windows Help or run the script with the /? option to dis-
play additional help on each option.
Note that with all these scripts you must leave a space between the option and the argument.
For example, you should enter prnport –l –s computername instead of prnport –l –scomputerrname.
Using Server Management Tools • Chapter 2 43
Figure 2.9 Using the //nologo Option with cscript
301_BD_W2k3_02.qxd 5/12/04 10:54 AM Page 43
The following list describes each of the new scripts:
■
Prncnfg.vbs Use prncnfg to display or change configuration information about a printer
or rename a printer on a local or remote computer.
■
Prndrvr.vbs Use prndrvr to delete, add, or list the printer drivers installed on a local or
remote computer.
■
Prnjobs.vbs Use prnjobs to manage print jobs.You can pause, resume, or cancel (delete)
individual print jobs or list all the jobs in a print queue on a local or remote computer.
Note that prnjobs is used to manage individual print jobs, not the whole queue.To manage
a queue, use prnqctl.
■
Prnmngr.vbs Use prnmngr to add and delete printers, list printers, and to display or
change the default printer. Some of the options for prnmngr work only on the local com-
puter.
■
Prnport.vbs Use prnport to manage TCP/IP ports.You can display or change configura-
tion information, create, delete, or list TCP/IP ports on a local or remote computer.
■
Prnqctl.vbs Use prnqctl to manage a printer queue.You can pause or resume printing of
jobs in the queue, cancel all print jobs in the queue, or print a test page.
Table 2.4 shows the main options for each script. Note that you will need to include additional
options over and above what is shown in Table 2.4 to specify the particular printer, driver, port, and
so on that is to be affected.Table 2.5 shows the command to use for each of the common printer
management tasks.
Table 2.4 Options for Printer Management Scripts
Script and Options Use
Prncnfg -g Display configuration information for a printer.
Prncnfg -t Configure a printer.
Prncnfg -x Rename a printer.
Prndrvr -l List installed printer drivers.
Prndrvr -a Install a printer driver.
Prndrvr -d Delete a printer driver.
Prnjobs -l List print jobs.
Prnjobs -z Pause a print job.
Prnjobs -m Resume a print job.
Prnjobs -x Cancel a print job.
Prnmngr -a Add a printer.
Prnmngr -d Delete a printer.
Prnmngr -l List all the printers on a computer.
Prnport -l List TCP/IP ports.
Prnport -g Display configuration information for a TCP/IP port.
44 Chapter 2 • Using Server Management Tools
Continued
301_BD_W2k3_02.qxd 5/12/04 10:54 AM Page 44
Table 2.4 Options for Printer Management Scripts
Script and Options Use
Prnport -t Change configuration information for a TCP/IP port.
Prnport -a Create a TCP/IP port.
Prnport -d Delete a TCP/IP port.
Prnqctl -z Pause the queue.
Prnqctl -m Resume printing of the queue.
Prnqctl -x Cancel all print jobs in the queue.
Prnqctl -e Print a test page.
Table 2.5 Example of Commands for Printer Management Tasks
Task Example of Command To Use
Create a printer prnmngr –a –p printername –m drivername –r portname
Share a printer prncnfg –t –p printername –h sharename +shared
Add a printer driver prndrvr -a -m drivername -v versionnumber –e environment
Set permissions Not available
Manage print queues prnjobs or prnqctl
Create printer pools Not available
Schedule printers prncnfg –t –p printername –st starttime –ut endtime
Set printer priorities prncnfg –i prioritynumber
The Printer Spooler Service
All printing is managed by the spooler service. If this service is not running, users cannot print.The
spooler has a number of configuration options.To change these, open the Printers and Faxes
folder and select Server Properties from the File pull-down menu.This opens the Print Server
Properties dialog box containing four tabs: Forms, Ports, Drivers,and Advanced, which are
used as follows:
■
Use the Forms tab to define custom paper sizes.
■
Use the Ports tab to define new ports (especially TCP/IP ports) and to configure proper-
ties of existing ports.
■
Use the Drivers tab to add new drivers or configure existing drivers.
■
Use the Advanced tab to modify the behavior of the spooler service.
In particular, note the Spool Folder under the Advanced tab.This location is where print jobs
are stored until they are printed. On larger networks with many printers the spool folder can get
quite large.
Using Server Management Tools • Chapter 2 45
301_BD_W2k3_02.qxd 5/12/04 10:54 AM Page 45