The Best Damn Windows Server 2003 Book Period- P84 pptx
Bạn đang xem bản rút gọn của tài liệu. Xem và tải ngay bản đầy đủ của tài liệu tại đây (395.32 KB, 10 trang )
Client (Respond Only)
Client (Respond Only) is the least secure default policy.You might wish to implement this policy
for intranet computers that need to respond to IPSec requests but do not require secure communi-
cations. If you implement this policy, the computer will use secured data communications when
requested to do so by another computer.
This policy uses the default response rule, which creates dynamic IPSec filters for inbound/
outbound traffic based on the port/protocol requested.The policy settings are as follows:
■
IP Filter List: All
■
Filter Action: None
■
Authentication: Kerberos
■
Tunnel Setting: None
■
Connection Type: All
Server (Request Security)
The Server (Request Security) policy consists of three rules and can be used when a computer
needs to be configured to accept unsecured traffic from other computers that are not IPSec-
enabled. However, it will always check for secure communication and use it if the other computer is
able to use IPSec.The policy settings for the three rules are shown in Table 23.2.
Table 23.2 Policy Settings for Server (Request Security) Rules
Third Rule (Default
Setting First Rule Second Rule Response Rule)
IP Filter List All IP Traffic All ICMP Traffic Dynamic
Filter Action Request Security Permit Default Response
(Optional)
Authentication Kerberos N/A Kerberos
Tunnel Setting None None None
Connection Type All All All
Secure Server (Require Security)
The Secure Server (Require Security) policy consists of three rules and can be used for computers
that require high security. Filters used in this policy require all outbound communication to be
secured.This allows only initial inbound communication requests to be unsecured.The policy set-
tings for the three rules are as shown in Table 23.3.
806 Chapter 23 • Planning, Implementing, and Maintaining Internet Protocol Security
301_BD_W2k3_23.qxd 5/14/04 9:49 AM Page 806
Table 23.3 Policy Settings for Secure Server (Require Security) Rules
Third Rule (Default
Setting First Rule Second Rule Response Rule)
IP Filter List All IP Traffic All ICMP Traffic Dynamic
Filter Action Require Security Permit Default Response
Authentication N/A Kerberos Kerberos
Tunnel Setting None None None
Connection Type All All All
Custom Policies
In addition to the default policies that can be implemented with the IPSec Security Policy MMC,
you can also create your own custom policies for implementation by using the New IPSec Policy in
the IP Security Policy Management MMC.
To create your own custom policies with the IP Security Policy Management MMC, open the
console and select the policy you wish to customize. Use the following steps to customize an IP
Security Policy.
Customize IP Security Policy
1. Open the IP Security Policy Management console and click IP Security Policies.
2. Locate the policy you wish to customize in the right pane and double-click it, or right-
click it and select Properties.
3. Click on the Rules tab, locate the rule you wish to modify and click Edit. Switch to the
Filter Action tab, double-click the filter action that you want to modify.
4. Next, switch to the Security Methods tab, and do one of the following:
■
To add a new security method, select the Add option.
■
To modify an existing security method, select the security method that you want to
modify and click the Edit option.
■
To remove a security method, click the security method that you wish to delete and
select the Remove option.
5. To add or modify a security method, select the Security Method tab, choose the
Custom option button, and then click Settings.
6. Set the security method as follows, depending on your policy’s need for encryption:
■
Select the Data and address integrity without encryption (AH) check box if
you need to provide data integrity for the packet’s IP header and the data.Then for
Integrity algorithm, select either MD5 (which uses a 128-bit key) or SHA1
(which uses a 160-bit key).
Planning, Implementing, and Maintaining Internet Protocol Security • Chapter 23 807
301_BD_W2k3_23.qxd 5/14/04 9:49 AM Page 807
■
If you need to provide both integrity and encryption for data confidentiality, select the
Data integrity and encryption (ESP) check box.Then under Integrity algo-
rithm, click None (for no data integrity; if you have AH enabled and for increased
performance, you can choose this), MD5, or SHA1. Under Encryption algorithm,
choose None, DES, or 3DES.
7. You can also change the default session key lifetime settings, as follows:
■
You can set the number of kilobytes of data that is transferred before a new key is
generated by choosing the Generate a new key every check box and typing in a
value in kilobytes.
■
You can choose the Generate a new key every option to enter the number of sec-
onds to elapse before a new session key is to be generated.
Using the IP Security Policy Wizard
You can open the IP Security Policy Management console by clicking Start | Run and typing
mmc, and then clicking OK. Select File | Add/Remove Snap-in, and then click Add, Click IP
Security Policy Management, and then click Add. For each computer scenario, you need to
select a specific option.Table 23.4 shows the scenario and specific snap-in you would need to use.
Table 23.4 IPSec Policy Management Scenarios
Scenario Snap-In to Choose
Manage IPSec policy for local computer Select the Local computer snap-in
Manage IPSec policies for any domain Select The Active Directory domain of which
members this computer is a member snap-in
Manage IPSec policies for a domain that Select the Another Active Directory domain
this computer that not a member of snap-in
Manage a remote computer Select the Another computer snap-in
After you’ve chosen the snap-in, you can close the management console by selecting Finish,
choosing Close, and clicking the OK button.To save your console settings select File | Save.
You can also access the IP Security Policy Management console from the Group Policy console.
To do this, select Start | Administrative Tools | Active Directory Users and Computers
and right-click the domain or OU for which you need to set Group Policy. (To open Active
Directory Users and Computers utility, select Start | Control Panel | Administrative Tools |
Active Directory Users and Computers.)
Create an IPSec Policy with the IP Security Policy Wizard
To create your own IPSec policy using the IP Security Wizard, follow these steps:
1. Open the IPSec Security Management Snap-in, right-click IP Security Policies in the
left console pane, and then choose Create IP Security Policy from the context menu.
808 Chapter 23 • Planning, Implementing, and Maintaining Internet Protocol Security
301_BD_W2k3_23.qxd 5/14/04 9:49 AM Page 808
2. The IP Security Policy Wizard Welcome window appears. Click the Next button.
3. The IP Security Policy Name window appears, prompting you to give your IPSec policy a
name and description.You can choose to accept the default name (not recommended, as
it’s not very descriptive), or you can enter a new name and description.Then click the
Next button.
4. The next window allows you to specify how the policy will respond to requests.Accept
the default (Activate the default response rule) or clear the check box, and then click
the Next button
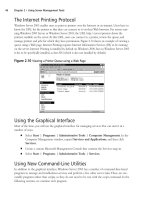
5. The Default Rule Authentication Method window appears, as shown in Figure 23.5.
Select a different authentication method or accept the default, Active Directory default
(Kerberos V5 protocol), and then click Next.
6. The Completing the IP Security Policy Wizard window appears.You can choose to
edit the properties of the policy (the default) or clear the check box if you do not wish to
edit the properties at this time. Click Finish to complete the Wizard. For this example, we
will leave the Edit properties box selected.
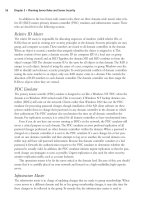
7. When you select the option to edit properties, the New IP Security Policy Properties
dialog box opens, as shown in Figure 23.6.This dialog box allows you to edit the IP secu-
rity rules and change the general properties of the rule, such as the name and description.
Click the Edit button in this dialog box.
Planning, Implementing, and Maintaining Internet Protocol Security • Chapter 23 809
Figure 23.5 Select the Default Rule Authentication Method
301_BD_W2k3_23.qxd 5/14/04 9:49 AM Page 809
8. The Edit Rule Properties dialog box opens, as shown in Figure 23.7. Here, you can add,
edit, or remove security methods; set the security methods that can be used when working
with another machine; and select to use session key perfect forward secrecy (PFS). Next,
click the Authentication Methods tab.
9. The Authentication Methods tab allows you to choose a trust method for communi-
cating client computers. Click Add to add a method (again, your selections include using
a certificate or a pre-shared key). Click OK to close the dialog box.
10. After the policy has been edited, you need to assign the policy. Before you assign the
policy, make sure that you have the IPSec service started.To assign the policy, right-click
the policy name in the right pane and select Assign, as shown in Figure 23.8.
810 Chapter 23 • Planning, Implementing, and Maintaining Internet Protocol Security
Figure 23.6 IP Security Policy Properties
Figure 23.7 Edit the IP Security Policy Security Methods
301_BD_W2k3_23.qxd 5/14/04 9:49 AM Page 810
Defining Key Exchange Settings
You can define key exchange settings that apply to IP security policy. Open the MMC containing
the security policy, and follow these instructions for modifying the policy:
1. Select the policy you wish to modify by double-clicking that policy.
2. Select the General tab and click the Settings button.
3. To force reauthentication and the negotiation of new master key keying material each
time a new session key is required, click Master key perfect forward secrecy (PFS).
4. To cause the reauthentication and new master key regeneration based on number of min-
utes, type in a value for Authenticate and generate a new key after every number
minutes.
If you require a different setting, you can add a value in the Authenticate and generate a
new key after every number sessions. This will set a maximum limit on the number of times a
master key or its base keying material can be reused to generate the session key. When this limit is
reached it will force a reauthentication with a new master key generation.
If you have enabled Master key perfect forward secrecy (PFS), the number of sessions is
set to 1 by default and cannot be reconfigured. For special requirements on the master key
exchange, select the methods and use master key PFS where it is required for interoperability. By
default, this setting is disabled, which should be appropriate in most environments. If you set the ses-
sion limit to 0, it will cause rekeys to be determined based only on time. If you work in a perfor-
mance-based environment, keep in mind that if you enable master key PFS, it could affect
performance because each quick mode will require a new main mode negotiation.
Planning, Implementing, and Maintaining Internet Protocol Security • Chapter 23 811
Figure 23.8 Assign the Newly Created IP Security Policy
301_BD_W2k3_23.qxd 5/14/04 9:49 AM Page 811
Managing Filter Lists and Filter Actions
To manage IP filter lists and filter actions, open the IP Security Policy Management MMC and
select the policy you wish to modify by double-clicking that policy. In the Rules tab, select the rule
you wish to modify that contains the IP filter and double-click it. Select the IP Filter List tab and
double-click the IP filter that contains the filter list you want to configure.To edit or modify a filter
in the IP Filter properties window, double-click the filter, choose the Addresses tab, and then
select the Source Address drop-down box.
Assigning and Applying Policies in Group Policy
Now we will take a look at how to assign or unassign IPSec policy in Group Policy for Active
Directory.These settings will take effect the next time Group Policy is refreshed, and if a new policy
is assigned over an existing policy, the current policy is automatically unassigned. Use the IP
Security Policies on Active Directory within the Group Policy console to assign policies to
apply to Active Directory objects.To assign or unassign a local computer policy, select Start | Run,
type mmc, and click OK.Then choose File | Add/Remove Snap-in and click Add. Click the
Group Policy Object Editor and click Add. Choose Finish, click Close, and then click OK.
Active Directory Based IPSec Policies
Any IPSec policy that is applied for the domain will take precedence over local IPSec policy that is
located on the member computer. After the IPSec policy has been applied to one of the Active
Directory Group Policy Objects, it will be broadcast to all of the computer accounts that are
affected by that GPO.
Group Policy has backup and restore tools that you can use to save policy information on
assigned GPOs.These tools do not back up the IPSec policies.To back up and restore IPSec policies,
use the Export Policies and Import Policies command in the IP Security Policy
Management console.The Group Policy console will back up and restore only information per-
taining to the IPSec policy assignments in relation to GPOs.
The IPSec Policy Agent on client computers running Windows XP Professional or a Windows
Server 2003 operating system will poll Active Directory for updates to the assigned IPSec policy.
This does not detect domain or OU changes or whether new IPSec policies have been assigned.
The Winlogon service polls for these changes every 90 minutes. If a change has been made, the
Winlogon service will notify the IPSec Policy Agent, and the IPSec policy changes will be applied.
Cached IPSec Policy
A copy of the currently assigned IPSec policy for a site, a domain, or an OU is cached in the local
Registry of each computer to which it applies. If the computer that has the IPSec policy assigned
cannot log on to the domain for any reason, the cache copy will be applied.The cache copy of the
IPSec policy cannot be changed or managed.
Local Computer IPSec Policy
All Windows Server 2003 servers and Windows XP Professional computers have one local GPO called
the local computer policy. With this local policy, Group Policy settings can be stored on individual
812 Chapter 23 • Planning, Implementing, and Maintaining Internet Protocol Security
301_BD_W2k3_23.qxd 5/14/04 9:49 AM Page 812
computers, even when they are not Active Directory domain members.You can manage the local
IPSec policy by using the IP Security Policy Management console.Alternatively, you can use the fol-
lowing netsh command at the prompt:
netsh ipsec static set store location=local
If a computer on which you’ve applied local IPSec policies later joins an Active Directory
domain that has IPSec policies applied, the domain policies will override the local IPSec policy.
IPSec Monitoring
It is important for network administrators to monitor IPSec settings and traffic on a regular basis
after deploying IPSec.You can perform monitoring with the netsh command-line utility or with the
IP Security Monitor MMC snap-in. In the following sections, we will look at each of these tools.
Using the netsh Utility for Monitoring
Earlier in the chapter, we discussed the use of the netsh command-line utility as equivalent to the IP
Security Policy Management console. However, the netsh utility provides some features that are not
available with the IP Security Policy Management console.These include the following:
■
IPSec diagnostics
■
Client computer startup security
■
Client computer startup traffic exemptions
■
Default traffic exemptions
■
Strong certificate revocation list checking Certificate Revocation List
■
IKE /Oakley logging
netsh Dynamic Mode Policy
If you want the IPSec rules you have configured to take effect without any wait time, you can use
the netsh ipsec dynamic commands at the command prompt to add, modify, and assign IPSec policies
immediately. Dynamic policies, as their name implies, are not saved; they will be lost if the IPSec
service is stopped. However, not all dynamic policies take effect immediately. In some cases, you
must restart the computer or the IPSec service first. If you need to make these changes permanent,
you need to use the netsh ipsec dynamic set config command.This will ensure that the changes are not
lost if the computer is restarted.
IPSec Diagnostics
You can use the netsh diag command with additional diagnostics at the command prompt.The fol-
lowing are the additional diagnostics switches:
■
netsh diag connect Used to connect to mail, news, and proxy servers.
■
netsh diag dump Used to display a script that is used for configuration.
Planning, Implementing, and Maintaining Internet Protocol Security • Chapter 23 813
301_BD_W2k3_23.qxd 5/14/04 9:49 AM Page 813
■
netsh diag show Used to show computer, operating system, network, news, mail, and
proxy server information.
■
netsh diag gui Used to display diagnostics on a Web page. Once this command has
been run, you can scan the computer for network diagnostics.
Here are two important things to remember when using the netsh utility:
■
If you stop the IPSec service when configuring a dynamic policy, you will lose
the settings.
■
Use caution because some commands will require you to stop and restart the IPSec
service.
Using the IP Security Monitor MMC Snap-in
Microsoft provides the IP Security Monitor MMC snap-in for monitoring IPSec activity.To use the
IP Security Monitor, open the MMC and add the IP Security Monitor to the console. We will dis-
cuss the use of the IP Security Monitor in more detail in the next section, which covers trou-
bleshooting IPSec.
Troubleshooting IPSec
Troubleshooting is always a big part of any network administrator’s job.The following sections will
cover how to troubleshoot your IPSec configuration. We include tables that will list specific tools
and scenarios you can use to perform the troubleshooting tasks.The IP Security Monitor and the
Network Monitor are important tools for troubleshooting IPSec problems, as are the IP Security
Policy Management MMC and the netsh utility. An additional tool that is introduced in this section
is the Network Diagnostics Tool, netdiag.exe.
Using netdiag for
Troubleshooting Windows Server 2003 IPSec
The netdiag tool is provided on the Windows Server 2003 family servers, Windows XP, and
Windows 2000 machines. However, it it stored in different locations on each platform, as described
below:
■
Windows Server 2003 family On the Windows Server 2003 installation CD, locate the
Support/Tools folder and run the Suptools.msi installation package with the Complete
option to install the tool.
■
Windows XP Professional On the Windows XP Professional installation CD, locate
the Support/Tools folder and run the Setup.exe file with the Complete setup option to
install the tool.
■
Windows 2000 Download the updated version of the tool from the Microsoft Web site.
814 Chapter 23 • Planning, Implementing, and Maintaining Internet Protocol Security
301_BD_W2k3_23.qxd 5/14/04 9:49 AM Page 814
Viewing Policy Assignment Information
The Policy Assignment option allows you to view policy assignment and precedence. For trou-
bleshooting, it is often important to be able to view IPSec policy assignments and determine the
precedence in which policies are applied.Table 23.5 shows a list of the tools to be used with dif-
ferent Microsoft operating systems for viewing the IPSec policy name viewing the Group Policy
object to which the IPSec policy is assigned.
Table 23.5 Viewing the IPSec Policy Precedence on Windows Server 2003 Family Machines
IPSec Policy Assignment for
Operating System IPSec Viewing Tools Group Policies
Windows Server 2003 IP Security Monitor console or Resultant Set of Policy (RSoP)
the netsh command: netsh console or the netsh
ipsec static show command netsh ipsec static
gpoassignedpolicy show gpoassignedpolicy
Windows XP IP Security Policy Man- netdiag.exe netdiag /
agement console for local test:ipsec command
IPSec policy viewing netdiag.exe command
netdiag /test:ipsec:ipsec
Windows 2000 netdiag.exe command: netdiag.exe command: net
netdiag /test:ipsec Go to diag /test:ipsec
the properties option in the gpresult.exe -Group
TCP/IP network connections Policy Results
and select Properties | gpotool.exe Group Policy
Advanced | Options | Verification Tool (these can
IPSec. The assigned IPSec be downloaded from the
policy that is shown is the Windows 2000 Server
global policy. Resource Kit Web site)
Additionally, you can view all IPSec policies that are available by using the IP Security Policy
Management console. Just because an IPSec policy is available, this does not mean that it has been
assigned or applied to a computer. In the Windows Server 2003 family, you can determine the
assigned (but not applied) policies on IPSec clients by using the RSoP console.
Viewing IPSec Statistics
To view IPSec statistics and items such as filters and security associations, use the tools listed in Table
23.6.These tools work on Windows Server 2003, Windows 2000, and Windows XP Professional
machines.
Planning, Implementing, and Maintaining Internet Protocol Security • Chapter 23 815
301_BD_W2k3_23.qxd 5/14/04 9:49 AM Page 815