The Best Damn Windows Server 2003 Book Period- P96 pot
Bạn đang xem bản rút gọn của tài liệu. Xem và tải ngay bản đầy đủ của tài liệu tại đây (309.8 KB, 10 trang )
clients into the system. Please refer to the Internet Connection Firewall section for configuration
details.
401 Error—Sub Authentication Error
Anonymous accesses to Web sites are managed by the sub-authentication component
(iissuba.dll). This DLL is not enabled by default in IIS 6.0.The reason is to avoid potential security
risks due to anonymous access. We can enable the sub-authentication component by registering iis-
suba.dll and setting the AnonymousPasswordSync attribute in the Metabase to true.The IIS
administrator will get a warning when anonymous access is enabled.
Client Requests Timing Out
There was less emphasis on time out connections in IIS 5.0 and below. IIS 6.0 has made some con-
siderable ground on this issue. IIS 6.0 has locked down and reduced the size of many client request
properties.This has resulted in better efficiency and performance. Here are the new features in IIS
6.0 to deal with time outs:
■
Limits on response buffering We can buffer all the process output at the server end
and send the whole output to the client as a single entity (as apposed to processing some
data and sending the information and starting to process the next bit of the initial request).
This is referred to as Response buffering. Limits on response buffering is 4.0 M.A
timeout will result if the buffer exceeds the limit.This feature can be modified by using
the ASPBufferingLimit metabase property.
■
Limits on posts The maximum ASP post size is 204,800 bytes. (Post refers to a HTTP
POST response to the Web server.This is usually done as an HTML form submission.
Sometimes these HTML form variables can be very lengthy.The maximum size allowed as
HTTP POST request is referred to as Post limit/size.) Each individual field can have up
to 100 kilobits of data. If these fields are exceeded, a time out error is thrown.This prop-
erty can also be modified from the AspMaxRequestEntityAllowed property of the
metabase.
■
Header size limitation HTTP.sys only accepts a request that has less than 16K as the
request header. HTTP.sys believes that anything larger is malicious and terminates the con-
nection.You can change this value by modifying the MaxRequestBytes registry key.
Troubleshooting Other Errors
We will investigate some miscellaneous troubleshooting errors in this section.These errors do not
clearly fall into content or connection categories.
File Not Found Errors for UNIX and Linux Files
IIS 6.0 can access and share information with UNIX and Linux systems. IIS 6.0, UNIX, and Linux
all support mixed-case filenames. Unfortunately, IIS static file cache stores filenames as upper case.
Therefore, the first file access will be trouble-free.The subsequent access to the same file will result
926 Chapter 26 • Managing Web Servers with IIS 6.0
301_BD_W2k3_26.qxd 5/14/04 9:52 AM Page 926
in a “File Not Found” error because IIS 6.0 will try to extract it from the static file cache.The
remedy is to disable static file cache if you deal with UNIX or Linux systems.
ISAPI Filters Are Not Automatically
Visible as Properties of the Web Site
IIS 5.0 used to display all the ISAPI filters that are associated with a particular site. IIS 6.0 does not
load an ISAPI DLL till it is actually invoked from a client request.Therefore, until the ISAPI DLL is
loaded, it will not show up in the ISAPI tab of the Properties window. Please run IIS 6.0 in iso-
lation mode if you want to get a complete list of ISAPI DLLs available for a site. (Refer to the New
Reliability Features section to learn how to run IIS 6.0 in isolation mode).
The Scripts and Msadc Virtual
Directories Are Not Found in IIS 6.0
IIS 5.0 had executable permission on the Scripts and Msadc directories.This was one of the
common security breaches of IIS 5.0. A malicious user can start to execute code in these virtual
directories and take control of the IIS server.Therefore, IIS 6.0 is configured not to have these two
directories to beef up security.
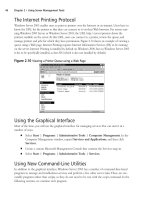
Using New IIS Command-Line Utilities
IIS Manager is the GUI interface for all IIS management functions.You can also perform these
management functions by using command-line tools. All these command line tools are VBScript
functions with “*.vbs: file extensions.You can get the complete help file information by applying
the /? Switch on each utility. Let’s go through them one by one.
iisweb.vbs
The insweb.vbs utility is used to create and manage Web sites in IIS 6.0.This utility is stored at
System Root\system 32 directory. Iisweb.vbs comes with six main switches.The first argument
for iisweb.vbs is one of these main switches.The rest of the arguments are further information to
perform the task.The common syntax is:
Iiswab [switch] [parameters to switch]
iisvdir.vbs
The iisvdir.vbs command enables us to create virtual directories for a specific Web site. We can use
create, delete, and query switches on this script. It is important to clarify that this command does
not generate any new code or physical directories.This command will basically instruct the IIS con-
figuration to point at existing directories and refer to it as a local directory of the Web site.
Managing Web Servers with IIS 6.0 • Chapter 26 927
301_BD_W2k3_26.qxd 5/14/04 9:52 AM Page 927
iisftp.vbs
Iisftp.vbs is the command-line tools to administer FTP sites on your IIS server.The functionality is
very similar to iisweb.vbs.The only major difference is the association with Active Directories under
iisftp.vbs.The parameters to switches change from switch to switch.
The use of the iisftp /create is very similar to iisweb /create. The input parameters and the
command shell output are very similar.
iisftpdr.vbs
The iisftpdr.vbs command is very similar to iisvdir.vbs. We create virtual directories for FTP sites
(not Web sites) using this command.You can use create, delete, and query switches on this script.
iisback.vbs
Use the iisback.vbs utility to create backups and restore IIS configurations. We can back up both
the metabase and metabase XML schema data using this tool.The backup creates two files.The
“.mdVersionNumber” file to back up the metabase and the “.scVersionNumber” file to back up the
metabase schema.
iiscnfg.vbs
The iiscnfg.vbs script will enable you to manipulate the configuration settings for IIS 6.0.
The main task is to import and export settings of the IIS metabase.You can also select a
node of the IIS 6.0 and import and export settings to it.The available switches are import,
export, copy, and save.
928 Chapter 26 • Managing Web Servers with IIS 6.0
301_BD_W2k3_26.qxd 5/14/04 9:52 AM Page 928
Managing and Troubleshooting
Terminal Services
In this chapter:
Understanding Windows Terminal Services
Using Terminal Services Components for Remote
Administration
Installing and Configuring the Terminal Server Role
Using Terminal Services Client Tools
Using Terminal Services Administrative Tools
Troubleshooting Terminal Services
Introduction
Windows Server 2003, like Windows 2000, includes the Terminal Services component
that enables you to connect from remote computers using a Terminal Services client
(such as the Remote Desktop Connection [RDC] utility built into Windows XP and
Windows 2003). A Windows 2003 terminal server can function in one of several ways.
Using a client such as the RDC utility, administrators can perform management tasks on
the server from any location on the network. When the terminal server role is installed,
it turns the server into an application server, which enables multiple users to connect to
the terminal server from “thin clients” or other computers running the client software.
These clients can then run applications on a Windows 2003 desktop even if they are
using older, less powerful operating systems or client hardware.
In this chapter, we will provide an overview of the benefits of using Windows
Server 2003 Terminal Services and how to select the Terminal Services functionality that
best fits your needs. We will discuss installation and configuration of the terminal server
role, the Terminal Services client software, and licensing issues.You’ll learn how to use
Chapter 27
929
301_BD_W2k3_27.qxd 5/14/04 12:21 PM Page 929
the Terminal Services administrative tools, including the Terminal Services Manager and Terminal
Services Configuration console tools. In addition, we’ll discuss the Remote Desktop MMC snap-in,
using group policies to control Terminal Services users and clients,Terminal Services extensions to
the properties of user accounts and the Terminal Services command-line tools. Finally, we look at
how to troubleshoot problems with Terminal Services.
Understanding Windows Terminal Services
The Microsoft Terminal Services feature has evolved and undergone major changes since Microsoft
first licensed the technology from Citrix. In the beginning, using Terminal Services required pur-
chasing a separate operating system (Windows NT 4.0 Terminal Server Edition). In Windows 2000,
it was included with the Server products, but it was a component that required separate installation.
In Windows 2003, the core service is installed with the operating system.This is to enable adminis-
tration of the server from remote clients right out of the box, with very little additional configura-
tion being necessary, and serves the same purpose as Terminal Services running in remote
administration mode in Windows 2000.
Despite its many enhancements and new features in the area of remote administration,Terminal
Services still maintains its traditional capability of serving as an application server to which multiple
remote clients can connect and run sessions simultaneously. In Windows 2000, this was called
Application Server mode; now it is referred to as the Terminal Server role. When the Terminal Server role
is installed, users can connect and use applications that are installed on the server as if they were sitting
at its keyboard. By default, when they connect, they will see a Windows 2003 desktop from the server
displayed on their local systems and be able to interact with it. Most importantly, all of their session
settings and application information will be kept separate from other users.This application-sharing
and multi-user capability exists only when the Terminal Server role is installed; it does not exist with
the Terminal Services Remote Administration feature that is available right out of the box.
Terminal Services Components
The Terminal Services service in Windows 2003 supports a number of components.These include
the following:
■
Remote Desktop for Administration (formerly called Remote Administration mode in
Windows 2000)
■
Remote Assistance (RA – a feature introduced in Windows XP)
■
The terminal server role (formerly called Application Server mode in Windows 2000)
Remote Desktop for Administration
Remote Desktop for Administration is the key component of Terminal Services that enables remote
server administration. It is installed by default, but is disabled; it must be manually enabled and con-
figured by an administrator before you can connect to it.This component enables a maximum of
two concurrent connections for the purposes of remotely administering the server. By default, when
930 Chapter 27 • Managing and Troubleshooting Terminal Services
301_BD_W2k3_27.qxd 5/14/04 12:21 PM Page 930
a Terminal Services client connects to this component, a new session is created and a copy of the
Windows 2003 desktop is displayed in a window on the client machine.
It’s important to note that this copy of the desktop is not the actual server desktop that the user
would see if he or she were sitting down at the server’s keyboard.That session is called the console.
This is an important distinction, because often the operating system or an installed application will
send a popup message to the server console. An administrator connecting to the server using
Terminal Services will not see the console by default, and thus will not see the popup messages.You
also will not see any applications that might be running on the console session – unless you use the
Remote Desktop Protocol (RDP) 5.1 or later client to run a remote console session.
In Windows 2000, there was no way to view the console session remotely. However, one of the
new Terminal Services client utilities (discussed in more detail later in the chapter) includes this
capability.
Remote Assistance
Remote Assistance (RA) depends on and uses the Terminal Services service. However, the way you
connect to it is substantially different from the methods used to establish a session with Remote
Desktop for Administration or a client session connecting to the multi-user terminal server. RA
enables a user at one computer (whom we’ll call the Novice) to ask for help from a user at another
computer (whom we’ll call the Expert or the assistant), on the LAN or across the Internet.This
request can be made through Windows Messenger, e-mail, or through a transferred file.The Expert
can also offer remote assistance without receiving an explicit request from the Novice (if Group
Policy settings are configured to enable offering of remote assistance and the Expert user is listed as
an assistant in the Offer Remote Assistance policy, or is a local administrator), but the Novice must
grant permission; the Expert can never take over the Novice’s computer without the Novice’s
agreement.This differs from Remote Desktop, in that administrators and users on the Remote
Desktop Users list can start a remote session without getting permission from the person who is
using the computer locally.
When an Expert receives a request from a Novice, he or she can initiate a connection to the
Novice’s computer. When connected, the Expert is able to view the actual desktop and applications
that are being used by the Novice on his or her computer. In addition, a special application is
launched on the Novice’s computer that enables him or her to chat with the Expert and control the
session, either via text messages or audio (as long as both computers are equipped with full-duplex
sound cards, speakers, and microphones). If the Novice desires, the Expert can be allowed to control
the Novice’s desktop and applications, including taking control of the Novice’s cursor. In addition,
files can be transferred easily between the two through the RA interface.
RA requires that both computers be running Windows XP or Server 2003. Because security is
always a concern in the business environment, RA invitations can require that the assistant provide a
password, to prevent an imposter from connecting to the computer while pretending to be the assis-
tant.You can also specify the amount of time for which an RA invitation will remain valid. Users
also have the option to turn off the RA feature entirely.
Managing and Troubleshooting Terminal Services • Chapter 27 931
301_BD_W2k3_27.qxd 5/14/04 12:21 PM Page 931
The Terminal Server Role
The original purpose of the Terminal Services was to enable Windows servers to be used in a thin
client environment without expensive third-party software such as Citrix MetaFrame.The develop-
ment of Microsoft’s Terminal Services involved the creation of several components that worked
together, including a a core architectural component known as Multi-Win and a special presentation
layer protocol, the Remote Desktop Protocol (RDP) .
The Multi-Win Component
The Multi-Win component sits at a very low level in the operating system and enables more than
one user to be logged in locally.The Multi-Win technology was originally created by Citrix for
WinFrame and licensed to Microsoft for Windows NT 4.0 Terminal Server Edition. It is a core
component of Terminal Services and is used in Remote Desktop for Administration (RDA),
Remote Assistance (RA), and the Terminal Server role. Prior to its development, only the user that
actually logged on at a server’s keyboard (the local console session) was considered a local user.The
creation of Multi-Win enabled remote users to log on and use the server as if they were local users.
The Multi-Win component not only allows for multiple local users, but it also keeps each of their
system and application settings separate, even when many are logged on at the same time.
This new capability enables remote users to actually launch and use applications on the remote
system. A Terminal Services session is altogether different. When you establish a terminal server ses-
sion, by default you see a copy of the desktop from the server to which you have connected. When
using Remote Desktop for Administration or the Terminal Server role, by default each terminal user
works in his or her own virtual Windows 2003 computer that has been created for that user by the
Terminal Services service on the Windows 2003 server. When you double-click an icon within this
session and launch an application, it launches in your session on the server. It uses the server’s pro-
cessor, the server’s memory, and accesses the server’s hard disk. Only images of the screen transfer to
the local computer; the application files never leave the server.
The Remote Desktop Protocol (RDP)
The second important Terminal Services component, the Remote Desktop Protocol (RDP), handles
the transfer of the screen information from the server to your client. It also ensures that your cursor
movements and keystrokes make it from the client back to your session on the server. RDP was
based on a set of International Telecommunications Union (ITU) T.120 protocol family. Windows
2000 Terminal Services included RDP v5.0, which increased performance. Windows XP and Server
2003 use RDP 5.1. RDP communicates on port 3389; it uses encryption to protect the information
that is sent between the terminal server and the client computer.
Comparing Remote Desktop for Administration and the Terminal Server Role
The primary difference between Remote Desktop for Administration and the Terminal Server role
is the number of simultaneous connections that are allowed and the extent to which settings from
multiple users are accommodated and kept separate. As mentioned, RDA enables only two simulta-
neous remote connections, which do not require separate licensing. With the Terminal Server role
932 Chapter 27 • Managing and Troubleshooting Terminal Services
301_BD_W2k3_27.qxd 5/14/04 12:21 PM Page 932
installed, you are allowed a number of connections equal to the number of terminal server licenses
you have purchased.
Unlike RDA, with the terminal server role installed, applications are installed in special way that
enables Terminal Services to make sure all settings are always kept and tracked separately. However,
keeping up with all this information requires system resources. A tremendous amount of resources
are used up by the Terminal Server role to keep track of multiple user sessions and maintain all of
their settings separately. Because of the overhead associated with the Terminal Server role, it is rec-
ommended that you do not install it on a domain controller or other resource-intensive application
server, such as an SQL server or e-mail server. Unlike with Remote Desktop for Administration and
RA, an administrator must explicitly install the terminal server role.
In the following sections, we will examine in detail how to configure and use the Windows
Server 2003 Terminal Services in each of these ways.
Using Terminal Services
Components for Remote Administration
As mentioned, no installation is necessary for the Remote Desktop for Administration component
of Terminal Services. It is installed with the operating system by default. However, for security pur-
poses it is not enabled by default.After it is enabled, members of the administrators group can con-
nect and use it by default. Non-administrators must be specifically granted access. Let’s take a look
at how to enable and configure this critical component.
Configuring RDA
To configure Remote Desktop for Administration, select Start | Control Panel | System and
click the Remote tab.To enable the feature, simply check the box next to Allow users to con-
nect remotely to this computer located in the Remote Desktop section of the tab.
Enabling RDA Access
When RDA is enabled, any user accounts that are members of the Administrators built-in group on
the server will be allowed to establish a remote session. However, other accounts must be explicitly
approved for access.There are two different ways this can be accomplished.The first is to simply add
any accounts that require access to the Remote Desktop Users group on the server.
The second, simpler way to access the Remote Desktop Users group and grant access is to
use an option provided in the Remote tab in the System properties located in Control Panel.To
use this method, perform the following steps:
1. In the Remote Desktop section of the Remote tab, click the Select Remote Users…
button.
2. In the Remote Desktop Users dialog box that appears, click the Add button.
Managing and Troubleshooting Terminal Services • Chapter 27 933
301_BD_W2k3_27.qxd 5/14/04 12:21 PM Page 933
3. Type (or search for and select) the account name of the user requiring access. (
4. Click the OK button.
Remote Desktop Security Issues
When enabled, Remote Desktop for Administration opens port 3389 and listens for connection
requests.This port is a significant target and is often sought during port scans. Most open ports link
to applications that must be attacked in complex ways to permit administrator level access to a com-
puter.This service is designed to actually provides administrator level access, which makes it a prime
target for attackers.There are several best practices that you should follow to maximize the security
of this component.
It goes without saying that users that do not require RDA should not be granted access. In
addition, it is important to enforce strong security precautions on all accounts that are enabled to
connect using Remote Desktop for Administration. Strong passwords and the use of account lock
out are essential to make it difficult for an attacker to successfully use a brute force attack to gain
system access. Administrators should be required to log on using a standard user account and per-
form administrative duties in the session using the Run as… feature.
All users should be required to use the most recent client available for their platform.This will
ensure that the latest security features are available to them. It should be standard policy to check
frequently for software updates to both client and server components, because these may contain
critical security fixes. In addition, users should be discouraged from storing their log-on credentials
in the properties of the client.This enables anyone with physical access to the user’s machine to
establish a session. It also stores sensitive information such as the user’s username and domain in a
clear text file with an RDP extension in the user’s My Documents folder.
Finally, denial of service is a significant possibility when using Remote Desktop for
Administration because it enables only two sessions to exist on the server. Both active and discon-
nected sessions count.The solution to this may appear to be seting the timeout settings so that ses-
sions are reset shortly after they enter the disconnected state. However, this can cause serious
problems.
An administrator may establish a session, begin an installation process and then disconnect to
enable the installation to finish unmonitored.The previous settings would terminate the session,
including the installation routine it was running, with potentially disastrous effects for the server.
Special circumstances like these must be taken into account when configuring your policies.
Because session timeout settings can be set at the user property level, Microsoft recommends the use
of a special shared administrative account for circumstances like this.The strategy applies a timeout
for disconnected sessions that are started by every user account except the shared account, which has
no timeout settings applied. In this way, there should always be one connection available to a server,
even though the second allowed connection is being consumed by a session involving the shared
administrative account.
934 Chapter 27 • Managing and Troubleshooting Terminal Services
301_BD_W2k3_27.qxd 5/14/04 12:21 PM Page 934
Using Remote Assistance
As with Remote Desktop for Administration, the Remote Assistance (RA) components of Windows
2003 install with the operating system and must be enabled and configured before they become
functional.
Two major services comprise the default installation: the Terminal Services service and the Remote
Desktop Help Session Manager service. In addition to installing these two components, Microsoft also
creates a special user account for connections involving RA, called HelpAssistant_XXXXXX.On
your system, the X’s will be replaced with a unique alphanumeric code and the account name will
appear as something similar to this: HelpAssistant_e4bb43.This account will be disabled until you
enable RA.As we’ve mentioned, although RA is based on and uses Terminal Services, it works very
differently from Remote Desktop for Administration or the terminal server role.
Configuring Remote Assistance for Use
RA is relatively easy to configure; you use the same tab that is used to configure Remote Desktop
for Administration.To enable RA, go to Control Panel and select the Remote tab in the System
properties. Select the check box next to Turn on Remote Assistance and allow invitations to
be sent from this computer, located in the Remote Assistance section of the tab.
Invitations have an expiration time of one hour by default, but the Novice (referring to our ear-
lier example) can alter the expiration time of the invitations sent, from 0 minutes to 99 days.The
acceptance and opening of a session in response to an invitation does not cause it to expire; it is
good until it reaches the specified expiration time.To modify the default expiration time, perform
the following steps:
1. Click Start | Control Panel | System.
2. Click the Remote tab.
3. Click the Advanced… button.
4. Choose the desired number (0 to 99) and interval (minutes, hours, or days) under the
Invitations section in the Remote Assistance Settings dialog box.
In addition to modifying the expiration time, the Remote Assistance Settings dialog box can
be used to enable (or not enable) the Expert to control the Novice’s desktop and applications
during an RA session. When the Allow this computer to be controlled remotely box is
checked, the Expert will be allowed to send mouse and keyboard input to the Novice’s system and
interact directly with his or her desktop and applications. When it is unchecked, the Expert will be
able to see the Novice’s desktop and any actions the Novice performs, but cannot control the cursor
or send keyboard commands.
Asking for Assistance
A Novice can use a variety of methods to request help by sending an invitation using RA:
■
The request can be sent using Windows Messenger.
■
The request can be sent via e-mail.
Managing and Troubleshooting Terminal Services • Chapter 27 935
301_BD_W2k3_27.qxd 5/14/04 12:21 PM Page 935