Microsoft SQL Server 2008 R2 Unleashed- P153 potx
Bạn đang xem bản rút gọn của tài liệu. Xem và tải ngay bản đầy đủ của tài liệu tại đây (537.57 KB, 10 trang )
ptg
1464
CHAPTER 39 Monitoring SQL Server Performance
Using the
AdventureWorks2008 database, you can generate some simple activity that is
known to acquire share locks on tables. Use the following T-SQL that references the
[Sales].[vSalesPersonSalesByFiscalYears] view:
Generate some lock acquiring workload
USE AdventureWorks2008;
SELECT TOP 1 * FROM [Sales].[vSalesPersonSalesByFiscalYears];
As soon as the preceding SELECT statement is generated, the Extended Event begins doing
its job of collecting information. As you can see in Figure 39.20, this fairly complex join
statement grabs the results of this Extended Event and displays them in a very nice read-
able fashion. This
SELECT statement uses the dynamic management views previously iden-
tified in this chapter during the Extended Events active session.
As you can see, this session isolates the table objects that have the most acquired locks on
them during execution. This capability is very powerful.
The T-SQL code is as follows:
The following query turns the xml data that is accumulating
from the Extended Event Session and displays it more clearly
TableName, TableObjectID, and number of AcquiredLocks
SELECT name AS TableName,
FIGURE 39.20 Displaying the results of acquired locks from the Extended Events session.
ptg
1465
Performance Monitoring Tools
39
object_id AS TableObjectID,
LocksX AS AcquiredLocks
FROM (SELECT objstats.value(‘.’,’bigint’) AS ObjectX,
objstats.value(‘@count’, ‘bigint’) AS LocksX
FROM (SELECT CAST(xest.target_data AS XML)
LockData
FROM sys.dm_xe_session_targets xest
JOIN sys.dm_xe_sessions xes ON xes.address = xest.event_session_address
JOIN sys.server_event_sessions ses ON xes.name = ses.name
WHERE xest.target_name = ‘synchronous_bucketizer’
AND xes.name = ‘TheMostLocks’
) Locks
CROSS APPLY LockData.nodes(‘//BucketizerTarget/Slot’) AS T(objstats)
) LockedObjects
INNER JOIN sys.objects o
ON LockedObjects.ObjectX = o.object_id
WHERE o.type != ‘S’
AND o.type = ‘U’
ORDER BY LocksX desc;
To turn off the Extended Events session, you simply issue another ALTER EVENT SESSION
command with the STATE equal to stop, as shown here:
STOP EVENT SESSION
ALTER EVENT SESSION TheMostLocks
ON SERVER STATE=stop ;
Various Extended Events can be defined for monitoring purposes within the SQL Server
environment, your application environment, and at the operating system level. You will
likely build up a complete library of Extended Events that represent what you are most
interested in monitoring about your environment. They will then become valuable tools
for years to come. We also expect forums and Microsoft to create many templates of
Extended Events to aid you in creating this extensive library of monitoring capability.
Windows Performance Monitor
Windows Performance Monitor is a graphical tool that provides a visual display of built-in
Windows performance counters, either in real-time or as a way to review historical data. It
is supplied as part of the installation of any Windows server or workstation (in Windows
Server 2008 it is called Reliability and Performance Monitor). Hundreds of performance coun-
ters are available. These counters can be monitored on the local machine or remotely over
the network, and they can be set up to monitor any object and counter on multiple
systems at once from one session. A small subset of performance information is also avail-
able via the Windows Task Manager Performance tab. However, all this information and
more is available using the Performance Monitor facility.
ptg
1466
CHAPTER 39 Monitoring SQL Server Performance
NOTE
This chapter covers the version of Performance Monitor available in Windows Server
2008, Windows Server 2008 R2, Windows Vista, and Windows 7. If you are running on
Windows XP, Windows Server 2003, or earlier versions of Windows, the interface and
functionality of Performance Monitor are a bit more limited than the version presented
here. However, many of the concepts of using Performance Monitor and performance
counters are still similar.
Performance Monitor features multiple graph views that enable you to visually review
performance log data. You can add performance counters to Performance Monitor individ-
ually or by creating custom Data Collector Sets. The recent version of Windows
Performance Monitor combines the functionality of previous standalone tools including
Performance Logs and Alerts (PLA), Server Performance Advisor (SPA), and System Monitor.
You can use Windows Performance Monitor to examine how programs you run affect your
computer’s performance, both in real-time and by collecting log data for later analysis.
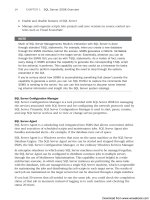
When you install SQL Server, additional performance counters are installed that you can
use to monitor SQL Server performance elements such as cache utilization, locking, wait
states, and I/O performance. Performance Monitor can be launched from many different
points. From SQL Profiler, choose the Tools menu option and choose the Performance
Monitor item. Figure 39.21 shows this menu option from SQL Profiler. You can also
launch it from the
Administrative Tools folder in the Windows Start menu.
Performance Monitor Views
When you first launch Performance Monitor, you are presented with the welcome screen
(in Windows 2008, the welcome screen is the Resource Overview). Click on Performance
Monitor in the
Monitoring Tools folder to bring up the Performance Monitor main
display. In the Performance Monitor main display, you can view the performance informa-
tion in one of three different modes:
. Graphic chart—This view, the default, shows the selected counters as colored lines
over a timeline with the y-axis representing the value and the x-axis representing
FIGURE 39.21 Launching Performance Monitor from SQL Profiler.
ptg
1467
Performance Monitoring Tools
39
time. You can also add gridlines (horizontal and vertical). This view lets you view
performance trends over time.
. Histogram chart—This view shows the selected counters as colored horizontal bars
(as in a histogram). These histogram bars change dynamically to reflect the data
sampling values. With this view, you see a current snapshot of the performance
counters rather than the trend of activity over time.
. Report display—In this mode, you see the current values for counters collected
under their parent object in a textual display format. Like the histogram view, this
view does not show you the activity trends, just the current sampling value, but it is
great for showing what counters you are collecting data with.
Figure 39.22 shows the basic graphic chart view interface for Performance Monitor
displaying several useful system counters that are explained later in this chapter. These
counters are added to Performance Monitor through the creation of Performance Monitor
Data Collector Sets.
When you open the Performance Monitor view, depending on the OS version you are
running, you see up to three default performance counters: Memory: Pages/sec,
PhysicalDisk:Avg.Disk Queue Length, and Processor:% Processor Time. These counters
provide a good start, but you really want to see many other counters that reflect the
complete picture of how your server is behaving. This chapter explains the recommended
ones to use for SQL Server in the “SQL Server Performance Counters” section.
FIGURE 39.22 Performance Monitor chart view, with various counters.
ptg
1468
CHAPTER 39 Monitoring SQL Server Performance
You add a counter by clicking the large plus sign toolbar button near the top. The Add
Counters dialog that appears (see Figure 39.23) allows you to select the computer to
monitor (this can be a remote server), a performance object, any specific counters, and an
instance of the counter, if applicable. You can select the Show Description check box to
get a simple explanation of the currently selected counter. When you are done making
your selections of counters to add, click OK to return to the Performance Monitor screen.
You can customize the look of the lines in the chart view by right-clicking and selecting
Properties. On the Data tab of the System Monitor Properties dialog, you can specify the
color, width, and style of line for each of your counters. You can also change the scale of a
counter’s value as well so that the line appears within the graph’s scale of 1 to 100.
TIP
To quickly rescale all the counters, select all the counters in the bottom panel of the
Chart view window, right-click, and select Scale Selected Counters. Performance
Monitor automatically selects a scale for each counter such that all lines appear within
the display.
To remove a counter, you simply highlight the line in the bottom area of the Chart view
window and press the Delete key or click on the X button in the toolbar. If you just want
FIGURE 39.23 Adding a counter in Performance Monitor.
ptg
1469
Performance Monitoring Tools
39
to temporarily hide a counter to make the display a little less busy, you can right-click a
counter in the bottom area of the Chart view and select Hide Selected Counters.
The Chart view also provides a way to make a specific counter or set of counters stand out
in the display by making the line or lines black and bold. This capability can help you
focus on the trend of a specific counter. To turn on highlighting, select one or more coun-
ters in the bottom area of the Chart view and click on the Highlight button on the toolbar
(the one that looks like highlighter pen just to the right of the big red X).
Adding counters like this in an ad hoc manner is fine for a quick monitoring session.
However, after you close the Performance Monitor tool, you lose the counters you have
selected, so they are not available the next time you open Performance Monitor. Typically,
you need to set up those counters you want to reuse or to have running continuously or
on a schedule that captures the performance counters to a log file. To do this, you create
one or more Data Collector Sets.
Creating Data Collector Sets in Performance Monitor
A Data Collector Set is the building block of performance monitoring and reporting in
Windows Performance Monitor. It organizes multiple data collection points into a single
component that can be used for review or to log performance counters. A Data Collector
Set can be created and then recorded individually, grouped with other Data Collector Sets
and incorporated into logs, viewed in Performance Monitor, or configured to generate
alerts when thresholds are reached. You can set up schedules on your Data Collector Sets
to have them run the data collection at specific times.
Data collector sets can contain the following types of Data Collectors:
. Performance counters
. Event trace data
. System configuration information (Registry key values)
Performance counters are measurements of system state or activity. They can be included
in the operating system or can be part of individual applications. When you install SQL
Server, a number of SQL Server–specific performance counters are installed (a number of
the more useful ones are described later in this chapter). Windows Performance Monitor
requests the current value of performance counters at specified time intervals.
Event trace data is collected from trace providers, which are components of the operating
system or of individual applications that report actions or events. Output from multiple
trace providers can be combined into a trace session.
Configuration information is collected from key values in the Windows Registry. Windows
Performance Monitor can record the value of a Registry key at a specified time or interval
as part of a log file.
The easiest way to created a Data Collector Set is to create a custom view of counters in
Performance Monitor (similar to what was shown in the previous section). When you are
satisfied with the counters and settings you have configured, right-click on the
Performance Monitor node in the Monitoring Tools folder, select New, and then select
ptg
1470
CHAPTER 39 Monitoring SQL Server Performance
Data Collector Set. This starts the Create Data Collector Set Wizard, which walks you
through the following steps:
1. The wizard prompts for a name for the Data Collector Set. Enter a name and click
Next.
2. Specify the root directory where the Performance Monitor log files will be written
and click Next.
3. Specify if you want the Data Collector to run under a different user ID and if you
want to start the Data Collector immediately or to just save the Data Collector Set.
Click Finish to return to Performance Monitor.
The newly created Data Collector Set is listed under the
User Defined folder in the Data
Collector Sets node in Performance Monitor.
You can also create a Data Collector Set manually or from a template by right-clicking on
the
User Defined folder in the Data Collector Sets node and selecting New, Data
Collector Set. This launches a modified version of the Create New Data Collector Set
Wizard, as shown in Figure 39.24.
You first specify a name for the collector set and then choose whether to create it from a
template or manually. Then you click Next.
If you choose to create from a template, the next screen displays the built-in templates
provided with Windows; these standard templates focus on general system performance
or diagnostics. You can also choose to import your own templates by clicking on the
Browse button.
FIGURE 39.24 The Create New Data Collector Set Wizard.
ptg
1471
Performance Monitoring Tools
39
NOTE
Creating your own Data Collector Set templates in Performance Monitor is relatively
easy. If you have a Data Collector Set that you’ve set up with the performance coun-
ters and settings that you would like to reuse, simply right-click the Data Collector Set
you want to export and click Save Template. Select a directory in which to store the
collector set as an XML file and click Save. You can now copy this template for use on
other computers.
After selecting the template, navigate to the next screen to specify the root directory for
the log files. On the final screen, you have the option again to start the collector immedi-
ately, save it, or open the properties for the Data Collector Set so you can make further
modifications to it, such as specifying a schedule or how it should handle.
If you choose to create a new Data Collector Set manually instead of using a template, you
are presented with the screen shown in Figure 39.25. You have the option to create a Data
Collector Set that generates data logs or to create a Performance Counter Alert. If you are
creating data logs, you can specify what sort of information you want to include in the
collector set (in this example, we’re logging performance counters only).
Depending on the Data Collector types you select, you are presented with dialogs to add
Data Collectors to your Data Collector Set. In this example, you are presented with the
dialog to add performance counters, as shown in Figure 39.25.
After defining the counters, and so on, you are presented with the familiar options to
specify the root directory and whether to save, run, or edit the properties of the Data
Collector Set.
FIGURE 39.25 Creating a new Data Collector Set manually to capture performance counters.
ptg
1472
CHAPTER 39 Monitoring SQL Server Performance
After you create a Data Collector Set, you can add additional Data Collectors to it as
desired. They can be additional performance counter event traces, configuration Data
Collectors, or performance counter alerts.
Running a Data Collector Set in Performance Monitor
The easiest way to run a Data Collector Set is to right-click on it and choose Start. When
you are done capturing, right-click again and choose Stop. However, this is probably not
the most effective way to execute your Data Collector Sets. A more effective approach is to
set up a schedule for data collection.
During Data Collector Set creation, you can configure the schedule by selecting Open
Properties for this Data Collector Set at the end of the Create New Data Collector Set
Wizard. After a Data Collector Set is created, you can access the schedule options by right-
clicking the Data Collector Set name in the Microsoft Management Console (MMC) navi-
gation pane and selecting Properties. When the Properties dialog is displayed, click the
Schedule tab to specify the schedule when you want the Data Collector to run. You can
specify the start date, time, or day for data collection. If you do not want to collect new
data after a certain date, select Expiration Date and choose a date from the calendar. You
can create multiple schedules for a single Data Collector Set.
The Data Collector runs continuously unless you specify a Stop condition for a Data
Collector Set. The Stop condition can be set in the Stop Condition tab. To stop collecting
data after a period of time, select Overall Duration and choose the quantity and units. On
the Stop Condition tab, you can also specify limits to segment data collection into sepa-
rate logs. Select the Restart the Data Collector Set at Limits option to continue running
the Data Collector after the limit is reached. You can select Duration to configure a time
period for data collection to write to a single log file, or select Maximum Size to restart the
Data Collector Set or to stop collecting data when the log file reaches a specific size. If you
select both limits, data collection stops or restarts when the first limit is reached.
TIP
If you are running a Data Collector continuously, you should set a limit so that the Data
Collector breaks the log file into multiple segments. In addition to preventing the file
from becoming exceedingly large, breaking up the log file also enables you to view the
log file segments prior to the current one while the Data Collector Set is running.
Unfortunately, you cannot directly open the currently active log file for a Data Collector
Set to view the live data collection. However, if you have a previous report available,
you can open the report in the Performance Monitor window. When this report is open,
click the View Current Activity button (or press Ctrl+T) and you can view the current
activity in real-time as it’s being captured.
Viewing Data Collector Set Results in Performance Monitor
To view a Data Collector Set report in Windows Performance Monitor, expand Reports and
click User Defined or System. Then expand the Data Collector Set that you want to view
as a report. Simply click the report that you want to view from the list of available reports.
The report opens in the console pane.
ptg
1473
Performance Monitoring Tools
39
If you want to open one or more log files in Performance Monitor (perhaps you have a set
of log files copied from another server), in the Windows Performance Monitor navigation
pane, expand Monitoring Tools and click Performance Monitor. In the console pane
toolbar, click the Add Log Data button (or press Ctrl+L). The Performance Monitor
Properties page opens with the Source tab active (see Figure 39.26). In the Data Source
section, follow these steps:
FIGURE 39.26 Importing log files into Performance Monitor.
1. Select Log Files and click Add.
2. Browse to the log file you want to view and click Open.
3. To add multiple log files to the Performance Monitor view, click Add again.
4. Click Time Range to see times included in the log or logs you selected.
5. When you are finished selecting log files, click OK.
6. Right-click in the Performance Monitor display and click Add Counters to select the
counters you want to display in Performance Monitor. Only the counters included in
the log file or files you selected in step 4 are made available.
For a single log file, you can move the beginning and ending time sliders to view only a
portion of the log file in Performance Monitor.
For multiple log files, you can move the beginning and ending time sliders to choose the
time period (from all the selected log files) to view in Performance Monitor. If a log has
data from the time period you select, it is available in the display.
Why Use Performance Monitor?
You might be asking, “With all the new performance monitoring tools provided with SQL
Server, is there a need to continue to use Performance Monitor?”