Phát triển web với PHP và MySQL - p 38 pot
Bạn đang xem bản rút gọn của tài liệu. Xem và tải ngay bản đầy đủ của tài liệu tại đây (421.32 KB, 10 trang )
<p>Your message could not be encrypted, so has not been sent.
<p>Sorry.”;
}
?>
In order to make this code work for you, you will need to change a few things. Email will be
sent to the address in $to_email.
The line
putenv(“GNUPGHOME=/tmp/.gnupg”);
will need to be changed to reflect the location of your GPG keyring. On our system, the Web
server runs as the user nobody, and has the home directory /tmp/.
We are using the function tempnam() to create a unique temporary filename. You can specify
both the directory and a filename prefix. We are going to create and delete these files in around
one second, so it is not very important what we call them. We are specifying a prefix of ‘pgp’,
but letting PHP use the system temporary directory.
The statement
$command = “/usr/local/bin/gpg -a “.
“ recipient ‘Luke Welling <>’ “.
“ encrypt -o $outfile $infile”;
sets up the command and parameters that will be used to call gpg. It will need to be modified
to suit you. As with when we used it on the command line, you need to tell GPG which key to
use to encrypt the message.
The statement
system($command, $result);
executes the instructions stored in $command and stores the return value in $result.
We could ignore the return value, but it lets us have an if statement and tell the user that some-
thing went wrong.
When we have finished with the temporary files that we use, we delete them using the
unlink() function. This means that our user’s unencrypted email is being stored on the server
for a short time. It is even possible that if the server failed during execution, the file could be
left on the server.
Implementing Secure Transactions with PHP and MySQL
C
HAPTER 15
15
I
MPLEMENTING
S
ECURE
TRANSACTIONS
345
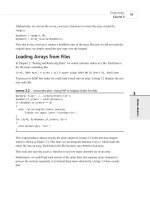
LISTING 15.2 Continued
19 7842 CH15 3/6/01 3:40 PM Page 345
While we are thinking about the security of our script, it is important to consider all flows of
information within our system. GPG will encrypt our email and allow our recipient to decrypt
it, but how does the information originally come from the sender? If we are providing a Web
interface to send GPG encrypted mail, the flow of information will look something like
Figure 15.5.
E-commerce and Security
P
ART III
346
3
Recipient’s
Server
2
Sender’s
Browser
Recipient’s
Client
Web
Server
1
FIGURE 15.5
In our encrypted email application, the message is sent via the Internet three times.
In this figure, each arrow represents our message being sent from one machine to another.
Each time the message is sent, it travels through the Internet and might pass through a number
of intermediary networks and machines.
The script we are looking at here exists on the machine labeled Web Server in the diagram. At
the Web server, the message will be encrypted using the recipient’s public key. It will then be
sent via SMTP to the recipient’s mail server. The recipient will connect to his mail server,
probably using POP or IMAP, and download the message using a mail reader. Here he will
decrypt the message using his private key.
The data transfers in Figure 15.5 are labeled 1, 2, and 3. For stages 2 and 3, the information
being transmitted is a GPG encrypted message and is of little value to anybody who does not
have the private key. For transfer 1, the message being transmitted is the text that the sender
entered in the form.
If our information is important enough that we need to encrypt it for the second and third leg
of its journey, it is a bit silly to send it unencrypted for the first leg. Therefore, this script
belongs on a server that uses SSL.
If we connect to our script using a port other than 443, it will provide a warning. This is the
default port for SSL. If your server uses a non-default port for SSL, you might need to modify
this code.
Rather than providing an error message, we could deal with this situation in other ways. We
could redirect the user to the same URL via an SSL connection. We could also choose to
ignore it because it is not usually important if the form was delivered using a secure connec-
tion. What is usually important is the details that the user has typed into the form are sent to us
securely. We could simply have given a complete URL as the action of our form.
19 7842 CH15 3/6/01 3:40 PM Page 346
Currently, our open form tag looks like this:
<form method = post action = send_private_mail.php>
We could alter it to send data via SSL even if the user connected without SSL like this:
<form method = post action = “https://webserver/send_private_mail.php”>
If we hard code the complete URL like this, we can be assured that visitors’ data will be sent
using SSL, but we will need to modify the code every time we use it on another server or even
in another directory.
Although in this case, and many others, it is not important that the empty form is sent to the
user via SSL, it is usually a good idea to do so. Seeing the little padlock symbol in the status
bar of their browsers reassures people that their information is going to be sent securely. They
should not need to look at your HTML source and see what the action attribute of the form is.
Further Reading
The specification for SSL version 3.0 is available from Netscape:
/>If you would like to know more about how networks and networking protocols work, a classic
introductory text is Andrew S. Tanenbaum’s Computer Networks.
Next
That wraps up our discussion of e-commerce and security issues. In the next section, we’ll
look at some more advanced PHP techniques including interacting with other machines on the
Internet, generating images on-the-fly, and using session control.
Implementing Secure Transactions with PHP and MySQL
C
HAPTER 15
15
I
MPLEMENTING
S
ECURE
TRANSACTIONS
347
19 7842 CH15 3/6/01 3:40 PM Page 347
19 7842 CH15 3/6/01 3:40 PM Page 348
IN THIS PART
16 Interacting with the File System and
the Server 351
17 Using Network and Protocol Functions 369
18 Managing the Date and Time 391
19 Generating Images 401
20 Using Session Control in PHP 429
21 Other Useful Features 447
Advanced PHP Techniques
PART
IV
20 7842 part 4 3/6/01 3:35 PM Page 349
20 7842 part 4 3/6/01 3:35 PM Page 350
CHAPTER
16
Interacting with the File
System and the Server
21 7842 CH16 3/6/01 3:40 PM Page 351
Advanced PHP Techniques
P
ART IV
352
In Chapter 2, “Storing and Retrieving Data,” we saw how to read data from and write data to
files on the Web server. In this chapter, we will cover other PHP functions that enable us to
interact with the file system on the Web server.
We will discuss
• Uploading files with PHP
• Using directory functions
• Interacting with files on the server
• Executing programs on the server
• Using server environment variables
In order to discuss the uses of these functions, we will look at an example.
Consider a situation in which you would like your client to be able to update some of a Web
site’s content—for instance, the current news about their company. (Or maybe you want a
friendlier interface than FTP for yourself.) One approach to this is to let the client upload the
content files as plain text. These files will then be available on the site, through a template you
have designed with PHP, as we did in Chapter 6, “Object Oriented PHP.”
Before we dive into the file system functions, let’s briefly look at how file upload works.
Introduction to File Upload
One very useful piece of PHP functionality is support for HTTP upload. Instead of files com-
ing from the server to the browser using HTTP, they go in the opposite direction, that is, from
the browser to the server. Usually you implement this with an HTML form interface. The one
we’ll use in our example is shown in Figure 16.1.
FIGURE 16.1
The HTML form we use for file upload has different fields and field types from those of a normal HTML form.
21 7842 CH16 3/6/01 3:40 PM Page 352
As you can see, the form has a box where the user can enter a filename, or click the Browse
button to browse files available to him locally. You might not have seen a file upload form
before. We’ll look at how to implement this in a moment.
After a filename has been entered, the user can click Send File, and the file will be uploaded to
the server, where a PHP script is waiting for it.
HTML for File Upload
In order to implement file upload, we need to use some HTML syntax that exists specially for
this purpose. The HTML for this form is shown in Listing 16.1.
LISTING 16.1 upload.html—HTML Form for File Upload
<html>
<head>
<title>Administration - upload new files</title>
</head>
<body>
<h1>Upload new news files</h1>
<form enctype=”multipart/form-data” action=”upload.php” method=post>
<input type=”hidden” name=”MAX_FILE_SIZE” value=”1000”>
Upload this file: <input name=”userfile” type=”file”>
<input type=”submit” value=”Send File”>
</form>
</body>
</html>
Note that this form uses POST. File uploads will also work with the PUT method supported by
Netscape Composer and Amaya. They will not work with GET.
The extra features in this form are
• In the <form> tag, you must set the attribute enctype=”multipart/form-data” to let the
server know that a file is coming along with the regular form information.
• You must have a form field that sets the maximum size file that can be uploaded. This is
a hidden field, and is shown here as
<input type=”hidden” name=”MAX_FILE_SIZE” value=”1000”>
The name of this form field must be MAX_FILE_SIZE. The value is the maximum size (in
bytes) of files you will allow people to upload.
• You need an input of type file, shown here as
<input name=”userfile” type=”file”>
Interacting with the File System and the Server
C
HAPTER 16
16
INTERACTING WITH
THE
F
ILE SYSTEM
AND THE
SERVER
353
21 7842 CH16 3/6/01 3:40 PM Page 353
You can choose whatever name you like for the file, but keep it in mind as you will use
this name to access your file from the receiving PHP script.
Writing the PHP to Deal with the File
Writing the PHP to catch the file is pretty straightforward.
When the file is uploaded, it will go into a temporary location on the Web server. This is the
Web server’s default temporary directory. If you do not move or rename the file before your
script finishes execution, it will be deleted.
Given that your HTML form has a field in it called
userfile, you will end up with four vari-
ables being passed to PHP:
• The value stored in
$userfile is where the file has been temporarily stored on the Web
server.
• The value stored in $userfile_name is the file’s name on the user’s system.
• The value stored in $userfile_size is the size of the file in bytes.
• The value stored in $userfile_type is the MIME type of the file, for example,
text/plain or image/gif.
You can also access these variables via the $HTTP_POST_FILES array, as follows:
• $HTTP_POST_FILES[‘userfile’][‘tmp_name’]
• $HTTP_POST_FILES[‘userfile’][‘name’]
• $HTTP_POST_FILES[‘userfile’][‘size’]
• $HTTP_POST_FILES[‘userfile’][‘type’]
Given that you know where the file is and what it’s called, you can now copy it to somewhere
useful. At the end of your script’s execution, the temporary file will be deleted. Hence, you
must move or rename the file if you want to keep it.
In our example, we’re going to use the uploaded files as recent news articles, so we’ll strip out
any tags that might be in them, and move them to a more useful directory. A script that does
this is shown in Listing 16.2.
LISTING 16.2 upload.php—PHP to Catch the Files from the HTML Form
<head>
<title>Uploading </title>
</head>
<body>
<h1>Uploading file </h1>
Advanced PHP Techniques
P
ART IV
354
21 7842 CH16 3/6/01 3:40 PM Page 354