Lập trình ứng dụng nâng cao (phần 9) potx
Bạn đang xem bản rút gọn của tài liệu. Xem và tải ngay bản đầy đủ của tài liệu tại đây (1.03 MB, 50 trang )
382
|
Chapter 17: Programming ASP.NET Applications
Web Forms implement a programming model in which web pages are dynamically
generated on a web server for delivery to a browser over the Internet. With Web
Forms, you create an ASPX page with more or less static content consisting of
HTML and web controls, as well as AJAX and Silverlight, and you write C# code to
add additional dynamic content. The C# code runs on the server for the standard
ASPX event handlers and on the client for the Silverlight event handlers (JavaScript is
used for standard AJAX event handlers), and the data produced is integrated with
the declared objects on your page to create an HTML page that is sent to the
browser.
You should pick up the following three critical points from the preceding paragraph
and keep them in mind for this entire chapter:
• Web pages can have both HTML and web controls (described later).
• Processing may be done on the server or on the client, in managed code or in
unmanaged code, or via a combination.
• Typical ASP.NET controls produce standard HTML for the browser.
Web Forms divide the user interface into two parts: the visual part or user interface
(UI), and the logic that lies behind it. This is called code separation; and it is a good
thing.
From version 2.0 of ASP.NET, Visual Studio takes advantage of par-
tial classes, allowing the code-separation page to be far simpler than it
was in version 1.x. Because the code-separation and declarative pages
are part of the same class, there is no longer a need to have protected
variables to reference the controls of the page, and the designer can
hide its initialization code in a separate file.
The UI page for ASP.NET pages is stored in a file with the extension .aspx. When
you run the form, the server generates HTML sent to the client browser. This code
uses the rich Web Forms types found in the
System.Web and System.Web.UI
namespaces of the .NET FCL, and the System.Web.Extension namespace in Microsoft
ASP.NET AJAX.
With Visual Studio, Web Forms programming couldn’t be simpler: open a form,
drag some controls onto it, and write the code to handle events. Presto! You’ve writ-
ten a web application.
On the other hand, even with Visual Studio, writing a robust and complete web
application can be a daunting task. Web Forms offer a very rich UI; the number and
complexity of web controls have greatly multiplied in recent years, and user expecta-
tions about the look and feel of web applications have risen accordingly.
In addition, web applications are inherently distributed. Typically, the client will not
be in the same building as the server. For most web applications, you must take
Web Forms Fundamentals
|
383
network latency, bandwidth, and network server performance into account when
creating the UI; a round trip from client to host might take a few seconds.
To simplify this discussion, and to keep the focus on C#, we’ll ignore
client-side processing for the rest of this chapter, and focus on server-
side ASP.NET controls.
Web Forms Events
Web Forms are event-driven. An event represents the idea that “something
happened” (see Chapter 12 for a full discussion of events).
An event is generated (or raised) when the user clicks a button, or selects from a list-
box, or otherwise interacts with the UI. Events can also be generated by the system
starting or finishing work. For example, if you open a file for reading, the system
raises an event when the file has been read into memory.
The method that responds to the event is called the event handler. Event handlers are
written in C#, and are associated with controls in the HTML page through control
attributes.
By convention, ASP.NET event handlers return
void and take two parameters. The
first parameter represents the object raising the event. The second, called the event
argument, contains information specific to the event, if any. For most events, the
event argument is of type
EventArgs, which doesn’t expose any properties. For some
controls, the event argument might be of a type derived from
EventArgs that can
expose properties specific to that event type.
In web applications, most events are typically handled on the server and, therefore,
require a round trip. ASP.NET supports only a limited set of events, such as button
clicks and text changes. These are events that the user might expect to cause a signif-
icant change, as opposed to Windows events (such as mouse-over) that might
happen many times during a single user-driven task.
Postback versus nonpostback events
Postback events are those that cause the form to be posted back to the server imme-
diately. These include click-type events, such as the button
Click event. In contrast,
many events (typically change events) are considered nonpostback in that the form
isn’t posted back to the server immediately. Instead, the control caches these events
until the next time a postback event occurs.
You can force controls with nonpostback events to behave in a post-
back manner by setting their
AutoPostBack property to true.
384
|
Chapter 17: Programming ASP.NET Applications
State
A web application’s state is the current value of all the controls and variables for the
current user in the current session. The Web is inherently a “stateless” environment.
This means that every post to the server loses the state from previous posts, unless
the developer takes great pains to preserve this session knowledge. ASP.NET, how-
ever, provides support for maintaining the state of a user’s session.
Whenever a page is posted to the server, the server re-creates it from scratch before it
is returned to the browser. ASP.NET provides a mechanism that automatically main-
tains state for server controls (
ViewState) independent of the HTTP session. Thus, if
you provide a list, and the user has made a selection, that selection is preserved after
the page is posted back to the server and redrawn on the client.
The HTTP session maintains the illusion of a connection between the
user and the web application, despite the fact that the Web is a state-
less, connectionless environment.
Web Forms Life Cycle
Every request for a page made to a web server causes a chain of events at the server.
These events, from beginning to end, constitute the life cycle of the page and all its
components. The life cycle begins with a request for the page, which causes the
server to load it. When the request is complete, the page is unloaded. From one end
of the life cycle to the other, the goal is to render appropriate HTML output back to
the requesting browser. The life cycle of a page is marked by the following events,
each of which you can handle yourself or leave to default handling by the ASP.NET
server:
Initialize
Initialize is the first phase in the life cycle for any page or control. It is here that
any settings needed for the duration of the incoming request are initialized.
Load
ViewState
The ViewState property of the control is populated. The ViewState information
comes from a hidden variable on the control, used to persist the state across
round trips to the server. The input string from this hidden variable is parsed by
the page framework, and the
ViewState property is set. You can modify this via
the
LoadViewState( ) method. This allows ASP.NET to manage the state of your
control across page loads so that each control isn’t reset to its default state each
time the page is posted.
Process Postback Data
During this phase, the data sent to the server in the posting is processed. If any
of this data results in a requirement to update the
ViewState, that update is per-
formed via the
LoadPostData( ) method.
Creating a Web Form
|
385
Load
CreateChildControls( ) is called, if necessary, to create and initialize server
controls in the control tree. State is restored, and the form controls contain
client-side data. You can modify the load phase by handling the
Load event with
the
OnLoad( ) method.
Send Postback Change Modifications
If there are any state changes between the current state and the previous state,
change events are raised via the
RaisePostDataChangedEvent( ) method.
Handle Postback Events
The client-side event that caused the postback is handled.
PreRender
This is your last chance to modify the output prior to rendering, using the
OnPreRender( ) method.
Save State
Near the beginning of the life cycle, the persisted view state was loaded from the
hidden variable. Now it is saved back to the hidden variable, persisting as a
string object that will complete the round trip to the client. You can override this
using the
SaveViewState( ) method.
Render
This is where the output to be sent back to the client browser is generated. You
can override it using the
Render method. CreateChildControls( ) is called, if
necessary, to create and initialize server controls in the control tree.
Dispose
This is the last phase of the life cycle. It gives you an opportunity to do any final
cleanup and release references to any expensive resources, such as database
connections. You can modify it using the
Dispose( ) method.
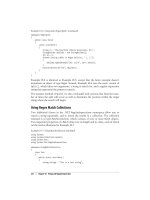
Creating a Web Form
To create the simple Web Form that we will use in the next example, start up Visual
Studio .NET and select File
➝ New Web Site. In the New Web Site dialog, choose
ASP.NET Web Site from the templates, File System for the location (you can also
create web sites remotely using HTTP or FTP), and Visual C# as your language.
Give your web site a location and a name and choose your .NET Framework, as
shown in Figure 17-1.
Visual Studio creates a folder named ProgrammingCSharpWeb in the directory
you’ve indicated, and within that directory it creates your Default.aspx page (for the
user interface), Default.aspx.cs file (for your code), web.config file (for web site con-
figuration settings), and an App_Data directory (currently empty but often used to
hold .mdb files or other data-specific files).
386
|
Chapter 17: Programming ASP.NET Applications
Although Visual Studio no longer uses projects for web applications, it
does keep solution files to allow you to quickly return to a web site or
desktop application you’ve been developing. The solution files are
kept in a directory you can designate through the Tools
➝ Options
window, as shown in Figure 17-2.
Code-Behind Files
Let’s take a closer look at the .aspx and code-behind files that Visual Studio creates.
Start by renaming Default.aspx to HelloWeb.aspx. To do this, close Default.aspx and
then right-click its name in the Solution Explorer. Choose Rename, and enter the
name
HelloWeb.aspx. That renames the file, but not the class. To rename the class,
right-click the .aspx page, choose View Code in the code page, and then rename the
class
HelloWeb_aspx. You’ll see a small line next to the name. Click it, and you’ll open
the smart tag that allows you to rename the class. Click “Rename ‘_Default’ to
‘HelloWeb_aspx’” and Visual Studio ensures that every occurrence of
Default_aspx
is replaced with its real name, as shown in Figure 17-3.
Within the HTML view of HelloWeb.aspx, you see that a form has been specified in
the body of the page using the standard HTML form tag:
<form id="form1" runat="server">
Figure 17-1. Creating your new web application
Creating a Web Form
|
387
Web Forms assume that you need at least one form to manage the user interaction,
and it creates one when you open a project. The attribute
runat="server" is the key
to the server-side magic. Any tag that includes this attribute is considered a server-
side control to be executed by the ASP.NET Framework on the server. Within the
form, Visual Studio has opened
div tags to facilitate placing your controls and text.
Having created an empty Web Form, the first thing you might want to do is add
some text to the page. By switching to the Source view, you can add script and
HTML directly to the file just as you could with classic ASP. Adding to the body seg-
ment of the .aspx page the highlighted line in the following code snippet:
<%@ Page Language="C#" AutoEventWireup="true" CodeFile="HelloWeb.aspx.cs"
Inherits="HelloWeb_aspx" %>
<!DOCTYPE html PUBLIC "-//W3C//DTD XHTML 1.0 Transitional//EN"
" />Figure 17-2. Project location options
Figure 17-3. Renaming the class
388
|
Chapter 17: Programming ASP.NET Applications
<html xmlns=" /><head runat="server">
<title>Hello Web Page</title>
</head>
<body>
<form id="form1" runat="server">
Hello World! It is now <% = DateTime.Now.ToString( ) %>
<div>
</div>
</form>
</body>
</html>
will cause it to display a greeting and the current local time:
Hello World! It is now 9/9/2009 5:24:16 PM
The <% and %> marks work just as they did in classic ASP, indicating that code falls
between them (in this case, C#). The
= sign immediately following the opening tag
causes ASP.NET to display the value, just like a call to
Response.Write( ). You could
just as easily write the line as:
Hello World! It is now
<% Response.Write(DateTime.Now.ToString( )); %>
Run the page by pressing F5.
Adding Controls
You can add server-side controls to a Web Form in three ways: by writing HTML into
the HTML page, by dragging controls from the toolbox to the Design page, or by
programmatically adding them at runtime. For example, suppose you want to use
buttons to let the user choose one of three shippers provided in the Northwind data-
base. You can write the following HTML into the
<form> element in the HTML
window:
<asp:RadioButton GroupName="Shipper" id="Speedy"
text = "Speedy Express" Checked="True" runat="server">
</asp:RadioButton>
<asp:RadioButton GroupName="Shipper" id="United"
text = "United Package" runat="server">
Enabling Debugging
When you press F5, you begin the debugger. It’s likely that Visual Studio will notice
that debugging is not enabled in the Web.config file for this application, and the
Debugging Not Enabled dialog box will appear, as shown in Figure 17-4.
The default in this dialog box is to modify (and, if needed, create) the Web.config file.
Go ahead and click OK to enable debugging for your application.
Creating a Web Form
|
389
</asp:RadioButton>
<asp:RadioButton GroupName="Shipper" id="Federal"
text = "Federal Shipping" runat="server">
</asp:RadioButton>
The asp tags declare server-side ASP.NET controls that are replaced with normal
HTML when the server processes the page. When you run the application, the
browser displays three radio buttons in a button group; selecting one deselects the
others.
You can create the same effect more easily by dragging three buttons from the Visual
Studio toolbox onto the form, or to make life even easier, you can drag a radio but-
ton list onto the form, which will manage a set of radio buttons declaratively. When
you do, the smart tag is opened, and you are prompted to choose a data source
(which allows you to bind to a collection; perhaps one you’ve obtained from a data-
base) or to edit items. Clicking Edit Items opens the ListItem Collection Editor,
where you can add three radio buttons.
Each radio button is given the default name ListItem, but you may edit its text and
value in the ListItem properties, where you can also decide which of the radio but-
tons is selected, as shown in Figure 17-5.
You can improve the look of your radio button list by changing properties in the
Properties window, including the font, colors, number of columns, repeat direction
(vertical is the default), and so forth, as well as by utilizing Visual Studio’s extensive
support for CSS styling, as shown in Figure 17-6.
In Figure 17-6, you can just see that in the lower-righthand corner you can switch
between the Properties window and the Styles window. Here, we’ve used the Proper-
ties window to set the tool tip, and the Styles window to create and apply the
ListBox
style, which creates the border around our listbox and sets the font and font color.
We’re also using the split screen option to look at Design and Source at the same time.
Figure 17-4. Enabling debugging
390
|
Chapter 17: Programming ASP.NET Applications
Figure 17-5. List item collection
Figure 17-6. Using properties and styles
Data Binding
|
391
The tag indications (provided automatically at the bottom of the window) show us
our location in the document; specifically, inside a ListItem, within the
ListBox
which is inside a div which itself is inside form1. Very nice.
Server Controls
Web Forms offer two types of server-side controls. The first is server-side HTML
controls. These are HTML controls that you tag with the attribute
runat=Server.
The alternative to marking HTML controls as server-side controls is to use ASP.NET
Server Controls, also called ASP controls or web controls. ASP controls have been
designed to augment and replace the standard HTML controls. ASP controls pro-
vide a more consistent object model and more consistently named attributes. For
example, with HTML controls, there are myriad ways to handle input:
<input type="radio">
<input type="checkbox">
<input type="button">
<input type="text">
<textarea>
Each behaves differently and takes different attributes. The ASP controls try to nor-
malize the set of controls, using attributes consistently throughout the ASP control
object model. Here are the ASP controls that correspond to the preceding HTML
server-side controls:
<asp:RadioButton>
<asp:CheckBox>
<asp:Button>
<asp:TextBox rows="1">
<asp:TextBox rows="5">
The remainder of this chapter focuses on ASP controls.
Data Binding
Various technologies have offered programmers the opportunity to bind controls to
data so that as the data was modified, the controls responded automatically.
However, as Rocky used to say to Bullwinkle, “That trick never works.” Bound con-
trols often provided the developer with severe limitations in how the control looked
and performed.
The ASP.NET designers set out to solve these problems and provide a suite of robust
data-bound controls, which simplify display and modification of data, sacrificing nei-
ther performance nor control over the UI. From version 2.0, they have expanded the
list of bindable controls and provided even more out-of-the-box functionality.
392
|
Chapter 17: Programming ASP.NET Applications
In the previous section, you hardcoded radio buttons onto a form, one for each of
three shippers in the Northwind database. That can’t be the best way to do it; if you
change the shippers in the database, you have to go back and rewire the controls.
This section shows you how you can create these controls dynamically and then bind
them to data in the database.
You might want to create the radio buttons based on data in the database because
you can’t know at design time what text the buttons will have, or even how many
buttons you’ll need. To accomplish this, you’ll bind your
RadioButtonList to a data
source.
Create a new page (right-click on the project, and choose Add New Item; put your
form in split view; from the dialog box, choose Web Form). Name the new Web
Form DisplayShippers.aspx.
From the toolbox, drag a
RadioButtonList onto the new form, either onto the design
pane, or within the
<div> in the Source view.
If you don’t see the radio buttons on the left of your work space, try
clicking on View
➝ Toolbox to open the toolbox, and then clicking on
the Standard tab of the toolbox. Right-click on any control in the tool-
box, and choose Sort Items Alphabetically.
In the Design pane, click on the new control’s smart tag. Then, select Choose Data
Source. The Choose a Data Source dialog opens, as shown in Figure 17-7.
Figure 17-7. Choose a Data Source dialog
Data Binding
|
393
Drop down the “Select a data source” menu and choose <New Data Source>. You
are then prompted to choose a data source from the datatypes on your machine.
Select Database, assign it an ID, and click OK. The Configure Data Source dialog
box opens, as shown in Figure 17-8.
Choose an existing connection, or in this case, choose New Connection to configure
a new data source, and the Add Connection dialog opens.
Fill in the fields: choose your server name, how you want to log in to the server (if in
doubt, choose Windows Authentication), and the name of the database (for this
example, Northwind). Be sure to click Test Connection to test the connection. When
everything is working, click OK, as shown in Figure 17-9.
After you click OK, the connection properties will be filled in for the Configure Data
Source dialog. Review them, and if they are OK, click Next. On the next wizard
page, name your connection (e.g.,
NorthWindConnectionString) if you want to save it
to your web.config file.
When you click Next, you’ll have the opportunity to specify the tables and columns
you want to retrieve, or to specify a custom SQL statement or stored procedure for
retrieving the data.
Figure 17-8. Choosing a data connection
Existing Connections
394
|
Chapter 17: Programming ASP.NET Applications
Open the Table list, and scroll down to Shippers. Select the ShipperID and
CompanyName fields, as shown in Figure 17-10.
While you are here, you may want to click the Advanced button just
to see what other options are available to you.
Figure 17-9. The Add Connection dialog
Data Binding
|
395
Click Next, and test your query to see that you are getting back the values you
expected, as shown in Figure 17-11.
It is now time to attach the data source you’ve just built to the
RadioButtonList.A
RadioButtonList (like most lists) distinguishes between the value to display (e.g., the
name of the delivery service) and the value of that selection (e.g., the delivery service
ID). Set these fields in the wizard, using the drop down, as shown in Figure 17-12.
You can improve the look and feel of the radio buttons by binding to the Shippers
table, clicking the Radio Button list, and then setting the list’s properties and CSS
styles, as shown in Figure 17-13.
Examining the Code
Before moving on, there are a few things to notice. When you press F5 to run this
application, it appears in a web browser, and the radio buttons come up as expected.
Choose View
➝ Source, and you’ll see that what is being sent to the browser is sim-
ple HTML, as shown in Example 17-1.
Figure 17-10. Configuring the Select statement
396
|
Chapter 17: Programming ASP.NET Applications
Figure 17-11. Testing the query
Figure 17-12. Binding radio buttons to the data source
Data Binding
|
397
Figure 17-13. The Radio Button list with the data control
Example 17-1. HTML Source view
<!DOCTYPE html PUBLIC "-//W3C//DTD XHTML 1.0 Transitional//EN" " />xhtml1/DTD/xhtml1-transitional.dtd">
<html xmlns=" /><head><title>
Display Shippers
</title>
<style type="text/css">
.RadioButtonStyle
{
font-family: Verdana;
font-size: medium;
font-weight: normal;
font-style: normal;
border: medium groove #FF0000;
}
</style>
398
|
Chapter 17: Programming ASP.NET Applications
Notice that the HTML has no RadioButtonList; it has a table, with cells, within
which are standard HTML input objects and labels. ASP.NET has translated the
developer controls to HTML understandable by any browser.
A malicious user may create a message that looks like a valid post from
your form, but in which he has set a value for a field you never pro-
vided in your form. This may enable him to choose an option not
properly available (e.g., a Premier-customer option), or even to launch
a SQL injection attack. You want to be especially careful about expos-
ing important data such as primary keys in your HTML, and take care
that what you receive from the user may not be restricted to what you
provide in your form. For more information on secure coding in .NET,
see /></head>
<body>
<form name="form1" method="post" action="DisplayShippers.aspx" id="form1">
<div>
<input type="hidden" name="_ _VIEWSTATE" id="_ _VIEWSTATE"
value="/wEPDwUJMzU1NzcyMDk0D2QWAgIDD2QWAgIBDxAPFgIeC18hRGF0YUJvdW5kZ2QQFQMOU3BlZWR5
IEV4cHJlc3MOVW5pdGVkIFBhY2thZ2UQRmVkZXJhbCBTaGlwcGluZxUDATEBMgEzFCsDA2dnZ2RkZA9Nylp
g2lObPr0KzM1NvwXJoMBn" />
</div>
<div>
<table id="RadioButtonList1" border="0">
<tr>
<td><input id="RadioButtonList1_0" type="radio"
name="RadioButtonList1" value="1" />
<label for="RadioButtonList1_0">Speedy Express</label></td>
</tr>
<tr>
<td><input id="RadioButtonList1_1" type="radio"
name="RadioButtonList1" value="2" />
<label for="RadioButtonList1_1">United Package</label></td>
</tr>
<tr>
<td><input id="RadioButtonList1_2" type="radio"
name="RadioButtonList1" value="3" />
<label for="RadioButtonList1_2">Federal Shipping</label></td>
</tr>
</table>
</div>
<div>
<input type="hidden" name="_ _EVENTVALIDATION" id="_ _EVENTVALIDATION"
value="/wEWBQLIyMfLBQL444i9AQL544i9AQL644i9AQL3jKLTDcEXOHLsO/LFFixl7k4g2taGl6Qy" />
</div></form>
</body>
</html>
Example 17-1. HTML Source view (continued)
Data Binding
|
399
Adding Controls and Events
By adding just a few more controls, you can create a complete form with which users
can interact. You will do this by adding a more appropriate greeting (“Welcome to
NorthWind”), a text box to accept the name of the user, two new buttons (Order
and Cancel), and text that provides feedback to the user. Figure 17-14 shows the fin-
ished form.
This form won’t win any awards for design, but its use will illustrate a number of key
points about Web Forms.
I’ve never known a developer who didn’t think he could design a per-
fectly fine UI. At the same time, I never knew one who actually could.
UI design is one of those skills (such as teaching) that we all think we
possess, but only a few very talented folks are good at it. As develop-
ers, we know our limitations: we write the code, and someone else lays
it out on the page and ensures that usability issues are reviewed. For
more on this, I highly recommend every programmer read Don’t Make
Me Think: A Common Sense Approach to Web Usability by Steve Krug
(New Riders Press) and Why Software Sucks and What You Can Do
About It by David Platt (Addison-Wesley).
Figure 17-14. The completed shipper form
400
|
Chapter 17: Programming ASP.NET Applications
Example 17-2 is the complete HTML for the .aspx file.
Example 17-2. The .aspx file
<%@ Page Language="C#" AutoEventWireup="true" CodeFile="DisplayShippers.aspx.cs"
Inherits="DisplayShippers" %>
<!DOCTYPE html PUBLIC "-//W3C//DTD XHTML 1.0 Transitional//EN"
" /><html xmlns=" /><head runat="server">
<title>Choose Shippers</title>
<style type="text/css">
.RadioButtonStyle
{
font-family: Verdana;
font-size: medium;
font-weight: normal;
font-style: normal;
border: medium groove #FF0000;
}
</style>
</head>
<body>
<form id="form1" runat="server">
<table style="width: 300px; height: 33px">
<tr>
<td colspan="2" style="height: 20px">Welcome to NorthWind</td>
</tr>
<tr>
<td>Your name:</td>
<td><asp:TextBox ID="txtName" Runat=server></asp:TextBox></td>
</tr>
<tr>
<td>Shipper:</td>
<td>
<asp:RadioButtonList ID="rblShippers" runat="server"
DataSourceID="SqlDataSource1" DataTextField="CompanyName"
DataValueField="ShipperID">
</asp:RadioButtonList>
</td>
</tr>
<tr>
<td><asp:Button ID="btnOrder" Runat=server Text="Order"
onclick="btnOrder_Click" /></td>
<td><asp:Button ID="btnCancel" Runat=server Text="Cancel" /></td>
</tr>
<tr>
<td colspan="2"><asp:Label id="lblMsg" runat=server></asp:Label></td>
</tr>
</table>
Data Binding
|
401
When the user clicks the Order button, you’ll check that the user has filled in his
name, and you’ll also provide feedback on which shipper was chosen. Remember, at
design time, you can’t know the name of the shipper (this is obtained from the data-
base), so you’ll have to ask the
Listbox for the chosen name (and ID).
To accomplish all of this, switch to Design mode, and double-click the Order
button. Visual Studio will put you in the code-behind page, and will create an event
handler for the button’s
Click event.
To simplify this code, we will not validate that the user has entered a
name in the text box. For more on the controls that make such valida-
tion simple, please see Programming ASP.NET.
You add the event-handling code, setting the text of the label to pick up the text
from the text box, and the text and value from the
RadioButtonList:
protected void btnOrder_Click(object sender, EventArgs e)
{
lblMsg.Text = "Thank you " + txtName.Text.Trim( ) +
". You chose " + rblShippers.SelectedItem.Text +
" whose ID is " + rblShippers.SelectedValue;
}
When you run this program, you’ll notice that none of the radio buttons are selected.
Binding the list did not specify which one is the default. There are a number of ways
to do this, but the easiest is to add a single line in the
Page_Load method that Visual
Studio created:
protected void Page_Load(object sender, EventArgs e)
{
rblShippers.SelectedIndex = 0;
}
This sets the RadioButtonList’s first radio button to Selected. The problem with this
solution is subtle. If you run the application, you’ll see that the first button is
selected, but if you choose the second (or third) button and click OK, you’ll find that
the first button is reset. You can’t seem to choose any but the first selection. This is
because each time the page is loaded, the
OnLoad event is run, and in that event han-
dler you are (re-)setting the selected index.
<asp:SqlDataSource ID="SqlDataSource1" runat="server"
ConnectionString="<%$ ConnectionStrings:NorthwindConnectionString %>"
SelectCommand="SELECT [ShipperID], [CompanyName] FROM [Shippers]">
</asp:SqlDataSource>
</form>
</body>
</html>
Example 17-2. The .aspx file (continued)
402
|
Chapter 17: Programming ASP.NET Applications
The fact is that you only want to set this button the first time the page is selected, not
when it is posted back to the browser as a result of the OK button being clicked.
To solve this, wrap the setting in an
if statement that tests whether the page has
been posted back:
protected override void OnLoad(EventArgs e)
{
if (!IsPostBack)
{
rblShippers.SelectedIndex = 0;
}
}
When you run the page, the IsPostBack property is checked. The first time the page is
posted, this value is false, and the radio button is set. If you click a radio button and
then click OK, the page is sent to the server for processing (where the
btnOrder_Click
handler is run), and then the page is posted back to the user. This time, the IsPostBack
property is true, and thus the code within the if statement isn’t run, and the user’s
choice is preserved, as shown in Figure 17-15.
Figure 17-15. The user’s choices preserved on postback
Data Binding
|
403
Example 17-3 shows the complete code-behind form.
Example 17-3. Code-behind form for DisplayShippers aspx.cs
using System;
public partial class DisplayShippers : System.Web.UI.Page
{
protected void Page_Load(object sender, EventArgs e)
{
if (!IsPostBack)
{
rblShippers.SelectedIndex = 0;
}
}
protected void btnOrder_Click(object sender, EventArgs e)
{
lblMsg.Text = "Thank you " + txtName.Text.Trim( ) +
". You chose " + rblShippers.SelectedItem.Text +
" whose ID is " + rblShippers.SelectedValue;
}
}
404
Chapter 18
CHAPTER 18
Programming WPF Applications 18
Microsoft currently offers two ways to create desktop applications: Windows Forms
(the technology in use since .NET 1.0) and Windows Presentation Foundation, or
WPF (new to .NET 3.5).
It is useful to see that regardless of the technology involved, the C# is very much the
same, so I will cover WPF in this chapter and Windows Forms in the next.
In this chapter, I’ll show you how to create a relatively straightforward (though non-
trivial) WPF application with C# event handlers. In the next chapter, I’ll show you
another nontrivial application, written in Windows Forms, and again, we’ll use C#
to implement the event handlers.
Everything about the two applications will be different, except for the C#; the lan-
guage remains unchanged whether you are writing WPF, Windows Forms, ASP.
NET, or Silverlight.
WPF in a Very Small Nutshell
It isn’t possible or reasonable to teach all of WPF in a single chapter,
and I won’t try. For a more reasonable introduction, please see Pro-
gramming .NET 3.5 by myself and Alex Horovitz (O’Reilly), and for a
complete and comprehensive review of WPF please see the truly won-
derful Programming WPF by Ian Griffiths and Chris Sells (O’Reilly),
which may be one of the best technical books I’ve ever read.
WPF is written, in large part, using a declarative language: XAML (pronounced
zamel, to rhyme with camel). XAML stands for eXtensible Application Markup Lan-
guage, which is a dialect of the industry-standard XML and thus is easily read and
manipulated by tools such as Visual Studio.
WPF in a Very Small Nutshell
|
405
Creating a WPF Example
WPF does a lot of things well, but what sets it apart from previous Windows frame-
works is its command of rich text and rich graphics. WPF uses a different model
from the form-centric approach that many of us have (overly?) focused on with Win-
dows Forms.
Any sweeping generalization about WPF versus Windows Forms is
bound to fail, as one can always find a counterexample. What I’m
describing here is what I’ve seen in practice in many development
organizations, not what can be done in theory. As my old boss, Pat
Johnson, used to say (and as I’ve quoted before), “In theory, theory
and practice are the same, but in practice, they never are.”
Because this is a book about C# and not WPF, I’m going to start by showing you the
example we’re going to build, and I’ll teach only enough to get us there, with an
emphasis on the C# needed to make it work.
The Example Program
The example program we’re going to use is a variant on an example I’ve used in a
number of other places (varied here to emphasize the C#, to keep you interested,
and to stop my editor from yelling at me).
In this example, we’re going to reach out to the White House’s web site, and pull
down the images of the first 20 presidents of the United States and present them in a
custom WPF control.
The control will not be wide enough to show all 20, so we’ll provide a horizontal
scroll bar, and as the user mouses over an image, we’ll provide feedback by enlarg-
ing that image (from 75 to 85) and increasing its opacity from 75 percent to 100 per-
cent. As the user mouses off, we’ll return the image to its smaller, dimmer starting
point.
This will show off declarative animation (we’ll write no procedural code to accom-
plish these changes in the images!). In addition, when the user clicks on an image,
we’ll capture the click and display the name of the president using a C# event han-
dler, and we’ll reach into the control and place the president’s name into the title bar
of the control.
Figure 18-1 shows the result of scrolling to the 16th president and clicking on the
image. Note that the name of the president is displayed in the title bar, and that the
image of President Lincoln is both larger and brighter than the surrounding images.
406
|
Chapter 18: Programming WPF Applications
Building the Application
To create this application, open Visual Studio 2008, and select Create ➝ Project. In
the New Project dialog select .NET Framework 3.5, and choose Visual C# in the
Project Types window and WPF Application in the Templates window. Select a
location for your program and give your program a name (I’ll be naming mine Presi-
dential Browser), as shown in Figure 18-2.
Visual Studio will create a starter application with a window, inside of which it will
place an empty grid. It will present you with a split window, with the designer on
top, and the XAML on the bottom. We can work with this (we’re easy).
Because we know that we want two items in our grid—the text block that says
“United States Presidents” and our sideways listbox of photographs—we can make a
start at a layout.
Grids and Stack Panels
Two of the layout objects WPF provides are stack panels and grids (not to be con-
fused with data grids!). A stack panel lets you stack a set of objects one on top of (or
next to) another set of objects. That turns out to be very useful.
At times, you’d like to set up a stack that is both horizontal and vertical—essentially
a table, which is what a grid is for. A grid has columns and rows, both counting from
zero.
We’ll create a simple grid of two rows and one column, and inside each row, we’ll
place a stack panel. The top stack panel will hold the text, and the bottom stack
panel will hold the listbox that will, in turn, hold the photos. (Don’t panic! We’ll
take this one step at a time.)
Figure 18-1. Clicking on Abraham Lincoln