Cutting Tools Episode 1 Part 8 pot
Bạn đang xem bản rút gọn của tài liệu. Xem và tải ngay bản đầy đủ của tài liệu tại đây (505.64 KB, 11 trang )
www.toolingandproduction.com
Chapter 8/Tooling & Production
1
8.1 Introduction
Drilling is the process most commonly associated
with producing machined holes. Although many
other processes contribute to the production of
holes, including boring, reaming, broaching, and
internal grinding, drilling accounts for the major-
ity of holes produced in the machine shop. This
is because drilling is a simple, quick, and eco-
nomical method of hole production. The other
methods are used principally for more accurate,
smoother, larger holes. They are often used after
a drill has already made the pilot hole.
Drilling is one of the most complex machining
processes. The chief characteristic that distin-
guishes it from other machining operations is the
combined cutting and extrusion of metal at the
chisel edge in the center of the drill. The high
thrust force caused by the feeding motion first
extrudes metal under the chisel edge. Then it
tends to shear under the action of a negative rake
angle tool. Drilling of a single hole is shown in
Figure 8.1 and high production drilling of a plate
component is shown in Figure 8.2.
Chapter 8
Drills & Drilling
Operations
Upcoming Chapters
Metal Removal
Cutting-Tool Materials
Metal Removal Methods
Machinability of Metals
Single Point Machining
Turning Tools and Operations
Turning Methods and Machines
Grooving and Threading
Shaping and Planing
Hole Making Processes
Drills and Drilling Operations
Drilling Methods and Machines
Boring Operations and Machines
Reaming and Tapping
Multi Point Machining
Milling Cutters and Operations
Milling Methods and Machines
Broaches and Broaching
Saws and Sawing
Finishing Processes
Grinding Wheels and Operations
Grinding Methods and Machines
Lapping and Honing
George Schneider, Jr.CMfgE
Professor Emeritus
Engineering Technology
Lawrence Technological University
Former Chairman
Detroit Chapter ONE
Society of Manufacturing Engineers
Former President
International Excutive Board
Society of Carbide & Tool Engineers
Lawrence Tech.Univ.:
Prentice Hall:
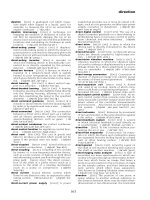
FIGURE 8.2: Holes can be drilled individually as shown in Figure 8.1, or many holes can be
drilled at the same time as shown here. (Courtesy Sandvik Coromant Co.)
FIGURE 8.1: Drilling accounts for the
majority of holes produced in industry
today. (Courtesy Valenite Inc.)
Chap. 8: Drills & Drilling Operations
2
Tooling & Production/Chapter 8
www.toolingandproduction.com
The cutting action along the lips of
the drill is not unlike that in other
machining processes. Due to variable
rake angle and inclination, however,
there are differences in the cutting
action at various radii on the cutting
edges. This is complicated by the con-
straint of the whole chip on the chip
flow at any single point along the lip.
Still, the metal removing action is true
cutting, and the problems of variable
geometry and constraint are present, but
because it is such a small portion of the
total drilling operation, it is not a distin-
guishing characteristic of the process.
Many of the drills discussed in this
chapter are shown in Figures 8.3.
The machine settings used in drilling
reveal some important features of this
hole producing operation. Depth of cut,
a fundamental dimension in other cut-
ting processes, corresponds most close-
ly to the drill radius. The undeformed
chip width is equivalent to the length of
the drill lip, which depends on the point
angle as well as the drill size. For a
given set-up, the undeformed chip
width is constant in drilling. The feed
dimension specified for drilling is the
feed per revolution of the spindle. A
more fundamental quantity is the feed
per lip. For the common two-flute drill,
it is half the feed per revolution. The
undeformed chip thickness differs from
the feed per lip depending on the point
angle.
The spindle speed is constant for any
one operation, while the cutting speed
varies all along the cutting edge.
Cutting speed is normally computed for
the outside diameter. At the center of
the chisel edge the cutting speed is zero;
at any point on the lip it is proportional
to the radius of that point. This varia-
tion in cutting speed along the cutting
edges is an important characteristic of
drilling.
Once the drill engages the workpiece,
the contact is continuous until the drill
breaks through the bottom of the part or
is withdrawn from the hole. In this
respect, drilling resembles turning and
is unlike milling. Continuous cutting
means that steady forces and tempera-
tures may be expected shortly after con-
tact between the drill and the work-
piece.
8.2 Drill Nomenclature
The most important type of drill is the
twist drill. The important nomenclature
listed below and illustrated in Figure 8.4
applies specifically to these tools.
Drill: A drill is an end-cutting tool
for producing holes. It has one or more
cutting edges, and flutes to allow fluids
to enter and chips to be ejected. The
drill is composed of a shank, body, and
point.
Shank: The shank is the
part of the drill that is held
and driven. It may be straight
or tapered. Smaller diameter
drills normally have straight
shanks. Larger drills have
shanks ground with a taper
and a tang to insure accurate
alignment and positive drive.
Tang: The tang is a flat-
tened portion at the end of the
shank that fits into a driving
slot of the drill holder on the
spindle of the machine.
Body: The body of the
drill extends from the shank
to the point, and contains the
flutes. During sharpening, it
is the body of the drill that is
partially ground away.
Point: The point is the cutting end of
the drill.
Flutes: Flutes are grooves that are
cut or formed in the body of the drill to
allow fluids to reach the point and chips
to reach the workpiece surface.
Although straight flutes are used in
some cases, they are normally helical.
Land: The land is the remainder of
the outside of the drill body after the
flutes are cut. The land is cut back
somewhat from the outside drill diame-
ter in order to provide clearance.
Margin: The margin is a short por-
tion of the land not cut away for clear-
ance. It preserves the full drill diameter.
Web: The web is the central portion
of the drill body that connects the lands.
Chisel Edge: The edge ground on
the tool point along the web is called the
chisel edge. It connects the cutting lips.
Lips: The lips are the primary cut-
ting edges of the drill. They extend
from the chisel point to the periphery of
the drill.
Axis: The axis of the drill is the cen-
terline of the tool. It runs through the web
and is perpendicular to the diameter.
Neck: Some drills are made with a
relieved portion between the body and
the shank. This is called the drill neck.
In addition to the above terms that
define the various parts of the drill,
there are a number of terms that apply to
the dimensions of the drill, including
the important drill angles. Among these
terms are the following:
Length: Along with its outside
diameter, the axial length of a drill is
listed when the drill size is given. In
addition, shank length, flute length, and
neck length are often used.(see Fig. 8.4)
Body Diameter Clearance: The
height of the step from the margin to the
land is called the body diameter clear-
ance.
FIGURE 8.3: Many of the drills used in industry are
shown here and described in this chapter. (Courtesy
Cleveland Twist Drill Greenfield Industries)
FIGURE 8.4: Nomenclature of a twist drill shown with taper and tang drives.
Taper shank
Tang
Tang drive
Neck
Shank
diameter
Axis
Straight
shank
Land width
Point angle
Lip relief angle
Helix angle
Drill diameter
Clearance Diameter
Body Diameter Clearance
Chisel Edge Angle
Shank length
Overall length
Flutes
Flute length
Margin
Lip
Web
Chisel edge
Land
Body
Chap. 8: Drills & Drilling Operations
www.toolingandproduction.com
Chapter 8/Tooling & Production
3
Web Thickness: The web thickness
is the smallest dimension across the
web. It is measured at the point unless
otherwise noted. Web thickness will
often increase in going up the body
away from the point, and it may have to
be ground down during sharpening to
reduce the size of the chisel edge. This
process is called ‘web thinning’. Web
thinning is shown in Figure 8.13.
Helix Angle: The angle that the lead-
ing edge of the land makes with the drill
axis is called the helix angle. Drills
with various helix angles are available
for different operational requirements.
Point Angle: The included angle
between the drill lips is called the point
angle. It is varied for different work-
piece materials.
Lip Relief Angle: Corresponding to
the usual relief angles found on other
tools is the lip relief angle. It is mea-
sured at the periphery.
Chisel Edge Angle: The chisel edge
angle is the angle between the lip and
the chisel edge, as seen from the end of
the drill.
It is apparent from these partial lists
of terms that many different drill
geometries are possible.
8.3 Classes of Drills
There are different classes of drills for
different types of operations.
Workpiece materials may also influence
the class of drill used, but it usually
determines the point geometry rather
than the general type of drill best suited
for the job. It has already been noted
that the twist drill is the most important
class. Within the general class of twist
drills there are a number of drill types
made for different kinds of operations.
Many of the special drills discussed
below are shown in Figure 8.5.
High Helix Drills: This drill has a
high helix angle, which improves cut-
ting efficiency but weakens the drill
body. It is used for cutting softer metals
and other low strength materials.
Low Helix Drills: A lower than nor-
mal helix angle is sometimes useful to
prevent the tool from ‘running ahead’ or
‘grabbing’ when drilling brass and sim-
ilar materials.
Heavy-duty Drills: Drills subject to
severe stresses can be made stronger by
such methods as increasing the web
thickness.
Left Hand Drills: Standard twist
drills can be made as left hand tools.
These are used in multiple drill heads
where the head design is simplified by
allowing the spindle to rotate in differ-
ent directions.
Straight Flute Drills: Straight flute
drills are an extreme case of low helix
drills. They are used for drilling brass
and sheet metal.
Crankshaft Drills: Drills that are
especially designed for crankshaft work
have been found to be useful for
machining deep holes in tough materi-
als. They have a heavy web and helix
angle that is somewhat higher than nor-
mal. The heavy web prompted the use
of a specially notched chisel edge that
has proven useful on other jobs as well.
The crankshaft drill is an example of a
special drill that has found wider appli-
cation than originally anticipated and
has become standard.
Extension Drills: The extension
drill has a long, tempered shank to
allow drilling in surfaces that are nor-
mally inaccessible.
Extra-length Drills: For deep holes,
the standard long drill may not suffice,
and a longer bodied drill is required.
Step Drill: Two or more diameters
may be ground on a twist drill to pro-
duce a hole with stepped diameters.
Subland Drill: The subland or
multi-cut drill does the same job as the
step drill. It has separate lands running
the full body length for each diameter,
whereas the step drill uses one land. A
subland drill looks like two drills twist-
ed together.
Solid Carbide Drills: For drilling
small holes in light alloys and non-
metallic materials, solid carbide rods
may be ground to standard drill geome-
try. Light cuts without shock must be
taken because carbide is quite brittle.
Carbide Tipped Drills: Carbide tips
may be used on twist drills to make the
edges more wear resistant at higher
speeds. Smaller helix angles and thick-
er webs are often used to improve the
rigidity of these drills, which helps to
preserve the carbide. Carbide tipped
drills are widely used for hard, abrasive
non-metallic materials such as masonry.
Oil Hole Drills: Small holes through
the lands, or small tubes in slots milled
in the lands, can be used to force oil
under pressure to the tool point. These
drills are especially useful for drilling
deep holes in tough materials.
Flat Drills: Flat bars may be ground
with a conventional drill point at the
end. This gives very large chip spaces,
but no helix. Their major application is
for drilling railroad track.
Three and Four Fluted Drills:
There are drills with three or four flutes
which resemble standard twist drills
except that they have no chisel edge.
They are used for enlarging holes that
have been previously drilled or
punched. These drills are used because
they give better productivity, accuracy,
and surface finish than a standard drill
would provide on the same job.
Drill and Countersink: A combina-
tion drill and countersink is a useful tool
FIGURE 8.5: Special drills are used for some drilling operations.
(a) Jobber s drill
(b) Low-helix drill
(c) High-helix drill
(d) Straight-shank oil-hole drill
(e) Screw-machine drill
(f) Three-flute core drill
(g) Left-hand drill
(h) Straight-flute drill
(i) Step drill
(j) Subland drill
Chap. 8: Drills & Drilling Operations
4
Tooling & Production/Chapter 8
www.toolingandproduction.com
for machining ‘center holes’ on bars to
be turned or ground between centers.
The end of this tool resembles a stan-
dard drill. The countersink starts a short
distance back on the body.
A double-ended combination drill
and countersink, also called a center
drill, is shown in Figure 8.6.
8.4 Related Drilling Operations
Several operations are related to
drilling. In the following list, most of
the operations follow drilling except for
centering and spotfacing which precede
drilling. A hole must be made first by
drilling and then the hole is modified by
one of the other operations. Some of
these operations are described here and
illustrated in Figure 8.7
Reaming: A reamer is used to
enlarge a previously drilled hole, to pro-
vide a higher tolerance and to improve
the surface finish of the hole.
Tapping: A tap is used to provide
internal threads on a previously drilled
hole.
Reaming and tapping are more
involved and complicated than
counterboring, countersinking,
centering, and spot facing, and
are therefore discussed in
Chapter 11.
Counterboring: Counterboring
produces a larger step in a hole to
allow a bolt head to be seated
below the part surface.
Countersinking: Countersinking is
similar to counterboring except that the
step is angular to allow flat-head screws
to be seated below the surface.
Counterboring tools are shown in
Figure 8.8a, and a counter- sinking tool
with two machined holes is shown in
Figure 8.8b.
Centering: Center drilling is used
for accurately locating a hole to be
drilled afterwards.
Spotfacing: Spotfacing is used to
provide a flat-machined surface on a
part.
8.5 Operating Conditions
The varying conditions, under which
drills are used, make it difficult to
give set rules for speeds and feeds. Drill
manufacturers and a variety of reference
texts provide recommendations for
proper speeds and feeds for drilling a
variety of materials. General drilling
speeds and feeds will be discussed here
and some examples will be given.
Drilling Speed: Cutting speed may
be referred to as the rate that a point on
a circumference of a drill will travel in 1
minute. It is expressed in surface feet
per minute (SFPM). Cutting speed is
one of the most important factors that
determine the life of a drill. If the cut-
ting speed is too slow, the drill might
chip or break. A cutting speed that is
too fast rapidly dulls the cutting lips.
Cutting speeds depend on the following
seven variables:
• The type of material being drilled.
The harder the material, the slower
the cutting speed.
• The cutting tool material and diame-
FIGURE 8.6: A double-ended combination drill
and countersink, also called a center drill.
(Courtesy Morse Cutting Tools)
FIGURE 8.7: Related drilling operations: (a) reaming, (b) tapping, (c) counterboring,
(d) countersinking, (e) centering, (f) spotfacing.
(a) (b)
FIGURE 8.8: Counterboring tools (a) and countersinking operation (b) are shown here.
(Courtesy The Weldon Tool Co.)
(a) (b) (c)
(d) (e) (f)
Chap. 8: Drills & Drilling Operations
www.toolingandproduction.com
Chapter 8/Tooling & Production
5
ter. The harder the cutting tool materi-
al, the faster it can machine the materi-
al. The larger the drill, the slower the
drill must revolve.
• The types and use of cutting fluids
allow an increase in cutting speed.
• The rigidity of the drill press.
• The rigidity of the drill (the shorter
the drill, the better).
• The rigidity of the work setup.
• The quality of the hole to be drilled.
Each variable should be considered
prior to drilling a hole. Each variable is
important, but the work material and its
cutting speed are the most important
factors. To calculate the revolutions per
minute (RPM) rate of a drill, the diame-
ter of the drill and the cutting speed of
the material must be considered.
The formula normally used to calcu-
late cutting speed is as follows:
SFPM = (Drill Circumference) x (RPM)
Where:
SFPM = surface feet per minute, or
the distance traveled by a point on
the drill periphery in feet each
minute.
Drill Circumference = the distance
around the drill periphery in feet.
RPM = revolutions per minute
In the case of a drill, the circumfer-
ence is:
Drill Circumference =
Pi/12 x (d) = .262 x d
Where:
Drill Circumference = the distance
around the drill periphery in feet.
Pi = is a constant of 3.1416
d = the drill diameter in inches.
By substituting for the drill circum-
ference, the cutting speed can now be
written as:
SFPM = .262 x d x RPM
This formula can be used to deter-
mine the cutting speed at the periphery
of any rotating drill.
For example: Given a .25 inch drill,
what is the cutting speed (SFPM)
drilling cast iron at 5000 RPM?
SFPM = .262 x d x RPM
SFPM = .262 x .25 x 5000
Answer = 327.5 or 327 SFPM
RPM can be calculated as follows:
Given a .75 inch drill, what is the
RPM drilling low carbon steel at 400
SFPM?
SFPM 400 400
RPM = ________ = ________ = ____
.262 x d .262 x .75 .1965
Answer = 2035.62 or 2036 RPM
Drilling Feed: Once the cutting
speed has been selected for a particular
workpiece material and condition, the
appropriate feed rate must be estab-
lished. Drilling feed rates are selected
to maximize productivity while main-
taining chip control. Feed in drilling
operations is expressed in inches per
revolution, or IPR, which is the distance
the drill moves in inches for each revo-
lution of the drill. The feed may also be
expressed as the distance traveled by the
drill in a single minute, or IPM (inches
per minute), which is the product of the
RPM and IPR of the drill. It can be cal-
culated as follows:
IPM = IPR x RPM
Where:
IPM = inches per minute
IPR = inches per revolution
RPM = revolutions per minute.
For example: To maintain a .015 IPR
feed rate on the .75 inch drill discussed
above, what would the IPM feed rate
be?
IPM = PR x RPM
IPM = .015 x 2036
Answer = 30.54 or 31 IPM
The selection of drilling speed
(SFPM) and drilling feed (IPR) for var-
ious materials to be machined often
starts with recommendations in the
form of application tables from manu-
facturers or by consulting reference
books.
8.5.1 Twist Drill Wear
Drills wear starts as soon as cutting
begins and instead of progressing at a
constant rate, the wear accelerates con-
tinuously. Wear starts at the sharp cor-
ners of the cutting edges and, at the
same time, works its way along the cut-
ting edges to the chisel edge and up the
drill margins. As wear progresses,
clearance is reduced. The resulting rub-
bing causes more heat, which in turn
causes faster wear.
Wear lands behind the cutting edges
are not the best indicators of wear, since
they depend on the lip relief angle. The
wear on the drill margins actually deter-
mines the degree of wear and is not
nearly as obvious as wear lands. When
the corners of the drill are rounded off,
the drill has been damaged more than is
readily apparent. Quite possibly the
drill appeared to be working properly
even while it was wearing. The margins
could be worn in a taper as far back as
an inch from the point. To restore the
tool to new condition, the worn area
must be removed. Because of the
accelerating nature of wear, the number
of holes per inch of drill can sometimes
be doubled by reducing, by 25 percent,
the number of holes drilled per grind.
8.5.2 Drill Point Grinding
It has been estimated that about 90 per-
cent of drilling troubles are due to
improper grinding of the drill point.
Therefore, it is important that care be
taken when resharpening drills. A good
drill point will have: both lips at the
same angle to the axis of the drill; both
lips the same length; correct clearance
angle; and correct thickness of web.
(a) (b)
FIGURE 8.9: The included lip angle varies between 90 and 135 degrees (a): two drill
points are shown in (b). (Courtesy Cleveland Twist Drill Greenfield Industries)
C
2
C
C
2
Chap. 8: Drills & Drilling Operations
6
Tooling & Production/Chapter 8
www.toolingandproduction.com
Lip Angle and Lip Length: When
grinding the two cutting edges they
should be equal in length and have the
same angle with the axis of the drill as
shown in Figure 8.9a. Figure 8.9b
shows two ground drill points.
For drilling hard or alloy steels, angle
C (Fig. 8.9a) should be 135 degrees.
For soft materials and for general pur-
poses, angle C should be 118 degrees.
For aluminum, angle C should be 90
degrees.
If lips are not ground at the same
angle with the axis, the drill will be sub-
jected to an abnormal strain, because
only one lip comes in contact with the
work. This will result in unnecessary
breakage and also cause the drill to dull
quickly. A drill so sharpened will drill
an oversized hole. When the point is
ground with equal angles, but has lips of
different lengths, a condition as shown
in Figure 8.10a is produced.
A drill having cutting lips of different
angles, and of unequal lengths, will be
laboring under the severe conditions
shown in Figure 8.10b.
Lip Clearance Angle: The clearance
angle, or ‘backing-off’ of the point, is
the next important
thing to consider.
When drilling steel
this angle A (Fig.
8.11a) should be
from 6 to 9 degrees.
For soft cast iron
and other soft mate-
rials, angle A may
be increased to 12
degrees (or even 15
degrees in some
cases)
This clearance
angle should
increase gradually
as the center of the drill is
approached. The amount of
clearance at the center of the
drill determines the chisel
point angle B (Fig. 8.11b).
The correct com-
bination of clearance
and chisel point
angles should be as
follows: When angle
A is made to be 12
degrees for soft
materials, angle B
should be made
approximately 135
degrees; when angle
A is 6 to 9 degrees
for harder materials,
angle B should be
115 to 125 degrees.
While insufficient
clearance at the cen-
ter is the cause of
drills splitting up the web, too much
clearance at this point will cause the
cutting edges to chip.
In order to maintain the necessary
accuracy of point angles, lip lengths, lip
clearance angle, and chisel edge angle,
the use of machine point grinding is rec-
ommended. There are many commer-
cial drill point grinders available today,
which will make the accurate repointing
of drills much easier. Tool and cutter
grinders such as the one shown in
Figure 8.12 are often used.
Twist Drill Web Thinning: The
tapered web drill is the most common
type manufactured. The web thickness
increases as this type of drill is resharp-
ened. This requires an operation called
web thinning to restore the tool’s origi-
nal web thickness. Without the web
thinning process, more thrust would be
required to drill, resulting in additional
generated heat and reduced tool life.
Figure 8.13 illustrates a standard drill
before and after the web thinning
process. Thinning is accomplished with
a radiused wheel and should be done so
the thinned section tapers gradually
(a) (b)
(a) (b)
A
B
Roll type
Dub type
Notch type
Original
chisel edge
Chisel edge
after drill
has been
shortened
FIGURE 8.10: Drill with equal lip angle but unequal
lip length (a), and drill with unequal lip angle and
unequal lip length (b).
FIGURE 8.12: Tool and cutter grinders, are used to
properly sharpen drills and other cutting tools.
(Courtesy K. O. Lee Co.)
FIGURE 8.13: Web thinning restores proper web thickness after
sharpening twist drills; three methods are shown.
FIGURE 8.11: Drill lip clearance angle (a) and drill chisel point angle (b).
Chap. 8: Drills & Drilling Operations
www.toolingandproduction.com
Chapter 8/Tooling & Production
7
from the point. This prevents a blunt
wedge from being formed that would be
detrimental to chip flow. Thinning can
be done by hand, but since point cen-
trality is important, thinning by machine
is recommended.
8.6 Spade Drills
The tool generally consists of a cutting
blade secured in a fluted holder (See
Figure 8.14). Spade drills can machine
much larger holes (up to 15 in. in diam-
eter) than twist drills. Spade drills usu-
ally are not available in diameters
smaller than 0.75 inch. The drilling
depth capacity of spade drills, with
length-to-diameter ratios over 100 to 1
possible, far exceeds that of twist drills.
At the same time, because of their much
greater feed capability, the penetration
rates for spade drills exceed those of
twist drills by 60 to 100 percent.
However, hole finish generally suffers
because of this. Compared to twist
drills, spade drills are much more resis-
tant to chatter under heavy feeds once
they are fully engaged with the work-
piece. Hole straightness is generally
improved (with comparable size capa-
bility) by using a spade drill. However,
these advantages can only be gained by
using drilling machines of suitable
capability and power.
The spade drill is also a very eco-
nomical drill due to its diameter flexi-
bility. A single holder will accommo-
date many blade diameters as shown in
Figure 8.14. Therefore, when
a diameter change is
required, only the blade
needs to be purchased which
is far less expensive than
buying an entire drill.
8.6.1 Spade Drill Blades
The design of spade drill
blades varies with the manu-
facturer and the intended
application. The most com-
mon design is shown in Figure
8.15. The locator length is
ground to a precision dimen-
sion that, in conjunction with
the ground thickness of the
blade, precisely locates the blade in its
holder. When the seating pads properly
contact the holder, the holes in the blade
and holder are aligned and the assembly
can be secured with a screw.
The blade itself as shown in Figure
8.15, possesses all the cutting geometry
necessary. The point angle is normally
130 degrees but may vary for special
applications. In twist drill designs, the
helix angle generally determines the
cutting rake angle but since spade drills
have no helix, the rake surface must be
ground into the blade at the cutting edge
angle that produces the proper web
thickness. The cutting edge clearance
angle is a constant type of relief, gener-
ally 6 to 8 degrees. After this clearance
is ground, the chip breakers are ground,
about 0.025 inch deep, in the cutting
edge.
These chip breakers are nec-
essary on spade drill blades and
not optional as with twist drills.
These notches make the chips
narrow enough to flush around
the holder. Depending on the
feed rate, the grooves can also
cause a rib to form in the chip.
The rib stiffens the chip and
causes it to fracture or break
more easily which results in
shorter, more easily removed
chips. Margins on the blade act
as bearing surfaces once the
tool is in a bushing or in the
hole being drilled. The width
of the margins will vary from
1/16 to 3/16 inches, depending
on the tool size. A slight back
taper of 0.004 to 0.006 inch is
normally provided and outside
diameter clearance angles are
generally 10 degrees.
8.6.2 Spade Drill Blade Holders
The blade holder makes up the major
part of the spade drill. The blade hold-
er is made of heat-treated alloy steel and
is designed to hold a variety of blades in
a certain size range as shown in Figure
8.14. Two straight chip channels or
flutes are provided for chip ejection.
The holder shank designs are avail-
able in straight, Morse taper, and vari-
ous other designs to fit the machine
spindles. The holders are generally sup-
plied with internal coolant passages to
ensure that coolant reaches the cutting
edges and to aid chip ejection.
When hole position is extremely crit-
ical and requires the use of a starting
bushing, holders with guide strips are
available. These strips are ground to fit
closely with the starting bushing to sup-
port the tool until it is fully engaged in
the workpiece. The strips may also be
ground to just below the drill diameter
to support the tool in the hole when the
set-up lacks rigidity.
8.6.3 Spade Drill Feeds and Speeds
The cutting speed for spade drills is
generally 20 percent less than for twist
drills. However, the spade drill feed
capacity can be twice that of twist drills.
The manufacturers of spade drills and
other reference book publishers provide
excellent recommendations for machin-
ing rates in a large variety of metals.
These published rates should generally
be observed. Spade drills work best
under moderate speed and heavy feed.
Feeding too lightly will result in either
long, stringy chips or chips reduced
almost to a powder. The drill cutting
edges will chip and burn because of the
absence of the thick, heat absorbing, C-
shaped chips. Chips can possibly jam
FIGURE 8.14: Spade drills with various cutting
blades. (Courtesy Kennametal Inc.)
FIGURE 8.15: Spade drill cutting blades shows
geometry specifications.
Seating pads
Rake surface
Chip
breakers
Margin
Blade
thickness
Chisel
edge
Web
Back taper
Point angle
O.D. Clearance
Locator
length
Chap. 8: Drills & Drilling Operations
8
Tooling & Production/Chapter 8
www.toolingandproduction.com
and pack, which can break the tool or
the workpiece. If the machine cannot
supply the required thrust to maintain
the proper feed without severe deflec-
tion, a change in tool or machine may
be necessary.
8.7 Indexable Carbide Drills
Indexable drilling has become so effi-
cient and cost effective that in many
cases it is less expensive to drill the hole
rather than to cast or forge it. Basically,
the indexable drill is a two fluted, center
cutting tool with indexable carbide
inserts. Indexable drills were
introduced using square inserts
(see Fig. 8.16). Shown in Figure
8.17a are indexable drills using
the more popular Trigon Insert
(see Fig. 8.17b). In most cases
two inserts are used, but as size
increases, more inserts are added
with as many as eight inserts in
very large tools. Figure 8.18
shows six inserts being used.
Indexable drills have the prob-
lem of zero cutting speed at the
center even though speeds can
exceed 1000 SFPM at the outer-
most inserts. Because speed gen-
erally replaces feed to some
degree, thrust forces are usually
25 to 30 percent of those required
by conventional tools of the same
size. Indexable drills have a
shank, body, and multi-edged
point. The shank designs gener-
ally available are straight, tapered
and number 50 V-flange.
The bodies have two flutes that are
normally straight but may be helical.
Because no margins are present to pro-
vide bearing support, the tools must rely
on their inherent stiffness and on the
balance in the cutting forces to maintain
accurate hole size and straightness.
Therefore, these tools are usually limit-
ed to length-to-diameter ratios of
approximately 4 to 1.
The drill point is made of pocketed
carbide inserts. These inserts are usual-
ly specially designed. The cutting rake
can be negative, neutral, or positive,
depending on holder and insert design.
Coated and uncoated carbide grades are
available for drilling a wide variety of
work materials. Drills are sometimes
combined with indexable or replaceable
inserts to perform more than one opera-
tion, such as drilling, counterboring,
and countersinking.
As shown in Figure 8.19a and Figure
8.19b, body mounted insert tooling can
perform multiple operations. More
examples will be shown and discussed
in Chapter 10: Boring Operations and
Machines.
The overall geometry of the cutting
edges is important to
the performance of
indexable drills. As
mentioned earlier,
there are no support-
ing margins to keep
these tools on line, so
the forces required to
move the cutting
edges through the
work material must be
balanced to minimize
tool deflection, partic-
ularly on starting, and
to maintain hole size.
While they are
principally designed
for drilling, some
indexable drills, as
shown in Figure 8.20,
can perform facing,
and boring in lathe
FIGURE 8.18: Indexable drill using six
Trigon inserts for drilling large holes.
(Courtesy Kennametal Inc.)
FIGURE 8.16: Indexing drills were introduced
using square inserts; three sizes are shown here.
(Courtesy Kennametal Inc.)
12¡
84¡
156¡
(b)
FIGURE 8.17: (a) Indexable drills using Trigon inserts. (b) A Trigon insert and holder. (Courtesy Komet of
America, Inc.)
(a)
Chap. 8: Drills & Drilling Operations
www.toolingandproduction.com
Chapter 8/Tooling & Production
9
applications. How well these tools per-
form in these applications depends on
their size, rigidity, and design.
8.7.1 Indexable Carbide Drill
Operation
When used under the proper conditions,
the performance of indexable drills is
impressive. However, the manufactur-
er’s recommendations must be carefully
followed for successful applications.
Set-up accuracy and rigidity is most
important to tool life and performance.
Chatter will destroy drilling inserts just as
it destroys turning or milling inserts. If
the inserts fail when the tool is rotating in
the hole at high speed, the holder and
workpiece will be damaged. Even if lack
of rigidity has only a minor effect on tool
life, hole size and finish will be poor. The
machine must be powerful, rigid and
capable of high speed. Radial drill press-
es do not generally meet the rigidity
requirements. Heavier lathes, horizontal
boring mills, and N/C machining centers
are usually suitable.
When installing the tool in the
machine, the same good practice fol-
lowed for other drill types should be
observed for indexable drills. The
shanks must be clean and free from
burrs to ensure good holding and to
minimize runout. Runout in indexable
drilling is dramatically amplified
because of the high operating speeds
and high penetration rates.
When indexing the inserts is neces-
sary, make sure that the pockets are
clean and undamaged. A small speck of
dirt or chip, or a burr will cause stress in
the carbide insert and result in a micro-
scopic crack, which in turn, will lead to
early insert failure.
8.7.2 Indexable Drill Feeds
and Speeds
Indexable drills are very sensitive to
machining rates and work materials.
The feed and speed ranges for various
materials, as recommended by some
manufacturers of these tools, can be
very broad and vague, but can be used
as starting points in determining exact
feed and speed rates. Choosing the cor-
rect feed and speed rates, as well as
selecting the proper insert style and
grade, requires some experimentation.
Chip formation is a critical factor and
must be correct.
In general, soft low carbon steel calls
for high speed (650 SFPM or more),
and low feed (0.004/0.006 IPR).
Medium and high carbon steels, as well
as cast iron, usually react best to lower
speed and higher feed. The exact speed
and feed settings must be consistent
with machine and set-up conditions,
hole size and finish requirements, and
chip formation for the particular job.
8.8 Trepanning
In trepanning the cutting tool produces a
hole by removing a disk shaped piece
also called slug or core, usually from
flat plates. A hole is produced without
reducing all the material removed to
chips, as is the case in drilling. The
trepanning process can be used to make
disks up to 6 in. in diameter from flat
sheet or plate. A trepanning tool also
called a “Rotabroach” with a core or
slug is shown in Figure 8.21a and an
end view of a Rotabroach is shown in
Figure 8.21 b.
Trepanning can be done on lathes,
drill presses, and milling machines, as
well as other machines using single
point or multi point tools. Figure 8.22
shows a Rotabroach cutter machining
holes through both sides of a rectangu-
lar tube on a vertical milling machine.
Rotabroach drills provide greater tool
life because they have more teeth than
conventional drilling tools. Since more
teeth are engaged in the workpiece, the
material cut per hole is distributed over
a greater number of cutting edges.
Each cutting edge cuts less material for
a given hole. This extends tool life sig-
nificantly.
Conventional drills must contend
with a dead center area that is prone to
chip, thus reducing tool life. In the chis-
el-edge region of a conventional drill
the cutting speed approaches zero. This
FIGURE 8.19: Body-mounted insert tool-
ing can perform multiple operations.
(Courtesy Komet of America, Inc.)
FIGURE 8.20: In addition to drilling, indexable drills can perform boring and facing
operations.
(b)
To diameter Larger than Diameter
Boring Facing
(a)
Chap. 8: Drills & Drilling Operations
10
Tooling & Production/Chapter 8
www.toolingandproduction.com
is quite different from the speed at the
drill O.D. Likewise, thrust forces are
high due to the point geometry.
Rotabroach drills cut in the region from
the slug O.D. to the drill O.D. Since
only a small kerf is machined, cutting
speeds are not so different across the
face of a tooth. This feature extends
tool life and provides uniform machin-
ability.
Figure 8.23
shows drilling
holes with conventional drills and hole
broaching drills.
8.8.1 Trepanning Operations
Trepanning is a roughing operation.
Finishing work requires a secondary
operation using reamers or boring bars
to get a specified size and finish. Of the
many types of hole-making operations,
it competes with indexable carbide cut-
ters and spade drilling.
Several types of tools are used to trepan.
The most basic is a single or double point
cutter (Fig. 8.24). It orbits the spindle cen-
terline cutting the periphery of the hole.
Usually, a pilot drill centers the tool and
drives the orbiting cutter like a compass
inscribing a circle on paper. Single/double
point trepanning tools are often adjustable
within their working diameter. They are
efficient and versatile, but do begin to have
rigidity problems when cutting large holes
- 6 1/2 inches in diameter is about the max-
imum.
A hole saw is another tool that
trepans holes. It is metalcutting’s ver-
sion of the familiar doorknob hole cut-
ter used in wood. Hole saws have more
teeth and therefore cut faster than sin-
gle, or double-point tools. Both hole
saws and single-point
tools curl up a chip in
the space, or gullet,
between the teeth, and
carry it with them in
the cut.
Hole broaching
tools are hybrid
trepanners. (Fig. 8.21a
and 8.21b) They com-
bine spiral flutes like a
drill with a broach-
like progressive tool
geometry that splits
the chip so it exits the
cut along the flutes.
With this design, the
larger number of cutting
edges and chip evacuation,
combine to reduce the chip
load per tooth so this drill
can cut at higher feed rates
than trepanning tools and
hole saws. Like the hole
saw, a hole broaching tool
has a fixed diameter. One
size fits one hole.
8.8.2 Cutting Tool
Material Selection
M2 High Speed Steel (HSS)
is the standard Rotabroach cutting tool
material. M2 has the broadest applica-
tion range and is the most economical
tool material. It can be used on ferrous
and non-ferrous materials and is gener-
ally recommended for cutting materials
up to 275 BHN. M2 can be applied to
harder materials, but tool life is dramat-
ically decreased.
TiN coated M2 HSS Rotabroach drills
are for higher speeds, more endurance,
harder materials or freer cutting action to
reduce power consumption. The TiN
coating reduces friction and operates at
cooler temperatures while presenting a
harder cutting edge surface. Increased
cutting speeds of 15 to 25 % are recom-
mended to obtain the benefits of this sur-
face treatment. The reduction in friction
and resistance to edge build-up are key
benefits. The ability to run at higher
speeds at less power is helpful for appli-
cations where the machine tool is slightly
underpowered and TiN coated tools are
recommended for these applications.
TiN coated tools are recommended for
applications on materials to 325 BHN.
Carbide cutting tool materials are
FIGURE 8.21: Trepanning tool also called Rotabroach with
core or slug. (Courtesy Hougen Manufacturing, Inc.)
FIGURE 8.23: Drilling holes with conventional drill and hole
broaching drill. Surface speed increases with distance from
center.
FIGURE 8.24: Traditional trepanning tool
orbits around a center drill.
FIGURE 8.22: Rotabroach machining set-
up on a milling machine. (Courtesy
Hougen Manufacturing, Inc.)
Velocity Approaches
"Zero" at
Center Point
Velocity of Cutting
Edge (SFPM)
Kerf
Hole Broaching Drill
Conventional Drill
(a)
(b)
Chap. 8: Drills & Drilling Operations
www.toolingandproduction.com
Chapter 8/Tooling & Production
11
also available as a special option on
Rotabroach drills. Carbide offers cer-
tain advantages over high-speed steel.
Applications are limited and need to be
discussed with a manufacturer’s repre-
sentative.
8.8.3 Rigidity and Hole Size
Tolerance
Rotabroach drills were originally
designed as roughing tools to compete
with twist drills and provide similar hole
tolerances. Many users have successful-
ly applied Rotabroach drills in semi-fin-
ishing applications, reducing the number
of passes from two or more to just one. A
rigid machine tool and set-up are required
to produce holes to these specifications.
Tolerances will vary with the application
and are impossible to pin point.
Spindle rigidity or “tightness” and
workpiece rigidity are more crucial than
with a twist drill. Even if a twist drill runs
out slightly at first, the conical point tends
to center itself before the O.D. of the tool
engages the workpiece. The higher thrust
of a twist drill also tends to “ preload” the
spindle and fixture. The trepanning cut-
ter relies more on the rigidity of the sys-
tem (workpiece, holder, and spindle). If
excessive spindle runout or, worse yet,
spindle play exists, the cutter may chatter
on entry. At best this will cause a bell-
mouthed hole with poor finish, but it can
easily lead to drill breakage.
Hole tolerances are dependent on
much more than the accuracy of any tool
and its grind. The machine tool, work-
piece, fixture, selection of speeds and
feeds, projection and type of application
also play an important part in determining
overall results.
8.8.4 Chip Control
In material such as aluminum, tool steels
and cast iron, proper selection of feeds
and speeds usually causes the chips to
break up and allows them to be flushed
out of the cut by the cutting fluid. In
many other materials, such as mild and
alloy steels, the chips tend to be long and
frequently wrap themselves around the
drill to form a “bird’s nest”. In most man-
ual operations this is an annoyance that is
outweighed by the other benefits of the
method. In automated operations, howev-
er, the build-up of chips around the drill
cannot be tolerated. Besides the obvious
problems that this can cause, the nest of
chips impedes the flow of additional
chips trying to escape from the flutes.
This in turn
can cause the
flutes to pack
and may
result in drill
breakage.
There are
several meth-
ods that can
be used to
break up the
chips if this
cannot be accomplished by adjusting the
feeds and speeds. One method is to use
an interrupted feed cycle. It is recom-
mended that the drill not be retracted as
with a “peck” cycle, because chips may
become lodged under the cutting edges.
Instead employ an extremely short dwell
approximately every two revolutions.
This will produce a chip that is usually
short enough not to wrap around the tool.
A programmed dwell may not be neces-
sary since some hesitation is probably
inherent between successive feed com-
mands in an NC system
8.8.5 Advantages of Trepanning
Tools
The twist drill has a center point, which is
not really a point at all - it’s the intersect-
ing line where two cutting edge angles
meet at the web of the drill. This point is
the so-called “dead zone” of a twist drill.
It’s called a dead zone because the sur-
face speed of the cutting edges (a factor
of revolutions per minute and diameter of
the drill) approaches zero as the corre-
sponding diameter nears zero. Slower
surface speed reduces cutting efficiency
and requires increased feed pressure for
the cutting edges to bite into the material.
In effect, the center of the drill does not
cut - it pushes its way through the
material. The amount of thrust
required to overcome the resis-
tance of the workpiece often caus-
es the stock to deform or dimple
around the hole, and creates a sec-
ond problem - burrs or flaking
around the hole’s breakthrough
side. As material at the bottom of
the hole becomes thinner and thin-
ner, if the feed is not eased off, the
drill will push through, typically
leaving two jagged remnants of
stock attached.
Trepanning tools produce
holes faster than more conven-
tional tooling as shown in Figure
8.25. From left to right are shown
a 1 1/2 inch hole drilled into a 2 inch
thick 1018 steel plate with: a spade drill,
with a twist drill, with an indexable car-
bide drill, and with a Rotabroach. With
approximately 50% to 80% faster
drilling time, the cost per hole can be
substantially lower.
An indirect yet significant source of
savings attributable to trepanning tool-
ing is the solid slug it provides.
Separating chips from coolant and oils
is increasingly called for by scrap
haulers, In one application, while sig-
nificant gains in productivity were
made with hole-broaching tools, the
savings in going from chips to a solid
slug was enough to justify the change in
process.
In Figure 8.26 the workpiece is a tube
holder for an industrial heat exchanger.
When this workpiece is finished, better
than 60 per cent of the plate has been
reduced to scrap.
Sixty percent of this heat exchanger
plate was converted into chips by the
sheer number of holes drilled. Besides
increasing production, trepanning tool-
ing’s solid core by-product increased
scrap value from $0.17 per pound of
chips, to $0.37 per pound for the core
metal.
FIGURE 8.25: Trepanning produces holes faster than more convention-
al tooling. (Courtesy Hougen Manufacturing, Inc.)
FIGURE 8.26: Sixty percent of this heat exchang-
er plate was converted to chips. (Courtesy Hougen
Manufacturing, Inc.)