Running Linux phần 2 pdf
Bạn đang xem bản rút gọn của tài liệu. Xem và tải ngay bản đầy đủ của tài liệu tại đây (698.04 KB, 90 trang )
Chapter 3. Installation and Initial Configuration
59
Command (m for help): m
Command action
a toggle a bootable flag
d delete a partition
l list known partition types
m print this menu
n add a new partition
p print the partition table
q quit without saving changes
t change a partition's system id
u change display/entry units
v verify the partition table
w write table to disk and exit
x extra functionality (experts only)
Command (m for help):
The n command is used to create a new partition. Most other options you won't need to worry
about. To quit fdisk without saving any changes, use the
q
command. To quit fdisk and write
the changes to the partition table to disk, use the
w command. This is worth repeating: so long
as you quit with
q
without writing, you can mess around as much as you want with fdisk
without risking harm to your data. Only when you type
w can you cause potential disaster to
your data if you do something wrong.
The first thing you should do is display your current partition table and write the information
down for later reference. Use the
p
command to see the information. It is a good idea to copy
the information to your notebook after each change you have made to the partition table. If,
for some reason, your partition table is damaged, you will not access any data on your hard
disk any longer, even though the data itself is still there. But by using your notes, you might
be able to restore the partition table and get your data back in many cases by running fdisk
again and deleting and re-creating the partitions with the parameters you previously wrote
down. Don't forget to save the restored partition table when you are done.
Here is an example of a printed partition table, where blocks, sectors, and cylinders are units
into which a hard disk is organized:
Command (m for help): p
Disk /dev/hda: 16 heads, 38 sectors, 683 cylinders
Units = cylinders of 608 * 512 bytes
Device Boot Begin Start End Blocks Id System
/dev/hda1 * 1 1 203 61693 6 DOS 16-bit >=32M
Command (m for help):
In this example, we have a single Windows partition on /dev/hda1, which is 61693 blocks
(about 60 MB).
2
This partition starts at cylinder number 1 and ends on cylinder 203. We have
a total of 683 cylinders in this disk; so there are 480 cylinders left on which to create Linux
partitions.
To create a new partition, use the
n
command. In this example, we'll create two primary
partitions (/dev/hda2 and /dev/hda3) for Linux:
2
A block, under Linux, is 1024 bytes.
Chapter 3. Installation and Initial Configuration
60
Command (m for help): n
Command action
e extended
p primary partition (1-4)
p
Here, fdisk is asking which type of the partition to create: extended or primary. In our
example, we're creating only primary partitions, so we choose
p:
Partition number (1-4):
fdisk will then ask for the number of the partition to create; because partition 1 is already
used, our first Linux partition will be number 2:
Partition number (1-4): 2
First cylinder (204-683):
Now, we enter the starting cylinder number of the partition. Because cylinders 204 through
683 are unused, we'll use the first available one (numbered 204). There's no reason to leave
empty space between partitions:
First cylinder (204-683): 204
Last cylinder or +size or +sizeM or +sizeK (204-683):
fdisk is asking for the size of the partition we want to create. We can either specify an ending
cylinder number, or a size in bytes, kilobytes, or megabytes. Because we want our partition to
be 80 MB in size, we specify
+80M. When specifying a partition size in this way, fdisk will
round the actual partition size to the nearest number of cylinders:
Last cylinder or +size or +sizeM or +sizeK (204-683): +80M
If you see a warning message such as this, it can be ignored. fdisk prints the warning because
it's an older program and dates back before the time that Linux partitions were allowed to be
larger than 64 MB.
Now we're ready to create our second Linux partition. For sake of demonstration, we'll create
it with a size of 10 MB:
Command (m for help): n
Command action
e extended
p primary partition (1-4)
p
Partition number (1-4): 3
First cylinder (474-683): 474
Last cylinder or +size or +sizeM or +sizeK (474-683): +10M
At last, we'll display the partition table. Again, write down all this information — especially
the block sizes of your new partitions. You'll need to know the sizes of the partitions when
creating filesystems. Also, verify that none of your partitions overlaps:
Chapter 3. Installation and Initial Configuration
61
Command (m for help): p
Disk /dev/hda: 16 heads, 38 sectors, 683 cylinders
Units = cylinders of 608 * 512 bytes
Device Boot Begin Start End Blocks Id System
/dev/hda1 * 1 1 203 61693 6 DOS 16-bit >=32M
/dev/hda2 204 204 473 82080 83 Linux native
/dev/hda3 474 474 507 10336 83 Linux native
As you can see, /dev/hda2 is now a partition of size 82080 blocks (which corresponds to about
80 MB), and /dev/hda3 is 10336 blocks (about 10 MB).
Note that most distributions require you to use the
t
command in fdisk to change the type of
the swap partition to "Linux swap," which is numbered 82. You can use the
L command to
print a list of known partition type codes, and then use the
t
command to set the type of the
swap partition to that which corresponds to "Linux swap."
This way the installation software will be able to automatically find your swap partitions
based on type. If the installation software doesn't seem to recognize your swap partition, you
might want to rerun fdisk and use the
t
command on the partition in question.
In the previous example, the remaining cylinders on the disk (numbered 508 to 683) are
unused. You may wish to leave unused space on the disk, in case you want to create
additional partitions later.
Finally, we use the
w
command to write the changes to disk and exit fdisk:
Command (m for help): w
#
Keep in mind that none of the changes you make while running fdisk takes effect until you
give the
w command, so you can toy with different configurations and save them when you're
done. Also, if you want to quit fdisk at any time without saving the changes, use the
q
command. Remember that you shouldn't modify partitions for operating systems other than
Linux with the Linux fdisk program.
You may not be able to boot Linux from a partition using cylinders numbered over 1023.
Therefore, you should try to create your Linux root partition within the sub-1024 cylinder
range, which is almost always possible (e.g., by creating a small root partition in the sub-1024
cylinder range). If, for some reason, you cannot or do not want to do this, you can simply boot
Linux from floppy.
Some Linux distributions require you to reboot the system after running fdisk to allow the
changes to the partition table to take effect before installing the software. Newer versions of
fdisk automatically update the partition information in the kernel, so rebooting isn't necessary.
To be on the safe side, after running fdisk you should reboot from the installation medium
before proceeding.
Chapter 3. Installation and Initial Configuration
62
3.1.4 Creating Swap Space
If you are planning to use a swap partition for virtual RAM, you're ready to prepare it.
3
In
Section 6.2 in Chapter 6, we discuss the preparation of a swap file, in case you don't want to
use an individual partition.
Many distributions require you to create and activate swap space before installing the
software. If you have a small amount of physical RAM, the installation procedure may not be
successful unless you have some amount of swap space enabled.
The command used to prepare a swap partition is mkswap, and it takes the following form:
mkswap -c partition
where partition is the name of the swap partition. For example, if your swap partition is
/dev/hda3, use the command:
#
mkswap -c /dev/hda3
With older versions of mkswap, you had to specify the size of the partition, which was
dangerous, as one typo could destroy your disk logically.
The -c option tells mkswap to check for bad blocks on the partition when creating the swap
space. Bad blocks are spots on the magnetic medium that do not hold the data correctly. This
occurs only rarely with today's hard disks, but if it does occur, and you do not know about it,
it can cause you endless trouble. Always use the -c option to have mkswap check for bad
blocks. It will exclude them from being used automatically.
If you are using multiple swap partitions, you need to execute the appropriate mkswap
command for each partition.
After formatting the swap space, you need to enable it for use by the system. Usually, the
system automatically enables swap space at boot time. However, because you have not yet
installed the Linux software, you need to enable it by hand.
The command to enable swap space is swapon, and it takes the following form:
swapon partition
After the mkswap command shown, we use the following command to enable the swap space
on /dev/hda3:
# swapon /dev/hda3
3
Again, some distributions of Linux prepare the swap space for you automatically, or via an installation menu
option.
Chapter 3. Installation and Initial Configuration
63
3.1.5 Creating the Filesystems
Before you can use your Linux partitions to store files, you must create filesystems on them.
Creating a filesystem is analogous to formatting a partition under Windows or other operating
systems. We discussed filesystems briefly in Section 2.2.3 in Chapter 2.
Several types of filesystems are available for Linux. Each filesystem type has its own format
and set of characteristics (such as filename length, maximum file size, and so on). Linux also
supports several "third-party" filesystem types, such as the Windows filesystem.
The most commonly used filesystem type is the Second Extended Filesystem, or ext2fs.
The ext2fs is one of the most efficient and flexible filesystems; it allows filenames of up to
256 characters and filesystem sizes of up to 32 terabytes. In Section 6.1.1 in Chapter 6, we
discuss the various filesystem types available for Linux. Initially, however, we suggest you
use the ext2fs filesystem.
To create an ext2fs filesystem, use the command:
mke2fs -c
partition
where partition is the name of the partition. For example, to create a filesystem on
/dev/hda2, use the command:
#
mke2fs -c /dev/hda2
If you're using multiple filesystems for Linux, you need to use the appropriate mke2fs
command for each filesystem.
If you have encountered any problems at this point, see Section 3.3 later in this chapter.
3.1.6 Installing the Software
Finally, you are ready to install the software on your system. Every distribution has a different
mechanism for doing this. Many distributions have a self-contained program that steps you
through the installation. On other distributions, you have to mount your filesystems in a
certain subdirectory (such as /mnt) and copy the software to them by hand. On CD-ROM
distributions, you may be given the option to install a portion of the software on your hard
drive and leave most of the software on the CD-ROM. This is often called a "live filesystem."
Such a live filesystem is convenient for trying out Linux before you make a commitment to
install everything on your disk.
Some distributions offer several different ways to install the software. For example, you may
be able to install the software directly from a Windows partition on your hard drive instead of
from floppies. Or you may be able to install over a TCP/IP network via FTP or NFS. See your
distribution's documentation for details.
For example, the Slackware distribution requires you to do the following:
Chapter 3. Installation and Initial Configuration
64
1. Create partitions with fdisk.
2. Optionally create swap space with mkswap and swapon (if you have 16 MB or less of
RAM).
3. Run the setup program to install the software. setup leads you through a self-
explanatory menu system.
The exact method used to install the Linux software differs greatly with each distribution.
You might be overwhelmed by the choice of software to install. Modern Linux distributions
can easily contain a thousand or more packages spread over several CD-ROMs. There are
basically three methods for selecting the software package:
Selection by task
This is the easiest means of selection for beginners. You don't have to think about
whether you need a certain package. You just pick whether your Linux computer
should act as a workstation, a development machine, or a network router, and the
installation program will pick the appropriate packages for you. In all cases, you can
then either refine the selection by hand or come back to the installation program later.
Selection of individual packages by series
With this selection mechanism, all the packages are grouped into series like
"Networking," "Development," or "Graphics." You can go through all the series and
pick the individual packages there. This requires more decisions than if you choose
selection by task, because you have to decide whether you need each package;
however, you can skip an entire series when you are sure that you are not interested in
the functions it offers.
Selection of individual packages sorted alphabetically
This method is useful only when you already know which packages you want to
install; otherwise you won't see the forest for the trees.
Choosing one selection method does not exclude the use of the others. Most distributions
offer two or more of the aforementioned selection mechanisms.
It might still be difficult to decide which package to pick. Good distributions show a short
description of each package on screen to make it easier for you to select the correct ones, but
if you are still unsure, our advice is this: when in doubt, leave it out! You can always go back
and add packages later.
Modern distributions have a very nifty feature, called dependency tracking. Some packages
work only when some other packages are installed (e.g., a graphics viewer might need special
graphics libraries to import files). With dependency tracking, the installation program can
inform you about those dependencies and will let you automatically select the package you
want along with all the ones it depends on. Unless you are very sure about what you are
doing, you should always accept this offer, or the package might not work afterward.
Chapter 3. Installation and Initial Configuration
65
Installation programs can help you make your selection and avoid mistakes in other ways. For
example, the installation program might refuse to start the installation when you deselect a
package that is absolutely crucial for even the most minimal system to boot (like the basic
directory structure). Or, it might check for mutual exclusions, such as cases in which you can
only have one package or the other, but not both.
Some distributions, such as SuSE, come with a large book that, among other things, lists all
the packages together with short descriptions. It might be a good idea to at least skim those
descriptions to see what's in store for you, or you might be surprised when you select the
packages and are offered the 25
th
text editor.
3.1.7 Creating the Boot Floppy or Installing LILO
Every distribution provides some means of booting your new Linux system after you have
installed the software. In many cases, the installation procedure suggests you create a boot
floppy, which contains a Linux kernel configured to use your newly created root filesystem.
In order to boot Linux, you could boot from this floppy; control is transferred to your hard
drive after you boot. On other distributions, this boot floppy is the installation floppy itself.
Many distributions give you the option of installing LILO on your hard drive. LILO is a
program that resides on your drive's master boot record. It boots a number of operating
systems, including Windows and Linux, and allows you to select to which boot at startup
time.
In order for LILO to be installed successfully, it needs to know a good deal of information
about your drive configuration: for example, which partitions contain which operating
systems, how to boot each operating system, and so on. Many distributions, when installing
LILO, attempt to "guess" at the appropriate parameters for your configuration. Occasionally,
the automated LILO installation provided by some distributions can fail and leave your master
boot record in shambles (however it's very doubtful that any damage to the actual data on
your hard drive will take place). In particular, if you use OS/2's Boot Manager, you should not
install LILO using the automated procedure; there are special instructions for using LILO
with the Boot Manager, which will be covered in Chapter 5.
In many cases, it is best to use a boot floppy until you have a chance to configure LILO
yourself, by hand. If you're exceptionally trusting, though, you can go ahead with the
automated LILO installation if it is provided with your distribution.
In Section 5.2.2 in Chapter 5, we'll cover in detail how to configure and install LILO for your
particular setup.
There are also other boot loaders besides LILO, including the Grand
Unified BootLoader (GRUB). Most distributions use LILO, though.
If everything goes well, congratulations! You have just installed Linux on your system. Go
have a cup of tea or something; you deserve it.
Chapter 3. Installation and Initial Configuration
66
In case you ran into trouble, Section 3.3, later in this chapter, describes the most common
sticking points for Linux installations, and how to get around them.
3.1.8 Additional Installation Procedures
Some distributions of Linux provide a number of additional installation procedures, allowing
you to configure various software packages, such as TCP/IP networking, the X Window
System, and so on. If you are provided with these configuration options during installation,
you may wish to read ahead in this book for more information on how to configure this
software. Otherwise, you should put off these installation procedures until you have a
complete understanding of how to configure the software.
It's up to you; if all else fails, just go with the flow and see what happens. It's doubtful that
anything you do incorrectly now cannot be undone in the future (knock on wood).
3.2 Post-Installation Procedures
After you have completed installing the Linux software, you should be able to reboot the
system, log in as
root, and begin exploring the system. (Each distribution has a different
method for doing this; follow the instructions given by the distribution.)
Before you strike out on your own, however, there are some tasks you should do now that
may save you a lot of grief later. Some of these tasks are trivial if you have the right hardware
and Linux distribution; others may involve a little research on your part, and you may decide
to postpone them.
3.2.1 Creating a User Account
In order to start using your system, you need to create a user account for yourself. Eventually,
if you plan to have other users on your system, you'll create user accounts for them as well.
But before you begin to explore you need at least one account.
Why is this? Every Linux system has several preinstalled accounts, such as
root. The root
account, however, is intended exclusively for administrative purposes. As
root
you have all
kinds of privileges and can access all files on your system.
However, using
root
can be dangerous, especially if you're new to Linux. Because there are
no restrictions on what
root can do, it's all too easy to mistype a command, inadvertently
delete files, damage your filesystem, and so on. You should log in as
root
only when you
need to perform system administration tasks, such as fixing configuration files, installing new
software, and so on. See Section 5.1 in Chapter 5 for details.
4
For normal usage, you should create a standard user account. Unix systems have built-in
security that prevents users from deleting other users' files and corrupting important
resources, such as system configuration files. As a regular user, you'll be protecting yourself
from your own mistakes. This is especially true for users who don't have Unix system
administration experience.
4
A side note: on a Windows 95/98/ME system, the user is always the equivalent to a root user, whether that
power is needed or not.
Chapter 3. Installation and Initial Configuration
67
Many Linux distributions provide tools for creating new accounts. These programs are usually
called useradd or adduser. As
root, invoking one of these commands should present you
with a usage summary for the command, and creating a new account should be fairly
self-explanatory.
Most modern distributions provide a generic system administration tool for various tasks, one
of which is creating a new user account.
Again, other distributions, such as SuSE Linux, Red Hat Linux, or Caldera Open Linux,
integrate system installation and system administration in one tool — e.g., yast or yast2 on
SuSE Linux, and lisa on Caldera Open Linux.
If all else fails, you can create an account by hand. Usually, all that is required to create an
account is:
1. Edit the file /etc/passwd to add the new user. (Doing this with vipw — instead of
editing the file directly — will protect you against concurrent changes of the password
file, but vipw is not available on all distributions.)
2. Optionally edit the file /etc/shadow to specify "shadow password" attributes for the
new user.
3. Create the user's home directory.
4. Copy skeleton configuration files (such as .bashrc) to the new user's home directory.
These can sometimes be found in the directory /etc/skel.
We don't want to go into great detail here: the particulars of creating a new user account can
be found in virtually every book on Unix system administration (see the Bibliography for
suggested reading). We also talk about creating users in Section 5.7 in Chapter 5. You should
be able to find a tool that takes care of these details for you.
Keep in mind that to set or change the password on the new account, you use the passwd
command. For example, to change the password for the user
duck
, issue the following
command:
# passwd duck
This will prompt you to set or change the password for duck. If you execute the passwd
command as
root, it will not prompt you for the original password. In this way, if you have
forgotten your old password, but can still log in as
root, you can reset it.
3.2.2 Getting Online Help
Linux provides online help in the form of manual pages. Throughout this book, we'll be
directing you to look at the manual pages for particular commands to get more information.
Manual pages describe programs and applications on the system in detail, and it's important
for you to learn how to access this online documentation in case you get into a bind.
To get online help for a particular command, use the man command. For example, to get
information on the passwd command, type the following command:
$ man passwd
Chapter 3. Installation and Initial Configuration
68
This should present you with the manual page for passwd.
Usually, manual pages are provided as an optional package with most distributions, so they
won't be available unless you have opted to install them. However, we very strongly advise
you to install the manual pages. You will feel lost many times without them.
In addition, certain manual pages may be missing or incomplete on your system. It depends
on how complete your distribution is and how up-to-date the manual pages are.
Linux manual pages also document system calls, library functions, configuration file formats,
and kernel internals. In Section 4.12 in Chapter 4, we'll describe their use in more detail.
Besides traditional manual pages, there are also so-called Info pages. These can be read with
the text editor Emacs, the command info, or one of many graphical info readers available.
Many distributions also provide documentation in HTML format that you can read with any
web browser, such as Konqueror, as well as with Emacs.
Finally, there are documentation files that are simply plain text. You can read these with any
text editor or simply with the command more.
If you cannot find documentation for a certain command, you can also try running it with
either the -h or - -help option. Most commands then provide a brief summary of their usage.
3.2.3 Editing /etc/fstab
In order to ensure that all your Linux filesystems will be available when you reboot the
system, you may need to edit the file /etc/fstab, which describes your filesystems. Many
distributions automatically generate the /etc/fstab file for you during installation, so all may
be well. However, if you have additional filesystems that were not used during the installation
process, you may need to add them to /etc/fstab in order to make them available. Swap
partitions should be included in /etc/fstab as well.
In order to access a filesystem, it must be mounted on your system. Mounting a filesystem
associates that filesystem with a particular directory. For example, the root filesystem is
mounted on /, the /usr filesystem on /usr, and so on. (If you did not create a separate
filesystem for /usr, all files under /usr will be stored on the root filesystem.)
We don't want to smother you with technical details here, but it is important to understand
how to make your filesystems available before exploring the system. For more details on
mounting filesystems, see Section 6.1.2 in Chapter 6, or any book on Unix system
administration.
The root filesystem is automatically mounted on / when you boot Linux. However, your other
filesystems must be mounted individually. Usually, this is accomplished with the command:
#
mount -av
in one of the system startup files in /etc/rc.d or wherever your distribution stores its
configuration files. This tells the mount command to mount any filesystems listed in the file
Chapter 3. Installation and Initial Configuration
69
/etc/fstab. Therefore, in order to have your filesystems mounted automatically at boot time,
you need to include them in /etc/fstab. (Of course, you could always mount the filesystems by
hand, using the mount command after booting, but this is unnecessary work.)
Here is a sample /etc/fstab file, shortened by omitting the last two parameters in each line,
which are optional and not relevant to the discussion here. In this example, the root filesystem
is on /dev/hda1, the /home filesystem is on /dev/hdb2, and the swap partition is on /dev/hdb1:
# /etc/fstab
# device directory type options
#
/dev/hda1 / ext2 defaults
/dev/hdb2 /home ext2 defaults
/dev/hdb1 none swap sw
/proc /proc proc defaults
The lines beginning with the "#" character are comments. Also, you'll notice an additional
entry for /proc. /proc is a "virtual filesystem" used to gather process information by
commands such as ps.
As you can see, /etc/fstab consists of a series of lines. The first field of each line is the device
name of the partition, such as /dev/hda1. The second field is the mount point — the directory
where the filesystem is mounted. The third field is the type; Linux ext2fs filesystems should
use
ext2 for this field. swap should be used for swap partitions. The fourth field is for
mounting options. You should use
defaults
in this field for filesystems and
sw
for swap
partitions.
Using this example as a model, you should be able to add entries for any filesystems not
already listed in the /etc/fstab file.
How do we add entries to the file? The easiest way is to edit the file, as
root
, using an editor
such as vi or Emacs. We won't get into the use of text editors here. vi and Emacs are both
covered at the beginning of Chapter 9.
After editing the file, you'll need to issue the command:
# /bin/mount -a
or reboot for the changes to take effect.
If you're stuck at this point, don't be alarmed. We suggest that Unix novices do some reading
on basic Unix usage and system administration. We offer a lot of introductory material in
upcoming chapters, and most of the remainder of this book is going to assume familiarity with
these basics, so don't say we didn't warn you.
3.2.4 Shutting Down the System
You should never reboot or shut down your Linux system by pressing the reset switch or
simply turning off the power. As with most Unix systems, Linux caches disk writes in
memory. Therefore, if you suddenly reboot the system without shutting down "cleanly," you
can corrupt the data on your drives. Note, however, that the "Vulcan nerve pinch" (pressing
Ctrl-Alt-Delete in unison) is generally safe: the kernel traps the key sequence and passes it to
Chapter 3. Installation and Initial Configuration
70
the init process, which, in turn, initiates a clean shutdown of the system (or whatever it is
configured to do in this case; see Section 5.3.2 in Chapter 5). Your system configuration
might reserve the Ctrl-Alt-Delete for the system administrator so that normal users cannot
shut down the network server that the whole department depends upon. To set permissions for
this keystroke combination, create a file called /etc/shutdown.allow that lists the names of all
the users who are allowed to shut down the machine.
The easiest way to shut down the system is with the shutdown command. As an example, to
shut down and reboot the system immediately, use the following command as
root
:
# shutdown -r now
This will cleanly reboot your system. The manual page for shutdown describes the other
available command-line arguments. Instead of
now, you can also specify when the system
should be shut down. Most distributions also provide halt, which calls shutdown now. Some
distributions also provide poweroff, which actually shuts down the computer and turns it off.
Whether it works depends on the hardware (which must support APM), not on Linux.
3.3 Running into Trouble
Almost everyone runs into some kind of snag or hang-up when attempting to install Linux the
first time. Most of the time, the problem is caused by a simple misunderstanding. Sometimes,
however, it can be something more serious, such as an oversight by one of the developers or a
bug.
This section will describe some of the most common installation problems and how to solve
them. It also describes unexpected error messages that can pop up during installations that
appear to be successful.
In general, the proper boot sequence is:
1. After booting from the LILO prompt, the system must load the kernel image from
floppy. This may take several seconds; you know things are going well if the floppy
drive light is still on.
2. While the kernel boots, SCSI devices must be probed for. If you have no SCSI devices
installed, the system will "hang" for up to 15 seconds while the SCSI probe continues;
this usually occurs after the line:
lp_init: lp1 exists (0), using polling driver
appears on your screen.
3. After the kernel is finished booting, control is transferred to the system bootup files on
the floppy. Finally, you will be presented with a login prompt, or be dropped into an
installation program. If you are presented with a login prompt such as:
Linux login:
you should then log in (usually as
root
or
install
— this varies with each
distribution). After you enter the username, the system may pause for 20 seconds or
Chapter 3. Installation and Initial Configuration
71
more while the installation program or shell is being loaded from floppy. Again, the
floppy drive light should be on. Don't assume the system is hung.
3.3.1 Problems with Booting the Installation Medium
When attempting to boot the installation medium for the first time, you may encounter a
number of problems. Note that the following problems are not related to booting your newly
installed Linux system. See Section 3.3.4 for information on these kinds of pitfalls.
• Floppy or medium error occurs when attempting to boot. The most popular cause
for this kind of problem is a corrupt boot floppy. Either the floppy is physically
damaged, in which case you should re-create the disk with a brand-new floppy, or the
data on the floppy is bad, in which case you should verify that you downloaded and
transferred the data to the floppy correctly. In many cases, simply re-creating the boot
floppy will solve your problems. Retrace your steps and try again.
If you received your boot floppy from a mail-order vendor or some other distributor,
instead of downloading and creating it yourself, contact the distributor and ask for a
new boot floppy — but only after verifying that this is indeed the problem. This can,
of course, be difficult, but if you get funny noises from your floppy drive or messages
like cannot read sector or similar, chances are that your medium is damaged.
• System "hangs" during boot or after booting
. After the installation medium boots,
you see a number of messages from the kernel itself, indicating which devices were
detected and configured. After this, you are usually presented with a login prompt,
allowing you to proceed with installation (some distributions instead drop you right
into an installation program of some kind). The system may appear to "hang" during
several of these steps. Be patient; loading software from floppy is very slow. In many
cases, the system has not hung at all, but is merely taking a long time. Verify that there
is no drive or system activity for at least several minutes before assuming that the
system is hung.
Each activity listed at the beginning of this section may cause a delay that makes you
think the system has stopped. However, it is possible that the system actually may
"hang" while booting, which can be due to several causes. First of all, you may not
have enough available RAM to boot the installation medium. (See the following item
for information on disabling the ramdisk to free up memory.)
Hardware incompatibility causes many system hangs. Even if your hardware is
supported, you may run into problems with incompatible hardware configurations that
are causing the system to hang. See Section 3.3.2, for a discussion of hardware
incompatibilities. Section 10.2 in Chapter 10 lists the currently supported video
chipsets, which are a major issue in running graphics on Linux.
• System reports out-of-memory errors while attempting to boot or install the
software. This problem relates to the amount of RAM you have available. Keep in
mind that Linux itself requires at least 4 MB of RAM to run at all; almost all current
distributions of Linux require 8 MB or more. On systems with 8 MB of RAM or less,
you may run into trouble booting the installation medium or installing the software
itself. This is because many distributions use a ramdisk, which is a filesystem loaded
Chapter 3. Installation and Initial Configuration
72
directly into RAM, for operations while using the installation medium. The entire
image of the installation boot floppy, for example, may be loaded into a ramdisk,
which may require more than 1 MB of RAM.
The solution to this problem is to disable the ramdisk option when booting the install
medium. Each distribution has a different procedure for doing this. Please see your
distribution documentation for more information.
You may not see an out-of-memory error when attempting to boot or install the
software; instead, the system may unexpectedly hang or fail to boot. If your system
hangs, and none of the explanations in the previous section seems to be the cause, try
disabling the ramdisk.
•
The system reports an error, such as "Permission denied" or "File not found,"
while booting. This is an indication that your installation boot medium is corrupt. If
you attempt to boot from the installation medium (and you're sure you're doing
everything correctly), you should not see any such errors. Contact the distributor of
your Linux software and find out about the problem, and perhaps obtain another copy
of the boot medium if necessary. If you downloaded the boot disk yourself, try re-
creating the boot disk, and see if this solves your problem.
• The system reports the error "VFS: Unable to mount root" when booting. This
error message means that the root filesystem (found on the boot medium itself) could
not be found. This means that either your boot medium is corrupt or you are not
booting the system correctly.
For example, many CD-ROM distributions require you to have the CD-ROM in the
drive when booting. Also be sure that the CD-ROM drive is on, and check for any
activity. It's also possible the system is not locating your CD-ROM drive at boot time;
see Section 3.3.2, for more information.
If you're sure you are booting the system correctly, your boot medium may indeed be
corrupt. This is an uncommon problem, so try other solutions before attempting to use
another boot floppy or tape. One handy feature here is RedHat's new
mediacheck
option on the CD-ROM. This will check if the CD is OK.
3.3.2 Hardware Problems
The most common problem encountered when attempting to install or use Linux is an
incompatibility with hardware. Even if all your hardware is supported by Linux, a
misconfiguration or hardware conflict can sometimes cause strange results: your devices may
not be detected at boot time, or the system may hang.
It is important to isolate these hardware problems if you suspect they may be the source of
your trouble. In the following sections, we describe some common hardware problems and
how to resolve them.
Chapter 3. Installation and Initial Configuration
73
3.3.2.1 Isolating hardware problems
If you experience a problem you believe is hardware-related, the first thing to do is attempt to
isolate the problem. This means eliminating all possible variables and (usually) taking the
system apart, piece by piece, until the offending piece of hardware is isolated.
This is not as frightening as it may sound. Basically, you should remove all nonessential
hardware from your system (after turning the power off), and then determine which device is
actually causing the trouble — possibly by reinserting each device, one at a time. This means
you should remove all hardware other than the floppy and video controllers, and, of course,
the keyboard. Even innocent-looking devices, such as mouse controllers, can wreak unknown
havoc on your peace of mind unless you consider them nonessential. So, to be sure, really
remove everything that you don't absolutely need for booting when experimenting, and add
the devices one by one later when reassembling the system.
For example, let's say the system hangs during the Ethernet board detection sequence at boot
time. You might hypothesize that there is a conflict or problem with the Ethernet board in
your machine. The quick and easy way to find out is to pull the Ethernet board and try booting
again. If everything goes well when you reboot, you know that either the Ethernet board is not
supported by Linux, or there is an address or IRQ conflict with the board. In addition, some
badly designed network boards (mostly ISA-based NE2000 clones, which are luckily dying
out by now) can hang the entire system when they are auto-probed. If this appears to be the
case for you, your best bet is to remove the network board from the system during the
installation and put it back in later, or pass the appropriate kernel parameters during boot-up
so that auto-probing of the network board can be avoided. The most permanent fix is to dump
that card and get a new one from another vendor that designs its hardware more carefully.
What does "Address or IRQ conflict?" mean, you may ask. All devices in your machine use
an interrupt request line, or IRQ, to tell the system they need something done on their behalf.
You can think of the IRQ as a cord the device tugs when it needs the system to take care of
some pending request. If more than one device is tugging on the same cord, the kernel won't
be able to determine which device it needs to service. Instant mayhem.
Therefore, be sure all your installed non-PCI devices are using unique IRQ lines. In general,
the IRQ for a device can be set by jumpers on the card; see the documentation for the
particular device for details. Some devices do not require an IRQ at all, but it is suggested you
configure them to use one if possible (the Seagate ST01 and ST02 SCSI controllers are good
examples). The PCI bus is more cleverly designed, and PCI devices can and do quite happily
share interrupt lines.
In some cases, the kernel provided on your installation medium is configured to use a certain
IRQ for certain devices. For example, on some distributions of Linux, the kernel is
preconfigured to use IRQ 5 for the TMC-950 SCSI controller, the Mitsumi CD-ROM
controller, and the busmouse driver. If you want to use two or more of these devices, you'll
need first to install Linux with only one of these devices enabled, then recompile the kernel in
order to change the default IRQ for one of them. (See Section 7.4 in Chapter 7 for information
on recompiling the kernel.)
Another area where hardware conflicts can arise is with DMA channels, I/O addresses, and
shared memory addresses. All these terms describe mechanisms through which the system
Chapter 3. Installation and Initial Configuration
74
interfaces with hardware devices. Some Ethernet boards, for example, use a shared memory
address as well as an IRQ to interface with the system. If any of these are in conflict with
other devices, the system may behave unexpectedly. You should be able to change the DMA
channel, I/O, or shared memory addresses for your various devices with jumper settings.
(Unfortunately, some devices don't allow you to change these settings.)
The documentation for your various hardware devices should specify the IRQ, DMA channel,
I/O address, or shared memory address the devices use, and how to configure them. Of
course, a problem here is that some of these settings are not known before the system is
assembled and may thus be undocumented. Again, the simple way to get around these
problems is to temporarily disable the conflicting devices until you have time to determine the
cause of the problem.
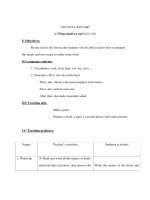
Table 3-2 is a list of IRQ and DMA channels used by various "standard" devices found on
most systems. Almost all systems have some of these devices, so you should avoid setting the
IRQ or DMA of other devices to these values.
Table 3-2. Common device settings
Device I/O address IRQ DMA
ttyS0 (COM1) 3f8 4 n/a
ttyS1 (COM2) 2f8 3 n/a
ttyS2 (COM3) 3e8 4 n/a
ttyS3 (COM4) 2e8 3 n/a
lp0 (LPT1) 378 - 37f 7 n/a
lp1 (LPT2) 278 - 27f 5 n/a
f
d0, fd1 (floppies 1 and 2) 3f0 - 3f7 6 2
f
d2, fd3 (floppies 3 and 4) 370 - 377 10 3
3.3.2.2 Problems recognizing hard drive or controller
When Linux boots, you see a series of messages on your screen, such as the following:
Console: colour VGA+ 80x25
Floppy drive(s): fd0 is 1.44M
ttyS00 at 0x03f8 (irq = 4) is a 16550A
Here, the kernel is detecting the various hardware devices present on your system. At some
point, you should see the line:
Partition check:
followed by a list of recognized partitions, for example:
Partition check:
hda: hda1 hda2
hdb: hdb1 hdb2 hdb3
If, for some reason, your drives or partitions are not recognized, you will not be able to access
them in any way.
Chapter 3. Installation and Initial Configuration
75
Several conditions can cause this to happen:
Hard drive or controller not supported
If you are using a hard drive or controller (IDE, SCSI, or otherwise) not supported by
Linux, the kernel will not recognize your partitions at boot time.
Drive or controller improperly configured
Even if your controller is supported by Linux, it may not be configured correctly.
(This is a problem particularly for SCSI controllers; most non-SCSI controllers should
work fine without additional configuration.)
Refer to the documentation for your hard drive and controller for information on
solving these kinds of problems. In particular, many hard drives will need to have a
jumper set if they are to be used as a "slave" drive (e.g., as the second hard drive). The
acid test for this kind of condition is to boot up Windows or some other operating
system known to work with your drive and controller. If you can access the drive and
controller from another operating system, the problem is not with your hardware
configuration.
See the previous section, Section 3.3.2.1, for information on resolving possible device
conflicts and the following section, Section 3.3.2.3, for information on configuring
SCSI devices.
Controller properly configured, but not detected
Some BIOS-less SCSI controllers require the user to specify information about the
controller at boot time. The following section, Section 3.3.2.3, describes how to force
hardware detection for these controllers.
Hard-drive geometry not recognized
Some older systems, such as the IBM PS/ValuePoint, do not store hard-drive
geometry information in the CMOS memory where Linux expects to find it. Also,
certain SCSI controllers need to be told where to find drive geometry in order for
Linux to recognize the layout of your drive.
Most distributions provide a boot option to specify the drive geometry. In general,
when booting the installation medium, you can specify the drive geometry at the LILO
boot prompt with a command such as:
boot: linux hd=cylinders,heads,sectors
where cylinders, heads, and sectors correspond to the number of cylinders,
heads, and sectors per track for your hard drive.
After installing the Linux software, you can install LILO, allowing you to boot from
the hard drive. At that time, you can specify the drive geometry to the LILO
Chapter 3. Installation and Initial Configuration
76
installation procedure, making it unnecessary to enter the drive geometry each time
you boot. See Section 5.2.2 in Chapter 5 for more about LILO.
3.3.2.3 Problems with SCSI controllers and devices
Presented here are some of the most common problems with SCSI controllers and devices,
such as CD-ROMs, hard drives, and tape drives. If you are having problems getting Linux to
recognize your drive or controller, read on. Let us again emphasize that most distributions use
a modularized kernel and that you might have to load a module supporting your hardware
during an early phase of the installation process. This might also be done automatically for
you.
The Linux SCSI HOWTO contains much useful information on SCSI devices in addition to
that listed here. SCSIs can be particularly tricky to configure at times.
It might be a false economy, for example, to use cheap cables, especially if you use wide
SCSI. Cheap cables are a major source of problems and can cause all kinds of failures, as well
as major headaches. If you use SCSI, use proper cabling.
Here are common problems and possible solutions:
• An SCSI device is detected at all possible IDs. This problem occurs when the
system straps the device to the same address as the controller. You need to change the
jumper settings so that the drive uses a different address from the controller itself.
• Linux reports sense errors, even if the devices are known to be error-free. This
can be caused by bad cables or by bad termination. If your SCSI bus is not terminated
at both ends, you may have errors accessing SCSI devices. When in doubt, always
check your cables. In addition to disconnected cables, bad-quality cables are a
common source of troubles.
• SCSI devices report timeout errors. This is usually caused by a conflict with IRQ,
DMA, or device addresses. Also, check that interrupts are enabled correctly on your
controller.
• SCSI controllers using BIOS are not detected. Detection of controllers using BIOS
will fail if the BIOS is disabled, or if your controller's "signature" is not recognized by
the kernel. See the Linux SCSI HOWTO for more information about this.
• Controllers using memory-mapped I/O do not work. This happens when the
memory-mapped I/O ports are incorrectly cached. Either mark the board's address
space as uncacheable in the XCMOS settings, or disable cache altogether.
•
When partitioning, you get a warning "cylinders > 1024," or you are unable to
boot from a partition using cylinders numbered above 1023. BIOS limits the
number of cylinders to 1024, and any partition using cylinders numbered above this
won't be accessible from the BIOS. As far as Linux is concerned, this affects only
booting; once the system has booted, you should be able to access the partition. Your
options are to either boot Linux from a boot floppy, or boot from a partition using
cylinders numbered below 1024. See Section 3.1.7 earlier in this chapter.
• CD-ROM drive or other removable media devices are not recognized at boot
time
. Try booting with a CD-ROM (or disk) in the drive. This is necessary for some
devices.
Chapter 3. Installation and Initial Configuration
77
If your SCSI controller is not recognized, you may need to force hardware detection at boot
time. This is particularly important for SCSI controllers without BIOS. Most distributions
allow you to specify the controller IRQ and shared memory address when booting the
installation medium. For example, if you are using a TMC-8xx controller, you may be able to
enter:
boot: linux tmx8xx=interrupt,memory-address
at the LILO boot prompt, where
interrupt
is the controller IRQ, and
memory-address
is the shared memory address. Whether you can do this depends on the distribution of Linux
you are using; consult your documentation for details.
3.3.3 Problems Installing the Software
Installing the Linux software should be trouble-free if you're lucky. The only problems you
might experience would be related to corrupt installation media or lack of space on your
Linux filesystems. Here is a list of common problems:
• System reports "Read error, file not found" or other errors while attempting to
install the software. This is indicative of a problem with your installation medium. If
you are installing from floppy, keep in mind that floppies are quite susceptible to
media errors of this type. Be sure to use brand-new, newly formatted floppies. If you
have a Windows partition on your drive, many Linux distributions allow you to install
the software from the hard drive. This may be faster and more reliable than using
floppies.
If you are using a CD-ROM, be sure to check the disk for scratches, dust, or other
problems that might cause media errors.
The cause of the problem may also be that the medium is in the incorrect format. For
example, many Linux distributions require floppies to be formatted in high-density
Windows format. (The boot floppy is the exception; it is not in Windows format in
most cases.) If all else fails, either obtain a new set of floppies, or re-create the
floppies (using new ones) if you downloaded the software yourself.
• System reports errors such as "tar: read error" or "gzip: not in gzip format".
This problem is usually caused by corrupt files on the installation medium itself. In
other words, your floppy may be error-free, but the data on the floppy is in some way
corrupted. For example, if you downloaded the Linux software using text mode, rather
than binary mode, your files will be corrupt and unreadable by the installation
software. When using FTP, just issue the binary command to set that mode before you
request a file transfer.
• System reports errors such as "device full" while installing. This is a clear-cut sign
that you have run out of space when installing the software. If the disk fills up, not all
distributions can clearly recover, so aborting the installation won't give you a working
system.
The solution is usually to re-create your filesystems with the mke2fs command, which
will delete the partially installed software. You can then attempt to reinstall the
software, this time selecting a smaller amount of software to install. If you can't do
Chapter 3. Installation and Initial Configuration
78
without that software, you may need to start completely from scratch, and rethink your
partition and filesystem sizes.
• System reports errors such as "read_intr: 0x10" while accessing the hard drive.
This is usually an indication of bad blocks on your drive. However, if you receive
these errors while using mkswap or mke2fs, the system may be having trouble
accessing your drive. This can either be a hardware problem (see Section 3.3.2 earlier
in this chapter), or it might be a case of poorly specified geometry. If you used the
option:
hd=cylinders,heads,sectors
at boot time to force detection of your drive geometry and incorrectly specified the
geometry, you could receive this error. This can also happen if your drive geometry is
incorrectly specified in the system CMOS.
• System reports errors such as "file not found" or "permission denied". This
problem can occur if the necessary files are not present on the installation medium or
if there is a permissions problem with the installation software. For example, some
distributions of Linux have been known to have bugs in the installation software itself;
these are usually fixed rapidly and are quite infrequent. If you suspect that the
distribution software contains bugs, and you're sure that you have done nothing wrong,
contact the maintainer of the distribution to report the bug.
If you have other strange errors when installing Linux (especially if you downloaded the
software yourself), be sure you actually obtained all the necessary files when downloading.
For example, some people use the FTP command:
mget *.*
when downloading the Linux software via FTP. This will download only those files that
contain a "." in their filenames; files without the "." will not be downloaded. The correct
command to use in this case is:
mget *
The best advice is to retrace your steps when something goes wrong. You may think that you
have done everything correctly, when in fact you forgot a small but important step somewhere
along the way. In many cases, just attempting to redownload or reinstall the Linux software
can solve the problem. Don't beat your head against the wall any longer than you have to!
Also, if Linux unexpectedly hangs during installation, there may be a hardware problem of
some kind. See Section 3.3.2 for hints.
3.3.4 Problems after Installing Linux
You've spent an entire afternoon installing Linux. In order to make space for it, you wiped
your Windows and OS/2 partitions and tearfully deleted your copies of SimCity 2000 and
Railroad Tycoon 2. You reboot the system and nothing happens. Or, even worse, something
happens, but it's not what should happen. What do you do?
Chapter 3. Installation and Initial Configuration
79
In Section 3.3.1, earlier in this chapter, we covered the most common problems that can occur
when booting the Linux installation medium; many of those problems may apply here. In
addition, you may be victim to one of the following maladies.
3.3.4.1 Problems booting Linux from floppy
If you are using a floppy to boot Linux, you may need to specify the location of your Linux
root partition at boot time. This is especially true if you are using the original installation
floppy itself and not a custom boot floppy created during installation.
While booting the floppy, hold down the Shift or Ctrl key. This should present you with a
boot menu; press Tab to see a list of available options. For example, many distributions allow
you to boot from a floppy by entering:
boot: linux root=partition
at the boot menu, where
partition
is the name of the Linux root partition, such as
/dev/hda2. SuSE Linux offers a menu entry early in the installation program that boots your
newly created Linux system from the installation boot floppy. Consult the documentation for
your distribution for details.
3.3.4.2 Problems booting Linux from the hard drive
If you opted to install LILO instead of creating a boot floppy, you should be able to boot
Linux from the hard drive. However, the automated LILO installation procedure used by
many distributions is not always perfect. It may make incorrect assumptions about your
partition layout, in which case you need to reinstall LILO to get everything right. Installing
LILO is covered in Section 5.2.2 in Chapter 5.
Here are some common problems:
• System reports "Drive not bootable-Please insert system disk". You will get this
error message if the hard drive's master boot record is corrupt in some way. In most
cases, it's harmless, and everything else on your drive is still intact. There are several
ways around this:
o While partitioning your drive using fdisk, you may have deleted the partition
that was marked as "active." Windows and other operating systems attempt to
boot the "active" partition at boot time (Linux, in general, pays no attention to
whether the partition is "active," but the Master Boot Records installed by
some distributions like Debian do). You may be able to boot MS-DOS from
floppy and run fdisk to set the active flag on your MS-DOS partition, and all
will be well.
Another command to try (with MS-DOS 5.0 and higher, including all
Windows versions since Windows 95) is:
FDISK /MBR
This command will attempt to rebuild the hard drive master boot record for
booting Windows, overwriting LILO. If you no longer have Windows on your
Chapter 3. Installation and Initial Configuration
80
hard drive, you'll need to boot Linux from floppy and attempt to install LILO
later.
o If you created a Windows partition using Linux's version of fdisk, or vice
versa, you may get this error. You should create Windows partitions only by
using Windows' version of fdisk. (The same applies to operating systems other
than Windows.) The best solution here is either to start from scratch and
repartition the drive correctly, or to merely delete and re-create the offending
partitions using the correct version of fdisk.
o The LILO installation procedure may have failed. In this case, you should boot
either from your Linux boot floppy (if you have one), or from the original
installation medium. Either of these should provide options for specifying the
Linux root partition to use when booting. At boot time, hold down the Shift or
Ctrl key and press Tab from the boot menu for a list of options.
• When you boot the system from the hard drive, Windows (or another operating
system) starts instead of Linux
. First of all, be sure you actually installed LILO
when installing the Linux software. If not, the system will still boot Windows (or
whatever other operating system you may have) when you attempt to boot from the
hard drive. In order to boot Linux from the hard drive, you need to install LILO (see
the section Section 5.2.2 in Chapter 5).
On the other hand, if you did install LILO, and another operating system boots instead
of Linux, you have LILO configured to boot that other operating system by default.
While the system is booting, hold down the Shift or Ctrl key and press Tab at the boot
prompt. This should present you with a list of possible operating systems to boot;
select the appropriate option (usually just
linux) to boot Linux.
If you wish to select Linux as the default operating system to boot, you will need to
reinstall LILO.
It also may be possible that you attempted to install LILO, but the installation
procedure failed in some way. See the previous item on installation.
3.3.4.3 Problems logging in
After booting Linux, you should be presented with a login prompt:
Linux login:
At this point, either the distribution's documentation or the system itself will tell you what to
do. For many distributions, you simply log in as
root, with no password. Other possible
usernames to try are
guest or test.
Most Linux distributions ask you for an initial root password. Hopefully, you have
remembered what you typed in during installation; you will need it again now. If your
distribution does not ask you for a root password during installation, you can try using an
empty password.
If you simply can't log in, consult your distribution's documentation; the username and
password to use may be buried in there somewhere. The username and password may have
Chapter 3. Installation and Initial Configuration
81
been given to you during the installation procedure, or they may be printed on the login
banner.
One possible cause of this password impasse may be a problem with installing the Linux login
and initialization files. If this is the case, you may need to reinstall (at least parts of) the Linux
software, or boot your installation medium and attempt to fix the problem by hand.
3.3.4.4 Problems using the system
If login is successful, you should be presented with a shell prompt (such as
#
or
$
) and can
happily roam around your system. The next step in this case is to try the procedures in
Chapter 4. However, some initial problems with using the system sometimes creep up.
The most common initial configuration problem is incorrect file or directory permissions.
This can cause the error message:
Shell-init: permission denied
to be printed after logging in. (In fact, anytime you see the message permission denied,
you can be fairly certain it is a problem with file permissions.)
In many cases, it's a simple matter of using the chmod command to fix the permissions of the
appropriate files or directories. For example, some distributions of Linux once used the
incorrect file mode
0644 for the root directory ( / ). The fix was to issue the command:
# chmod 755 /
as root. (File permissions are covered in the section Section 4.13 in Chapter 4.) However, in
order to issue this command, you needed to boot from the installation medium and mount
your Linux root filesystem by hand — a hairy task for most newcomers.
As you use the system, you may run into places where file and directory permissions are
incorrect, or software does not work as configured. Welcome to the world of Linux! While
most distributions are quite trouble-free, you can't expect them to be perfect. We don't want to
cover all those problems here. Instead, throughout the book we help you to solve many of
these configuration problems by teaching you how to find them and fix them yourself. In
Chapter 1, we discussed this philosophy in some detail. In Chapter 5, we give hints for fixing
many of these common configuration problems.
Chapter 4. Basic Unix Commands and Concepts
82
Chapter 4. Basic Unix Commands and Concepts
If you've come to Linux from Windows or another non-Unix operating system, you have
a steep learning curve ahead of you. We might as well be candid on this point. Unix is a world
all its own.
In this chapter, we're going to introduce the rudiments of Unix for those readers who have
never had exposure to this operating system. If you are coming from Microsoft Windows or
other environments, the information in this chapter will be absolutely vital to you. Unlike
other operating systems, Unix is not at all intuitive. Many of the commands have seemingly
odd names or syntax, the reasons for which usually date back many years to the early days of
this system. And, although many of the commands may appear to be similar to their
counterparts in the Windows command-line interpreter, there are important differences.
Dozens of other books cover basic Unix usage. You should be able to go to the computer
section of any chain bookstore and find at least several of them on the shelf. (A few we like
are listed in the Bibliography.) However, most of these books cover Unix from the point of
view of someone sitting down at a workstation or terminal connected to a large mainframe,
not someone who is running his own Unix system on a personal computer. A popular
introduction to Unix usage that also covers Linux is Learning the Unix Operating System by
Grace Todino, John Strang, and Jerry Peek, published by O'Reilly.
Also, these books often dwell upon the more mundane aspects of Unix: boring text-
manipulation commands, such as awk, tr, and sed, most of which you will never need unless
you start doing some serious Unix trickery. In fact, many Unix books talk about the original
ed line editor, which has long been made obsolete by vi and Emacs. Therefore, although many
of the Unix books available today contain a great deal of useful information, many of them
contain pages upon pages of humdrum material you couldn't probably care less about at this
point.
Instead of getting into the dark mesh of text processing, shell syntax, and other issues, in this
chapter we strive to cover the basic commands needed to get you up to speed with the system
if you're coming from a non-Unix environment. This chapter is far from complete; a real
beginner's Unix tutorial would take an entire book. It's our hope that this chapter will give you
enough to keep you going in your adventures with Linux, and that you'll invest in a good Unix
book once you have a need to do so. We'll give you enough Unix background to make your
terminal usable, keep track of jobs, and enter essential commands.
Chapter 5 contains material on system administration and maintenance. This is by far the most
important chapter for anyone running his own Linux system. If you are completely new to
Unix, the material found in Chapter 5 should be easy to follow once you've completed the
tutorial here.
One big job we don't cover in this chapter is how to edit files. It's one of the first things you
need to learn on any operating system. The two most popular editors for Linux, vi and Emacs,
are discussed at the beginning of Chapter 9.
Chapter 4. Basic Unix Commands and Concepts
83
4.1 Logging In
Let's assume that your installation went completely smoothly, and you are facing
the following prompt on your screen:
Linux login:
Many Linux users are not so lucky; they have to perform some heavy tinkering when
the system is still in a raw state or in single-user mode. But for now, we'll talk about logging
into a functioning Linux system.
Logging in, of course, distinguishes one user from another. It lets several people work on
the same system at once and makes sure that you are the only person to have access to your
files.
You may have installed Linux at home and are thinking right now, "Big deal. No one else
shares this system with me, and I'd just as soon not have to log in." But logging in under your
personal account also provides a certain degree of protection: your account won't have the
ability to destroy or remove important system files. The system administration account
(covered in the next chapter) is used for such touchy matters.
If you connect your computer to the Internet, even via a modem, make sure you set nontrivial
passwords on all your accounts. Use punctuation and strings that don't represent real words or
names.
Note that some distributions install a so-called graphical login manager right away, so you
might not be greeted by the somewhat arcane
login
: prompt in white letters on black
background, but with a fancy graphical login screen, possibly even presenting you with the
user accounts available on your system as well as different modes to log into. The basic login
procedure is the same as described here, however; you still type your username and password.
You were probably asked to set up a login account for yourself when you installed Linux. If
you have such an account, type the name you chose at the
Linux login: prompt. If you
don't have an account yet, type
root
because that account is certain to exist. Some
distributions may also set up an account called
install or some other name for fooling
around when you first install the system.
After you choose your account, you see:
Password:
and you need to enter the correct password. The terminal turns off the normal echoing of
characters you enter for this operation so that people looking at the screen cannot read your
password. If the prompt does not appear, you should add a password to protect yourself from
other people's tampering; we'll go into this later.
By the way, both the name and the password are case-sensitive. Make sure the Caps Lock key
is not set because typing
ROOT instead of root will not work.