Sun Fundamentals of Solaris 7 EU-118 Student Guide With Instructor Notes phần 9 doc
Bạn đang xem bản rút gọn của tài liệu. Xem và tải ngay bản đầy đủ của tài liệu tại đây (531.81 KB, 103 trang )
13
Printing 13-15
Copyright 1999 Sun Microsystems, Inc. All Rights Reserved. Enterprise Services August 1999, Revision D
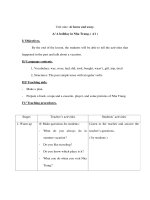
Setting Printer Job Options
You can also set the time interval that the Print Manager uses to check
the current print queue, as shown in the following illustration:
13
13-16 Fundamentals of Solaris 7
Copyright 1999 Sun Microsystems, Inc. All Rights Reserved. Enterprise Services August 1999, Revision D
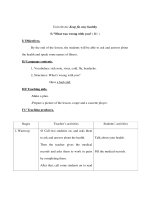
Printing From the File Manager
You can print a file from the File Manager window by dragging and
dropping it on the Print Manager icon or dropping the object directly
into the Print Manager window.
Once the file object has been dropped into the Print Jobs window,
another window will be displayed in which you can:
● Designate an alternative printer to print the file
● Designate the number of copies of the file to be printed
● Set a banner title (which will be displayed in the Print Manager
window alongside the print object)
● Select specific pages to print
● Designate which UNIX print command options should be used as
an alternative to the default print command.
Once the Print button is selected, the file will be sent to the
appropriate printer queue.
13
Printing 13-17
Copyright 1999 Sun Microsystems, Inc. All Rights Reserved. Enterprise Services August 1999, Revision D
Printing From the File Manager
13
13-18 Fundamentals of Solaris 7
Copyright 1999 Sun Microsystems, Inc. All Rights Reserved. Enterprise Services August 1999, Revision D
Displaying the Banner Page Title
When a banner page title has been entered for a print request, that text
will be displayed in the Print Manager window. The name of the user
who submitted the print request will be displayed below the banner
text.
13
Printing 13-19
Copyright 1999 Sun Microsystems, Inc. All Rights Reserved. Enterprise Services August 1999, Revision D
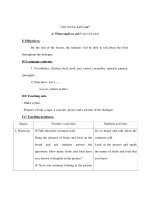
Canceling a Print Request
To cancel a print request, you must first select the Print Manager
display object corresponding to that print request.
Once the object has been selected, use the Selected ➤ Cancel menu
options.
You will be asked to confirm that you want to have the print request
cancelled, as shown in the following illustration. Again, you can only
cancel your own print requests.
13
13-20 Fundamentals of Solaris 7
Copyright 1999 Sun Microsystems, Inc. All Rights Reserved. Enterprise Services August 1999, Revision D
Canceling a Print Request
If you attempt to cancel another user’s print job from the Print
Manager, the print job will reappear in the printer queue.
13
Printing 13-21
Copyright 1999 Sun Microsystems, Inc. All Rights Reserved. Enterprise Services August 1999, Revision D
Exercise: Printing Files
Exercise objective – In this exercise you will use the print commands
learned in this module to print a file.
Tasks
Complete or answer the following:
1. Files can be printed by dragging a File Manager file object on to
the Default Printer icon (on the Front Panel) or into the Printer
Jobs window, true or false?
___________________________________________________________
2. Print requests can only be sent to the system default printer, true
or false?
___________________________________________________________
3. Only the system administrator can cancel print requests, true or
false?
___________________________________________________________
4. From the command line, what command would you use to see if a
printer was accepting requests?
___________________________________________________________
5. An alternate printer can be designated from the command line,
true or false?
___________________________________________________________
6. Using the lp command, print the dante file on the default printer.
7. From the command line, check the status of the previously sent
print request.
13
13-22 Fundamentals of Solaris 7
Copyright 1999 Sun Microsystems, Inc. All Rights Reserved. Enterprise Services August 1999, Revision D
Exercise: Printing Files
Exercise Summary
Discussion – Take a few minutes to discuss what experiences, issues,
or discoveries you had during the lab exercises.
✓
Manage the discussion here based on the time allowed for this module, which was given
in the “About This Course” module. If you find you do not have time to spend on
discussion, then just highlight the key concepts students should have learned from the
lab exercise.
● Experiences
✓
Ask students what their overall experiences with this exercise have been. You might want
to go over any trouble spots or especially confusing areas at this time.
● Interpretations
✓
Ask students to interpret what they observed during any aspects of this exercise.
● Conclusions
✓
Have students articulate any conclusions they reached as a result of this exercise
experience.
● Applications
✓
Explore with students how they might apply what they learned in this exercise to
situations at their workplace.
13
Printing 13-23
Copyright 1999 Sun Microsystems, Inc. All Rights Reserved. Enterprise Services August 1999, Revision D
Exercise: Printing Files
Exercise Solutions
1. Files can be printed by dragging a File Manager file object on to
the Default Printer icon (on the Front Panel) or into the Printer
Jobs window, true or false?
True
2. Print requests can only be sent to the system default printer, true
or false?
False; If other printers are available to your system, you can designate the
printer for each print job.
3. Only the system administrator can cancel print requests, true or
false?
False; A user can cancel his or her own job.
4. From the command line, what command would you use to see if a
printer was accepting requests?
$ lpstat -a
5. An alternate printer can be designated from the command line,
true or false?
True
6. Using the lp command, print the dante file on the default printer.
lp dante
7. From the command line, check the status of the previously sent
print request.
lpstat
13
13-24 Fundamentals of Solaris 7
Copyright 1999 Sun Microsystems, Inc. All Rights Reserved. Enterprise Services August 1999, Revision D
Check Your Progress
Before continuing on to the next module, check that you are able to
accomplish or answer the following:
❑ Use command-line commands to print a file, check print queue
status, and cancel a print request
❑ Print using the Print Manager in CDE
❑ Determine and change the default printer
❑ Set print options
❑ Demonstrate the major functions of the Print Manager
13
Printing 13-25
Copyright 1999 Sun Microsystems, Inc. All Rights Reserved. Enterprise Services August 1999, Revision D
Think Beyond
What kinds of printers do you have access to in your environment?
For what kinds of jobs would you use a printer other than your default
printer?
Copyright 1999 Sun Microsystems, Inc. All Rights Reserved. Enterprise Services August 1999, Revision D
FileandUserInformationUtilities
14
Objectives
Upon completion of this module, you should be able to:
● Describe some advantages of using file systems
● List the inode number of a file
● Link files using hard and symbolic links
● Employ the find command to locate files by specific criteria
● Search for text within a document using the grep command
● Identify which users are logged on to your system
● Switch to a new user ID and identify the user ID you are currently
using
● Identify your effective and real UID when switching users
● Use the sort command to sort ASCII files in alphabetical and
numerical order
● Use the sort command to perform multilevel sorts on ASCII data
14
14-2 Fundamentals of Solaris 7
Copyright 1999 Sun Microsystems, Inc. All Rights Reserved. Enterprise Services August 1999, Revision D
Relevance
✓
Present the following question to stimulate the students and get them thinking about the
issues and topics presented in this module. While they are not expected to know the
answer to the question, the answer should be of interest to them and inspire them to learn
the content presented in this module.
Discussion – What utilities do you need for daily computer use?
Do you need to search for items, such as files? What other searches do
you need to do?
Additional Resources
Additional resources – The following references can provide
additional details on the topics discussed in this module:
● Solaris Advanced User’s Guide, Part Number 801-6615-10
● Solaris System Administrator AnswerBook
14
File and User Information Utilities 14-3
Copyright 1999 Sun Microsystems, Inc. All Rights Reserved. Enterprise Services August 1999, Revision D
File Systems
When the UNIX operating system was first developed, hard disks
could store what is now considered a very small amount of data.
When disks larger than 300 Mbytes arrived on the market the
operating system could not address such a large amount of space. This
necessitated the development of logical partitions of the hard drive to
allow the kernel to access smaller, addressable parts of the drive.
14
14-4 Fundamentals of Solaris 7
Copyright 1999 Sun Microsystems, Inc. All Rights Reserved. Enterprise Services August 1999, Revision D
File Systems
Today, with hard drives being sold with up to a Tbyte or more of space
on them, the kernel can access all available space. Despite this, the
convention of partitioning a hard drive into logical partitions has
persisted for various reasons. Partitioning allows an administrator to
functionally organize data so that user files are on a different logical
partition than executables or applications. One of the main advantages
to this is that daily backups can be done only to those partitions on
which the data changes frequently, without having to back up all
information on the disk. Logical partitioning also cuts down on seek
time: if the disk is partitioned, when a user specifies a file to search for
or a directory to change to, the name of the directory gives the kernel
information about where the information is stored. This prevents the
system from having to seek the information over the entire disk.
These logical partitions are referred to as file systems. They are
transparent to a user and therefore appear to be just part of the
directory hierarchy. The most common file systems on a UNIX system
are /usr, where binary and executables are stored, /opt, where third
party applications are usually located, and root (/), where the files
that pertain to the operation of the system are kept.
14
File and User Information Utilities 14-5
Copyright 1999 Sun Microsystems, Inc. All Rights Reserved. Enterprise Services August 1999, Revision D
Inode Numbers
Inode numbers are identifiers of a file on a file system. Similar to the
way in which a passport number is unique for each person in a
country, an inode number is unique for each file in a file system.
Each file and directory has an inode number assigned to it by the
system. These numbers can be seen by using the following ls
command:
$ ls -i ~
12110 dante 68349 dir3 12118 file3
12115 dante_1 68451 dir4 12119 file4
67773 dir1 12169 file1 68552 practice
The numbers to the left of the file name are the inode numbers. These
are sometimes referred to as index numbers, as the kernel keeps an
index of the files and directories by the inode number and can
therefore refer to them faster.
Note – Inode numbers are unique on each file system, even when file
names are identical.
14
14-6 Fundamentals of Solaris 7
Copyright 1999 Sun Microsystems, Inc. All Rights Reserved. Enterprise Services August 1999, Revision D
Linking Files and Directories
Links
Links are used to create alternate names or aliases for files and
directories on a system. In this way, different users can refer to the
same file or directory by names they are more comfortable with or
names that are shorter. Many system administrators set up links to
commands, giving them names more familiar to users of different
operating systems.
There are two kinds of links, hard and symbolic (or soft).
14
File and User Information Utilities 14-7
Copyright 1999 Sun Microsystems, Inc. All Rights Reserved. Enterprise Services August 1999, Revision D
Linking Files and Directories
Links
Hard Links
Hard links are used to link files on the same file system. Files that are
hard linked share the same inode number and, therefore, refer to the
same data on the hard disk. Hard links are not used to link directories
and cannot cross file systems, as the inode number is only unique for
that file in its current file system. A completely different file may have
the same inode number on a different file system.
14
14-8 Fundamentals of Solaris 7
Copyright 1999 Sun Microsystems, Inc. All Rights Reserved. Enterprise Services August 1999, Revision D
Linking Files and Directories
Links
Hard Links
The output of the ls -l command shows a link count following the
permissions. This is a count of how many files are hard linked to the
same inode number as the file listed.
$ ls -l ~
-rw 1 torey staff 1320 Oct 19 dante
-rw 1 torey staff 368 Oct 19 dante_1
drwx x x 5 torey staff 512 Oct 19 dir1
drwx x x 4 torey staff 512 Oct 19 dir2
<output omitted>
The link count on directories includes a link to the current directory (.)
and from the parent ( ) directory, and a number for each file or
subdirectory included in the directory.
The structure of a hard link is as follows:
All hard-linked files share the same inode number and therefore the
same data. This data can be displayed using an appropriate command;
for example, cat or more. In the case of hard links, as long as one file
that refers to the inode number remains, the data remains available on
the system. For this reason, File1 and File3 could be deleted, leaving
the information referred to intact, as File2 would still exist.
Note – Hard links cannot be used to link directories; only symbolic
links can be used to do so.
File1
Inode number Data
Display
File2
File3
14
File and User Information Utilities 14-9
Copyright 1999 Sun Microsystems, Inc. All Rights Reserved. Enterprise Services August 1999, Revision D
Linking Files and Directories
Links
Symbolic Links
Symbolic links are used for two main reasons: to link a file or directory
across file systems, or for backwards compatibility. Since symbolically
linked files do not share a single inode, these links can cross file
system boundaries. There are also many cases where commands, files,
or directories that have existed as part of the UNIX operating system
for years are given different names. In order to avoid having to retrain
the multitude of UNIX users in the world, symbolic links are
employed to refer to these files by both their old and new names. This
is referred to as backwards compatibility.
14
14-10 Fundamentals of Solaris 7
Copyright 1999 Sun Microsystems, Inc. All Rights Reserved. Enterprise Services August 1999, Revision D
Linking Files and Directories
Links
Symbolic Links
The following commands indicate that the file symlink is a
symbolically linked file:
$ ls -l Test
-rw-r r 1 torey staff 35 May 8 linktest
lrwxrwxrwx 1 torey staff 8 May 12 symlink > linktest
$ ls -F
linktest
symlink@
The structure of a symbolic link is as follows:
The data contained in File2 is the absolute pathname to File1, but
displaying either File1 or File2 will produce the same output. If
File2 is deleted, there is no effect on File1.IfFile1 is deleted File2
will still exist, but it will point to an invalid file name and therefore be
of no practical use.
File1
inode number Data Display
File2 inode number Absolute pathname to File1
14
File and User Information Utilities 14-11
Copyright 1999 Sun Microsystems, Inc. All Rights Reserved. Enterprise Services August 1999, Revision D
Linking Files and Directories
The ln Command
Use the ln command to create hard or symbolic links.
Command Format
ln [-s]
source_file target_file
By default, the ln command will create a hard link. The -s option is
used to create a symbolic link. The
source_file
is the existing file
and the
target_file
is the new file to be linked to the
source_file
.
Creating Links
You can link two files with a
● Hard link
● Symbolic link
$ ln /export/home/user2/dante essay
$ ls -i /export/home/user2/dante
89532 dante
$ ls -i essay
89532 essay
$ ln -s tutor.vi symlink
$ ls -l symlink
lrwxrwxrwx 1 torey staff 8 May 9 symlink >tutor.vi
14
14-12 Fundamentals of Solaris 7
Copyright 1999 Sun Microsystems, Inc. All Rights Reserved. Enterprise Services August 1999, Revision D
Finding Files
The find Command
The find command is one of the most powerful and useful of the
commands available to a UNIX environment user. This command can
be used to find files based on specific criteria. Once a file or group of
files that matches a search criterion is found, another command can be
executed on the matching files. The find command can be used for
many purposes including deleting, backing up, or printing files.
14
File and User Information Utilities 14-13
Copyright 1999 Sun Microsystems, Inc. All Rights Reserved. Enterprise Services August 1999, Revision D
Finding Files
The find Command
Command Format
find
path expression
[
action
]
path
Names the directory where the search begins.
expression
The search criteria is specified by one or more values. If
more than one expression is specified, find treats the
statement as an “and” request and all listed expressions
must be verified as true or present. Many search
expressions will require a value to match and in some
cases metacharacters, or wildcards, may be used for the
arguments.
Search Expressions Definition
-name
filename
Search for all files matching the specified
filename
.
Metacharacters are acceptable but will be interpreted
literally unless placed inside quotes.
-type
filetype
Search for all files matching the specified
filetype
.
-mtime [+|-]
n
Search for all files whose modification time either
matches, is older than (+), or is newer than (–)
n
days.
-atime [+|-]
n
Search for all files whose access time either matches, is
older than (+), or is newer than (–)
n
days.
-inum
n
Search for the files with the inode number of
n
.
-user
loginid
-group
groupid
Search for all files that match the ownership of
loginid
or group of
groupid
.
-perm
mode
Search for all files that match the permission setting of
mode
. (Octal notation only)
-size [+|-]
n
[c] Search for all files whose size either matches, is larger
than (+), or is smaller than (–)
n
. The
n
represents 512
byte blocks, or characters (bytes) if followed by a c.