Beginning Ajax with PHP From Novice to Professional phần 7 pot
Bạn đang xem bản rút gọn của tài liệu. Xem và tải ngay bản đầy đủ của tài liệu tại đây (1.09 MB, 21 trang )
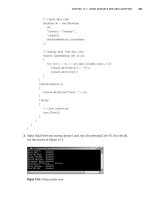
Next is a function called refreshView. This function is used to reload the gallery. It
does this by reloading the main image container, and then reloading the navigation strip.
Since this needs to be done in several places, we made a function out of it (when an
image is uploaded, and when an image is deleted).
The function works by using Ajax to reload the
midpic.php and picnav.php scripts. We
put each of these calls into the JavaScript
setTimeout function, which means the browser
waits the time specified by
refreshrate before loading those scripts.
function refreshView()
{
// Reload the full-size image.
setTimeout ('runajax ("middiv","midpic.php")',refreshrate);
// Reload the navigation.
setTimeout ('runajax ("picdiv","picnav.php")',refreshrate);
}
As shown in sample7_1.php, when the user uploads an image, the uploadimg function
is called. The code for this function, shown following, first updates the status to the user
to indicate that something is occurring. Next, the form is submitted to the hidden
iframe
(i.e., the image is uploaded), and finally, the gallery is refreshed.
function uploadimg(theform)
{
// Update user status message.
updateStatus();
// Now submit the form.
theform.submit();
// And finally update the display.
refreshView();
}
Next, the removeimg function, which is called when a user clicks the Delete link beside
a gallery image, is defined. This function simply uses Ajax to load the
delpic.php script
(which we will look closer at shortly), and then refreshes the gallery.
function removeimg(theimg)
{
runajax("errordiv", "delpic.php?pic=" + theimg);
refreshView();
}
CHAPTER 7 ■ A REAL-WORLD AJAX APPLICATION116
6676CH07.qxd 9/27/06 11:56 AM Page 116
Last is the imageClick function, which is called when an image is clicked from the
gallery navigation. These function calls could be embedded directly into each image’s
onclick event, but instead, a separate function that cleans up the code has been created.
This code simply refreshes the gallery, with the clicked image as the image that is to be
selected.
function imageClick(img)
{
updateStatus();
runajax('middiv', 'midpic.php?curimage=' + img);
runajax('picdiv', 'picnav.php?curimage=' + img);
}
All right, so now that you have a solid wrapper and a means to make server requests
through JavaScript, let’s have a look at some of the server-side processes that are being
triggered. First up is the
midpic.php file, which controls the currently viewed image.
The first aspect to notice is the inclusion of the configuration file (
config.php) and
the
functions.php file. The configuration (viewable in the Listing 7-3) merely allows
you to customize the gallery to your preferences (again, keeping things modular). The
functions.php file (also viewable in the code section) merely houses a few functions for
maintaining the site.
<?php
//midpic.php
require_once ("config.php");
require_once ("functions.php");
Next, the getImages function (which is defined in functions.php) is called. The
getImages function returns an array of all the images in the gallery. If one or more images
exist in the gallery, the image selected by the user will be outputted (specified by the
curimage URL parameter). If an image has not been selected (such as on the initial load),
the first image will instead be chosen. If no images are found, a message will be displayed
to indicate this.
// If our gallery contains images, show either the selected
// image, or if none is selected, then show the first one.
if (count($imgarr) > 0) {
$curimage = $_GET['curimage'];
if (!in_array($curimage, $imgarr))
$curimage = $imgarr[0];
CHAPTER 7 ■ A REAL-WORLD AJAX APPLICATION 117
6676CH07.qxd 9/27/06 11:56 AM Page 117
At this point, you have an image to be displayed, but you want to display it within
the maximum dimensions specified in the configuration file (
config.php). To do this,
you create a resized version of the image by calling the
createthumb function defined in
functions.php. You pass in the maxwidth and maxheight configuration parameters to deter-
mine the size of the new image.
// Create a smaller version in case of huge uploads.
$thumb = createthumb($curimage,
$GLOBALS['maxwidth'],
$GLOBALS['maxheight'],
'_big');
Now that you’ve potentially created a new image, you just need to make sure the path
returned by the
createthumb function refers to a valid file. Assuming it does, you output
the image, as well the link to delete the image with.
if (file_exists($thumb) && is_file($thumb)) {
?>
<div id="imagecontainer">
<img </div>
<div id="imageoptions">
<a href="delpic.php?pic=<?= $curimage ?>"
onclick="removeimg ('<?= $curimage ?>'); return false">
<img src="delete.png" alt="Delete image" />
</a>
</div>
<?php
}
Finally, you close the if statement, checking for one or more images in the gallery.
You then output a message if there are no images in the gallery.
<?php
}
}
else
echo "Gallery is empty.";
?>
OK, let’s move on to the more complicated PHP aspect of the gallery. The picnav.php
file’s goal it to show a visual thumbnail representation of the currently selected image, as
well as the images directly before and after the selected image. The thing that makes this
CHAPTER 7 ■ A REAL-WORLD AJAX APPLICATION118
6676CH07.qxd 9/27/06 11:56 AM Page 118
complicated is that your goal is to always show as many images as possible (subject
to the
maxperrow setting), while trying to keep the selected image in the middle of the
navigation.
First, you include your external files again. Note that this was done using the
require_once function, as there may be instances in which both picnav.php and midpic.php
are loaded at the same time. This prevents functions and variables from being defined
multiple times (which will result in PHP errors).
Additionally, a list of the images in the gallery is retrieved, and the number of images
found is stored in
$numimages for future use. The code also checks that there actually are
images found—otherwise, there will be nothing to display.
<?php
//picnav.php
require_once ("config.php");
require_once ("functions.php");
//Find a total amount of images.
$imgarr = getImages();
$numimages = count($imgarr);
//If there is more than one image.
if ($numimages > 0) {
Just as in midpic.php, you need to determine which image is selected. Additionally,
you want to find out the location in the gallery of the currently selected image. You use
this to determine which images to show before and after the selected image. By using
array_search, you can determine the index in the array of the image (remembering that
array indexes start at 0).
$curimage = $_GET['curimage'];
if (!in_array($curimage, $imgarr))
$curimage = $imgarr[0];
$selectedidx = array_search($curimage, $imgarr);
?>
Since you’re going to use a table to display each image (with a single table cell dis-
playing a single image), you next create your table, and also determine the number of
images to show and which image to show first.
To determine the number of images to show, you first look at the maximum you can
show, which is specified by the
maxperrow setting. Obviously, you can’t show more images
than are available, so you use
min to determine the smaller of the two numbers. This is the
number of images you will show at one time.
CHAPTER 7 ■ A REAL-WORLD AJAX APPLICATION 119
6676CH07.qxd 9/27/06 11:56 AM Page 119
To determine the first image to show, you divide $numtoshow by 2 and subtract this
number from the index of the selected image (
$selectedidx). This effectively “centers” the
selected image. Obviously, though, if the selected image is the first image in the gallery,
then there can be no images to the left of it—so you use
max to make sure the number is
greater that or equal to 0.
The final two lines check for a special case, where one of the last images in the gallery
is selected. If the last image were centered in the display, then there would be nothing to
display to its right (unless you repeated from the first image, which you are not doing in
this gallery). So, to handle this, you check whether centering the image will result in there
not being enough images after it—if there aren’t, the value of
$firstidx is adjusted so that
this won’t occur.
<table id="navtable">
<tr>
<?php
$numtoshow = min($numimages, $GLOBALS['maxperrow']);
$firstidx = max(0, $selectedidx - floor($numtoshow / 2));
if ($firstidx + $numtoshow > $numimages)
$firstidx = $numimages - $numtoshow;
Now, you must loop over all the images to be displayed. You are going to loop
$numtoshow times, starting with the $firstidx image. Additionally, since you want to high-
light the selected image, you must know when the loop is processing the selected image.
This allows you to change the CSS class applied for this one image.
for ($i = $firstidx; $i < $numtoshow + $firstidx; $i++) {
$file = $imgarr[$i];
$selected = $selectedidx == $i;
As you did when displaying the main image, you must now create a resized version of
the current image to display. In this case, you are displaying a small thumbnail, so you
pass in the
maxwidththumb and maxheightthumb settings. Additionally, you again make sure
that a valid file was returned, skipping the current loop if there is no thumbnail (using
continue).
$thumb = createthumb($file,
$GLOBALS['maxwidththumb'],
$GLOBALS['maxheightthumb'],
'_th');
CHAPTER 7 ■ A REAL-WORLD AJAX APPLICATION120
6676CH07.qxd 9/27/06 11:56 AM Page 120
if (!file_exists($thumb) || !is_file($thumb))
continue;
?>
Finally, you output the image, using the selected CSS class if the current image is the
selected image. Additionally, you apply the
onclick event to the image so that the gallery
can be updated using Ajax when the user clicks the image.
<td<?php if ($selected) { ?> class="selected"<?php } ?>>
<a href="sample7_1.php?curimage=<?= $file ?>"
onclick="imageClick('<?= $file ?>'); return false">
<img </a>
</td>
<?php
}
?>
</tr>
</table>
<?php
}
?>
Finally, let’s have a look at how to remove an image. The script to do so is located
within the
delpic.php file. The functionality involved is really quite simple. You check
whether the picture URL passed to it by the Ajax request is a valid image, and then
attempt to remove it. Finally, you output a status message to let the user know whether
the image removal was successful. This status message will appear in the
errordiv con-
tainer created in
sample7_1.php.
<?php
//delpic.php
require_once ("config.php");
require_once ("functions.php");
$imgarr = getImages();
$pic = $_GET['pic'];
$succ = false;
if (in_array($pic, $imgarr)) {
$path = $GLOBALS['imagesfolder'] . '/' . $pic;
CHAPTER 7 ■ A REAL-WORLD AJAX APPLICATION 121
6676CH07.qxd 9/27/06 11:56 AM Page 121
$succ = unlink($path);
}
?>
<div class="status">
<?php if ($succ) { ?>
<div>
Image successfully removed.
</div>
<?php } else { ?>
<div class="status-err">
Image could not be removed.
</div>
<?php } ?>
</div>
Summary
Well, there you have it—a fully functional online application powered on the client side
by Ajax technologies, and on the server side by PHP. The result is a photo gallery that is
different than the run-of-the-mill web gallery application. It runs smoothly and effi-
ciently, and can be easily implemented into any existing web application. The idea that a
web application can be fluid and dynamic without having to reload the screen whenever
you click a link is quite powerful and, in my opinion, rather fun to create and use.
CHAPTER 7 ■ A REAL-WORLD AJAX APPLICATION122
6676CH07.qxd 9/27/06 11:56 AM Page 122
Ergonomic Display
For years, web developers have been stuck with the notion of what a web page can and
cannot do. This mindset is based around technical limitations rather than lack of imagi-
nation; but over time this limitation has made many web developers become set in their
ways.
Over time, technical limitations began to recede and be overcome by such advances
in technology as scripting languages, style sheets, client-side languages (JavaScript,
ActiveX), and, at long last, Ajax. Ajax allows web developers to truly begin to once again
think outside of the box. In the last few months, I have seen more innovative applications
created than I have since the inception of the Web.
However, while we now have a new way of doing business (so to speak) on the Web,
a few problems have begun to arise. First off, users are extremely used to the old way of
doing things. Action happening on a web page without a page refresh is unheard of and
rather unexpected. Users have gotten used to such staples as the Back button, which can
no longer be used in the same way when a page uses the
XMLHttpRequest object.
It is therefore important to build Ajax applications with the notion that users are not
up to speed on the advances that have been made. By integrating ergonomic features
such as navigation, help buttons, and loading images, we can make it simpler and more
intuitive for the end user to move into the richer Internet applications that we can now
create.
Sadly, not all developers have truly considered the ramifications that rich Internet
applications can have. I have seen web sites built entirely using Ajax functionality that
work far worse than they would have if they had been coded without. Throughout this
chapter, you’ll have a look not so much at how to use Ajax, but, more importantly, when it
is appropriate to use it, how it should be implemented in such cases, and what forms of
existing coding standards you can use to make the job easier.
123
CHAPTER 8
6676CH08.qxd 9/27/06 11:57 AM Page 123
When to Use Ajax
Ajax is not the most efficient or effective technique to use with all styles of web sites. In
my opinion, this is largely because a large number of web sites were built before there
was any idea that the page would do anything but refresh when you clicked a link. There-
fore, there are a large number of web pages that maintain link structures on the bottom
or side, and read from the top down on every new page. This sort of web site does not
work well with Ajax-based navigation, as you can see in Figure 8-1 (although it may work
fine with other Ajax-type applications, such as tool tips or auto-complete features).
Figure 8-1. What sorts of links work well with Ajax-based navigation, and what sorts
do not?
There are several reasons why this does not work all that efficiently. First off, when
you click an Ajax-based link, people generally load the content from the request into the
content portion of a web site. Now, if you have a generic two-column layout, with the
content in the left column and navigation in the right column (and perhaps in the footer
also), a problem potentially arises. For instance, suppose you’re viewing an article that’s
about three screens long. If you click a link to the contact page in the footer (near the bot-
tom of the page), your viewing position on the page will still be where the footer link was
clicked. However, when the content area (at the top) refreshes to the contact page, you
won’t see any changes—potentially leaving you wondering what happened.
CHAPTER 8 ■ ERGONOMIC DISPLAY124
6676CH08.qxd 9/27/06 11:57 AM Page 124
This can be problematic for all sorts of linking structures, such as comments in a
blog, return buttons, and new page links within articles. It can be a strange affair to have
content load in near the top of a page when you just clicked a link near the bottom.
Back Button Issues
The other, more deeply rooted, reason that sites using Ajax-based navigation do not work
well is because of user’s dependence on the Back button. Most people, when reading an
article, for instance, know that they are a mere button press away from the last page they
viewed. Despite the fact that most developers put redundant linking into their articles to
facilitate link-based navigation, people have become truly reliant on the Back button.
Most modern mouses and keyboards even have the functionality built right in.
This causes quite a problem because, no matter how much redundant and obvious
navigation you put into place, people still find themselves using the Back button, which
can be a problem. Picture, for example, a complicated mortgage application form that
has four or five pages to fill out. If the form is controlled by Ajax, and a user is on the third
page when he decides to hit the Back button, he could potentially lose all of the informa-
tion he worked so hard to input.
Now, I’m not saying that it’s impossible to implement Ajax-based functionality on
web sites of this nature; I’m merely suggesting that web developers need to ease the user
into it while working around potential pitfalls. Let’s address the whole Ajax navigation
issue first. I find that links located near the top of the page can work well with Ajax func-
tionality. Because the links are at or near the top, when they are clicked, the change in
content will be obvious and can be read and addressed efficiently by the user. There is
nothing wrong with using redundant navigation on the side and in the footer as well, but
it might be wise to make these redundant links of the page-refreshing nature.
Next, when dealing with forms or pages with many items to submit, there are ways
to help. First off, when using multipage forms, it is a very good idea to save information
with every page. You can hold the user-submitted data in a session object or a temporary
database table. This way, should users find themselves accidentally hitting the Back but-
ton, all their work will not be for naught. Additionally, you should also provide Back and
Forward links for users to move between each page in the form.
Let’s have a look at how to use Ajax to its fullest and when it works best, beginning
with navigation.
Ajax Navigation
Let’s consider a web page that benefits from some Ajax navigation but is also set up to
handle some of the issues I have identified. This particular example uses a typical two-
column layout. Figure 8-2 depicts the site with the top navigation and side navigation
being Ajax-enabled (which works well in this case due to the way the site is laid out),
CHAPTER 8 ■ ERGONOMIC DISPLAY 125
6676CH08.qxd 9/27/06 11:57 AM Page 125
while the bottom navigation is left to ordinary means of linking (because Ajax would not
work very well in this case).
Figure 8-2. Your everyday, run-of-the-mill, two-column web page layout
Now, in this case, because both the top and side navigation are high enough up on
the page, you can enable Ajax for them both and not experience much difficulty. In this
example, even the footer navigation would be safe if the content on each page remains
roughly the same size. However, as you may know, web pages have a habit of changing
size depending on the amount of content in a particular page. Have a look at Figure 8-3
and what can happen if you try to use Ajax-based navigation in the footer on pages of a
larger size.
CHAPTER 8 ■ ERGONOMIC DISPLAY126
6676CH08.qxd 9/27/06 11:57 AM Page 126
Figure 8-3. Not a very useful or appealing view. Ajax in footers may not be the best of ideas.
As you can see, the page simply loads based on where the link was clicked. This is not
a very desirable effect and can cause confusion. In order to do this page properly, it is
imperative to have the bottom links (in the footer) refresh the page and start you back at
the top by simply using normal navigation, rather than Ajax-based navigation.
Hiding and Showing
One of the more powerful effects of using Ajax for ergonomic purposes involves the
principle of “Now you see it, now you don’t.” Enabling onscreen objects to appear and
disappear at the click of a link is a powerful tool in that you can show exactly what you
want without having to move to a different page.
A prime example of this revolves around the notion of drop-down menus. By storing
navigation within hidden menus, you can save space on your web page and allow content
to appear only when necessary. This sort of functionality is once again quite overused, and
not suitable to every position within a web page. As with the aforementioned Ajax navi-
gation, it is important to use common sense when calling hidden objects. For example, in
instances like the two-column layout shown previously, menus are really only useful at
the top of the page. Putting them at the bottom will only frustrate your user. Figure 8-4
shows a way to display a menu that will help with navigation.
CHAPTER 8 ■ ERGONOMIC DISPLAY 127
6676CH08.qxd 9/27/06 11:57 AM Page 127
Figure 8-4. Hiding and showing elements of a web page is a great, ergonomic way to make
use of Ajax-based functionality.
Now, it’s pretty obvious that ergonomics plays a major role when it comes to creating
layouts that the user is both familiar with and can use with little effort when using client-
side Ajax. However, it is when you combine Ajax with a server-side language such as PHP
that you can truly start to make things amazing for your audience.
Introduction to PEAR
As you might imagine, there are plenty of open source libraries available to the PHP lan-
guage. In fact, one might say that PHP’s success as a language is due to the multitude of
available resources and the amazing, helpful online community. Because of the large
amount of open source development libraries, implementing clean, effective code into
your Ajax-based applications is a mere Google search away. However, like anything, some
code libraries/repositories are better than others.
One of the more robust extension packages that has been around for quite a while is
that of the PEAR (PHP Extension and Application Repository) package. PEAR is more
CHAPTER 8 ■ ERGONOMIC DISPLAY128
6676CH08.qxd 9/27/06 11:57 AM Page 128
than just a PHP framework—it is a whole model for proper coding practices. By using the
PEAR framework, you give yourself a leg up by providing extensions that will help to
create clean, customizable layouts for your Ajax applications.
How you get started with PEAR depends on your version of PHP. If you are using
PHP 4.3.1 or above, the PEAR extensions are available to you straight out of the box.
Users of PHP versions prior to 4.3.1 can download the entire set from the PEAR web site,
at
.
The basic installation of newer versions of PHP comes with a fairly large assortment
of PEAR modules ready to go, but you can still visit the PEAR web site to download
whichever extensions you deem necessary.
Making use of the PEAR code base is quite easy. The extensions in PEAR require the
generic
PEAR.php file that is included into the extension-based code. From there you
merely have to include the extension that you require, and you have full access to the
functionality contained within. While there are plenty of ways to make use of PEAR with
Ajax to create highly functional and ergonomic web-based applications, let’s start with a
fairly simple one:
HTML_Table. If you don’t have the HTML_Table module, you can get it from
/>The way to install the PEAR modules depends on the platform you are using. For
instance, in Linux (once you have PEAR installed on your server), the package can be
installed from your command line by using the following command:
pear install html_table
For Windows users, the process is largely the same and can be done from your com-
mand line. A simple Google search will allow you to pinpoint an easy installation method
for your platform of choice.
In order to use
HTML_Table, you’re also required to have HTML_Common, so be sure to
install this package as well, using the same process as detailed previously.
HTML_Table
The HTML_Table PEAR module is a code set designed to allow you to create and modify
tables using PHP code. Basically, you set up the cells and rows you want, and then use the
PHP class to output the table. By using this module, you will get a clean, easily main-
tained table every time.
In order to show off what’s possible when you combine the efficiency and maintain-
ability of
HTML_Table with Ajax functionality, I’ve created something of a number
calculator. While it’s not exactly Microsoft Excel, this example does an adequate job of
showing how to create and use the
HTML_Table module, and then use it to perform Ajax-
based functionality that is efficient, ergonomic, and easy for the user to make use of. This
example is shown in Figures 8-5 and 8-6.
CHAPTER 8 ■ ERGONOMIC DISPLAY 129
6676CH08.qxd 9/27/06 11:57 AM Page 129
Figure 8-5. Simply enter your values like you would in a spreadsheet application.
Figure 8-6. Our HTML_Table application automatically adds up the values.
The
HTML_Table application, as shown in Figures 8-5 and 8-6, works by creating a set
of fields that the user can make use of to calculate a sum of the rows. You have seen what
it looks like—now let’s have a look at how it works. The first aspect of the code that you
need to look at is the
sample8_2.php file. It creates an instance of an HTML_Table object that
you will use as the framework for your application. Consider the following block of code:
<!DOCTYPE html PUBLIC "-//W3C//DTD XHTML 1.0 Transitional//EN"
" /><html xmlns=" /><head>
<title>Sample 8_2</title>
<meta http-equiv="Content-Type" content="text/html; charset=iso-8859-1" />
<link rel="stylesheet" type="text/css" href="style.css" />
<script type="text/javascript" src="xmlhttp.js"></script>
<script type="text/javascript" src="functions.js"></script>
</head>
<body>
<?php
// Set the size of the table
$maxrows = 3;
$maxcols = 4;
// Create the table and set its properties
require_once ("HTML/Table.php");
$table = new HTML_Table(array('cellpadding' => 0,
CHAPTER 8 ■ ERGONOMIC DISPLAY130
6676CH08.qxd 9/27/06 11:57 AM Page 130
'cellspacing' => 0,
'border' => 1,
'class' => 'tablehead'));
$table->setCaption ("HTML_Table use with AJAX");
//Create our data set of empty rows.
$counter = 0;
for ($i = 0; $i < $maxrows; $i++){
for ($j = 0; $j < $maxcols; $j++){
$counter++;
$event = sprintf('createtext(this, %d, %d, %d, %d)',
$j,
$counter,
$maxcols,
$maxrows);
$attrs = array('onclick' => $event,
'width' => intval(100 / $maxcols) . '%',
'height' => 20,
'align' => 'center');
$table->setCellAttributes($i, $j, $attrs);
}
}
//Create a "totals" separator.
$totdata = array ("Totals");
$table->addRow($totdata, array('colspan' => $maxcols,
'align' => 'center',
'bgcolor' => '#c0c0c0',
'color' => '#fff'));
//Then create the totals boxes.
$totcounter = 0;
for ($j = 0; $j < $maxcols; $j++){
$attrs = array('id' => 'tot' . $totcounter,
'height' => '20',
'width' => intval(100 / $maxcols) . '%',
'bgcolor' => '#eee',
'align' => 'center');
CHAPTER 8 ■ ERGONOMIC DISPLAY 131
6676CH08.qxd 9/27/06 11:57 AM Page 131
$table->setCellAttributes($maxcols, $j, $attrs);
$totcounter++;
}
echo $table->toHTML();
?>
</body>
</html>
As you can see, by making use of the ability to set attributes within each individual
cell of the table, you can create an Ajax application using a PHP module from PEAR.
While that certainly seems like a mouthful, it is not necessarily all that complicated. The
code starts by initializing a new
HTML_Table object. You then build upon it from there by
supplying it a caption and gradually building the rows you want.
There are two crucial portions of this script, however. The first to note is when you
are creating your first set of empty cells. Notice that, within the first call to the
setCell➥
Attributes function, you assign the onclick value to call the createtext function. What
this will do is assign a value to each cell that tells it to call the
createtext function when-
ever the cell is clicked. The next crucial element of this script happens when you create
the Totals boxes. You will notice that the
id value is assigned to a specific number. This
will be crucial when loading in the calculated totals from your Ajax-based scripts.
The last piece of functionality that occurs is the call to the
toHTML method, which
converts this block of PHP code into an HTML table. At this point, your framework has
been set. Let’s look at your
functions.js file to see how the Ajax-based functionality is
achieved.
The first function you want to have a look at is the
createtext function. This function
takes in as arguments the location to create the text box, the column this box is part of,
and the unique number of the box itself. Basically, when a user clicks on a cell in your
table, this function is called. If the box has not yet been created, you will dynamically
create the box within the cell. You use CSS to mask the box (no border, same width and
height) so that the user does not know that a box has been created.
Once the box has been created, you assign focus to it and allow the user to enter
some values. When the user finishes entering the values and clicks off of the box, the
loadtotals function is called:
//functions.js
function createtext (where, col, counter, numCols, numRows)
{
var id = 'box' + counter;
if (where.innerHTML == '' || where.innerHTML == ' ') {
var theEvent = 'loadTotals(' + col + ', ' + numCols + ', ' + numRows + ')';
CHAPTER 8 ■ ERGONOMIC DISPLAY132
6676CH08.qxd 9/27/06 11:57 AM Page 132
where.innerHTML = '<input id="' + id + '" type="text" class="noshow"'
+ ' onblur="' + theEvent + '" />';
}
document.getElementById(id).focus();
}
The loadtotals function is not so much complicated as it is a validation nightmare.
Because the user could potentially enter any form of data, and you only want
integer val-
ues (in this case), you must be very careful how you attempt this. Another hurdle to the
execution of this script can arise if the function tries to perform the addition before all of
the relevant boxes are created. As you can see, there is a bit of validation to do.
In order to calculate the total of the column, you first run a loop through each col-
umn by going through the number of rows in a column. Now, before you can add up all
of the values, a check must be done to ensure that the three values to be added are of an
Integer type. You can use the
isNaN function to determine if a non-Integer has slipped
through the cracks, and if so, default said value to zero again. It is also imperative, when
calculating data that will be at first interpreted as a String data type, to change the String
data type into a numerical data type, such as Integer. This can be done in JavaScript
using the
parseInt function, as shown in the following code example. At this point, you
simply need to add up your Integer values and submit the sum to the column total cell’s
innerHTML property, thereby finishing the calculation.
function loadTotals(col, numCols, numRows)
{
var total = 0;
var cellId = 0;
for (var row = 0; row < numRows; row++) {
cellId = row * numCols + col + 1;
var id = "box" + cellId;
var elt = document.getElementById(id);
if (elt) {
val = parseInt(elt.value);
if (!isNaN(val))
total += val;
}
}
document.getElementById('tot' + col).innerHTML = total;
}
CHAPTER 8 ■ ERGONOMIC DISPLAY 133
6676CH08.qxd 9/27/06 11:57 AM Page 133
Summary
This chapter has shown how to sidestep some crippling issues that Ajax can introduce,
and has brought to light the true benefit of Ajax. By setting up Ajax functionality properly,
you can save your users a lot of grief and do what was intended by this technology in the
first place: provide a solid, seamless, powerful web site–browsing experience. By combin-
ing a solid Ajax framework with simple, clean, easily maintainable server-side PHP, you
have yourself a recipe for a successful end product.
Now that you’ve gone through the ins and outs of Ajax and displaying it properly to
the web page, it’s time to move on to a slightly more advanced topic: web services. Now, I
know this was the big buzz word not too long ago (right before Ajax, seemingly), but that
doesn’t mean that the technology is now old and stale. Quite the opposite in fact, seeing
as you can combine the two to create something truly special. Stay tuned, as Chapter 9
moves into some very cool Ajax- and PHP-based functionality.
CHAPTER 8 ■ ERGONOMIC DISPLAY134
6676CH08.qxd 9/27/06 11:57 AM Page 134
Web Services
Before Ajax became all the rage, web services was the talk of the town. How could it not
be, really? Web services is a very exciting concept, both for those wishing to allow use of
their custom code and information sets, and those eager to make use of such functionality.
Basically, web services provide an interface for developers to perform certain operations
on a computer external to the script calling the function. Site owners who wish to provide
external access to information in their databases can look to web services to take care of
business.
Web services are designed so that computers running different software and on dif-
ferent networks can easily communicate with each other in a cross-platform environ-
ment (typically XML). Web services have already become crucial tools for major content
providers, such as Google, PayPal, Amazon, and eBay. Google allows access to its search
engine, its mapping system (more on that in Chapter 10), and other peripheral services;
PayPal allows for payment processing; Amazon allows you to browse its catalog; and eBay
allows for other sites to list items for auction in real time.
Why is this such a grand concept? Well, the answer is simple. Those who have
attempted to compile an up-to-date listing of available movie releases, or tried to con-
struct a product catalog filled with, for instance, the latest DVD releases (including
up-to-date pricing), will know that a serious time investment is required. Web services
provide those who have taken the time to accumulate data or code difficult applications
a means to share (and sell!) their hard-earned virtual product.
Figure 9-1 shows an example of web services in action. The top image shows the
product as it is listed on Amazon. This includes the title, an image, a list of people associ-
ated, and its pricing and availability. Using web services, this data can be accessed
directly, allowing developers to display each of these properties as they please. In the sec-
ond part of Figure 9-1, the developer has also included their own data along with the
Amazon data (namely the “Copies for Trade” and “Requested Copies” data, which is not
provided by Amazon.
135
CHAPTER 9
6676CH09.qxd 9/27/06 11:58 AM Page 135
Figure 9-1. Companies like Amazon offer web services to their clientele. This content can
then be harnessed and used on your own custom web site, as has been done in this case.
Introduction to SOAP Web Services
All right, so this web services stuff sounds pretty cool, but how does it work? Well, inter-
estingly enough, it works in a similar fashion to your typical client/server relationship.
You’re used to using a web browser to interact with a server in order to retrieve requested
web pages. Web services works in quite a similar way; the only thing that changes is what
constitutes a client and a server.
When a developer creates a web service, what he is actually doing is creating a set of
functions that can be called remotely. The client code then connects to this URL and
invokes one or more methods. Additionally, the client code can also get a list of the
CHAPTER 9 ■ WEB SERVICES136
6676CH09.qxd 9/27/06 11:58 AM Page 136