Inspection Evaluation And Repair Of Steel structures Part 7 docx
Bạn đang xem bản rút gọn của tài liệu. Xem và tải ngay bản đầy đủ của tài liệu tại đây (304.69 KB, 10 trang )
EM 1110-2-6054
1 Dec 01
6-4
Figure 6-3. Required dimensions of a discontinuity (after British Standards Institution 1980) where t =
component thickness, l = effective crack length, (2a), b = effective dimension of crack in the through-
thickness direction, and P = effective dimension of the distance between the edge of component and edge of
crack in the through-thickness direction
Figure 6-4. Resolution of a discontinuity (after British Standards
Institution 1980)
(b) Check interaction with neighboring discontinuities to obtain the idealized discontinuity dimensions;
idealizations for interaction of discontinuities are shown in Figures 6-5 and 6-6.
(c) Check interaction with surfaces by recategorization as shown in Figure 6-7 for surface or embedded
discontinuities (idealized or actual).
(d) Determine final idealized effective dimensions for fracture analysis.
(3) Determine the stress level by an appropriate structural analysis, assuming no crack exists. Structural
loading can be divided into primary stress σ
p
and secondary stress σ
s
. The primary stress consists of membrane
stress σ
m
and bending stress σ
b
, due to imposed loading. Examples of secondary stresses include stress
increase due to stress concentration imposed by geometry of the detail under consideration, thermal stress, and
residual stress. For discontinuities at non-heat-treated welds, the residual tensile stress should be taken as the
yield stress. An estimate of the residual stress should be used for post-heat-treated weldments. The applied
stress is the sum of primary σ
p
and secondary σ
s
stresses. If the applied stress is greater than the yield stress,
EPFM must be employed. If applied stress is less than the yield stress and the plane-strain factor β
Ic
≤ 0.4
(Equation 2-2), LEFM should be used based on K
Ic
. When the applied stress is less than the yield stress and β
Ic
> 0.4, K
c
(a function of plate thickness) should be used instead of K
Ic
, if available. Otherwise, EPFM based on
CTOD analysis must be employed.
Direction of
Principal stress
EM 1110-2-6054
1 Dec 01
6-5
Figure 6-5. Interaction of coplanar discontinuities (Extracts from
British Standards Institution 1980. Complete copies of the standard
can be obtained by post from BSI Publications, Linford Wood, Milton
Keynes, MK14 6LE)
(4) Determine material properties including yield strength σ
ys
, modulus of elasticity E, K
Ic
(based on the
level of applied stress and the value of β
Ic
), K
c
, or CTOD. K
Ic
may be estimated from Charpy V-Notch (CVN)
test values by the transition method (paragraph 5-8) if direct K
Ic
test data are not available.
(5) Perform fracture assessment to determine the critical discontinuity size.
(6) If the discontinuity is noncritical, determine the remaining life using a fatigue analysis as described in
paragraphs 6-7 and 6-8.
These steps are further discussed in the following paragraphs.
EM 1110-2-6054
1 Dec 01
6-6
Figure 6-6. Interaction of noncoplanar discontinuities (Extracts from
British Standards Institution 1980. Complete copies of the standard
can be obtained by post from BSI Publications, Linford Wood, Milton
Keynes, MK14 6LE)
Figure 6-7. Interaction of discontinuities with surfaces (Extracts from
British Standards Institution 1980. Complete copies of the standard
can be obtained by post from BSI Publications, Linford Wood, Milton
Keynes, MK14 6LE)
EM 1110-2-6054
1 Dec 01
6-7
6-4. Linear-Elastic Fracture Mechanics
a. Fundamental concepts of LEFM are described by Barsom and Rolfe (1987). LEFM is valid only
under plane-strain conditions, when β
Ic
≤ 0.4. The basic principle of LEFM is that incipient crack growth will
occur when the stress-intensity factor K
I
(the driving force) equals or exceeds the critical stress-intensity factor
K
Ic
(or K
Id
for dynamic loading) (the resistance). For nonplane-strain cases, an initial evaluation based on an
approximate analysis using LEFM with K
c
taken as the resistance could be carried out.
b. K
I
characterizes the stress field in front of the crack and is related to the nominal stress σ and crack
dimension a for a given load rate and temperature by
aC =
K
I
σ
(6-1)
where C is the dimensionless correction factor for a given geometry and loading type. If C is known, K
I
can be
computed for any combination of σ and a. Stress-intensity factors for various types of geometries can be
calculated using the information included in Figures 6-8 through 6-16 (Barsom and Rolfe 1987). Barsom and
Rolfe and Tada, Paris, and Irwin (1985) contain compilations of solutions for a wide variety of configurations.
c. After the stress-intensity factor is determined by Equation 6-1, it should be compared to the critical
stress-intensity factor K
Ic
(or K
Id
for dynamic loading, or K
c
for approximated nonplane-strain cases). A factor
of safety (FS) = 2.0 applied to crack length is considered appropriate to prevent fracture. Therefore, the crack
is considered to be acceptable if K
I
< K
ic
/
. 2
d. To determine the allowable maximum crack size or nominal stress for a given K
Ic
(or K
Id
or K
c
),
substitute K
Ic
for K
I
and solve for a or σ using Equation 6-1. The critical discontinuity size a
cr
a structural
member can tolerate at a given nominal stress σ and K
Ic
with a factor of safety applied to the crack size is given
by Equation 6-2:
σ
C
K
FS
1
=
a
Ic
2
cr
(6-2)
e. In determining the nominal stress when stress gradients are present, an approximate method is to
linearize the stress distribution, and divide it into membrane stress σ
m
and bending stress σ
b
. The stress-
intensity factor for each component of stress can be calculated separately and then added together. The
total applied stress (σ
p
and σ
s
) can be linearized and resolved into σ
m
and σ
b
as shown in Figure 6-17.
6-5. Elastic-Plastic Fracture Assessment
Rearranging Equation 2-2, the upper limit of plane-strain behavior may be determined as
2.5
t
=
K
ys
Ic
σ
(6-3)
When this upper limit is exceeded, extensive plastic deformation occurs at the crack tip (crack tip blunting) and
a nonlinear EPFM model must be used for analysis. (LEFM analysis using K
c
may be used if the applied stress
is less than yield stress.) Crack growth criteria for nonlinear fractures can be modeled by an R-curve,
J-integral, or CTOD analysis (Barsom and Rolfe 1987). The CTOD method is the recommended method of
EPFM analysis for evaluating hydraulic steel structures. The recommended procedure for cases where the
applied stress (σ
p
+ σ
s
) is greater than the yield stress is as follows (British Standards Institution 1980).
EM 1110-2-6054
1 Dec 01
6-8
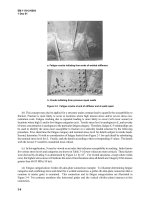
Figure 6-8. Through-thickness crack (Barsom and
Rolfe 1987, p 39. Reprinted by permission of
Prentice-Hall, Inc., Englewood Cliffs, NJ.)
a. Determine the effective discontinuity parameter ā. This is the equivalent through-thickness dimension that
would yield the same stress intensity as the actual discontinuities under the same load.
(1) For through-thickness discontinuities, ā = l/2, where l is the measured crack length.
(2) For surface discontinuities, ā is determined by Figure 6-18.
(3) For embedded discontinuities, ā is determined by Figure 6-19.
b. Determine allowable discontinuity parameter ā
m
that is calculated by
crit
m
y
= C
a
δ
ε
(6-4)
Figure 6-9. Double-edge crack (Barsom and Rolfe
1987, p 40. Reprinted by permission of Prentice-
Hall, Inc., Englewood Cliffs, NJ.)
EM 1110-2-6054
1 Dec 01
6-9
Figure 6-10. Single-edge crack (Barsom and Rolfe
1987, p 40. Reprinted by permission of Prentice-Hall,
Inc., Englewood Cliffs, NJ.)
where
C = values determined by Figure 6-20
δ
crit
= critical CTOD (paragraph 5-8c)
ε
y
= yield strain of the material
In determination of C, if the sum of primary and secondary stresses, excluding residual stress, is less than 2σ
ys
,
the total stress ratio (σ
p
+ σ
s
)/σ
ys
(including residual stress) is used as the abscissa in Figure 6-20. If this sum
exceeds 2σ
ys
, an elastic-plastic stress analysis should be carried out to determine the maximum equivalent
plastic strain that would occur in the region containing the discontinuity if the discontinuity were not present.
The value of C may then be determined using the strain ratio ε/ε
y
as the abscissa in Figure 6-20.
Figure 6-11. Cracks growing from round holes
(Barsom and Rolfe 1987, p 42. Reprinted by
permission of Prentice-Hall, Inc., Englewood Cliffs,
NJ.)
EM 1110-2-6054
1 Dec 01
6-10
Figure 6-12. Cracks growing from elliptical holes (Barsom
and Rolfe 1987, p 43. Reprinted by permission of Prentice-
Hall, Inc., Englewood Cliffs, NJ) where K
T
= theoretical stress
concentration factor, a
N
= half of the long dimension of the
ellipse, b = half of the short dimension of the ellipse, and
f = radius at the narrow end of the ellipse
Figure 6-13. Edge-notched beam in bending (Barsom and Rolfe 1987, p 45. Reprinted by
permission of Prentice-Hall, Inc., Englewood Cliffs, NJ) where M = bending moment per unit
thickness, B = beam width, W = beam depth, and g = function that describes effect of a/w on K
I
EM 1110-2-6054
1 Dec 01
6-11
Figure 6-14. Embedded elliptical or circular crack (Barsom and Rolfe 1987, p 47. Reprinted by permission of
Prentice-Hall, Inc., Englewood Cliffs, NJ.)
EM 1110-2-6054
1 Dec 01
6-12
Figure 6-15. Surface crack (Barsom and Rolfe 1987, p 48. Reprinted by permission of Prentice-Hall, Inc.,
Englewood Cliffs, NJ.)
Figure 6-16. Cracks with wedge forces (Barsom and Rolfe 1987, p 52. Reprinted by permission of Prentice-
Hall, Inc., Englewood Cliffs, NJ.)
EM 1110-2-6054
1 Dec 01
6-13
Figure 6-17. Linearization of stresses (Extracts from British Standards Institution 1980. Complete copies of
the standard can be obtained by post from BSI Publications, Linford Wood, Milton Keynes, MK14 6LE)
c. If the effective discontinuity parameter ā is smaller than the allowable discontinuity parameter ā
m
, then
the discontinuity is acceptable. Using the procedure described in b above results in a factor of safety equal to
approximately 2.0 in the determination of ā
m
; Figure 6-20 was developed as a design curve. Therefore, the
calculated critical crack size would be equal to 2.0 ā
m
(British Standards Institution 1980).
6-6. Fatigue Analysis
a. For most lock gates and spillway gates that have vibration problems, fatigue loading is a real concern
and a fatigue evaluation may be required. Fatigue analysis is used to predict when the cyclic loading will cause
a crack to propagate to critical size resulting in fracture. A fatigue analysis can also provide crack growth rates
that are useful in determining inspection intervals.
b. The total fatigue life is the sum of the fatigue crack-initiation life and the fatigue crack-propagation life
to a critical size (Barsom and Rolfe 1987).
N
T
= N
i
+ N
p
(6-5)
where
N
T
= total fatigue life
N
I
= initiation life
N
p
= propagation life


