Apress pro Silverlight 3 in C# phần 4 pdf
Bạn đang xem bản rút gọn của tài liệu. Xem và tải ngay bản đầy đủ của tài liệu tại đây (1.67 MB, 70 trang )
CHAPTER 5 ■ ELEMENTS
172
}
}
You then decide to build an AutoCompleteBox that attempts to match the user’s text
with a Product object. In preparation for this step, you fill the AutoComplexBox.ItemsSource
collection with product objects:
Product[] products = new []{
new Product("Peanut Butter Applicator", "C_PBA-01"),
new Product("Pelvic Strengthener", "C_PVS-309"), };
acbProduct.ItemsSource = products;
If you take no further steps, the AutoCompleteBox will use its standard behavior. As
the user types, it will call ToString() on each Product object. It will then use that text to perform
its suggestion filtering. Because the Product class overrides the ToString() method to return the
product name, the AutoCompleteBox will attempt to match the user’s text with a product
name, which is perfectly reasonable.
However, if you perform custom filtering you can get a bit more sophisticated. For
example, you can check if the user’s text matches the ProductName property or the
ProductCode property and deem the Product object as a match either way. Here’s an example
of the custom filtering logic that does the trick:
public bool ProductItemFilter(string text, object item)
{
Product product = (Product)item;
// Call it a match if the typed-in text appears in the product code
// or at the beginning of the product name.
return ((product.ProductName.StartsWith(text)) ||
(product.ProductCode.Contains(text)));
}
You simply need to connect this method to your AutoComplexBox when it’s first
initialized:
acbProduct.ItemFilter = ProductItemFilter;
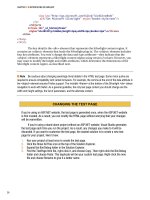
Now if the user types the text PBA, it matches the product code C_PBA-01 and see the
matching item Peanut Butter Applicator in the list of suggestions, as shown in Figure 5-15.
CHAPTER 5 ■ ELEMENTS
173
Figure 5-15. A custom search that matches product codes
Dynamic Item Lists
So far, you’ve used the ItemsSource property to fill the AutoCompleteBox with a collection of
suggestions. For this to work, you must have the complete list and it must be a manageable size.
If you need to pull the information from somewhere else or the list is large enough that it isn’t
practical to load the whole thing at once, you’ll need to take a different approach to filling the
AutoCompleteBox. Instead of setting the ItemsSource property when the page is first created,
you’ll need to set it in real time, as the user types.
To do so, set the FilterMode property to None, and handle the Populating event. The
Populating event fires whenever the AutoCompleteBox is ready to search for results. By default,
this happens every time the user presses a key and changes the current text entry. You can
make the AutoCompleteBox somewhat more relaxed using the MinimumPrefixLength and
MinimumPopupDelay properties that are discussed at the end of this section.
<input:AutoCompleteBox x:Name="acbProducts" FilterMode="None"
Populating="acbProducts_Populating" ></input:AutoCompleteBox>
When the Populating event fires, you have two choices: set the ItemsSource property
immediately or launch an asynchronous process to do it. Setting the ItemsSource property
immediately makes sense if you have the list of suggestions on hand or you can generate them
quickly. The list of suggestions will then appear in the drop-down list right away.
But in many situations, you’ll need a potentially time-consuming step to get the list of
suggestions, such as performing a series of calculations or querying a web service. In this
situation, you need to launch an asynchronous process. Although you can accomplish this with
the multithreading support that’s described in Chapter 19, you won’t necessarily need to. Some
Silverlight features have built-in asynchronous support. This is the case with Silverlight’s
implementation of web services, which is hard-wired to use asynchronous calls exclusively.
When using an asynchronous operation, you need to explicitly cancel the normal
processing in the Populating event handler, by setting PopulatingEventArgs.Cancel to true. You
can then launch the asynchronous operation. The following example gets the suggestion list
asynchronously from a web service. (You’ll learn much more about coding and consuming web
services in Chapter 15. For now, you can review the example code and the downloadable
project with this chapter.)
private void acbProduct_Populating(object sender, PopulatingEventArgs e)
{
CHAPTER 5 ■ ELEMENTS
174
// Signal that the task is being performed asynchronously.
e.Cancel = true;
// Create the web service object.
ProductAutoCompleteClient service = new ProductAutoCompleteClient();
// Attach an event handler to the completion event.
service.GetProductMatchesCompleted += GetProductMatchesCompleted;
// Call the web service (asynchronously).
service.GetProductMatchesAsync(e.Parameter);
}
On the web server, the code in a GetProductMathes() web method runs and retrieves
the matches:
public string[] GetProductMatches(string inputText)
{
// Get the products (for example, from a server-side database).
Product[] products = GetProducts();
// Create a collection of matches.
List<string> productMatches = new List<string>();
foreach (Product product in products)
{
// See if this is a match.
if ((product.ProductName.StartsWith(inputText)) ||
(product.ProductCode.Contains(inputText)))
{
productMatches.Add(product.ProductName);
}
}
// Return the list of matches.
return productMatches.ToArray();
}
When the asynchronous operation finishes and you receive the result in your
Silverlight application, you fill the ItemsSource property with the list of suggestions. Then, you
must call the PopulateComplete() method to notify the AutoCompleteBox that the new data has
arrived. Here’s the callback handler that does the job in the current example:
private void GetProductMatchesCompleted(object sender,
GetProductMatchesCompletedEventArgs e)
{
// Check for a web service error.
if (e.Error != null)
{
lblStatus.Text = e.Error.Message;
return;
}
// Set the suggestions.
CHAPTER 5 ■ ELEMENTS
175
acbProducts.ItemsSource = e.Result;
// Notify the control that the data has arrived.
acbProducts.PopulateComplete();
}
When filling the AutoCompleteBox with a time-consuming or asynchronous step,
there are two properties you may want to adjust: MinimumPrefixLength and
MinimumPopupDelay. MinimumPrefixLength determines how much text must be typed in
before the AutoCompleteBox gives its suggestions. Ordinarily, the AutoCompleteBox offers
suggestions after the first letter is entered. If you want it to wait for three letters (the standard
used by many of the Ajax-powered auto-completion text boxes that you’ll find on the Web), set
MinimumPrefixLength to 3. Similarly, you can force the AutoCompleteBox to hold off until a
certain interval of time has passed since the user’s last keystroke using the
MinimumPopulateDelay property. This way, you won’t waste time with a flurry of overlapping
calls to a slow web service. Of course, this doesn’t necessarily determine how long it takes for
the suggestions to appear–that depends on the wait before initiating the query and then the
time needed to contact the web server and receive a response.
Range-Based Controls
Silverlight includes three controls that use the concept of a range. These controls take a
numeric value that falls in between a specific minimum and maximum value. These controls–
ScrollBar, Slider, and ProgressBar–derive from the RangeBase class (which itself derives from
the Control class). The RangeBase class adds a ValueChanged event, a Tooltip property, and the
range properties shown in Table 5-5.
Table 5-5. Properties of the RangeBase Class
Name Description
Value This is the current value of the control (which must fall between the minimum
and maximum). By default, it starts at 0. Contrary to what you might expect,
Value isn’t an integer–it’s a double, so it accepts fractional values. You can
react to the ValueChanged event if you want to be notified when the value is
changed.
Maximum This is the upper limit (the largest allowed value). The default value is 1.
Minimum This is the lower limit (the smallest allowed value). The default value is 0.
SmallChange This is the amount the Value property is adjusted up or down for a “small
change.” The meaning of a small change depends on the control (and may not
be used at all). For the ScrollBar and Slider, this is the amount the value
changes when you use the arrow keys. For the ScrollBar, you can also use the
arrow buttons at either end of the bar. The default SmallChange is 0.1.
CHAPTER 5 ■ ELEMENTS
176
Name Description
LargeChange This is the amount the Value property is adjusted up or down for a “large
change.” The meaning of a large change depends on the control (and may not
be used at all). For the ScrollBar and Slider, this is the amount the value
changes when you use the Page Up and Page Down keys or when you click the
bar on either side of the thumb (which indicates the current position). The
default LargeChange is 1.
Ordinarily, there’s no need to use the ScrollBar control directly. The higher-level
ScrollViewer control, which wraps two ScrollBar controls, is typically much more useful. (The
ScrollViewer was covered in Chapter 3.) However, the Slider and ProgressBar are more useful
on their own.
The Slider
The Slider is a specialized control that’s occasionally useful. You might use it to set numeric
values in situations where the number itself isn’t particularly significant. For example, it makes
sense to set the volume in a media player by dragging the thumb in a slider bar from side to
side. The general position of the thumb indicates the relative loudness (normal, quiet, loud),
but the underlying number has no meaning to the user.
Here’s an example that creates the horizontal slider shown in Figure 5-16:
<Slider Orientation="Horizontal" Minimum="0" Maximum="10" Width="100" />
Unlike WPF, the Silverlight slider doesn’t provide any properties for adding tick marks.
However, as with any control, you can change its appearance while leaving its functionality
intact using the control template feature described in Chapter 13.
Figure 5-16. A basic slider
The ProgressBar
The ProgressBar indicates the progress of a long-running task. Unlike the slider, the
ProgressBar isn’t user interactive. Instead, it’s up to your code to periodically increment the
CHAPTER 5 ■ ELEMENTS
177
Value property. By default, the Minimum value of a ProgressBar is 0, and the Maximum value is
100, so the Value corresponds to the percentage of work done. You’ll see an example with the
ProgressBar in Chapter 6, with a page that downloads a file from the Web and shows its
progress on the way.
One neat trick that you can perform with the ProgressBar is using it to show a long-
running status indicator, even if you don’t know how long the task will take. You do this by
setting the IsIndeterminate property to true:
<ProgressBar Height="18" Width="200" IsIndeterminate="True"></ProgressBar>
When setting IsIndeterminate, you no longer use the Minimum, Maximum, and Value
properties. No matter what values these properties have, the ProgressBar will show a hatched
pattern that travels con-tinuously from left to right. This pattern indicates that there’s work in
progress, but it doesn’t provide any information about how much progress has been made so
far.
Date Controls
Silverlight adds two date controls, neither of which exists in the WPF control library. Both are
designed to allow the user to choose a single date.
The Calendar control displays a calendar that’s similar to what you see in the Windows
operating system (for example, when you configure the system date). It shows a single month at
a time and allows you to step through from month to month (by clicking the arrow buttons) or
jump to a specific month (by clicking the month header to view an entire year, and then
clicking the month).
The DatePicker requires less space. It’s modeled after a simple text box, which holds a
date string in long or short date format. However, the DatePicker provides a drop-down arrow
that, when clicked, pops open a full calendar view that’s identical to that shown by the Calendar
control. This pop-up is displayed over top of any other content, just like a drop-down combo
box.
Figure 5-17 shows the two display modes that the Calendar supports, and the two date
formats that the DatePicker allows.
CHAPTER 5 ■ ELEMENTS
178
Figure 5-17. The Calendar and DatePicker
The Calendar and DatePicker include properties that allow you to determine which
dates are shown and which dates are selectable (provided they fall in a contiguous range). Table
5-6 lists the properties you can use.
CHAPTER 5 ■ ELEMENTS
179
Table 5-6. Properties of the Calendar and DatePicker Classes
Property Description
DisplayDateStart
and DisplayDateEnd
Sets the range of dates that are displayed in the calendar view, from the
first, earliest date (DisplayDateStart) to the last, most recent date
(DisplayDateEnd). The user won’t be able to navigate to months that
don’t have any displayable dates. To show all dates, set
DisplayDateStart to DateTime.MinValue and DisplayDateEnd to
DateTime.MaxValue.
BlackoutDates Holds a collection of dates that will be disabled in the calendar and
won’t be selectable. If these dates are not in the range of displayed
dates, or if one of these dates is already selected, you’ll receive an
exception. To prevent selection of any date in the past, call the
BlackoutDates.AddDatesInPast() method.
SelectedDate Provides the selected date as a DateTime object (or a null value if no
date is selected). It can be set programmatically, by the user clicking the
date in the calendar, or by the user typing in a date string (in the
DatePicker). In the calendar view, the selected date is marked by a
shaded square, which is only visible when the date control has focus.
SelectedDates Provides the selected dates as a collection of DateTime objects. This
property is supported by the Calendar, and it’s only useful if you’ve
changed the SelectionMode property to allow multiple date selection.
DisplayDate Determines the date that’s displayed initially in the calendar view (using
a DateTime object). If null, the SelectedDate is shown. If DisplayDate
and SelectedDate are both null, the current date is used. The display
date determines the initial month page of the calendar view. When the
date control has focus, a square outline is displayed around the
appropriate day in that month (which is different than the shaded
square used for the currently selected date).
FirstDayOfWeek Determines the day of the week that will be displayed at the start of each
calendar row, in the leftmost position.
IsTodayHighlighted Determines whether the calendar view uses highlighting to point out
the current date.
DisplayMode
(Calendar only)
Determines the initial display month of the calendar. If set to Month,
the Calendar shows the standard single-month view. If set to Year, the
Calendar shows the months in the current year (similar to when the
user clicks the month header). Once the user clicks a month, the
Calendar shows the full calendar view for that month.
SelectionMode Determines what type of date selections are allowed. The default is
SingleDate, which allows a single date to be selected. Other options
CHAPTER 5 ■ ELEMENTS
180
Property Description
(Calendar only) include None (selection is disabled entirely), SingleRange (a contiguous
group of dates can be selected), and MultipleRange (any combination of
dates can be selected). In SingleRange or MultipleRange modes, the
user can drag to select multiple dates, or click while holding down the
Ctrl key. You can use the SelectedDates property to get a collection with
all the selected dates.
IsDropDownOpen
(DatePicker only)
Determines whether the calendar view drop-down is open in the
DatePicker. You can set this property programmatically to show or hide
the calendar.
SelectedDateFormat
(DatePicker only)
Determines how the selected date will be displayed in the text part of
the DatePicker. You can choose Short or Long. The actual display
format is based on the client computer’s regional settings. For example,
if you use Short, the date might be rendered in the yyyy/mm/dd format
or dd/mm/yyyy. The long format generally includes the month and day
names.
The date controls also provide a few different events. Most useful is
SelectedDateChanged (in the DatePicker) or the very similar SelectedDatesChanged (in the
Calendar), which adds support for multiple date selection. You can react to these events to
reject specific date selections, such as dates that fall on a weekend:
private void Calendar_SelectedDatesChanged (object sender,
CalendarDateChangedEventArgs e)
{
// Check all the newly added items.
foreach (DateTime selectedDate in e.AddedItems)
{
if ((selectedDate.DayOfWeek == DayOfWeek.Saturday) ||
(selectedDate.DayOfWeek == DayOfWeek.Sunday))
{
lblError.Text = "Weekends are not allowed";
// Remove the selected date.
((Calendar)sender).SelectedDates.Remove(selectedDate);
}
}
}
You can try this out with a Calendar that supports single or multiple selection. If it
supports multiple selection, try dragging the mouse over an entire week of dates. All the dates
will remain highlighted except for the disallowed weekend dates, which will be unselected
automatically.
The Calendar also adds a DisplayDateChanged event (when the user browses to a new
month). The DatePicker adds CalendarOpened and CalendarClosed events (which fire when
the calendar drop-down is displayed and closed) and a DateValidationError event (which fires
when the user types a value in the text entry portion that can’t be interpreted as a valid date).
Ordinarily, invalid values are discarded when the user opens the calendar view, but here’s an
option that fills in some text to alert the user of the problem:
CHAPTER 5 ■ ELEMENTS
181
private void DatePicker_DateValidationError(object sender,
DatePickerDateValidationErrorEventArgs e)
{
lblError.Text = "'" + e.Text +
"' is not a valid value because " + e.Exception.Message;
}
The Last Word
In this chapter, you saw all the fundamental Silverlight elements. You considered several
categories:
• The TextBlock, which allows you to display richly formatted text using built-in and
custom fonts
• The Image, which allows you to show JPEG and PNG images
• Content controls that can contain nested elements, including various types of buttons
and the ToolTip
• List controls that contain a collection of items, such as the ListBox, ComboBox, and
TabControl
• Text controls, including the standard TextBox, the PasswordBox, and the
AutoCompleteBox
• Range-based controls that take a numeric value from a range, such as the Slider
• The date controls, which allow the user to select one or more dates from a calendar
display
Although you haven’t had an exhaustive look at every detail of XAML markup, you’ve
learned enough to reap all its benefits. Now, your attention can shift to the Silverlight
technology itself, which holds some of the most interesting surprises. In the next chapter, you’ll
start out by considering the core of the Silverlight application model: the Application class.
183
CHAPTER 6
■ ■ ■
The Application Model
Over the past five chapters, you’ve taken a detailed look at the different visual ingredients you
can put inside a Silverlight page. You’ve learned how to use layout containers and common
controls, and how to respond to mouse and keyboard events. Now, it’s time to take a closer look
at the Silverlight application model–the scaffolding that shapes how Silverlight applications
are deployed, downloaded, and hosted.
You’ll begin by considering the lifecycle of a Silverlight application. You’ll examine the
events that fire when your application is created, unloaded, or runs into trouble with an
unhandled exception. Next, you’ll pick up a few practical techniques that help you extend your
application beyond Silverlight’s basic behavior. You’ll see how to pass in initialization
parameters, show a custom splash screen, and break free from the confines of the browser to
run your Silverlight application in a stand-alone window–even when the client computer can’t
get a network connection.
Finally, you’ll explore the many options Silverlight provides for efficiently retrieving
the large files called binary resources, whether they’re images, video, or other assemblies that
your application requires. You’ll learn two strategies for dealing with resources: including them
in your application package for easy deployment, and downloading them on demand to
streamline performance.
■ What’s New In this chapter, you’ll encounter two new features. First, Silverlight 3 adds the ability to
create out-of-browser applications—applications that the user can install locally and run in a stand-alone
window. Clients can even use stand-alone applications when they don’t have a connection to the Internet. You’ll
learn about this feature in the “Out-of-Browser Applications” section. Silverlight 3 also supports assembly
caching, which you first learned about in Chapter 1. You’ll learn how your own assemblies can take advantage of
assembly caching in the “Supporting Assembly Caching” section.
The Application Class
In Chapter 1, you took your first look at the App.xaml file. Much as every XAML page is a
template for a custom class that derives from System.Windows.UserControl, the App.xaml file is
a template for a custom class (named App by default) that derives from
System.Windows.Application. You’ll find the class definition in the App.xaml.cs file:
CHAPTER 6 ■ THE APPLICATION MODEL
184
public partial class App : Application
{ }
When the Silverlight plug-in loads your application, it begins by creating an instance of
the App class. From that point on, the application object serves as your entry point for a variety
of application-specific features, including application events, resources, and services.
Accessing the Current Application
You can retrieve a reference to the application object at any time, at any point in your code,
using the static Application.Current property. However, this property is typed as a
System.Windows.Application object. To use any custom properties or methods that you’ve
added to the derived application class, you must cast the reference to the App type. For
example, if you’ve added a method named DoSomething() to the App.xaml.cs file, you can
invoke it with code like this:
((App)Application.Current).DoSomething();
This technique allows you to use your custom application class as a sort of
switchboard for global tasks that affect your entire application. For example, you can add
methods to your application class that control navigation or registration, and add properties
that store global data. You’ll see the App class used this way in examples throughout this book.
Application Properties
Along with the static Current property, the Application class also provides several more
members, as described in Table 6-1.
Table 6-1. Members of the Application Class
Member Description
Host This property lets you interact with the browser and, through it, the
rest of the HTML content on the web page. It’s discussed in Chapter
14.
Resources This property provides access to the collection of XAML resources
that are declared in App.xaml, as described in Chapter 2.
RootVisual This property provides access to the root visual for your application–
typically, the user control that’s created when your application first
starts. Once set, the root visual can’t be changed, although you can
manipulate the content in the root visual to change what’s displayed
in the page. For example, if it’s the Grid control, you can remove one
or more of its current children and insert new controls in their place.
Chapter 7 demonstrates this technique.
CHAPTER 6 ■ THE APPLICATION MODEL
185
Member Description
IsRunningOutOf-
Browser and
InstallState
These properties let you recognize and monitor out-of-browser
applications. IsRunningOutOfBrowser indicates whether the
application is currently running out of the browser (true) or in the
browser window (false). InstallState provides a value from the
InstallState enumeration that indicates whether the current
application is installed as an out-of-process application on the
current computer (Installed), not installed (NotInstalled or
InstallFailed), or in the process of being installed (Installing). You’ll
learn more about both properties when you consider out-of-browser
applications later in this chapter.
ApplicationLifetime-
Objects
This property holds a collection of application extension services.
These are objects that provide additional respond to application
events, in much the same way as your event handling code in the
Application class. The difference is that the code for an application
extension service is separated into its own class, which makes it easier
to reuse this code in more than one Silverlight application.
Install() and
CheckAndDownload-
UpdateAsync()
These methods provide support for out-of-browser applications. The
Install() method installs the current Silverlight application on the
client’s computer. The CheckAndDownloadUpdateAsync() method
launches an asynchronous process that checks the web server for
updates. If an updated version is found, it’s downloaded and used the
next time the user runs the application.
GetResourceStream() This static method is used to retrieve resources in code. You’ll see
how to use it later in this chapter, in the “Resources” section.
LoadComponent() This static method accepts a XAML file and instantiates the
corresponding elements (much as Silverlight does automatically
when you create a page class and the constructor calls the
InitializeComponent() method).
Along with these properties and methods, the Application object also raises events at
various points in the lifecycle of your application. You’ll explore these next.
Application Events
In Chapter 1, you took your first look at the life cycle of a Silverlight application. Here’s a quick
review:
1. The user requests the HTML entry page in the browser.
2. The browser loads the Silverlight plug-in. It then downloads the XAP file that contains
your application.
CHAPTER 6 ■ THE APPLICATION MODEL
186
3. The Silverlight plug-in reads the AppManifest.xml file from the XAP to find out what
assemblies your application uses. It creates the Silverlight runtime environment and
then loads your application assembly (along with any dependent assemblies).
4. The Silverlight plug-in creates an instance of your custom application class (which is
defined in the App.xaml and App.xaml.cs files).
5. The default constructor of the application class raises the Startup event.
6. Your application handles the Startup event and creates the root visual object for your
application.
From this point on, your page code takes over, until it encounters an unhandled error
(UnhandledException) or finally ends (Exit). These events–Startup, UnhandledException, and
Exit–are the core events that the Application class provides. Along with these standards, the
Application class includes two events–InstallStateChanged and
CheckAndDownloadUpdateCompleted–that are designed for use with the out-of-browser
applications you’ll explore later in this chapter.
If you look at the contents of the App.xaml.cs file, you’ll see that in Visual Studio, the
application constructor contains some pregenerated code. This code attaches an event handler
to the three application events:
public App()
{
this.Startup += this.Application_Startup;
this.Exit += this.Application_Exit;
this.UnhandledException += this.Application_UnhandledException;
InitializeComponent();
}
As with the page and element events you’ve considered in earlier chapters, there are
two ways to attach application event handlers. Instead of using code, you can add event
attributes to the XAML markup, as shown here:
<Application x:Class="SilverlightApplication1.App"
Startup="Application_Startup" >
There’s no reason to prefer one approach to the other. By default, Visual Studio uses
the code approach shown first.
In the following sections, you’ll see how you can write code that plugs into the
application events.
Application Startup
By default, the Application_Startup method creates the first page and assigns it to the
Application.RootVisual property, ensuring that it becomes the top-level application element–
the visual core of your application:
CHAPTER 6 ■ THE APPLICATION MODEL
187
private void Application_Startup(object sender, StartupEventArgs e)
{
this.RootVisual = new MainPage();
}
Although you can change the root visual by adding or removing elements, you can’t
reassign the RootVisual property at a later time. After the application starts, this property is
essentially read-only.
Initialization Parameters
The Startup event passes in a StartupEventArgs object, which includes one additional detail:
initialization parameters. This mechanism allows the page that hosts the Silverlight control to
pass in custom information. This is particularly useful if you host the same Silverlight
application on different pages, or you want the Silverlight application to vary based on user-
specific or session-specific information. For example, you can customize the application’s view
depending on whether users are entering from the customer page or the employee page. Or,
you may choose to load different information based on the product the user is currently
viewing. Just remember that the initialization parameters come from the tags of the HTML
entry page, and a malicious user can alter them.
■ Note For more detailed interactions between the HTML and your Silverlight application—for example, to
pass information back and forth while your Silverlight application is running—see Chapter 14.
For example, imagine you want to pass a ViewMode parameter that has two possible
values, Customer or Employee, as represented by this enumeration:
public enum ViewMode
{
Customer, Employee
}
You need to change a variety of details based on this information, so it makes sense to
store it somewhere that’s accessible throughout your application. The logical choice is to add a
property to your custom application class, like this:
private ViewMode viewMode = ViewMode.Customer;
public ViewMode ViewMode
{
get { return viewMode; }
}
This property defaults to customer view, so it needs to be changed only if the web page
specifically requests the employee view.
To pass the parameter into your Silverlight application, you need to add a <param>
element to the markup in the Silverlight content region. This parameter must have the name
CHAPTER 6 ■ THE APPLICATION MODEL
188
initParams. Its value is a comma-separated list of name-value pairs that set your custom
parameters. For example, to add a parameter named viewMode, you add the following line
(shown in bold) to your markup:
<div id="silverlightControlHost">
<object data="data:application/x-silverlight,"
type="application/x-silverlight-2" width="100%" height="100%">
<param name="source" value="TransparentSilverlight.xap"/>
<param name="onerror" value="onSilverlightError" />
<param name="background" value="white" />
<param name="initParams" value="viewMode=Customer" />
</object>
<iframe style='visibility:hidden;height:0;width:0;border:0px'></iframe>
</div>
Then, you can retrieve this from the StartupEventArgs.InitParams collection. However,
you must check first that it exists:
private void Application_Startup(object sender, StartupEventArgs e)
{
// Take the view mode setting, and store in an application property.
if (e.InitParams.ContainsKey("viewMode"))
{
string view = e.InitParams["viewMode"];
if (view == ""Employee"") this.viewMode = ViewMode.Employee;
}
// Create the root page.
this.RootVisual = new Page();
}
If you have many possible values, you can use the following leaner code to convert the
string to the corresponding enumeration value, assuming the text matches exactly:
string view = e.InitParams["viewMode"];
try
{
this.viewMode = (ViewMode)Enum.Parse(typeof(ViewMode), view, true);
}
catch { }
Now, different pages are free to pass in a different parameter and launch your
application with different view settings. Because the view information is stored as a property in
the custom application class (named App), you can retrieve it anywhere in your application:
lblViewMode.Text = "Current view mode: " +
((App)Application.Current).ViewMode.ToString();
Figure 6-1 shows what you’ll see when you run the test page that uses the Customer
view mode.
CHAPTER 6 ■ THE APPLICATION MODEL
189
Figure 6-1. Displaying an initialization parameter
If you have more than one initialization parameter, pass them all in one comma-
delimited string. Initialization values should be made up of alphanumeric characters. There’s
currently no support for escaping special characters like commas in parameter values:
<param name="initParams" value="startPage=Page1,viewMode=Customer" />
Now, the event handler for the Startup event can retrieve the StartPage value and use it
to choose the application’s root page. You can load the correct page using a block of conditional
logic that distinguishes between the available choices, or you can write a more general solution
that uses reflection to attempt to create the class with the requested name, as shown here:
UserControl startPage = null;
if (e.InitParams.ContainsKey("startPage"))
{
string startPageName = e.InitParams["startPage"];
try
{
// Create an instance of the page.
Type type = this.GetType();
Assembly assembly = type.Assembly;
startPage = (UserControl)assembly.CreateInstance(
type.Namespace + "." + startPageName);
}
catch
{
startPage = null;
}
}
// If no parameter was supplied or the class couldn't be created, use a default.
if (startPage == null) startPage = new MenuPage();
this.RootVisual = startPage;
CHAPTER 6 ■ THE APPLICATION MODEL
190
Application Shutdown
At some point, your Silverlight application ends. Most commonly, this occurs when the user
surfs to another page in the web browser or closes the browser window. It also occurs if the
users refreshes the page (effectively abandoning the current instance of the application and
launching a new one), if the page runs JavaScript code that removes the Silverlight content
region or changes its source, or an unhandled exception derails your code.
Just before the application is released from memory, Silverlight gives you the chance to
run some code by responding to the Application.Exit event. This event is commonly used to
store user-specific information locally in isolated storage (see Chapter 18), so it’s available the
next time the user runs your application.
The Exit event doesn’t provide any additional information in its event arguments.
Unhandled Exceptions
Although you should use disciplined exception-handling code in situations where errors are
possible (for example, when reading a file, downloading web content, or accessing a web
service), it’s not always possible to anticipate all sources of error. If your application encounters
an error that isn’t handled, it will end, and the Silverlight content region will revert to a blank
space. If you’ve included JavaScript code that reacts to potential errors from the Silverlight
plug-in, that code will run. Otherwise, you won’t receive any indication about the error that’s
just occurred.
The Application.UnhandledException event gives you a last-ditch chance to respond
to an exception before it reaches the Silverlight plug-in and terminates your application. This
code is notably different than the JavaScript error-handling code that you may add to the page,
because it has the ability to mark an exception as handled. Doing so effectively neutralizes the
exception, preventing it from rising to the plug-in and ending your application.
Here’s an example that checks the exception type and decides whether to allow the
application to continue:
public void Application_UnhandledException(object sender,
ApplicationUnhandledExceptionEventArgs e)
{
if (e.ExceptionObject is FileNotFoundException)
{
// Suppress the exception and allow the application to continue.
e.Handled = true;
}
}
Ideally, an exception like this should be handled closer to where it occurs–for
example, in your page code, when you’re performing a task that may result in a
FileNotFoundException. Application-level error handling isn’t ideal, because it’s difficult to
identify the original process that caused the problem and it’s awkward to notify the user about
what went wrong. But application-level error handling does occasionally offer a simpler and
more streamlined way to handle certain scenarios–for example, when a particular type of
exception crops up in numerous places.
After you’ve neutralized the error, it makes sense to notify the user. One option is to
call a custom method in your root visual. For example, this code calls a custom ReportError()
method in the MainPage class, which is the root visual for this application:
CHAPTER 6 ■ THE APPLICATION MODEL
191
MainPage rootPage = (MainPage)this.RootVisual;
rootPage.ReportError(e.ExceptionObject);
Now the MainPage.ReportError() method can examine the exception object and
display the appropriate message in an element on the page.
In an effort to make your applications a little more resilient, Visual Studio adds a bit of
boilerplate error-handling code to every new Silverlight application. This code checks whether
a debugger is currently attached (which indicates that the application is running in the Visual
Studio debug environment). If there’s no debugger, the code handles the error (rendering it
harmless) and uses the HTML interoperability features you’ll learn about in Chapter 14 to raise
a JavaScript error in its place. Here’s the slightly simplified code that shows how the process
works:
public void Application_UnhandledException(object sender,
ApplicationUnhandledExceptionEventArgs e)
{
if (!System.Diagnostics.Debugger.IsAttached)
{
// Suppress the exception and allow the application to continue.
e.Handled = true;
try
{
// Build an error message.
string errorMsg = e.ExceptionObject.Message +
e.ExceptionObject.StackTrace;
errorMsg = errorMsg.Replace('"', '\'').Replace("\r\n", @"\n");
// Use the Window.Eval() method to run a line of JavaScript code that
// will raise an error with the error message.
System.Windows.Browser.HtmlPage.Window.Eval(
"throw new Error(\"Unhandled Error in Silverlight 2 Application " +
errorMsg + "\");");
}
catch {}
}
}
Essentially, this code converts a fatal Silverlight error to a relatively harmless JavaScript
error. The way the JavaScript error is dealt with depends on the browser. In Internet Explorer, a
yellow alert icon appears in the status bar. (Double-click the alert icon to get the full error
details, as shown in Figure 6-2.) In Firefox, a script error message appears. Either way, the error
won’t stop your application from continuing.
CHAPTER 6 ■ THE APPLICATION MODEL
192
Figure 6-2. A JavaScript error that represents an unhandled Silverlight exception
When you finish developing your application, you need to tweak the automatically
generated error-handling code. That’s because it isn’t acceptable to indiscriminately ignore all
errors–doing so allows bugs to flourish and cause other usability problems or data errors
further down the road. Instead, consider selectively ignoring errors that correspond to known
error conditions and signaling the problem to the user.
■ Caution It’s easy to forget that you need to tweak the Application.UnhandledException event
handler, because it only springs into action when you run your Silverlight application without a debugger. When
you’re testing your application in Visual Studio, you don’t see this behavior—instead, any unhandled exception
ends the application immediately.
Custom Splash Screens
If a Silverlight application is small, it downloads quickly and appears in the browser. If a
Silverlight application is large, it may take a few seconds to download. As long as your
application takes longer than 500 milliseconds to download, Silverlight shows an animated
splash screen.
The built-in splash screen isn’t too exciting–it displays a ring of blinking circles and
the percentage of the application that’s been downloaded so far (see Figure 6-3).
CHAPTER 6 ■ THE APPLICATION MODEL
193
Figure 6-3. The built-in Silverlight splash screen
If you don’t like the stock splash screen, you can easily create your own (see Figure 6-
4). Essentially, a custom splash screen is a XAML file with the graphical content you want to
display and a dash of JavaScript code that updates the splash screen as the application is
downloaded. You can’t use C# code at this point, because the Silverlight programming
environment hasn’t been initialized yet. However, this isn’t a major setback, because the code
you need is relatively straightforward. It lives in one or two event-handling functions that are
triggered as content is being downloaded and after it’s finished, respectively. And because
JavaScript is syntactically similar to C#, you won’t have much trouble putting together the code
you need.
CHAPTER 6 ■ THE APPLICATION MODEL
194
Figure 6-4. A custom splash screen
The XAML file for your splash screen can’t be a part of your Silverlight XAP file. That’s
because the splash screen needs to be shown while the XAP file is still in the process of being
downloaded. For that reason, the splash screen XAML must be a separate file that’s placed
alongside your XAP file at the same web location.
■ Note Testing a custom splash screen requires some work. Ordinarily, you don’t see the splash screen
during testing because the application is sent to the browser too quickly. To slow down your application enough
to see the splash screen, you need to first ensure that you’re using an ASP.NET test website, which ensures that
your Silverlight application is hosted by Visual Studio test web server (as described in Chapter 1). Then, you
need to add multiple large resource files to your Silverlight project—say, a handful of MP3 files—and set the
build action of each one to Resource so it’s added to the XAP file. Another trick is to temporarily remove the line
of code in the Application_Startup() method that sets the root visual for your application. This way, after your
application has been completely downloaded, it won’t display anything. Instead, the splash screen will remain
visible, displaying a progress percentage of 100%.
To create the example shown in Figure 6-4, begin by creating a new Silverlight project
with an ASP.NET test website, as described in Chapter 1. Then, add a new XAML file to your
CHAPTER 6 ■ THE APPLICATION MODEL
195
ASP.NET website (not the Silverlight project). To do so, select the ASP.NET website in the
Solution Explorer, and choose Website ➤ Add New Item. Choose the Silverlight group and
select the Silverlight JScript page template. Then enter a name and click Add. This XAML file
will hold the markup for your splash screen.
When you add a new XAML file, Visual Studio creates a basic XAML skeleton that
defines a Canvas. That’s because Visual Studio assumes you’re building a Silverlight 1.0
application, which supports a much smaller set of elements and doesn’t include any of the
more advanced layout containers. But you can use any of the core Silverlight elements–that is,
elements that are in the built-in assemblies and don’t require a separate download. You can’t
use elements that are defined in the add-on System.Windows.Controls.dll assembly, or those in
any other assembly that needs to be packaged in the XAP and downloaded by the client.
■ Tip The easiest way to build a simple splash screen is to create it in your Silverlight project and then copy
the markup into the splash screen file on your website. This way, you can take advantage of the Visual Studio
design surface and XAML IntelliSense, which won’t be available if you write the markup directly in your ASP.NET
website.
Here’s the XAML for the splash screen shown in Figure 6-4. It includes a Grid with a
TextBlock and two Rectangle elements. (Rectangle is a shape-drawing element you’ll learn
about in Chapter 8.) The first rectangle paints the background of the progress bar, and the
second paints the foreground. The two Rectangle objects are placed together in a single-celled
grid so that one rectangle is superimposed over the other:
<Grid xmlns="
xmlns:x="
<StackPanel VerticalAlignment="Center">
<Grid>
<Rectangle x:Name="progressBarBackground" Fill="White" Stroke="Black"
StrokeThickness="1" Height="30" Width="200"></Rectangle>
<Rectangle x:Name="progressBar" Fill="Yellow" Height="28" Width="0">
</Rectangle>
</Grid>
<TextBlock x:Name="progressText" HorizontalAlignment="Center"
Text="0% downloaded "></TextBlock>
</StackPanel>
</Grid>
Next, you need to add a JavaScript function to your HTML entry page or ASP.NET test
page. (If you plan to use both, place the JavaScript function in a separate file and then link to it
in both files, using the source attribute of the script block.) The JavaScript code can look up
named elements on the page using the sender.findName() method and manipulate their
properties. It can also determine the current progress using the eventArgs.progress property. In
this example, the event-handling code updates the text and widens the progress bar based on
the current progress percentage:
<script type="text/javascript">
function onSourceDownloadProgressChanged(sender, eventArgs)
{
CHAPTER 6 ■ THE APPLICATION MODEL
196
sender.findName("progressText").Text =
Math.round((eventArgs.progress * 100)) + "% downloaded ";
sender.findName("progressBar").Width =
eventArgs.progress * sender.findName("progressBarBackground").Width;
}
</script>
■ Note The splash-screen example that’s included with the downloadable code uses a slightly more
advanced technique that draws on a transform, a concept you’ll explore in Chapter 9. This approach allows you
to create a progress-bar effect without hard-coding the maximum width, so the progress bar is sized to fit the
current browser window.
To use this splash screen, you need to add the splashscreensource parameter to
identify your XAML splash screen and the onsourcedownloadprogresschanged parameter to
hook up your JavaScript event handler. If you want to react when the download is finished, you
can hook up a different JavaScript event handler using the onsourcedownloadcomplete
parameter:
<object data="data:application/x-silverlight," type="application/x-silverlight-2"
width="100%" height="100%">
<param name="source" value="ClientBin/SplashScreen.xap"/>
<param name="onerror" value="onSilverlightError" />
<param name="background" value="white" />
<param name="splashscreensource" value="SplashScreen.xaml" />
<param name="onsourcedownloadprogresschanged"
value="onSourceDownloadProgressChanged" />
</object>
Expert designers can craft elaborate splash screens. This tradition is well-established
with Flash applications. To see a taste of what’s possible, visit
You
can duplicate many of these effects with an ordinary Silverlight splash screen, like the one
described here. However, some are extremely difficult. Most would be far easier to achieve after
you’ve downloaded your application, such as code-heavy animations.
If you want more flexibility to create an eye-catching splash screen, you need to use a
completely different technique. First, make your application as small as possible. Move its
functionality to class-library assemblies, and place large resources (like graphics and videos) in
separate files or in separate class-library assemblies. Now that your application is stripped
down to a hollow shell, it can be downloaded quickly. After it’s downloaded, your application
can show its fancy preloader and start the real work–programmatically downloading the
resources and assemblies it needs to function.
Designing an application this way takes more work, but you’ll get all the information
you need to perform dynamic downloads in the following sections. Pay particular attention to
the last section in this chapter, "Downloading Assemblies on Demand."