Pro WPF in C# 2010 phần 9 doc
Bạn đang xem bản rút gọn của tài liệu. Xem và tải ngay bản đầy đủ của tài liệu tại đây (2.46 MB, 150 trang )
CHAPTER 24 ■ PAGES AND NAVIGATION
828
The obvious disadvantage with this code is that it relies on exception handling to control normal
program flow, which is discouraged (both because it leads to unclear code and because it adds
overhead). An alternative would be to simply attempt to perform the operation (such as writing to a file)
and then catch any resulting SecurityException. However, this approach makes it more likely that you’ll
run into a problem halfway through a task, when recovery or cleanup may be more difficult.
Isolated Storage
In many cases, you may be able to fall back on less powerful functionality if a given permission isn’t
available. For example, although code running in the Internet zone isn’t allowed to write to arbitrary
locations on the hard drive, it is able to use isolated storage. Isolated storage provides a virtual file
system that lets you write data to a small, user-specific and application-specific slot of space. The actual
location on the hard drive is obfuscated (so there’s no way to know exactly where the data will be written
beforehand), and the total space available is typically 1 MB. A typical location on a Windows 7 or
Windows Vista computer is a path in the form
c:\Users\[UserName]\AppData\Local\IsolatedStorage\[GuidIdentifier]. Data in one user’s isolated store
is restricted from all other nonadministrative users.
■ Note Isolated storage is the .NET equivalent of persistent cookies in an ordinary web page. It allows small bits
of information to be stored in a dedicated location that has specific controls in place to prevent malicious attacks
(such as code that attempts to fill the hard drive or replace a system file).
Isolated storage is covered in detail in the .NET reference. However, it’s quite easy to use because it
exposes the same stream-based model as ordinary file access. You simply use the types in the
System.IO.IsolatedStorage namespace. Typically, you’ll begin by calling the
IsolatedStorageFile.GetUserStoreForApplication() method to get a reference to the isolated store for the
current user and application. (Each application gets a separate store.) You can then create a virtual file in
that location using the IsolatedStorageFileStream. Here’s an example:
// Create a permission that represents writing to a file.
string filePath = System.IO.Path.Combine(appPath, "highscores.txt");
FileIOPermission permission = new FileIOPermission(
FileIOPermissionAccess.Write, filePath);
// Check for this permission.
if (CheckPermission(permission))
{
// Write to local hard drive.
try
{
using (FileStream fs = File.Create(filePath))
{
WriteHighScores(fs);
}
}
catch { }
CHAPTER 24 ■ PAGES AND NAVIGATION
829
}
else
{
// Write to isolated storage.
try
{
IsolatedStorageFile store =
IsolatedStorageFile.GetUserStoreForApplication();
using (IsolatedStorageFileStream fs = new IsolatedStorageFileStream(
"highscores.txt", FileMode.Create, store))
{
WriteHighScores(fs);
}
}
catch { }
}
You can also use methods such as IsolatedStorageFile.GetFileNames() and
IsolatedStorageFile.GetDirectoryNames() to enumerate the contents of the isolated store for the current
user and application.
Remember that if you’ve made the decision to create an ordinary XBAP that will be deployed on the
Web, you already know that you won’t have FileIOPermission for the local hard drive (or anywhere else).
If this is the type of application you’re designing, there’s no reason to use the conditional code shown
here. Instead, your code can jump straight to the isolated storage classes.
■ Tip To determine the amount of available isolated storage space, check IsolatedStorageFile.AvailableFreeSpace. You
should use code that checks this detail and refrains from writing data if the available space is insufficient. To
increase the amount of data you can pack into isolated storage, you may want to wrap your file-writing operations
with the DeflateStream or GZipStream. Both types are defined in the System.IO.Compression namespace and use
compression to reduce the number of bytes required to store data.
Simulating Dialog Boxes with the Popup Control
Another limited feature in XBAPs is the ability to open a secondary window. In many cases, you’ll use
navigation and multiple pages instead of separate windows, and you won’t miss this functionality.
However, sometimes it’s convenient to pop open a window to show some sort of a message or collect
input. In a stand-alone Windows application, you’d use a modal dialog box for this task. In an XBAP,
there’s another possibility—you can use the Popup control that was introduced in Chapter 6.
The basic technique is easy. First, you define the Popup in your markup, making sure to set its
StaysOpen property to true so it will remain open until you close it. (There’s no point in using the
PopupAnimation or AllowsTransparency property, because neither will have any effect in a web page.)
Include suitable buttons, such as OK and Cancel, and set the Placement property to Center so the popup
will appear in the middle of the browser window.
CHAPTER 24 ■ PAGES AND NAVIGATION
830
Here’s a simple example:
<Popup Name="dialogPopUp" StaysOpen="True" Placement="Center" MaxWidth="200">
<Border>
<Border.Background>
<LinearGradientBrush>
<GradientStop Color="AliceBlue" Offset="1"></GradientStop>
<GradientStop Color="LightBlue" Offset="0"></GradientStop>
</LinearGradientBrush>
</Border.Background>
<StackPanel Margin="5" Background="White">
<TextBlock Margin="10" TextWrapping="Wrap">
Please enter your name.
</TextBlock>
<TextBox Name="txtName" Margin="10"></TextBox>
<StackPanel Orientation="Horizontal" Margin="10">
<Button Click="dialog_cmdOK_Click" Padding="3" Margin="0,0,5,0">OK</Button>
<Button Click="dialog_cmdCancel_Click" Padding="3">Cancel</Button>
</StackPanel>
</StackPanel>
</Border>
</Popup>
At the appropriate time (for example, when a button is clicked), disable the rest of your user
interface and show the Popup. To disable your user interface, you can set the IsEnabled property of
some top-level container, such as a StackPanel or a Grid, to false. (You can also set the Background
property of the page to gray, which will draw the user’s attention to the Popup.) To show the Popup,
simply set its IsVisible property to true.
Here’s an event handler that shows the previously defined Popup:
private void cmdStart_Click(object sender, RoutedEventArgs e)
{
DisableMainPage();
}
private void DisableMainPage()
{
mainPage.IsEnabled = false;
this.Background = Brushes.LightGray;
dialogPopUp.IsOpen = true;
}
When the user clicks the OK or Cancel button, close the Popup by setting its IsVisible property to
false, and reenable the rest of the user interface:
private void dialog_cmdOK_Click(object sender, RoutedEventArgs e)
{
// Copy name from the Popup into the main page.
lblName.Content = "You entered: " + txtName.Text;
EnableMainPage();
}
CHAPTER 24 ■ PAGES AND NAVIGATION
831
private void dialog_cmdCancel_Click(object sender, RoutedEventArgs e)
{
EnableMainPage();
}
private void EnableMainPage()
{
mainPage.IsEnabled = true;
this.Background = null;
dialogPopUp.IsOpen = false;
}
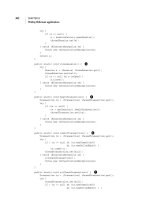
Figure 24-16 shows the Popup in action.
Figure 24-16.
Simulating a dialog box with the Popup
Using the Popup control to create this work-around has one significant limitation. To ensure that
the Popup control can’t be used to spoof legitimate system dialog boxes, the Popup window is
constrained to the size of the browser window. If you have a large Popup window and a small browser
window, this could chop off some of your content. One solution, which is demonstrated with the sample
code for this chapter, is to wrap the full content of the Popup control in a ScrollViewer with the
VerticalScrollBarVisibility property set to Auto.
There’s one other, even stranger option for showing a dialog box in a WPF page. You can use the
Windows Forms library from .NET 2.0. You can safely create and show an instance of the
System.Windows.Forms.Form class (or any custom form that derives from Form), because it doesn’t
require unmanaged code permission. In fact, you can even show the form modelessly, so the page
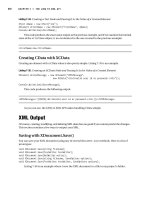
remains responsive. The only drawback is that a security balloon automatically appears superimposed
over the form and remains until the user clicks the warning message (as shown in Figure 24-17). You’re
also limited in what you can show in the form. Windows Forms controls are acceptable, but WPF
content isn’t allowed. For an example of this technique, refer to the sample code for this chapter.
CHAPTER 24 ■ PAGES AND NAVIGATION
832
Figure 24-17.
Using a .NET 2.0 form for a dialog box
Embedding an XBAP in a Web Page
Usually, an XBAP is loaded directly in the browser so it takes up all the available space. However, you can
have one other option: you can show an XBAP inside a portion of an HTML page, along with other HTML
content. All you need to do is create an HTML page that uses the <iframe> tag to point to your .xbap file,
as shown here:
<html>
<head>
<title>An HTML Page That Contains an XBAP</title>
</head>
<body>
<h1>Regular HTML Content</h1>
<iframe src="BrowserApplication.xbap"></iframe>
<h1>More HTML Content</h1>
</body>
</html>
Using an <iframe> is a relatively uncommon technique, but it does allow you to pull off a few new
tricks. For example, it allows you to display more than one XBAP in the same browser window. It also
allows you to create a WPF-driven gadget for Windows Vista or Windows 7.
■ Note WPF applications don’t have direct support for Windows gadgets, but you can embed a WPF application
in a gadget using an <iframe>. The key drawback is that the overhead of WPF application is greater than the
overhead of an ordinary HTML and JavaScript web page. There are also some quirks with the way that a WPF
application handles mouse input. You can find an example of this technique and a good discussion of its
limitations at
CHAPTER 24 ■ PAGES AND NAVIGATION
833
The WebBrowser Control
As you’ve seen in this chapter, WPF blurs the boundaries between traditional desktop applications and
the Web. Using pages, you can create WPF applications with web-style navigation. Using XBAPs, you can
run WPF inside a browser window, like a web page. And using the Frame control, you can perform the
reverse trick and put an HTML web page into a WPF window.
However, when you use the Frame to show HTML content, you give up all control over that content.
You have no way to inspect it or to follow along as the user navigates to a new page by clicking a link. You
certainly have no way to call JavaScript methods in an HTML web page or let them call your WPF code.
This is where the WebBrowser control comes into the picture.
■ Tip The Frame is a good choice if you need a container that can switch seamlessly between WPF and HTML
content. The WebBrowser is a better choice if you need to examine the object model of a page, limit or monitor
page navigation, or create a path through which JavaScript and WPF code can interact.
Both the WebBrowser and the Frame (when it’s displaying HTML content) show a standard Internet
Explorer window. This window has all the features and frills of Internet Explorer, including JavaScript,
Dynamic HTML, ActiveX controls, and plug-ins. However, the window doesn’t include additional details
like a toolbar, address bar, or status bar (although you can add all of these ingredients to your form using
other controls).
The WebBrowser isn’t written from scratch in managed code. Like the Frame (when it’s displaying
HTML content), it wraps the shdocvw.dll COM component, which is a part of Internet Explorer and is
included with Windows. As a side effect, the WebBrowser and the Frame have a few graphical limitations
that other WPF controls don’t share. For example, you can’t place other elements on top of the HTML
content that’s displayed in these controls, and you can’t use a transform to skew or rotate it.
■ Note As a feature, WPF’s ability to show HTML (either through the Frame or the WebBrowser) isn’t nearly as
useful as the page model or XBAPs. However, you might choose to use it in specialized situations where you have
already developed HTML content that you don’t want to replace. For example, you might use the WebBrowser to
show HTML documentation inside an application, or to allow a user to jump between the functionality in your
application and that in a third-party website.
Navigating to a Page
Once you’ve placed the WebBrowser control on a window, you need to point it to a document. The easiest
approach is to set the Source property with a URI. Set this to a remote URL (like
mypage.html) or a fully qualified file path (like file:///c:\mydocument.text). The URI can point to any file
type that Internet Explorer can open, although you’ll almost always use the WebBrowser to show HTML
pages.
<WebBrowser Source=""></WebBrowser>
CHAPTER 24 ■ PAGES AND NAVIGATION
834
■ Note You can also direct the WebBrowser to a directory. For example, set the Url property to file:///c:\. In this
case, the WebBrowser window becomes the familiar Explorer-style file browser, allowing the user to open, copy,
paste, and delete files. However, the WebBrowser doesn’t provide events or properties that allow you to restrict
this ability (or even monitor it), so tread carefully!
In addition to the Source property, you can navigate to a URL using any of the navigation methods
described in Table 24-4.
Table 24-4.
Navigation Methods for the WebBrowser
Method Description
Navigate() Navigates to the new URL you specify. If you use the overloaded
method, you can choose to load this document into a specific frame,
post back data, and send additional HTML headers.
NavigateToString() Loads the content from the string you supply, which should contain
the full HTML content of a web page. This provides some interesting
options, like the ability to retrieve HTML text from a resource in your
application, and display it.
NavigateToStream() Loads the content from a stream that contains an HTML document. This allows
you to open a file and feed it straight into the WebBrowser for rendering,
without needing to hold the whole HTML content in memory at once.
GoBack() and GoForward() Move to the previous or next document in the navigation history. To
avoid errors, you should check the CanGoBack and CanGoForward
properties before using these methods, because attempting to move to a
document that does not exist (for example, trying to move back while on
the first document in the history) will cause an exception.
Refresh() Reloads the current document.
All WebBrowser navigation is asynchronous. That means your code continues executing while the
page is downloading.
The WebBrowser also adds a small set of events, including the following:
x
Navigating
fires when you set a new URL, or the user clicks a link. You can inspect
the URL, and cancel navigation by setting e.Cancel to true.
x
Navigated
fires after Navigating, just before the web browser begins downloading the page.
x
LoadCompleted
fires when the page is completely loaded. This is your chance to
process the page.
CHAPTER 24 ■ PAGES AND NAVIGATION
835
Building a DOM Tree
Using the WebBrowser, you can create C# code that browses through the tree of HTML elements on a
page. You can even modify, remove, or insert elements as you go, using a programming model that’s
similar to the HTML DOM used in web browser scripting languages like JavaScript. In the following
sections, you’ll see both techniques.
Before you can use the DOM with the WebBrowser, you need to add a reference to the Microsoft
HTML Object Library (mshtml.tlb). This is a COM library, so Visual Studio needs to generate a managed
wrapper. To do so, choose Project ➤ Add Reference, pick the COM tab, select the Microsoft HTML
Object Library, and click OK.
The starting point for exploring the content in a web page is the WebBrowser.Document property.
This property provides an HTMLDocument object that represents a single web page as a hierarchical
collection of IHTMLElement objects. You’ll find a distinct IHTMLElement object for each tag in your
web page, including paragraphs (<p>), hyperlinks (<a>), images (<img>), and all the other familiar
ingredients of HTML markup.
The WebBrowser.Document property is read-only. That means that although you can modify the
linked HtmlDocument, you can’t create a new HtmlDocument object on the fly. Instead, you need to set
the Source property or call the Navigate() method to load a new page. Once the
WebBrowser.LoadCompleted event fires, you can access the Document property.
■ Tip Building the HTMLDocument takes a short but distinctly noticeable amount of time (depending on the size
and complexity of the web page). The WebBrowser won’t actually build the HTMLDocument for the page until you
try to access the Document property for the first time.
Each IHTMLElement object has a few key properties:
x
tagName
is the actual tag, without the angle brackets. For example, an anchor tag
takes this form <a href="…">…</a>, and has the tag name A.
x
id
contains the value of the id attribute, if specified. Often, elements are identified
with unique id attributes if you need to manipulate them in an automated tool or
server-side code.
x
children
provides a collection of IHTMLElement objects, one for each
contained tag.
x
innerHTML
shows the full content of the tag, including any nested tags and their
content.
x
innerText
shows the full content of the tag and the content of any nested tags.
However, it strips out all the HTML tags.
x
outerHTML and outerText
play the same role as innerHTML and innerText,
except they include the current tag (rather than just its contents).
CHAPTER 24 ■ PAGES AND NAVIGATION
836
To get a better understanding of innerText, innertHTML, and outerHTML, consider the
following tag:
<p>Here is some <i>interesting</i> text.</p>
The innerText for this tag is:
Here is some interesting text.
The innerHTML is:
Here is some <i>interesting</i> text.
Finally, the outerHTML is the full tag:
<p>Here is some <i>interesting</i> text.</p>
In addition, you can retrieve the attribute value for an element by name using the
IHTMLElement.getAttribute() method.
To navigate the document model for an HTML page, you simply move through the children
collections of each IHTMLElement. The following code performs this task in response to a button click,
and builds a tree that shows the structure of elements and the content on the page (see Figure 24-18).
private void cmdBuildTree_Click(object sender, System.EventArgs e)
{
// Analyzing a page takes a nontrivial amount of time.
// Use the hourglass cursor to warn the user.
this.Cursor = Cursors.Wait;
// Get the DOM object from the WebBrowser control.
HTMLDocument dom = (HTMLDocument)webBrowser.Document;
// Process all the HTML elements on the page, and display them
// in the TreeView named treeDOM.
ProcessElement(dom.documentElement, treeDOM.Items);
this.Cursor = null;
}
private void ProcessElement(IHTMLElement parentElement,
ItemCollection nodes)
{
// Scan through the collection of elements.
foreach (IHTMLElement element in parentElement.children)
{
// Create a new node that shows the tag name.
TreeViewItem node = new TreeViewItem();
node.Header = "<" + element.tagName + ">";
nodes.Add(node);
if ((element.children.length == 0) && (element.innerText != null))
{
// If this element doesn't contain any other elements, add
CHAPTER 24 ■ PAGES AND NAVIGATION
837
// any leftover text content as a new node.
node.Items.Add(element.innerText);
}
else
{
// If this element contains other elements, process them recursively.
ProcessElement(element, node.Items);
}
}
}
Figure 24-18.
A tree model of a web page
If you want to find a specific element without digging through all the layers of the web page, you
have a couple of simpler options. You can use the HTMLDocument.all collection, which allows you to
retrieve any element on the page using its id attribute. If you need to retrieve an element that doesn’t
have an id attribute, you can use the HTMLDocument method getElementsByTagName().
Scripting a Web Page with .NET Code
The last trick you’ll see with the WebBrowser is something even more intriguing: the ability to react to
web-page events in your Windows code.
CHAPTER 24 ■ PAGES AND NAVIGATION
838
The WebBrowser makes this technique remarkably simple. The first step is to create a class that will
receive the messages from the JavaScript code. To make it scriptable, you must add the ComVisible
attribute (from the System.Runtime.InteropServices namespace) to the class declaration:
[ComVisible(true)]
public class HtmlBridge
{
public void WebClick(string source)
{
MessageBox.Show("Received: " + source);
}
}
Next, you need to register an instance of this class with the WebBrowser. You do this by setting the
WebBrowser.ObjectForScripting property:
public MainWindow()
{
InitializeComponent();
webBrowser.Navigate("file:///" + System.IO.Path.Combine(
Path.GetDirectoryName(Application.ResourceAssembly.Location),
"sample.htm"));
webBrowser.ObjectForScripting = new HtmlBridge();
}
Now the sample.html web page will be able to call any public method in the HtmlBridge class,
including HtmlBridge.WebClick().
In the web page, you use JavaScript code to trigger the event. Here, the trick is the window.external
object, which represents the linked .NET object. Using this object, you specify a method that you want to
trigger; for example, use window.external.HelloWorld() if you want to call a public method named
HelloWorld in the .NET object.
■ Caution If you use JavaScript to trigger an event from your web page, make sure that your class doesn’t
include any other public methods that aren’t related to web access. A nefarious user could theoretically find the
HTML source, and modify it to call a different method than the one you intend. Ideally, the scriptable class should
contain only web-related methods to ensure security.
To build the JavaScript command into your web page, you first need to decide to which web-page
event you want to react. Most HTML elements support a small number of events, and some of the most
useful include the following:
x
onFocus
occurs when a control receives focus.
x
onBlur
occurs when focus leaves a control.
x
onClick
occurs when the user clicks a control.
CHAPTER 24 ■ PAGES AND NAVIGATION
839
x
onChange
occurs when the user changes the value of certain controls.
x
onMouseOver
occurs when the user moves the mouse pointer over a control.
To write a JavaScript command that responds to one of these events, you simply add an attribute
with that name to the element tag. For example, if you have an image tag that looks like this:
<img border="0" id="img1" src="buttonC.jpg" height="20" width="100">
you can add an onClick attribute that triggers the HelloWorld() method in your linked .NET class
whenever the user clicks the image:
<img o
onClick="window.external.HelloWorld()"
border="0" id="img1"
src="buttonC.jpg" height="20" width="100">
Figure 24-19 shows an application that puts it all together. In this example, a WebBrowser control
shows a local HTML file that contains four buttons, each of which is a graphical image. But when the
user clicks a button, the image uses the onClick attribute to trigger the HtmlBridge.WebClick() method:
<img onClick="window.external.WebClick('Option1')' >
The WebClick()method then takes over. It could show another web page, open a new window, or
modify part of the web page. In this example, it simply displays a message box to confirm that the event
has been received. Each image passes a hard-coded string to the WebClick() method, which identifies
the button that triggered the method.
Figure 24-19.
An HTML menu that triggers .NET code
CHAPTER 24 ■ PAGES AND NAVIGATION
■ Caution Keep in mind that unless your HTML document is compiled into your assembly as an embedded
resource or retrieved from some secure location (like a database), it may be subject to client tampering. For
example, if you store HTML documents as separate files, users can easily edit them. If this is a concern, use the
embedding techniques described in Chapter 7. You can create file resources, retrieve them as strings, and then
show them using the WebBrowser.NavigateToString() method.
The Last Word
In this chapter, you took a close look at the WPF navigation model. You learned how to build pages, host
them in different containers, and use WPF navigation to move from one page to the next.
You also delved into the XBAP model that allows you to create a web-style WPF application that runs
in a browser. Because XBAPs still require the .NET Framework, they won’t replace the existing web
applications that we all know and love. However, they just might provide an alternate way to deliver rich
content and graphics to Windows users.
Finally, you learned how to embed web content in a WPF application using the WebBrowser
control, and how to allow your web page script code to trigger methods in your WPF application.
■ Note If you’re planning to build WPF applications that run in a web browser over the Internet, you may want
to consider WPF’s scaled-down sibling, Silverlight. Although it’s not as powerful as WPF, Silverlight borrows a
substantial portion of the WPF model and adds support for cross-platform use. (For example, you can run a
Silverlight application in a Safari browser on a Mac computer.) For more information about Silverlight, refer to
or read my book Pro Silverlight 3 (Apress, 2009).
C H A P T E R 25
841
Menus, Toolbars, and Ribbons
A few rich controls can appear in virtually any type of application, from document editors to system
utilities. Those are the controls that you’ll meet in this chapter. They include the following:
• Menus. They’re one of the oldest user interface controls, and they’ve changed
surprisingly little in the past two decades. WPF includes solid, straightforward
support for main menus and popup context menus.
• Toolbars and status bars. They decorate the top and bottom of countless
applications—sometimes when they aren’t even needed. WPF supports both
controls with its customary flexibility, allowing you to insert virtually any control
inside. However, the WPF toolbars and status bars don’t have many frills. They
support overflow menus, but they don’t provide floating and docking capability.
• Ribbons. With only a little more effort, you can add an Office-style ribbon to the
top of your application window. It requires a separate (free) download, but you’ll
get some valuable built-in features, such as configurable resizing. You’ll also get
an Office-style menu feature to match.
Menus
WPF provides two menu controls: Menu (for main menus) and ContextMenu (for popup menus that are
attached to other elements). Like all the WPF classes, WPF performs the rendering for the Menu and
ContextMenu controls. That means these controls aren’t simple Win32 wrappers, and they have the
flexibility to be used in some unusual ways.
Note If you use the Menu class in a browser-hosted application, it appears at the top of the page. The browser
window wraps your page, and it may or may not include a menu of its own, which will be completely separate.
The Menu Class
WPF doesn’t make any assumption about where a stand-alone menu should be placed. Ordinarily, you’ll
dock it at the top of your window using a DockPanel or the top row of a Grid, and you’ll stretch it across
the entire width of your window. However, you can place a menu anywhere, even alongside other
controls (as shown in Figure 25-1). Furthermore, you can add as many menus in a window as you want.
Although it might not make much sense, you have the ability to stack menu bars or scatter them
throughout your user interface.
CHAPTER 25
MENUS, TOOLBARS, AND RIBBONS
842
Figure 25-1. Mixed menus
This freedom provides some interesting possibilities. For example, if you create a menu with one
top-level heading and style it to look like button, you’ll end up with a one-click popup menu (like the
menu that’s activated in Figure 25-1). This sort of user interface trickery might help you get the exact
effect you want in a highly customized interface. Or, it might just be a more powerful way to confuse
users.
The Menu class adds a single new property: IsMainMenu. When true (which is the default value),
pressing the Alt key or F10 gives the menu focus, just as in any other Windows application. Along with
this small detail, the Menu container has a few of the familiar ItemsControl properties for you to play
with. That means you can create data-bound menus using the ItemsSource, DisplayMemberPath,
ItemTemplate, and ItemTemplateSelector properties. You can also apply grouping, change the layout of
menu items inside the menu, and apply styles to your menu items.
For example, Figure 25-2 shows a scrollable sidebar menu. You can create it by supplying a
StackPanel for the ItemsPanel property, changing its background, and wrapping the entire Menu in a
ScrollViewer. Obviously, you can make more radical changes to the visual appearance of menus and
submenus using triggers and control templates. The bulk of the styling logic is in the default control
template for the MenuItem.
Figure 25-2. A Menu in a StackPanel
CHAPTER 25
MENUS, TOOLBARS, AND RIBBONS
843
Menu Items
Menus are composed of MenuItem objects and Separator objects. The MenuItem class derives from
HeaderedItemsControl, because each menu item has a header (which contains the text for that item)
and can hold a collection of MenuItem objects (which represents a submenu). The Separator simply
displays a horizontal line separating menu items.
Here’s a straightforward combination of MenuItem objects that creates the rudimentary menu
structure shown in Figure 25-3:
<Menu>
<MenuItem Header="File">
<MenuItem Header="New"></MenuItem>
<MenuItem Header="Open"></MenuItem>
<MenuItem Header="Save"></MenuItem>
<Separator></Separator>
<MenuItem Header="Exit"></MenuItem>
</MenuItem>
<MenuItem Header="Edit">
<MenuItem Header="Undo"></MenuItem>
<MenuItem Header="Redo"></MenuItem>
<Separator></Separator>
<MenuItem Header="Cut"></MenuItem>
<MenuItem Header="Copy"></MenuItem>
<MenuItem Header="Paste"></MenuItem>
</MenuItem>
</Menu>
As with buttons, you can use the underscore to indicate an Alt+ shortcut key combination. Whereas
this is often considered an optional feature in buttons, most menu users expect to have keyboard
shortcuts.
Figure 25-3. A basic menu
WPF allows you to break most of the commonsense rules of structuring a menu. For example, you
can have non-MenuItem objects inside a Menu or MenuItem. This allows you to create menus that hold
ordinary WPF elements, ranging from the ordinary CheckBox to a DocumentViewer. For a variety of
reasons, placing non-MenuItem objects in a menu is almost always a bad way to go. If you place non-
MenuItem objects in a menu, they’ll exhibit a few oddities that you’ll need to track down and correct.
For example, a TextBox in a MenuItem will lose focus as soon as you move the mouse out of the bounds
of the MenuItem. If you really want a user interface that includes some sort of drop-down menu with
CHAPTER 25
MENUS, TOOLBARS, AND RIBBONS
844
controls, consider using another element (such as the Expander) and styling it to suit your needs. Use
menus only when you really want the behavior of a menu—in other words, a group of clickable
commands.
Note Set the MenuItem.StaysOpenOnClick property to true if you want submenus to remain visible when
opened until the user clicks somewhere else.
MenuItem objects can also be used outside the standard Menu, ContextMenu, and MenuItem
containers. These items behave just like ordinary menu items—they glow blue when you hover over
them, and they can be clicked to trigger actions. However, any submenus they include won’t be
accessible. Again, this is an aspect of Menu flexibility you probably won’t want to use.
To react when a MenuItem is clicked, you may choose to handle the MenuItem.Click event. You can
handle it for individual items, or you can attach an event handler to the root Menu tag. Your other
alternative is to use the Command, CommandParameter, and CommandTarget properties to connect a
MenuItem to a Command object, as you learned to do with buttons in Chapter 9. This is particularly
useful if your user interface includes multiple menus (for example, a main menu and a context menu)
that use the same commands or includes a menu and a toolbar that do.
Along with text content (which is supplied through the Header property), MenuItem objects can
actually show several more details:
• A thumbnail icon in the margin area just to the left of the menu command.
• A check mark in the margin area. If you set the check mark and an icon, only the
check mark appears.
• Shortcut text to the right of the menu text. For example, you might see Ctrl+O to
indicate the shortcut key for the Open command.
Setting all these ingredients is easy. To show a thumbnail icon, you set the MenuItem.Icon property.
Interestingly, the Icon property accepts any object, which gives you the flexibility to construct a
miniature vector drawing. This way, you can take full advantage of WPF’s resolution-independent
scaling to show more detail at higher system DPI settings. If you want to use an ordinary icon, simply use
an Image element with a bitmap source.
To show a check mark next to a menu item, you simply need to set the MenuItem.IsChecked
property to true. Additionally, if IsCheckable is true, clicking the menu item will toggle back and forth
between its checked and unchecked state. However, there’s no way to associate a group of checked
menu items. If that’s the effect you want, you need to write the code to clear the other check boxes when
an item is checked.
You can set the shortcut text for a menu item using the MenuItem.InputGestureText property.
However, simply displaying this text doesn’t make it active. It’s up to you to watch for the key presses
you want. This is almost always too much work, so menu items are commonly used with commands,
which gives you the shortcut key behavior and the InputGestureText in one step.
For example, the following MenuItem is linked to the ApplicationsCommands.Open command:
<MenuItem Command="ApplicationCommands.Open"></MenuItem>
This command already has the Ctrl+O keystroke defined in the RoutedUICommand.InputGestures
command collection. As a result, Ctrl+O appears for the shortcut text, and the Ctrl+O keystroke triggers
CHAPTER 25
MENUS, TOOLBARS, AND RIBBONS
845
the command (assuming you’ve wired up the appropriate event handler). If a keystroke wasn’t defined,
you could add it to the InputGestures collection yourself.
Tip Several useful properties indicate the current state of the MenuItem, including IsChecked, IsHighlighted,
IsPressed, and IsSubmenuOpen. You can use these to write triggers that apply different styling in response to
certain actions.
The ContextMenu Class
Like the Menu, the ContextMenu class holds a collection of MenuItem objects. The difference is that a
ContextMenu can’t be placed in a window. Instead, it can be used only to set the ContextMenu property
of another element:
<TextBox>
<TextBox.ContextMenu>
<MenuItem >
</MenuItem>
</TextBox.ContextMenu>
</TextBox>
The ContextMenu property is defined in the FrameworkElement class, so it’s supported by virtually
all WPF elements. If you set the ContextMenu property of an element that ordinarily has its own context
menu, your menu replaces the standard menu. If you simply want to remove an existing context menu,
just set it to a null reference.
When you attach a ContextMenu object to an element, it appears automatically when the user right-
clicks that control (or presses Shift+F10 while it has focus). The context menu won’t appear if the
element has IsEnabled set to false, unless you explicitly allow this with the
ContextMenuService.ShowOnDisabled attached property:
<TextBox ContextMenuService.ShowOnDisabled="True">
<TextBox.ContextMenu>
</TextBox.ContextMenu>
</TextBox>
Menu Separators
The Separator is a standard element for dividing menus into groups of related commands. However, the
content of the separator is completely fluid, thanks to control templates. By taking a separator and
supplying a new template, you can add other, nonclickable elements to your menus, such as
subheadings.
You might expect that you could add a subheading simply by adding a non-MenuItem object to a
menu, such as a TextBlock with some text. However, if you take this step, the newly added element keeps
the menu selection behavior; this means you can step through it with the keyboard, and when you hover
over it with the mouse, the edges glow blue. The Separator doesn’t exhibit this behavior—it’s a fixed
piece of content that doesn’t react to keyboard or mouse actions.
Here’s an example of a Separator that defines a text title:
CHAPTER 25
MENUS, TOOLBARS, AND RIBBONS
846
<Separator>
<Separator.Template>
<ControlTemplate>
<Border CornerRadius="2" Padding="5" Background="PaleGoldenrod"
BorderBrush="Black" BorderThickness="1">
<TextBlock FontWeight="Bold">
Editing Commands
</TextBlock>
</Border>
</ControlTemplate>
</Separator.Template>
</Separator>
Figure 25-4 shows the title this creates.
Figure 25-4. A menu that includes a fixed subheading
Unfortunately, the Separator isn’t a content control, so it’s not possible to separate the content you
want to show (for example, the string of text) from the formatting you want to use. That means you’ll be
forced to define the same template each time you use the separator if you want to vary its text. To make
this process a bit simpler, you can create a separator style that bundles together all the properties you
want to set on the TextBlock inside the Separator, except for the text.
Toolbars and Status Bars
Toolbars and status bars are two well-worn staples of the Windows world. Both are specialized
containers that hold a collection of items. Traditionally, a toolbar holds buttons, and a status bar
consists primarily of text and other noninteractive indicators (like a progress bar). However, both
toolbars and status bars are used with a variety of different controls.
In Windows Forms, toolbars and status bars have their own content model. Although it’s still
possible to place arbitrary controls inside a toolbar and status bar using a wrapper, the process isn’t
seamless. The WPF toolbar and status bar don’t have this limitation. They support the WPF content
model, allowing you to add any element to a toolbar or status bar and giving you unparalleled flexibility.
CHAPTER 25
MENUS, TOOLBARS, AND RIBBONS
847
In fact, there are no toolbar-specific or status bar–specific elements. Everything you need is already
available in the basic collection of WPF elements.
The ToolBar
A typical WPF ToolBar is filled with Button, ComboBox, CheckBox, RadioButton, and Separator objects.
Because these elements are all content controls (except for the Separator), you can place text and image
content inside. Although you can use other elements, such as Label and Image to put noninteractive
elements into the ToolBar, the effect is often confusing.
At this point, you might be wondering how you can place these common controls in a toolbar
without creating an odd visual effect. After all, the content that appears in standard Windows toolbars
looks quite a bit different from similar content that appears in a window. For example, the buttons in a
toolbar are displayed with a flat, streamlined appearance that removes the border and the shaded
background. The toolbar surface shows through underneath, and the button glows blue when you hover
over it with the mouse.
In the WPF way of thinking, the button in a toolbar is the same as a button in a window—both are
clickable regions you can use to perform an action. The only difference is the visual appearance. Thus,
the perfect solution is to use the existing Button class but adjust various properties or change the control
template. This is exactly what the ToolBar class does—it overrides the default style of some types of
children, including the buttons. You can still have the last word by manually setting the Button.Style
property if you want to create your own customized toolbar button, but usually you’ll get all the control
you need by setting the button content.
Not only does the ToolBar change the appearance of many of the controls its holds, but it also
changes the behavior of the ToggleButton and the CheckBox and RadioButton that derive from it. A
ToggleButton or CheckBox in a ToolBar is rendered like an ordinary button, but when you click it, the
button remains highlighted (until you click it again). The RadioButton has a similar appearance, but you
must click another RadioButton in a group to clear the highlighting. (To prevent confusion, it’s always
best to separate a group of RadioButton objects in a toolbar using the Separator.)
To demonstrate what this looks like, consider the simple markup shown here:
<ToolBar>
<Button Content="{StaticResource DownloadFile}"></Button>
<CheckBox FontWeight="Bold">Bold</CheckBox>
<CheckBox FontStyle="Italic">Italic</CheckBox>
<CheckBox>
<TextBlock TextDecorations="Underline">Underline</TextBlock>
</CheckBox>
<Separator></Separator>
<ComboBox SelectedIndex="0">
<ComboBoxItem>100%</ComboBoxItem>
<ComboBoxItem>50%</ComboBoxItem>
<ComboBoxItem>25%</ComboBoxItem>
</ComboBox>
<Separator></Separator>
</ToolBar>
Figure 25-5 shows this toolbar in action, with two CheckBox controls in the checked state and the
drop-down list on display.
CHAPTER 25
MENUS, TOOLBARS, AND RIBBONS
848
Figure 25-5. Different controls in a toolbar
Although the example in Figure 25-5 is limited to buttons that contain text, ToolBar buttons usually
hold image content. (You can also combine both by wrapping an Image element and a TextBlock or
Label in a horizontal StackPanel.) If you’re using image content, you need to decide whether you want to
use bitmap images (which may show scaling artifacts at different resolutions), icons (which improve this
situation somewhat because you can supply several differently sized images in one file), or vector images
(which require the most markup but provide flawless resizing).
The ToolBar control has a few oddities. First, unlike other controls that derive from ItemsControl, it
doesn’t supply a dedicated wrapper class. (In other words, there is a ToolBarItem class.) The ToolBar
simply doesn’t require this wrapper to manage items, track selection, and so on, as other list controls.
Another quirk in the ToolBar is that it derives from HeaderedItemsControl even though the Header
property has no effect. It’s up to you to use this property in some interesting way. For example, if you
have an interface that uses several ToolBar objects, you could allow users to choose which ones to
display from a context menu. In that menu, you could use the toolbar name that’s set in the Header
property.
The ToolBar has one more interesting property: Orientation. You can create a top-to-bottom toolbar
that’s docked to one of the sides of your window by setting the ToolBar.Orientation property to Vertical.
However, each element in the toolbar will still be oriented horizontally (for example, text won’t be
turned on its side), unless you use a LayoutTransform to rotate it.
The Overflow Menu
If a toolbar has more content than it can fit in a window, it removes items until the content fits. These
extra items are placed into an overflow menu, which you can see by clicking the drop-down arrow at the
end of the toolbar. Figure 25-6 shows the same toolbar shown in Figure 25-5 but in a smaller window
that necessitates an overflow menu.
Figure 25-6. The automatic overflow menu
The ToolBar control adds items to the overflow menu automatically, starting with the last item.
However, you can configure the way this behavior works to a limited degree by applying the attached
ToolBar.OverflowMode property to the items in the toolbar. Use OverflowMode.Never to ensure that an
CHAPTER 25
MENUS, TOOLBARS, AND RIBBONS
849
important item is never placed in the overflow menu, OverflowMode.AsNeeded (the default) to allow it
to be placed in the overflow menu when space is scarce, or OverflowMode.Always to force an item to
remain permanently in the overflow menu. (For example, Visual Studio keeps the customization
command Add or Remove buttons in the overflow menu of its toolbars, and the main Excel 2003 and
Word 2003 toolbars include a command named Show Buttons on Two Rows or Show Buttons on One
Row that’s always in the overflow menu.)
Note If the toolbar’s container (usually, a window) is smaller than the required space to display all the
OverflowMode.Always items, the items that don’t fit will be clipped off at the bounds of the container and will be
inaccessible to the user.
If your toolbar contains more than one OverflowMode.AsNeeded item, the ToolBar removes items
that are at the end of the toolbar first. Unfortunately, there’s no way to assign relative priorities to
toolbar items. For example, there’s no way to create an item that’s allowed in the overflow menu but
won’t be placed there until every other relocatable item has already been moved. There’s also no way to
create buttons that adapt their sizes based on the available space, as in the Office 2007 ribbon. Look for
third-party controls to bridge these gaps.
The ToolBarTray
Although you’re free to add multiple ToolBar controls to your window and manage them using a layout
container, WPF has a class that’s designed to take care of some of the work: the ToolBarTray. Essentially,
the ToolBarTray holds a collection of ToolBar objects (which are exposed through a property named
ToolBars).
The ToolBarTray makes it easier for toolbars to share the same row, or band. You can configure the
ToolBarTray so that toolbars share a band, while others are placed on other bands. The ToolBarTray
provides the shaded background behind the entire ToolBar area. But most important, the ToolBarTray
adds support for toolbar drag-and-drop functionality. Unless you set the ToolBarTray.IsLocked property
to true, the user can rearrange your toolbars in a ToolBar tray by clicking the grip at the left side.
Toolbars can be repositioned in the same band or moved to a different band. However, the user is not
able to drag a toolbar from one ToolBarTray to another. If you want to lock down individual toolbars,
simply set the ToolBarTray.IsLocked attached property on the appropriate ToolBar objects.
Note When moving toolbars, it’s possible that some content may be obscured. For example, the user may move
a toolbar to a position that leaves very little room for another adjacent toolbar. In this situation, the missing items
are added to the overflow menu.
You can place as many ToolBar objects as you want in a ToolBarTray. By default, all your toolbars
will be placed in left-to-right order on the topmost band. Initially, each toolbar is given its full desired
width. (If a subsequent toolbar doesn’t fit, some or all of its buttons are moved to the overflow menu.) To
get more control, you can specify which band a toolbar should occupy by setting the Band property
using a numeric index (where 0 is the topmost band). You can also set the placement inside the band
CHAPTER 25
MENUS, TOOLBARS, AND RIBBONS
850
explicitly by using the BandIndex property. A BandIndex of 0 puts the toolbar at the beginning of the
band.
Here’s some sample markup that creates several toolbars in a ToolBarTray. Figure 25-7 shows the
result.
<ToolBarTray>
<ToolBar>
<Button>One</Button>
<Button>Two</Button>
<Button>Three</Button>
</ToolBar>
<ToolBar>
<Button>A</Button>
<Button>B</Button>
<Button>C</Button>
</ToolBar>
<ToolBar Band="1">
<Button>Red</Button>
<Button>Blue</Button>
<Button>Green</Button>
<Button>Black</Button>
</ToolBar>
</ToolBarTray>
Figure 25-7. Grouping toolbars in the ToolBarTray
The StatusBar
Compared to the ToolBar, the StatusBar is a much less glamorous control class. Like the ToolBar, it holds
any content (which it wraps implicitly in StatusBarItem objects), and it overrides the default styles of
some elements to provide more suitable rendering. However, the StatusBar control doesn’t have the
support for draggable rearranging or an overflow menu. It’s primarily used to display text and image
indicators (and the occasional progress bar).
The StatusBar doesn’t work very well if you want to use one of the ButtonBase-derived elements or
the ComboBox. It doesn’t override the styles of any of these controls, so they look out of place in the
status bar. If you need to create a status bar that includes these controls, you might consider docking an
ordinary ToolBar control to the bottom of your window. It’s probably as a result of this general lack of
features that the StatusBar is found in the System.Windows.Controls.Primitives namespace rather than
in the more mainstream System.Windows.Controls namespace where the ToolBar control exists.
CHAPTER 25
MENUS, TOOLBARS, AND RIBBONS
851
There’s one tip worth noting if you’re using a status bar. Ordinarily, the StatusBar control lays its
children out from left to right using a horizontal StackPanel. However, applications often use
proportionately sized status bar items or keep items locked to the right side of the status bar. You can
implement this design by specifying that the status bar should use a different panel using the
ItemsPanelTemplate property, which you first considered in Chapter 20.
One way to get proportionally or right-aligned items is to use a Grid for your layout container. The
only trick is that you must wrap the child element in a StatusBarItem object in order to set the
Grid.Column property appropriately. Here’s an example that uses a Grid to place one TextBlock on the
left side of a StatusBar and another on the right side:
<StatusBar Grid.Row="1">
<StatusBar.ItemsPanel>
<ItemsPanelTemplate>
<Grid>
<Grid.ColumnDefinitions>
<ColumnDefinition Width="*"></ColumnDefinition>
<ColumnDefinition Width="Auto"></ColumnDefinition>
</Grid.ColumnDefinitions>
</Grid>
</ItemsPanelTemplate>
</StatusBar.ItemsPanel>
<TextBlock>Left Side</TextBlock>
<StatusBarItem Grid.Column="1">
<TextBlock>Right Side</TextBlock>
</StatusBarItem>
</StatusBar>
This highlights one of the key advantages of WPF—other controls can benefit from the core layout
model without needing to re-create it. By contrast, Windows Forms included several controls that
wrapped some sort of proportionally sized items, including the StatusBar and the DataGridView. Despite
the conceptual scenario, these controls were forced to include their own layout model and add their own
layout-specific properties to manage child items. In WPF, this isn’t the case—every control that derives
from ItemsControl can use any panel to arrange its child items.
Ribbons
At this point, you might be feeling that the WPF toolbars are just a bit underwhelming. Other than two
built-in features—a basic overflow menu and the ability to be rearranged by the user—they don’t
provide any modern frills. Even the Windows Forms toolkit has a feature that allows users to drag and
dock toolbars to different places in a window.
The reason that toolbars haven’t evolved since the first version of WPF is simple: they’re a dying
trend. Although toolbars are still relatively popular at the moment, the shift is to smarter tab-based
controls, such as the ribbon that debuted in Office 2007 and now graces Windows 7 and Office 2010.
With the ribbon, Microsoft found itself faced with a familiar dilemma. To improve the productivity
and consistency of all Windows applications, Microsoft wanted to encourage every application to adopt
the ribbon. But because Microsoft also wanted to keep its competitive edge, it wasn’t in a rush to release
the APIs that would make that possible. After all, Microsoft spent thousands of hours of research and
development in perfecting its version of the ribbon, so it’s no surprise that the company took a few years
to enjoy the result.
Fortunately, the wait has ended, and Microsoft has now made a version of the ribbon available to
WPF developers. The good news is that it’s completely free and respectably full-featured, including rich
tooltips, drop-down buttons, dialog launchers, a quick access toolbar, and configurable resizing.
CHAPTER 25
MENUS, TOOLBARS, AND RIBBONS
852
However, the ribbon control isn’t included with the .NET Framework. Instead, it’s available as a
separate download, which is considered to be a “preview” version at the time of this writing. You can
download it from the Office UI Licensing website at (look for a
“License the Office UI” link). Don’t be intimidated about the terminology—licensing simply means
providing your contact information and accepting a one-page agreement that states that you will follow
the Office UI design guidelines. (In other words, Microsoft doesn’t want you using the ribbon control if
you aren’t using it right.) You can find ribbon guidelines and best practices at
Once you’ve downloaded the ribbon, you’ll get a single compiled class library assembly, named
RibbonControlsLibrary.dll. To start using the ribbon, add a reference to this library in any WPF
application, and keep reading.
Adding the Ribbon
As with any control that’s not a part of the core WPF libraries, you need to map the control assembly to
an XML prefix before you can use it:
<Window x:Class="RibbonTest.MainWindow" xmlns:r=
"clr-namespace:Microsoft.Windows.Controls.Ribbon;assembly=RibbonControlsLibrary">
You can then add an instance of the Ribbon control anywhere in your window:
<r:Ribbon>
</r:Ribbon>
By far the best position for the ribbon is at the top of the window, using a Grid or Dock panel. But
before you go any further, there’s one change you should make to the top-level window. That’s because
the ribbon just doesn’t look right in a conventional window—it sits below the window frame, looking like
a bit of an afterthought. By comparison, in an application such as Office 2010 or Windows 7 Paint, the
ribbon fits neatly into the top of the window. There’s no border line between the window frame and the
ribbon, and the quick access toolbar (which sits at the top of the window) is inserted directly into the
window’s title bar.
The RibbonControlsLibrary.dll assembly addresses this issue by including the RibbonWindow—a
class that derives from Window and integrates more seamlessly with the ribbon. Figure 25-8 compares
the difference.
Figure 25-8. An ordinary window (left) and the RibbonWindow (right)