the book of javascript 2nd edition phần 6 pot
Bạn đang xem bản rút gọn của tài liệu. Xem và tải ngay bản đầy đủ của tài liệu tại đây (795.98 KB, 50 trang )
222 Chapter 12
<! hide me from older browsers
_ document.write("Name: " + cookie_information["name"] + "<br>");
document.write("Age: " + cookie_information["age"] + "<br>");
document.write("Phone: " + cookie_information["phone"] + "<br>");
// show me >
</script>
</body>
</html>
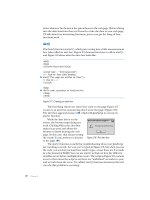
Figure 12-6: Loading a complex cookie into an associative array
When this page loads, \ sets a cookie, ] creates a new array, and ^
sends the new, empty array to the
readTheCookie() function. The function first
gets the cookie and splits off the cookie’s name (
my_cookie). After X, the_values
will equal
"name:thau/age:just a tyke/phone:411" because that’s how we set the
cookie in the
setCookie() function.
Next, Y splits
the_values into its component parts, loading "name:thau"
into
separated_values[0], "age:just a tyke" into separated_values[1], and
"phone:411" into separated_values[2].
After the function breaks up the_values, Z loops through each of the
three elements (
name, age, and phone) in separated_values. Each time through
the loop, the function breaks the element into two pieces along the colon. It
then loads the first part of the element into
the_property and the second part
into
the_value.
The first time through the loop,
the_property is "name" and the_value
is
"thau". Once the element is split like this, the associative array the_info
gets loaded in [. After the loop has occurred three times, you get these
results:
the_info["name"] = "thau", the_info["age"] = "just a tyke", and
the_info["phone"] = "411".
With the associative array loaded properly, the three lines starting in _
retrieve the information and display it on a web page.
Setting the Duration of a Cookie
Until now, we’ve been creating cookies that disappear when a user exits the
browser. Sometimes this is for the best. Since each domain can have only 20
cookies on a user’s machine, you don’t want to waste space by saving unnec-
essary cookies between browser sessions. However, if you do want your cookies
to remain on a user’s hard drive after he or she quits the browser, you have to
set an expiration date in UTC format. For example,
Sun, 12 Jan 1992 00:00:00 UTC
is the supposed birth date in of HAL 9000, the intelligent computer from
2001: A Space Odyssey, expressed in UTC. (“HAL? HAL? Are you out there?”)
NOTE UTC time is the time at the Royal Observatory in Greenwich, England. Urbana,
Illinois, where HAL was built, is six hours west of Greenwich, so the date given
here is actually 6
PM local time on January 11.
Saving Visitor Information with Cookies 223
The UTC format can be sort of a pain, especially since you must figure
out whether the day was a Monday, Friday, or whatever. Luckily, JavaScript’s
toUTCString() date method converts a date in a simpler format to a date in
UTC format. Here’s an easy way to set a date relatively far into the future:
var the_date = new Date("December 21, 2012");
var the_cookie_date = the_date.toUTCString();
NOTE JavaScript versions earlier than 1.3 used a date string format in which the day, month,
and year were separated by hyphens instead of spaces, and the time was followed by the
letters
GMT to indicate that it was Greenwich Mean Time. This was therefore called
GMT format, and JavaScript had a
toGMTString() method instead of a toUTCString()
method. The
toGMTString() method is still provided, but UTC is the norm. For example,
with Windows XP and Internet Explorer 6.0,
toGMTString() returns a UTC string,
and
new Date() works when passed a UTC string but not when passed a GMT string.
To set your cookie to expire, you have to add the expiration date to the
cookie. Add
expires = date to the string, and separate the cookie components
with a semicolon:
cookie_name = whatever;expires = date
Figure 12-7 shows you how to build a cookie that will last until the end of
the Mayan calendar:
function setCookie()
{
// get the information
//
var the_name = prompt("What's your name?","");
var the_date = new Date("December 21, 2012");
var the_cookie_date = the_date.toUTCString();
// build and save the cookie
//
var the_cookie = "my_cookie=" + escape(the_name);
the_cookie = the_cookie + ";expires = " + the_cookie_date;
document.cookie = the_cookie;
}
Figure 12-7: Setting a cookie that will expire far in the future
Before the_cookie in Figure 12-7 is escaped (using the escape() function),
it will resemble the following line:
my_cookie = thau;expires = Fri, 21 Dec 2012 00:00:00 UTC
Once set, this cookie lives on your visitor’s hard drive until the expira-
tion date.
224 Chapter 12
You can also use the expiration date to delete cookies. To do so, set the
date to a time in the past. This can come in handy if you’re using cookies to
log people in and out of your site. When a visitor logs in, assign a cookie that
shows that the visitor has done so. When the user wants to log out, delete the
cookie.
Who Can Read the Cookie?
I’ve already mentioned that only the website that set a cookie can read it—
McDonald’s can’t read Burger King’s cookies, and vice versa. The full story is
a little more complicated than that, however.
Letting One Page Read a Cookie Set on Another
By default, only the web page that set the cookie can read it. If one of your
pages sets a cookie, to let other pages on your site read that cookie you must
set its path. The cookie’s path sets the top-level directory from which a cookie
can be read. Setting the path of a cookie to the root-level directory of your
site makes it possible for all your web pages to read the cookie.
To do this, add
path=/; to your cookie. If you just want the cookie to be
readable in a directory called food, add
path=/food;.
Dealing with Multiple Domains
Some websites have lots of little domains. For example, the Yahoo! web
portal has a main site (), a finance site (http://
finance.yahoo.com), a personalized site (), and many
others. By default, if a web page on the finance site sets a cookie, pages on
the personalized site can’t read that cookie. But if you add
domain=domain_name
to a cookie, all domains ending in
domain_name can read the cookie. To allow
all the web pages on any of the machines in the yahoo.com domain to read a
cookie, Yahoo! has to add
domain=yahoo.com to the cookie.
The Whole Cookie
Adding an expiration date, domain, and path to a cookie makes it pretty big.
Figure 12-8 lists a function that sets all these variables so you can see the whole
picture in one example.
function setCookie()
{
var the_name = prompt("What's your name?","");
var the_date = new Date("December 21, 2012");
var the_cookie = escape(the_name) + ";";
var the_cookie = the_cookie + "path=/;";
var the_cookie = the_cookie + "domain=nostarch.com;";
var the_cookie = the_cookie + "expires=" + the_date.toUTCString() + ";";
document.cookie = "my_cookie=" + the_cookie;
}
Figure 12-8: Setting all the cookie properties
Saving Visitor Information with Cookies 225
Figure 12-8 results in a cookie that looks like this (before escaping it):
my_cookie = thau;path=/;domain = nostarch.com;expires =
Fri, 21 Dec 2012 00:00:00 UTC;
Of course, because I’m setting the domain to nostarch.com, only a web page
from a No Starch Press computer can read this cookie.
Setting Multiple Cookies
Sometimes one cookie just isn’t enough. For instance, if your website has
two different JavaScript applications—one that uses cookies to store infor-
mation about your visitors and one that uses cookies to keep track of their
purchases—you’ll probably want to store these two types of information in
different cookies.
To save multiple cookies, just give each cookie a different name. Setting
document.cookie to a cookie with a new name won’t delete the cookies that are
already there. Here’s some code that sets two cookies:
var visitor_cookie = "this_person=" +
escape("name:thau/occupation:slacker/phone:411");
document.cookie = visitor_cookie;
var purchase_cookie = "purchases=" + escape("tshirt:1/furbie:15/burrito:400");
document.cookie = purchase_cookie;
This code sets document.cookie twice. It looks as if the second document.cookie =
statement should overwrite the information stored by the first one, as would
happen if some other object were to the left of the equal sign. Assignment to
document.cookie works differently, however. As long as the cookies have differ-
ent names, you can store both in
document.cookie. After running the lines
above,
document.cookie looks like this (except for the escaped characters):
this_person = name:thau/occupation:slacker/phone:411;purchases=tshirt:1/
furbie:15/burrito:400
In this example, storing two cookies in document.cookie works well
because the JavaScript that looks at purchase information doesn’t have to
deal with the information in the other cookie. Unfortunately, it’s a bit difficult
to pull the contents of one cookie out of
document.cookie because it contains
multiple cookies. Here’s where prewritten JavaScript libraries come in handy.
Cookie Libraries
You’ll find many free cookie libraries on the Web. Just use any search
engine, and search for javascript cookie to get a list. The functions in the
libraries generally come ready to run, so you can just cut and paste them
into your web pages. Webmonkey has exceptionally well-commented
libraries, so we’ll use its code here. You can find more of Webmonkey’s free
226 Chapter 12
JavaScript code at />javascript_code_library/wm_ckie_lib/?tw=reference&category=forms_data.
Figure 12-9 shows you Webmonkey’s code for accessing one cookie when
document.cookie is storing multiple cookies.
function WM_readCookie(name) {
if(document.cookie == '') { // there's no cookie, so return false
return false;
} else { // there is a cookie
var firstChar, lastChar;
var theBigCookie = document.cookie;
firstChar = theBigCookie.indexOf(name);// find the start of 'name'
var NN2Hack = firstChar + name.length;
{ // if you found the cookie
if((firstChar != -1) && (theBigCookie.charAt(NN2Hack) == '='))
firstChar += name.length + 1; // skip 'name' and '='
// find the end of the value string (the next ';').
lastChar = theBigCookie.indexOf(';', firstChar);
if(lastChar == -1) lastChar = theBigCookie.length;
return unescape(theBigCookie.substring(firstChar, lastChar));
} else { // if there was no cookie of that name, return false
return false;
}
}
} // WM_readCookie
Figure 12-9: Reading one cookie from
document.cookie
To use these functions, cut and paste them into the page, and call the
functions appropriately. To retrieve a cookie named
thisuser, call the func-
tion
WM_readCookie("thisuser").
Webmonkey’s well-commented functions speak for themselves. If you use
these, read them over first and make sure you understand how they work.
A Cookie-Based Shopping Cart
You can build fairly complicated applications using cookies. This section
discusses code that represents the start of a shopping cart script. You defi-
nitely do not want to use this code to run your own shopping cart—it’s much
too simplistic. For example, you can’t remove an item from the basket once
you’ve selected it.
However, this code should give you an idea of how to start building
complex applications using cookies. Figure 12-10 shows you the code for a
main page of a simple shopping cart (see Figure 12-11) with simple links to
pages that contain items to buy.
<html><head><title>Welcome to My Store</title>
</head>
<body>
<h1>Welcome to My Store!</h1>
Here you can buy:<br>
Saving Visitor Information with Cookies 227
<a href = "parts.html">Computer parts!</a> and <br>
<a href = "clothes.html">Clothes!</a><br>
<p>
When you're done choosing items, you can
<form>
X <input type = "button" value = "check out"
onClick = "window.location='checkout.html';">
</form>
</body>
</html>
Figure 12-10: The shopping cart main page
Figure 12-11: What the shopping cart main page looks like
The only new and interesting feature in Figure 12-10 is X, which redirects
visitors to the page checkout.html (listed in Figure 12-15 and discussed later
in this section) when they click the check out button.
Adding an Item to the Cart
Figure 12-12 shows you the code for one of the pages where you can buy a
product.
<html><head><title>Clothes</title>
X <script type = "text/javascript" src = "shopping.js"></script>
</head>
<body>
<h1>Buy these clothes!</h1>
<form name = "clothes">
T-shirt:
<input type = "text" name = "tshirt" size = "3" value = "1">
Y <input type = "button" value = "add"
onClick = "addToCart(window.document.clothes.tshirt.value, 'tshirt',14);">
($14 each)
<p>
Jeans:
<input type = "text" name = "jeans" size = "3" value = "1">
<input type = "button" value = "add"
onClick = "addToCart(window.document.clothes.jeans.value,'jeans',30);">
228 Chapter 12
($30 each)
<p>
<a href = "main.html">Go back to main page</a>
or <br>
<form>
<input type = "button" value = "check out"
onClick = "window.location='checkout.html';">
</form>
</body>
</html>
Figure 12-12: Code for a page where you can purchase goods
Most of this page describes the form that lists what visitors can buy.
Each item has a button next to it that lets you buy the item (see Figure 12-13).
Pushing that button (as in Y) calls the function
addToCart(), which takes three
parameters: the quantity of the item to buy, what the item is, and how much
it costs. The
addToCart() function isn’t stored on this web page but in a file
called shopping.js (Figure 12-14), a normal text file that contains all the
functions the shopping cart needs to work. The browser reads the shopping.js
file into the page and interprets it in X. This technique is very handy when
you have a set of functions that apply to many pages. In our example, all the
shopping pages on the site will need the
addToCart() function, so rather than
cut and paste this function onto every page, we can use X to call the func-
tions from shopping.js. You’ll also find this feature extremely useful when
you want to change the function. Instead of having to track down every place
you’ve cut and pasted it, you just need to change it once in the shopping.js
file. Once you’ve changed it there, any page that uses the shopping.js file will
load the changed version.
Figure 12-13: A shopping page
function addToCart(amount, item, price)
{
X var purch_string = escape(item + ":" + amount + ":" + price);
Y var the_cookie = WM_readCookie("purchases");
Z if (the_cookie)
Saving Visitor Information with Cookies 229
{
[ purch_string = the_cookie + "/" + purch_string;
}
\ WM_setCookie("purchases",purch_string,0,"/");
}
Figure 12-14: shopping.js
The addToCart() function in shopping.js creates a string to save into a
cookie (X) in the form
item:amount:price. The function then uses the
Webmonkey
WM_readCookie() function to see whether the visitor has already
received a cookie named
purchases (Y and Z). If there is already a cookie, [
puts a forward slash (/) at its end and adds the string created in X. Each time
a visitor buys an item, the cookie gets a slash followed by the item name. If you
bought one T-shirt and one pair of jeans, the cookie would look like this:
purchases = tshirt:1:14/jeans:1:30
If you then bought another T-shirt, the cookie would look like this:
purchases = tshirt:1:14/jeans:1:30/tshirt:1:14
A more complete version of addToCart() would realize that you had already
bought a T-shirt and, instead of tacking another
tshirt:1:14 to the end of the
cookie, would add one to the T-shirt amount:
purchases = tshirt:2:14/jeans:1:30
However, since that “small” change involves a fair amount of code, I’m
leaving it out.
After the new cookie string has been constructed, \ uses the Webmonkey
library function
WM_setCookie() to save the visitor’s cookie information.
The Checkout Page
The final page to consider is the checkout page listing in Figure 12-15.
<html><head><title>Checkout</title>
X <script type = "text/javascript" src = "shopping.js"></script>
</head>
<body>
<h1>Here's Your Basket So Far</h1>
<script type = "text/javascript">
Y checkOut();
</script>
</body>
</html>
Figure 12-15: Code for the checkout page
230 Chapter 12
The checkout page loads in the shopping.js file in X just as the product
page does in Figure 12-12. Although there is a little HTML on this page, most
of what you see when you visit this page (Figure 12-16 shows the page in IE) is
generated by the
checkOut() function, which is stored in the shopping.js file.
Figure 12-17 lists the
readTheCookie() function, which reads the cookie and
formats it in a way that makes the
checkOut() function’s job easier. Figure 12-18
lists the
checkOut() function itself.
Figure 12-16: What the checkout page looks like
function readTheCookie(the_info)
{
var split_stuff;
// load the cookie into a variable and unescape it
X var the_cookie = WM_readCookie("purchases");
if (the_cookie)
{
Y if (the_cookie.indexOf('/') != -1)
{
split_stuff = the_cookie.split("/");
Z for (var loop = 0; loop < split_stuff.length; loop++)
{
the_info[loop] = split_stuff[loop];
}
} else {
[ the_info[0] = the_cookie;
}
}
}
Figure 12-17: Code for the
readTheCookie() function
The readTheCookie() Function
The readTheCookie() function, which is called by the checkOut() function,
breaks up the cookie into each item bought and loads the items into the
array passed to it. As is shown in Figure 12-18, the array is new and empty
Saving Visitor Information with Cookies 231
when checkOut() calls readTheCookie(). Line X reads the cookie using the
WM_readCookie() function. If there is a purchases cookie (which the visitor
would have set by adding an item—see Figure 12-13), Y determines whether
the visitor bought more than one item. If he or she purchased only one item,
that item gets loaded into the array in position 0 ([). If he or she purchased
two or more items, a forward slash appears between them and the cookie
gets split into the
split_stuff array. Then the loop in Z copies everything
in the
split_stuff array into the_info, the array sent into the readTheCookie()
function. At the end of
readTheCookie(), the_info contains all the items
purchased.
function checkOut()
{
var total = 0;
var the_stuff = new Array();
X readTheCookie(the_stuff);
document.writeln("<table border=2>");
document.writeln("<th>Item</th><th>Amount</th><th>Price</th>
<th>Subtotal</th>");
Y for (var loop = 0; loop<the_stuff.length; loop++)
{
Z var this_item = the_stuff[loop].split(":");
[ document.writeln("<tr>");
\ for (var inloop = 0; inloop < this_item.length; inloop++)
{
document.writeln("<td>");
document.writeln(this_item[inloop]);
document.writeln("</td>");
}
] sub_total = this_item[1] * this_item[2];
^ total += sub_total;
document.writeln("<td>" + sub_total + "</td>");
document.writeln("</tr>");
}
document.writeln("<tr>");
document.writeln("<td><b>total</b></td>");
_ document.writeln("<td></td><td></td><td><b>" + total + "</b></td>");
document.writeln("</tr>");
document.writeln("</table>");
}
Figure 12-18: Code for the
checkOut() function
The checkOut() Function
Once readTheCookie() loads the information from the cookie into the_stuff
(X),
checkOut() writes the purchased items to the web page. Line Y loops
through
the_stuff, each element of which contains a purchased item. If the
first item bought is one pair of jeans, for example, the first element in the array
appears as
jeans:1:14. Line Z then splits this element at the colons, loading
the three resulting elements into the
this_item array.
The rest of the code writes the table. Line [ begins a new row, and \
sandwiches each element in
this_item between <td> and </td> tags.
232 Chapter 12
Line ] calculates how much this_item costs by multiplying the price of the
item (
this_item[2]) by the quantity bought (this_item[1]). If the first element
in
the_info is jeans:1:14, then this_item[0] is jeans, this_item[1] is 1, and
this_item[2] is 14 because of the split in Z. Line [ then multiplies the quantity
by the price to get the subtotal, and ^ adds this subtotal to the total, written to
the page in _. Figure 12-16 shows you what the checkout page looks like after
someone buys a T-shirt, then a pair of jeans, and then another T-shirt.
Even though this shopping cart requires a lot of JavaScript, each of its
functions is short and fairly easy to understand. Complicated applications
such as shopping carts are usually just groups of smaller functions that work
together.
Once you understand the basics of JavaScript, the hard part of writing an
application is figuring out what functions you need and how they interrelate.
This is the art of programming, and it comes only with a lot of practice. If
you understand the shopping cart code in this example but don’t think you
could write it yourself, practice writing smaller scripts—you’ll soon get the
hang of it.
Summary
Cookies are an advanced JavaScript feature and can add a lot of functionality
to your site. In addition to setting up a shopping cart, you can use cookies to
keep track of when and how often a visitor comes to your site and to save
customization preferences visitors might set. If you’ve thoroughly grasped
this chapter, you now know:
z What cookies are
z How to set a basic cookie
z How to make a cookie last after the user has turned off the computer
z How to control which pages can read your cookie
z How to store more than one piece of information in a cookie
z How to set and read more than one cookie
z How to create a separate JavaScript file that other HTML files can
include
z Where to find JavaScript cookie libraries
z How to build a complex application using cookies
Assignment
Write a page that greets new visitors with an alert box that says, Welcome,
new-timer! This should only appear the first time a visitor sees the page—
at the next visit, that alert box shouldn’t appear.
DYNAMIC HTML
Dynamic HTML (DHTML) combines
JavaScript, HTML, and Cascading Style
Sheets (CSS) to give web page designers
an incredible degree of freedom to animate their
pages and add interactivity. If you’ve seen sites that
have dynamic menus or images that dance all over the screen, you’ve
seen DHTML in action. DHTML is also a key component of Asynchronous
JavaScript and XML (Ajax), a technique used to create complete web-based
applications. We’ll talk more about Ajax in Chapters 14, 15, 16, and 17.
DHTML is an immense subject. This chapter will introduce DHTML
and show you how what you’ve learned so far fits into the DHTML puzzle.
1
1
If you want to learn more about DHTML, I suggest you read Dynamic HTML: The Definitive
Reference by Danny Goodman (O’Reilly, 2002).
234 Chapter 13
This chapter covers the following topics:
z The CSS basics you need to know
z How JavaScript, HTML, and CSS work together to make objects move
around your screen
z How to use fancy event handling to read the keyboard and discover the
location of the user’s mouse
z How to create dynamic drop-down menus
Real-World Examples of DHTML
DHTML can enhance your web pages in a variety of ways. There are entire
sites devoted to DHTML examples and tutorials. A few good ones are:
z
z
z
Searching for dynamic html in any search engine will return dozens more
choices.
DHTML is often used to create drop-down menus, examples of which
can be seen on many websites, including the Doctor Who fan site, Outpost
Gallifrey (), and Fortune magazine’s website
(, shown in Figure 13-1). The code for these menus
can be complicated, but by the end of this chapter, you should have a good
sense of how it works.
Figure 13-1: A DHTML pull-down menu
CSS Basics
As mentioned in the opening of the chapter, DHTML is a combination
of JavaScript, HTML, and CSS. CSS enables you to position HTML
precisely on your pages—no longer will you have to use bizarre tables
Dynamic HTML 235
and invisible GIFs to position elements. With a CSS you can easily place
a GIF precisely in the center of your page, or position a block of text in
the lower-right corner.
The <div> Tag
Before you can position any HTML, you have to use the <div> and </div> tags
to tell your browser which displayed HTML you want to position. Figure 13-2
shows a simple use of
<div> tags.
<html><head><title>Divide and Conquer</title></head>
<body>
<h1>Divide and Conquer</h1>
This text is not inside a div.
<p>
X <div id = "myFirstDiv">
But this text is.<br>
And so is this text.<br>
Y </div>
<p>
But this text is not.
</body>
</html>
Figure 13-2: Basic
div usage
Positioning a div with CSS
You can position the contents of a <div> tag anywhere on a web page using
the HTML
style element. Replacing X in Figure 13-2 with the following line
moves the block of HTML called
myFirstDiv into the lower middle of the page:
<div id = "myFirstDiv" style = "position:absolute; top:150; left:100;">
Figure 13-4 shows what this looks like.
The page displayed by this code
(Figure 13-3) looks just like any other
HTML page. However, X and Y
assign an
id to a block of HTML by
using a
<div> tag with an id attribute
of
myFirstDiv. You can use any set of
letters or numbers for a
div’s id, but it
can’t contain spaces or underscores,
and the first character has to be a
letter. Now that we’ve provided a
way for code to refer to this block,
we can use the
div’s id to position
the block with CSS or to move it
around dynamically with JavaScript.
Figure 13-3: An HTML page with divs
236 Chapter 13
As you can see, the style element goes inside the <div> tag and has
three components separated by semicolons. The
position component
gives the
div a reference point (with position:absolute, the reference
point is the browser window’s upper-left corner). The
top component
determines how many pixels down from the reference point the top-left
corner of the
div appears, and the left component determines how
many pixels to the right of the reference point the top-left corner of the
div appears.
Instead of positioning the
div relative to the upper-left corner of the
browser window, you can position it relative to where it would normally
appear in the HTML. If you do not include any positioning information
in the
div, it would follow the line This text is not inside a div. However, if
you use the
style shown in Figure 13-4 but replace position:absolute
with
position:relative, the div appears 150 pixels below and 100 pixels to
the right of the This text is… line. Figure 13-5 shows you what this would
look like.
Whether you use
position:absolute or position:relative depends
on what you’re aiming for. If you want one block of HTML to appear
directly to the right of another block, you might find it easier to use
position:relative. But if you want to make sure an image appears in
the center of the screen, you’ll find
position:absolute more useful.
Figure 13-4: Moving a div into the
lower middle of the page
Figure 13-5: Using
position:relative
instead of position:absolute
Dynamic HTML 237
Hiding a div
You can display or hide the contents of a div by setting its visibility to either
visible or hidden. The style below puts the div in the lower center of the page
and hides it.
<div id = "myFirstDiv" style =
"position:absolute; top:150; left:100; visibility:hidden">
You can change the visibility of a div with JavaScript. Sometimes it makes
sense to create a bunch of invisible
divs on a page and then use JavaScript to
make them appear when you need them. For example, you could make an
entire section of HTML code blink on and off by alternately hiding and
showing it. Later in the chapter, when we talk about drop-down menus, I’ll
show you how to use JavaScript to hide
divs.
Layering divs
Another nice feature of divs is that you can layer them on top of each
other. For example, you could put an image of a mouse in one
div and
an image of a maze in another
div, then put the mouse in the maze by
layering the mouse
div on top of the maze div. Once you’ve done that,
you can change the position of the mouse
div to make it look like the
mouse is exploring the maze.
To layer one
div on top of another, set the div’s z-index. A div with a
higher
z-index value appears on top of a div with a lower z-index. Figure 13-6
shows the code for a page with one GIF (a small white square) on top of
another GIF (a bigger black square). The small white square has a higher
z-index, giving the result shown in Figure 13-7. Figure 13-8 shows what would
happen if the black square were given a higher
z-index.
<html><head><title>Layering divs</title></head>
<body>
<div id = "whiteSquare" style =
"position:absolute; top:100; left:100; z-index:2">
<img src = "white.gif">
</div>
<div id = "blackSquare" style = "position:absolute; top:0; left:0; z-index:1">
<img src = "black.gif">
</div>
</body>
</html>
Figure 13-6: Layering
divs with z-index
238 Chapter 13
Normal HTML is at z-index 0. If you set the z-index of a div to a negative
number, it appears behind the normal HTML, like a background image.
JavaScript and DHTML
DHTML becomes dynamic when you start using JavaScript to manipulate
divs. For example, if you have a div named myFirstDiv (as in Figure 13-2),
you could use this JavaScript to hide the
div:
window.getElementById('myFirstDiv').style.visibility = "hidden";
This line gets the element whose id is myFirstDiv and then gets its CSS
style object and changes the visibility value of that style object from visible
to
hidden.
Figure 13-9 shows how you can hide a
div when the user clicks a link.
<html><head><title>Hiding a div</title></head>
<body>
<h1>Hide the Div</h1>
This text is not inside a div.
<p>
<div id = "myFirstDiv" style =
"position:absolute; top:150; left:100; visibility:visible">
But this text is.<br>
And so is this text.<br>
</div>
<p>
But this text is not.
<br>
Figure 13-7: The white square with a higher
z-index than the black square
Figure 13-8: The black square with a higher
z-index than the white square
Dynamic HTML 239
<a href = "#"
onClick = "document.getElementById('myFirstDiv').style.visibility="hidden";
return false;">Hide the div.</a>
</body>
</html>
Figure 13-9: Hiding a
div
Making divs Move
The top property of a div’s style dictates the vertical position of the div, and
the
left property determines the horizontal position. You can use these
properties to move a
div around the screen. For example, to position a div
500 pixels from the left border of the browser window, do this:
document.getElementById('myDiv').style.left = 500;
Adding an amount to the top or left attribute of a div’s style will move it
vertically or horizontally. If a
div is 500 pixels from the left border of the win-
dow, and you add 5 to the
left property, you will move the div to a position
505 pixels from the border. Unfortunately, adding numbers to the
left and
top properties is not straightforward, because most browsers will stick a px at
the end of the
left and top properties. For example, if you load Figure 13-9
into a browser, and then type
javascript:alert(document.getElementById('myFirstDiv').style.top)
the response will be 150px, and not the number 150. To get rid of the px,
use the
parseInt() method that you learned about way back in Chapter 3.
Here is an example:
document.getElementById('myDiv').style.left =
parseInt(document.getElementById('myDiv').style.left) + 5;
To move a div 5 pixels to the left, subtract 5 from the value of the left
property as follows:
document.getElementById('myDiv').style.left =
parseInt(document.getElementById('myDiv').style.left) - 5;
Using setTimeout() and clearTimeout() to Animate a Page
The code described above makes a div jump across the screen. If you want
the
div to drift more slowly across the screen or to move along a specific path,
you can use timing loops (discussed in Chapter 9) to animate your
div.
To make a
div move smoothly across the screen, write a function that
moves the
div a little bit, then uses setTimeout() to call itself in a few milli-
seconds. Figure 13-10 contains code that causes an image of the number 1
to roam randomly around the screen.
240 Chapter 13
<html><head><title>The Wandering One</title>
<script type = "text/javascript">
<! hide me from older browsers
var the_timeout;
function moveNumber()
{
var the_div, move_amount;
X the_div = window.document.all.numberOne.style;
Y move_amount = parseInt(Math.random() * 10);
Z if (parseInt(Math.random()*10) < 5) {
the_div.left = parseInt(the_div.left) + move_amount;
} else {
the_div.left = parseInt(the_div.left) - move_amount;
}
[ random_number = parseInt(Math.random() * 10);
\ if (parseInt(Math.random()*10) < 5)
{
the_div.top = parseInt(the_div.top) + move_amount;
} else {
the_div.top = parseInt(the_div.top) - move_amount;
}
] the_timeout = setTimeout("moveNumber();", 100);
}
// show me >
</script>
</head>
<body>
<h1>The Wandering One</h1>
<div id = "numberOne" style =
"position:absolute; top:150; left:100; z-index:-1">
<img src = "one.jpg">
</div>
<br>
^ <a href = "#" onClick =
"the_timeout=setTimeout('moveNumber();',100);
return false;">Start wandering</a> <br>
_ <a href = "#" onClick =
"clearTimeout(the_timeout);
return false;">Stop wandering</a>
</body>
</html>
Figure 13-10: The Wandering One
Line-by-Line Analysis of Figure 13-10
In Figure 13-10, the image of the number 1 starts wandering when a visitor
clicks the link in ^, calling the
moveNumber() function. The moveNumber()
function sets
the_div to point to the div we want to move (X) and then
determines how far the
div moves.
Generating Random Numbers
Line Y moves the div by a random amount between 0 and 9 pixels. It chooses
this amount by generating a random number between 0 and 0.999 (that is,
Dynamic HTML 241
0.9 repeating, a fraction with a decimal point followed by an infinite number
of nines after it), using the
Math.random() method, and then multiplying this
number by 10. This yields a number between 0 and 9.999… The
parseInt()
function then drops the digits to the right of the decimal point. If
Math.random()
generates 0.543, then multiplying by 10 gives you 5.43, and
parseInt() turns
that into 5.
Determining the Direction of an Image’s Motion
The if-then statement starting in Z generates another number between 0
and 9. If the number is below 5 (which happens exactly half the time), the
amount generated in Y is added to the
left property, moving the number 1
on the screen a little to the right. If the number is 5 or above, the amount is
subtracted from the
left property, moving the 1 to the left. Lines [ and \
act similarly, moving the 1 up or down.
After the 1 has moved a little horizontally and a little vertically, ] calls
setTimeout() to call the function again in a tenth of a second (remember,
there are 1,000 milliseconds in a second, so 100 milliseconds is one-tenth
of a second). After 100 milliseconds pass, the
moveNumber() function is called
again, moving the number a little more and again setting
setTimeout(). The 1
keeps wandering until the visitor clicks the link in _, clearing the last timeout
set and ending the cycle.
Changing the Contents of a div
The contents of a div can be changed by setting the div’s innerHTML property.
As the name of the property implies,
innerHTML is the HTML inside a div. For
example, Figure 13-11 shows a web page with a brainteaser—find all the Fs in
the text.
In the HTML, the block of text is
contained in a
div. Clicking on the link
makes the Fs bigger by replacing the
contents of the
div with a string of
HTML that displays the same text,
but with larger Fs. Figure 13-12 shows
the code.
The JavaScript in Figure 13-12 should
look very familiar to you by now. Line Z
creates a
div called myDiv, X sets the vari-
able
theDiv to point to myDiv, and Y changes
the
innerHTML of that div to a new string
containing a block of HTML. Changing
the
innerHTML of the div changes its con-
tents, replacing the original HTML with
the HTML in the string.
Figure 13-11: Find all the Fs
in this text.
242 Chapter 13
<html><head><title>How Many Fs Are There?</title>
<script type = "text/javascript">
<! hide me from older browsers
function swapText() {
X var theDiv = document.getElementById("myDiv");
Y theDiv.innerHTML = "<font size='+3'>F</font>INISHED <font size='+3'>F</
font>ILES ARE THE RESULT O<font size='+3'>F</font> YEARS O<font size='+3'>F</
font> SCIENTI<font size='+3'>F</font>IC STUDY COMBINED WITH THE EXPERIENCE
O<font size='+3'>F</font> YEARS.";
}
// show me >
</script>
<body>
Z <div id = "myDiv" style = "width:200;height:100">
FINISHED FILES ARE THE RESULT OF YEARS OF SCIENTIFIC STUDY COMBINED WITH
THE EXPERIENCE OF YEARS.
</div>
<a href = "#" onClick = "swapText(); return false;">Show me the Fs!</a>
</body>
</html>
Figure 13-12: Changing the
innerHTML property of a div
spans and getElementsByTagName()
If each F were in a div of its own, this JavaScript could be rewritten so that
clicking an individual F would make it bigger. Unfortunately, browsers insert
line breaks before and after each
div, so the text would look like
Figure 13-13. To mark a bit of
HTML without introducing line
breaks, use the
<span> tag. A span
is an HTML element that differs
from a
div only in that it doesn’t
create line breaks.
Figure 13-14 shows how
to use
spans. It also introduces
the built-in JavaScript method
document.getElementsByTagName(),
which returns an array of all the
HTML elements of a given kind
on the web page.
Figure 13-13: Putting Fs inside
<div> tags
Dynamic HTML 243
<html><head><title>How Many Fs Are There?</title>
<script type = "text/javascript">
<! hide me from older browsers
X function makeBig(theSpan) {
var spanText = theSpan.innerHTML;
var newText = "<font size='+3'>" + spanText + "</font>";
theSpan.innerHTML = newText;
}
function countBig(correctNumber) {
Y var theSpans = document.getElementsByTagName("span");
var count = 0;
for (var loop = 0; loop < theSpans.length; loop++) {
[ if ((theSpans[loop].innerHTML.indexOf("FONT") != -1) ||
(theSpans[loop].innerHTML.indexOf("font") != -1)) {
\ count++;
}
}
] if (count == correctNumber) {
alert("Congratulations! You got all " + correctNumber + " of them!");
} else {
var missed = correctNumber - count;
alert("Not yet there are still " + missed + " left.");
}
}
// show me >
</script>
<body>
<h1>Click every F you see below.</h1>
<div style = "width:200;height:100">
^ <span onClick = "makeBig(this); return false;">F</span>INISHED <span
onClick = "makeBig(this); return false;">F</span>ILES ARE THE RESULT O<span
onClick = "makeBig(this); return false;">F</span> YEARS O<span
onClick = "makeBig(this); return false;">F</span> SCIENTI<span
onClick = "makeBig(this); return false;">F</span>IC STUDY COMBINED WITH THE
EXPERIENCE O<span onClick = "makeBig(this); return false;">F</span> YEARS.
</div>
_ <a href = "#" onClick = "countBig(6); return false;">I'm done!</a>
</body>
</html>
Figure 13-14: Using
<span> tags and getElementsByTagName()
The script in Figure 13-14 combines much of what has been covered in
this book up until now. Line ^ shows how
onClick can be used inside a <span>
tag to call some JavaScript. Notice that the built-in JavaScript variable
this is
passed into the
makeBig() function. Recall from the chapter on forms and
form elements that the word
this stands for the element in which it occurs.
In ^,
this means this <span> tag.
244 Chapter 13
Clicking the F inside the span calls the makeBig() function, which starts
in X. The
makeBig() function loads the innerHTML of the span into a variable
called
spanText. The function then creates a new string called newText, which
is the old text surrounded by beginning and ending
<font> tags. Next, the
function sets the
span’s innerHTML to this new text. The body of the function
makeBig() could have been written as just one line like this:
theSpan.innerHTML = "<font size='+3'"> + theSpan.innerHTML + "</font>";
but breaking it up into three lines makes the function easier to understand.
The tricky part of the JavaScript comes when the user thinks all the Fs
have been found and clicks the link in _. This calls the
countBig() function,
which takes the correct answer as a parameter.
The first line in the body of
countBig() calls the built-in JavaScript
method
document.getElementsByTagName() to get an array containing all the
span elements on the page (Y). Line Z loops over this array. For each span
in the array, [ checks to see if the
innerHTML of the span includes a <font>
tag. Notice that [ checks for both the word
font and its capitalized version,
FONT. This is because some browsers, like Internet Explorer, automatically
capitalize all HTML tags when they are accessed using
innerHTML, whereas
other browsers, like Firefox, automatically lowercase HTML tag elements.
I’ll talk more about cross-browser issues in the next section.
Getting back to the code, if the
innerHTML of the <span> tag being consid-
ered does have a
<font> tag, the count variable is increased by one. After the
loop has inspected all the
<span> tags, ] checks to see if the number of spans
containing tags is correct. If so, the user gets a congratulatory message. If
not, an alert comes up telling the user how many more Fs need to be found.
This script employs many of the techniques and features we’ve discussed
in this book. Pat yourself on the back if you’ve understood the whole thing.
Advanced DOM Techniques
So far we’ve seen how to use JavaScript to change the HTML in a div and a
span, and how to hide, show, and move HTML elements by changing various
attributes of their
style objects. We’ve also seen how to get access to HTML
elements using
getElementById() and getElementsByTagName(). All of these
techniques make a web page dynamic by altering HTML elements that are
already on the page. This section discusses a few ways to dynamically add
new HTML elements to a web page.
Actually, we’ve already added new HTML elements to a web page
by putting them in the
innerHTML property of a span or div. The makeBig()
function in Figure 13-14, for example, added a new
<font> tag to the page.
Often, injecting HTML into your web pages using
innerHTML is the easiest
and fastest way to add new HTML tags to your page.
Because it’s quick and easy, most people use
innerHTML when manipulat-
ing the contents of their web pages. However,
innerHTML is not actually part of
the official World Wide Web Consortium (W3C) standard for manipulating
Dynamic HTML 245
HTML documents, so different browsers tend to support it slightly differently.
We’ve already seen one inconsistency—some browsers capitalize HTML
element names, and others lowercase the HTML element names. Another
inconsistency occurs when a user types contents into the text element of a
form. If the
innerHTML of the form element is checked, Microsoft browsers
will include the text typed by the users, but Firefox, Opera, and other non-
Microsoft browsers will not include that text.
The standard, W3C-compliant way to add and delete HTML elements
from a web page uses DOM methods. These methods work not only in
JavaScript, but in other programming languages as well. This will become
important when you’re working in Ajax, as you’ll see in the chapters that
follow. If you’re not planning on doing anything with Ajax and
innerHTML does
everything you want, you can comfortably skip to the section on drop-down
menus. If you’re ready to embrace the world of the W3C DOM, read on.
W3C DOM Overview
As you learned in Chapter 4, the W3C DOM defines the hierarchical structure
of a web page. According to this model, a web page is a constructed from
nodes, which are organized into a tree. Some of the nodes contain HTML
elements, like
<br> and <div>; others contain text. The top node contains the
top-level HTML element,
HTML. The HTML element node has two child nodes—
the node containing the
HEAD element and the node containing the BODY
element. The
BODY node might have several child nodes, some of which
represent HTML tags on your page, such as
<img> tags or hyperlinks. Some
of these tag nodes will have children of their own. For example, a
form
element might have two text input nodes, each of which would be a child
of the
form node.
Creating and Adding Elements Using the W3C DOM
Creating a new HTML element node with the W3C DOM is pretty simple:
var newDiv = document.createElement("div");
This line creates a new div, but it doesn’t put it into a web page. Note that
this new
div also lacks an id. If we were to stick it into a web page, there would
be no way to refer to it. Before putting it into the web page, we should give
our new
div an id:
newDiv.setAttribute("id","newDiv");
Finally, it’s time to stick the div into the web page. Let’s put the div at
the end of the web page using the DOM’s
appendChild() method. To use this
method, you first have to figure out which node you want your new node to
have as a parent. If we want the node to go at the end of the page, the parent
will be the
body of the document. The appendChild() method will add our new
246 Chapter 13
node to the end of the list of the parent’s children. If our parent is the body of
the document, that puts the
div at the end of the document. First we have to
get the
<body> tag.
var bodyTags = document.getElementsByTagName("body");
var thisBody = bodyTags[0];
Remember that getElementsByTagName() returns a list of elements. That’s
why you need the second line to pull the
<body> tag out of the list.
Once you’ve set a variable to point to the
<body> tag, add the new div to
the list of the
<body> tag’s children using appendChild():
thisBody.appendChild(newDiv);
Now we have a new div inserted at the end of the web page.
Adding Text to an Element
The above lines will add the following HTML to the end of a web page:
<div id = "newDiv"></div>. You could use the new div’s innerHTML property to
put some text in there, but that would not be the W3C-compliant way. The
standard says that you must first create a text node, and then make that text
node a child of the
div. Here’s how to do it:
var textNode = document.createTextNode("I'm your new div.");
newDiv.appendChild(textNode);
Figure 13-15 presents a JavaScript that inserts a new div containing the
text I’m your new div at the end of a web page.
<html><head><title>Inserting a div</title>
<script type = "text/javascript">
function addDiv() {
var newDiv = document.createElement("div");
newDiv.setAttribute("id","newDiv");
var bodyTags = document.getElementsByTagName("body");
var thisBody = bodyTags[0];
thisBody.appendChild(newDiv);
var textNode = document.createTextNode("I'm your new div.");
newDiv.appendChild(textNode);
}
</script>
</head>
<body>
<a href = "#" onClick = "addDiv(); return false;">Add the new div.</a>
</body>
</html>
Figure 13-15: Adding a
div to the end of a page