Underwater Photographya web magazine phần 3 pps
Bạn đang xem bản rút gọn của tài liệu. Xem và tải ngay bản đầy đủ của tài liệu tại đây (1.1 MB, 10 trang )
42/21
www.uwpmag.com
When the Nikon D300 was
released last summer (07) I along with
many other underwater photographers
recognised that its introduction
coupled with the relatively low retail
price would substantially inuence
uwp world over. In my role as uwp
educator I decided to ‘jump on the
bandwagon’ and up – grade from my
trusty, reliable and much loved D200.
You need to know that I have
favoured Nikon since my days with a
Nikon F2 and Oceanic housings of the
80’s. I have owned and used Subal
housings since the introduction of the
Nikon F801 in the early 1990’s. In
my teaching role I regularly instruct
in Ikelite, Sea & Sea, Nexus and
Hugyfot DSLR housings. Whilst I’ll
endeavour to be impartial as I can,
the inuence that Nikon and Subal
have had on my own photographic
career cannot be ignored. I am unable
to compare the D300 against our
Canon cousins but I do have sufcient
experience using the D200 to compare
against the Nikon D300
On rst appearance the Subal
ND30 is very similar to the ND20
(Nikon D200). It weighs the same,
looks the same and when you take
hold, it feels the same. But then you
notice the huge 3” LCD screen. Now,
I am a rm believer that the larger the
LCD the easier and more accurate it
is to review the result underwater. I
cannot emphasise this enough. It’s no
use nding out that you have clipped
the composition or chosen the wrong
angle when you’re back on dry land!
The time to review and correct an
error or to pursue a new idea on a
subject is underwater at the time of
shooting. The 3in LCD of the D300
is bright, clear and easy to view even
in shallow water. There is a one
nger - press - zoom button on the
rear of the housing. In practice I was
able to determine sharp focus on my
macro/close up subjects and on many
occasions I persisted with the subject
to correct my focusing/compositional
mistakes. I doubt if I would have
noticed underwater (at the time) these
small imperfections/mistakes by
viewing my Nikon D200 LCD.
I receive many enquiries
concerning whether of not the Subal
GS viewnder is worth the money.
In my opinion the viewnder of any
camera housing is without doubt the
most signicant feature of the entire
design. If we cannot see clearly
and accurately what we are trying to
shoot then what is the point? Doesn’t
it frustrate when a manufacturer
produces a housing where the user
is unable to see all four corners of
the viewnder to compose a subject
correctly. Enhanced viewnders like
Subal and other housings, though
expensive are denitely worth the
money IMHO.
The front main dial (aperture)
the rear main dial (shutter speed) and
shutter release control are in exactly
the same position as before. I have
heard criticisms that for users with
small hands the shutter release is too
far away from the right handled grip.
My suggestion is to simply release the
velcro strap to allow the right hand
closer access.
The On/Off switch has changed
to a circular design. In my opinion
this is an improvement and I feel the
sensitivity to turn the camera on and
off both on land (without the back
plate) connected and underwater have
a more positive feel to it.
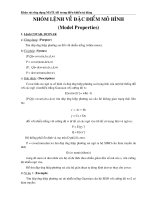
The Mode and +/- exposure
compensation push down controls
Nikon D300 and Subal ND3
by Martin Edge
42/22
www.uwpmag.com
situated behind the On/off switch are
now raised up slightly. Whilst on rst
glance this would not appear to make
the slightest difference, underwater I
noticed that it was much easier for me
to locate both the ‘Mode’ and +/- to
push down and make changes without
looking at either dial. I’m unable
to comment on whether or not these
dials are as easy to manipulate when
wearing gloves.
A similar design improvement
is evident on the left hand side of the
housing with the ‘QUAL’ quality,
‘WB’ White Balance and ISO push
down controls. With the ND30, Subal
have disposed with the small black
circular base on which these three
push buttons were situated on with the
ND20.
Now, I always change the
‘Quality’ and ‘ISO’ setting via the
‘My Menu’ in the rear LCD screen but
with ‘WB’ White Balance I do need
easy access to this button. My WB
settings uctuate between ‘Auto’ and
‘Preset’. To set Preset WB via the
housing I rst use the LCD screen to
locate and change it. This brings the
‘PRE’ setting up in the bottom right
hand corner of the camera viewnder.
Once done, you push down and hold
the ‘WB’ control for about three
seconds and press the shutter. If this
attempt to ‘preset’ is successful you
will see the ‘Gd’ sign (which signies
the preset reading is ‘good’ and has
worked).
I nd it much easier to locate
this WB push button control on the
top left of the housing than it was
before. With a little practice, ‘preset’
WB readings can be set quite easily
without having to ddle around to
locate the control.
The ND30 now has a lever on
top of the housing which activates the
ash exposure compensation button
situated just below the ‘pop up’ ash
button of the camera. The addition
of this control is for users of Nikon
SB ashguns in housings to control
exposure compensation.
Moving down the rear back-plate
towards the LCD screen the BKT
‘bracket’ button of the ND20 has been
replaced with the ‘playback’ button
and next to it remains the ‘Delete’
button. Below this in order are the
following ve push down buttons:
Menu, ? Info and Lock, Zoom out –,
Zoom in +, OK
Many readers will be familiar
with the above but I’ll just mention
the highlights.
Press the Info/Lock button and
the shooting display information
comes up on the LCD screen.
Information including the Aperture,
Shutter speed, Exposure Mode, etc
are displayed on the LCD monitor.
The implications of this I found to
be a signicant I did not have to look
through the viewnder to ascertain my
exposure settings or exposure mode
The viewnder’s built in
exposure meter is also displayed.
Indicating if a scene will be under or
over exposed.
I could easily change and
determine my settings i.e chosen
aperture and shutter speed by simply
turning the appropriate dials and
having a clear unrestricted view of my
progress in the 3in LCD monitor.
In practice, I could swim towards
a subject (turtle) whilst at the same
time, adjusting aperture and shutter
speed and without taking my eye off
the of the turtle
The Zoom in or out is a one push
zoom feature which can magnify the
LCD by up to 27 times. Whilst this is
not a new, it has been developed and I
found it so much more ergonomic.
The MSC focus mode selector,
lens release, shutter release, AF On
lever have not changed to any degree.
The spot, matrix and center weighted
dial are also unchanged.
The multi selector push down
controls now have an additional
42/23
www.uwpmag.com
push button in the center. I found
this very useful in order to activate
a full size histogram overlay on top
of the image and most importantly
– activate it at your own convenience.
This histogram can be set by going to
Custom Setting F1
I used the camera and housing
during a 10 day photo workshop
at Kasai Village Resort in Cebu
Philippines. Now, I’ll point out that I
am unable to thrill you with images
of the likes which Berkley White
produced with the sailsh but for
everyday subjects then read on.
The ND30 felt no different in
water than the ND20 but soon into the
trip I noticed the improvement of both
‘S’ and ‘C’ auto focus (center point)
to lock onto subjects. For the last
eight months I have been using the
Nikon VR 105mm macro lens with
mixed results, the jury is still out on
this! I love the results on land and the
quality of blur (bokeh) but underwater
I’ve found it difcult to lock on to
macro subjects because the focus
is so damn quick from minimum to
maximum. Using this lens early one
morning, I dropped to 30m to shoot
a longnosed hawk sh which I had
found the previous day. Once in the
water I realised I had not attached my
focus torch. I shot it all the same and
was surprised and very impressed by
how the focus locked-on in such poor
ambient light. After 700 frames with
my Nikon 105m macro VR - I can
see substantial improvement in the
focusing abilities of the D300 and this
lens now has a permanent place in my
camera bag.
Sunbursts and highlights
Just so you know where I stand
on this: By choice, I don’t often
include the sun ball itself within the
frame. I nd myself leaving it out
and using the beams of light in the
corners to add sparkle and ‘jazz up’ an
otherwise monochromatic blue void
in my wide angles. Will the D300
provide our sunbursts with the appeal
they had on lm? I think so but I’m
unable to evidence it! Our 10 days
in Cebu, suffered with poor visibility
and whilst the sea was not rough it
was often choppy. I shot sunbursts at
various depths down to 25m but the
beams were so scattered and diffused,
it’s hard to pass an informed opinion.
As I recollect, shooting sunbursts in
these conditions on lm, the results
were not that impressive either. What
I can conrm is that low light shallow
water sunlight shots worked very well
and there’s a signicant improvement
over the Nikon D200.
On four consecutive mornings
I shot sunlight with a 10.5mm
sheye in 1m to 6m of water. The
sea conditions were glass calm and
visibility was at its best for the day
– 20m. I used shutter speeds of
1/320th sec with an whole range of
apertures. I shot Raw at the 200 ISO
default and Auto white balance. The
sunbeams appeared more accentuated
with the fast shutter speed of 320th as
opposed to 125th. But I was forever
minded that this could also be affected
by the height of the sun in relation to
the horizon. The ‘highlights’ warning
42/24
www.uwpmag.com
seldom indicated the sunbeams as
‘clipped’ but when the ball of the
sun was present - this would ‘blink’.
In Raw postproduction – CS3, it
was easy to recover the highlights
as long as they were not excessively
overexposed.
I have no doubt that the ability
of the D300 to handle the nature
of highlights so often associated
with underwater is a substantial
improvement over Nikon DSLR
cameras which have gone before.
Together with my photo buddy
Shannon Conway we compared
almost identical images taken with
my rig and his own Nikon D2x and
we both agreed the D300 was superior
for highlights. We also compared how
similarly the D300 rendered saturation
and colour, particularly with the tones
of blue mid-water. An aspect of the
Nikon D2x, which I have always been
jealous of. For my own photography
these improvements, together with the
low light focusing abilities and almost
double the pixel count are good
reasons to justify an up-grade.
Noise
At 400 ISO I saw no evidence
of digital noise. At 800 ISO I made
the mistake of underexposing several
blue water examples and when these
areas were magnied, noise was
slightly visible. Expose correctly
at 1600 ISO and the noise effect
diminishes. In Berkley White’s
review of the D300 and sailsh he
warns of the importance to shoot
accurate exposures to avoid the noise
enhancing effects of brightening
a dark image in post processing.
This is excellent advice and I would
recommend readers revisit his review
at UwP41
Live view Mode
During my 10 day workshop I
looked for numerous opportunities
to use the Liveview Mode as an
advantage to normal viewnder
composition. Whilst it is quite easy
to set ‘liveview’on a Subal housing,
all my attempts to use it in some
meaningful way failed. Perhaps I
was not selecting appropriate subjects
or opportunities; perhaps the GS
viewnder is so outstandingly clear as
not to warrant in the circumstances,
which I found before me. Whatever
the reason, at this time, I fail to see
a purpose to use ‘live view’ mode
underwater when used in conjunction
with the ND30. Perhaps a housing
with poor viewnding characteristics
would benet.
Battery Life
Compared to the D200 the
battery life is a very comforting
and a much needed improvement. I
averaged 700 frames with both 60mm
and 105mm macro lenses.
With the 10.5mm and Tokina
10mm – 17mm the average was 800.
I allowed the battery to ‘run down’
to 3% and it continued to function
adequately until it reached 1% when
it died. At 10% power I could nd no
difference in performance from 100%
Weight and Transport
The Subal ND30 housing with
the Nikon D300, a Nikon 60mm
macro lens and port. Two Inon Z220’s
with leads and a couple of Inon ash
arms have a combined weight of 7
kilos. I carry this equipment in a large
but light weight ruck-sac which can
be crumpled up and made to t the
luggage rack dimensions at airports.
I wear a photographer’s vest (at the
last count I found 15 pockets). I carry
ash guns, a variety of lenses and
other essential bits and bobs. My vest
(on average) weighs between 10k and
13k. Once through all the check-in
hassle I re-pack the contents of my
jacket into the ruck-sac. This method
is working well for me at international
airports and I include it in this review
for those who may nd it helpful.
42/25
www.uwpmag.com
To Upgrade or not
For those of you who may
be contemplating an upgrade to
the Nikon D300. I would suggest
you visit the most comprehensive
review, which I have seen - by Thom
Hogan. />nikond300review.htm It’s a long
read but at the bottom of the review,
Thom compares the D300 and offers
his opinions on upgrades under the
heading of ‘Should I get a D300’.
For use underwater I recommend
the Nikon D300 very highly and after
using and reviewing the ND30, I
am unable to identify any particular
aspect of this housing, which I believe
could be improved upon.
Martin Edge
www.edgeunderwaterphotography.com
www.heinrichsweikamp.com/blitz/en/rsu.htm
42/26
www.uwpmag.com
Mastering the operation of an
underwater housing is a journey of
familiarization. You move through a
process of engaging its functionality,
employing its ergonomics and
adapting to its idiosyncrasies and so
become at one with it; through lots of
practice. It’s like learning to play an
instrument.
Sealux’s CD300 housing for
the Nikon D300 DSLR has a similar
feel to the earlier D200 housing only
with improvements in performance
and functionality. All the controls just
seem right and the changes I have so
far encountered are for the better.
Key improvements with the
D300 camera over the D200 which I
have found to be useful in a practical
context for underwater photography
are:
∑ excellent monitor resolution and
response, enabling effective in-camera
decision making while underwater;
∑ the ability to view camera settings,
previously only visible in the top LCD
window, in a large clear format in the
monitor window;
∑ improved image quality (if nothing
else, this allows for more leeway with
cropping);
∑ signicantly longer battery life;
∑ slightly increased dynamic range
with 14 bit RAW images;
∑ slightly less noise at higher ISO
levels;
∑ self cleaning image sensor;
∑ Nikon D2X plus-some in a compact
D200 style body.
Whilst my previous two Sealux
housings were functional and durable
(see www.underwaterdisplay.net/
rig for reviews) the CD300 shows
an improvement in aesthetics and
ergonomics with the introduction of
some subtle changes including: curved
handles and conically tapered at
ports for close-up and macro work.
A feature on Sealux housings
which I think is a good design
attribute is the raised inner lip on
the housing body which stops water
falling back into the housing when
the housing back is removed after a
dive. This also serves as a guide to
placement of the lid on the housing
body for sealed closure.
Attention to detail is evident in
the design of the CD300. Mineral
glass rather than polycarbonate is
used for the window over the D300
monitor display and this does justice
to the resolution and clarity of the
D300’s display. This is an important
feature and one which rated highly
in my deciding whether to purchase.
The monitor window is visible with
the 150 degree viewnder rotated to
any of its selectable positions. As with
other Sealux DSLR housings, tested
depth rating is given as 90 metres.
The CD300 allows for an
additional ball mount to be installed
in the threaded socket provided on
the centre top of the housing to mount
a focus light or other accessory.
This effectively gives four possible
mounting points on the housing for
strobes and accessories; one on each
arm, a third one on the left hand side
and the ball mount at centre top.
Two different size ball ttings are
available. The additional ball mount
can be unscrewed to allow the housing
to t in my cabin bag without the ball
protruding.
My CD300 sports the new 150
degree optical viewnder (GV150).
Sealux viewnders have in the past
been very successful and this one
appears to be no exception. The prism
model GD Viewnder made by Sealux
is also on-sold to Subal for their
underwater housings. The GV150
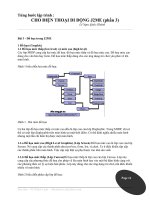
Sealux CD300 for the
Nikon D300
by Colin Gans
42/27
www.uwpmag.com
viewnder provides an enlarged 150
degree view which is bright, sharp and
complete; it rotates to allow portrait
and landscape views and is useful
for over-under images. A detachable
sunshield is tted to the eyepiece. The
viewnder can be turned downwards
when transporting or removed by
hand by disengaging the plastic
circlip on the inside of the housing
cover. Dual o’rings on the viewnder
shaft provide a watertight t onto
the housing. I found the GV150 to
be as good as the GD Viewnder in
coverage and clarity with the added
advantage of being angled and able to
rotate.
The housing is made of
aluminium milled monoblock CNC,
hard anodized and is sealed for
resistance to saltwater corrosion. The
colour, described as titanium grey, is
a little darker than my earlier D200
housing. The controls appear to feel
better but whether this is a case of
‘new broom’ syndrome or not, time
will tell.
The Controls
One improvement which is
welcomed is a change in design to the
previously quirky focus mode control
which switches between continuous,
single, or manual focus (C/S/M)
modes. This has been re-engineered
and works very well with a good
tactile feel when switching. Some
controls described below are available
optional extras. I suggest visiting the
Sealux website for current details on
options (www.sealux.de).
Live View Release Mode Dial
The release mode dial which
allows control of Live View, Single
Frame, Continuous, Self Timer and
Mirror Up is engineered as a single
control; a clever solution. When
engaged it depresses the locking
button while rotating the dial on the
camera. I would be interested to see
how other housing manufacturers’
solve this.
Focus Priority Override
The AF Lock lever is well
positioned to be used in conjunction
with the shutter release lever to
override focus priority. This is handy
for lenses like the Nikon 105VR
micro when used with the focus
gear as it allows focus priority to be
42/28
www.uwpmag.com
overridden on demand simply by
squeezing the AF Lock lever with
the thumb while operating the shutter
release with the forenger; a perfectly
natural movement.
A Centre Multi Selector Button
Some underwater housings I
have tried lack the centre control for
the camera’s multi selector. Sealux
have provided access to the centre
button by engineering four of the
shafts at slight angles allowing the
buttons to be spread a little further
apart on the outside. The ve controls
(North, South, West, East and Centre)
are symmetrically placed. I found the
response of the multi-selector quite
sensitive but after a day or so of using
the housing I have now become used
to this.
The Flash Mode Button
The Flash mode button is another
challenging control to engineer due
to its position on the camera. This
button is controlled via a lever and
is well situated for access to enable
switching between normal ash mode
and rear curtain sync as well as ash
compensation when using a housed
speedlight.
The Mode and +/- Control
Both the mode and +/- buttons on
the camera are controlled by a single
lever, neither of which are engaged
when the lever is in centre position.
Pushing the lever to the left engages
+/- exposure compensation. Pushing
the lever to the right engages camera
mode. In either engaged position the
respective button stays down until the
lever is returned to the centre position.
In practice I have found this to be
useful since both of the underlying
buttons work in conjunction with the
front command dial which needs to
be rotated. Having these buttons stay
down until disengaged allows the
front command dial to be operated
with thumb and forenger.
Func Button Control
A Func button control lever
allows the D300’s user-dened
function button to be accessed. With
the D200, I viewed this as a ‘nice
to have’. Now that its available I’ve
had to think what I’ll use it for. I
have since decided that assigning the
Func button to ‘Flash Off’ is a good
choice. There have been times when
I’ve wished for a convenient way of
cancelling ash without taking my eye
off the viewnder and this approach
works very well. I can override the
ash to do an ambient light shot with
my ring nger, override autofocus
with my thumb and press the shutter
with my forenger; feels like I’m
playing a saxophone! This is certainly
more convenient than having to
manually switch off strobes. The
location and feel of each of these three
levers is ergonomically good.
Lens Release Lever
A lens release lever in the
housing body allows the easy removal
of lenses from the front port. This is
handy when switching lenses between
dives. Prior to using this control I had
placed it in the ‘nice to have’ basket of
features. Now that it is available I’m
nding that I use it more frequently
than expected.
QUALity, ISO and WhiteBalance
While the more important WB
and ISO button controls are available,
there is no direct control button for the
third member of the trio, the QUAL
button. This control can be set as a
shortcut and then accessed by pressing
the Menu button. In my opinion
having a QUAL button is not missed
as it’s not often that I would choose
to switch image quality and should
I wish to do so then ‘My Menu’ is
sufciently convenient for the job.
42/29
www.uwpmag.com
The Lens Port System
Sealux ports use glass and I do like their
dependable design. They have a large diameter
bayonet tting with good o’ring seals making for a
reliable seal. I have used the housing with a dome
port, towed next to a boat, photographing spinner
dolphin and have experienced no leaks despite
such turbulent motion at shallow depth. The port
system is modular and allows the use of extension
rings to match ports to be used with a wider range
of lenses. All port windows are high quality optical
glass. Barrels are made of Delrin. The ports are
durable, well designed and I have yet to experience
a leak from either port or housing body in hundreds
of dives over a four year period. The effort
experienced in changing ports can be reduced with
the use of a lightweight strap wrench as described in
the ‘Niggles’ section. The tight and positive bayonet
t of the Sealux ports may in fact contribute to their
very low ood rate.
Port extension rings allow a modular approach
and the same rings can be used on at and dome
ports to cater for most popular lenses. Since the
same tried and tested bayonet ttings have been
used for many years, there is protection of existing
investment and as we know, our lasting investment
is more in the glass (lenses and ports) than the ever
changing cameras and housings which t them.
The large dome port (180F) has been available
for some time and is excellent for 10.5mm Nikon,
10-17mm Tokina and the 12-24mm Nikon with the
addition of an extension ring. What’s new is the
PS series of at ports which are conically tapered
from about 126mm at the housing side down to
approximately 92mm at the glass end. The tapering
allows better positioning of strobes for macro work
and has a more aesthetically pleasing look.
In addition to this, Sealux have come out with
a series of good quality wetmate diopters for the
new at ports which t neatly onto the front of the
ports with a bayonet type lock. I ordered one of
these on a whim and am very impressed with how
well it ts on the port. The diopter works with both
the 60mm and 105mm micro lenses.
The following are examples of port options for
popular lenses for underwater photography:
o Nikon 10.5mm sheye: 180F Dome Port
o Tokina 10-17 sheye zoom: 180F Dome Port
o Nikon 12-24mm: 180F Dome Port + 28mm
extension ring
o Nikon 60mm micro: PS104
o Nikon 105mm micro (both VR and classic): either
PS114; or PS 104+ 28mm extension ring with
manual focus gear option available either in the port
or in the extension ring if this latter combination is
chosen.
Strobe Wiring and Bulkhead Options
Strobe ports are available in three forms,
Nikonos style exible pin, Nikonos style all pins
xed, or S6. Either one or two strobe ports can be
ordered in various combinations.
The strobe bulkhead wiring allows choice of
TTL (5 pins active) wiring or just two pins active
for traditional strobes and these can be changed
at a later stage by ordering a different wiring
conguration. Having all 5 pins wired allows use of
a single housed SB800 to be electrically connected
as well as third party TTL adapters such as Ikelite’s
#4302. Careful thought should be given to the
choice of ports and wiring. My personal choice is
for two Nikonos style exible pin ports with all
ve pins active as this provides wired connections
for either a single housed speedlight or two Ikelite
DS125 strobes.
I chose two Nikonos style strobe bulkheads.
The Nikonos bulkheads are offered in two avours,
the traditional with two exible / three xed
pins and the other form with all ve pins xed.
Whichever avour is chosen the option exists to
order either as TTL capable with all ve pins wired
or just the two GND and TRG active, i.e. wired.
From past experience I have found switching
wiring on Sealux housings to be a relatively
straightforward exercise once the strobe logic is
understood.
Niggles
Whilst this review is for the most part positive
there are two niggles, still present, which I have
experienced with earlier housings. The rst relates
to the degree of effort involved in changing ports;
42/30
www.uwpmag.com
yes, unnecessary physical effort! The second issue
arose with the D200 housing as a symptom of
downsizing in the drive to keep things compact. The
D200 and D300 housings became more negatively
buoyant with these cameras which were heavier
than the similar sized D70. Effective workarounds
exist for both of these issues and I do not see them
as detracting from the overall qualities of the
housing once the workarounds are applied. Each
particular brand of housing has its quirks and after
all, where would the challenge lie in underwater
photography without having to problem solve?
I previously found switching ports on dive
trips to be tedious with some effort required, to
coerce the installed port off the housing. Enter the
‘Baby Boa strap wrench’, a lightweight plastic strap
wrench perfect for the job of removing ports by
gripping the barrel and allowing sufcient leverage
to be applied. It would be useful to have these,
or similar supplied with Sealux ports. The strap
wrench has made changing ports easy for me and
can be found in many hardware stores or you can
try online using ‘strap wrench’ for your search.
The issue of a negatively buoyant housing
should only be of concern for macro photography
and I have found that using Stix buoyancy arms
with my two Ikelite DS125 strobes resolves this
neatly. I use four of the SX-109 sets and UCLS
buttery clamps to hold them.
With this setup and the heaviest lens / port
combo I own (105mm Nikon VR / PS114 port) plus
focus light the rig weighs 330grams negative in
fresh water.
The Housing In Summary
In brief, I see the CD300 as a step forward; it
has, so far, exceeded my expectations.
The good points
∑ Optics: the ports, the display and the 150 degree
viewnder; all precision glass optics
∑ Ergonomics: the location of key controls in
relation to each other
∑ Functionality: almost every camera control one
could wish for including controls for Live View,
C/S/M, Func, Multi-selector centre, Flash mode, AF
Lock and Lens release.
∑ Durability: good seals, raised inner housing lip,
robust construction
∑ Portability: compact and relatively easy to pack
and transport for a DSLR housing
∑ Depth rating: 90 metres (295 feet)
The niggles
∑ Negatively buoyant: remedied by otation arms
∑ Effort in removing lens ports: remedied by using
a lightweight strap wrench
Notes from the Field
For this review I tested the housing dry; in a
pool and then followed up with a week of diving
off Niue Island. I used 60mm, 105mm, 10-17mm
and 12-24mm lenses with respective close-up port
/ wetmate diopter combinations and dome port plus
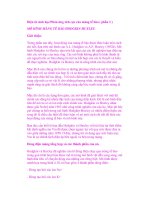
extension ring combinations. I was happy with
results from all combinations tested; particularly
when using the PS close-up ports as these were
10-17mm lens, Sealux 180F dome port, 1/200sec,
f/13, ISO 200
60mm lens, Sealux PS104 port, 1/60sec, f/22, ISO 200