GIVING THE BROWSERS
WHAT THEY WANT
Much to the dismay of web developers
everywhere, different browsers implement
JavaScript and HTML in slightly different
ways. Wouldn’t it be great if you could serve
each browser exactly the content it could understand?
Fortunately, you can use JavaScript to determine which browser a visitor
is using. You can then use that information to deliver content suitable for
that specific browser, either by redirecting the visitor to a page containing
content especially tailored for that browser or by writing your JavaScripts
so that the same page does different things depending on the browser
looking at it.
This chapter covers the three topics you need to understand to deliver
browser-specific pages using redirects:
How to determine which browser your visitor is using
How to redirect the visitor to other pages automatically
How to send the visitor to the page you want, depending on which
browser he or she is using
As in Chapter 2, while learning how to handle an important web
authoring task, you’ll also be introduced to fundamental elements of the
JavaScript language—in this case, if-then statements and related methods
for implementing logical decision making in your scripts.
Let’s first talk about determining which browser a visitor is using.
A Real-World Example of Browser Detection
Before we get into the details of how browser detection works, let’s look at a
real-world example.
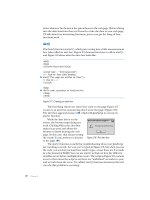
Netscape, the company that brought you the Netscape Navigator browser,
has a complicated home page with lots of interesting features. They’ve taken
great pains to make their home page look good to most browsers, including
early versions of their own browser. If you compare the Netscape home page
seen with Netscape Navigator 4 (Figure 3-1) to the page seen using Navigator 8
(Figure 3-2), you’ll notice some subtle differences. Among other things, the
news blurb at the bottom of Figure 3-2 has a little navigational element in the
lower-right corner. Clicking the numbers in that corner cycles you through
different news blurbs. Figure 3-1 does not have these numbers, probably
because there isn’t a good way to provide this fancy functionality in the old
Netscape Navigator.
Figure 3-1: Netscape Navigator 4 view
of Netscape home page
Figure 3-2: Netscape Navigator 8 view
of Netscape home page
How does Netscape show the numbers to only those browsers that can
provide this feature? There are two steps. First you have to determine which
browser your visitor is using. Once you know the browser, you know what
JavaScript and HTML features it supports. Then you have to figure out how
to control what the person will see based on the known capabilities of the
browser.
34
Chapter 3
Browser Detection Methods
A browser is identified by its name (Netscape, Firefox, Internet Explorer, and
so on) combined with its version number. Your JavaScript needs to determine
both of these items. There are two ways to approach this task: a quick but
rough method and a slightly less quick but more accurate method.
Quick-but-Rough Browser Detection
In general, the line
var browser_name = navigator.appName;
determines who made the browser. If the user is using a Netscape browser, the
variable browser_name will be set to the string "Netscape". If it’s a Microsoft Internet Explorer browser, browser_name will be set to "Microsoft Internet Explorer".
Every JavaScript-enabled browser must have the variable navigator.appName.
If you use Opera, navigator.appName equals "Opera". Unfortunately, some
browsers travel incognito. For example, the navigator.appName for Firefox is
"Netscape". The JavaScript in Firefox is the same as that for Netscape browsers,
so in general, it’s fine to treat Firefox browsers as Netscape browsers. But, as
you can see, if you want to be sure about the browser being used, you can’t
rely on naviagor.appName.
There’s a similar rough method for determining the browser version
being used: navigator.appVersion. Unfortunately, navigator.appVersion isn’t
just a number but a sometimes cryptic string that varies from browser to
browser. For example, the Macintosh browser Safari has this nice, simple
navigator.appVersion string: "5.0". By contrast, Internet Explorer 6.0 running under Windows XP has a navigator.appVersion that looks like this:
"4.0 (compatible; MSIE 6.0; Windows NT 5.1; .NET CLR 1.1.4322)". To see the
navigator.appVersion string for your browser, type this into the browser’s
address box (where you normally enter web addresses):
javascript:alert(navigator.appVersion)
If you care only about whether a person is using a 4.0 browser or later,
you can pick out the version numbers from those navigator.appVersion strings
with the parseFloat() command, which looks at the string and grabs the first
item that resembles a floating-point number (a number that contains a decimal
point). Thus the line
var browser_version = parseFloat(navigator.appVersion);
sets the variable browser_version to the first number in the navigator.appVersion
string. For most browsers, this will be the actual version number. For Internet
Explorer, it will be 4.0 for any version of the browser 4.0 or later. You can see
why I call this method rough.
G i v i n g th e B ro w s e r s W h a t T h e y W an t
35
More Accurate Browser Detection
JavaScript has another variable that contains information about the browser
being used: navigator.userAgent. This variable identifies both the manufacturer
of the browser and its version. As it did with navigator.appVersion, however,
the formatting of the string varies from browser to browser.
Because the navigator.userAgent strings are different from each other,
there is no simple way to extract the information you want. Fortunately,
people have already written browser sniffers: bits of JavaScript that will do all
the hard work of browser identification for you. You can find brwsniff.js,
which I downloaded from , at http://
www.bookofjavascript.com/Chapter03.
To use this file, put it in the same folder as the web page containing your
JavaScript. Then, put this line in the header of your web page:
<script type = "text/javascript" src = "brwsniff.js"></script>
This tells JavaScript to add the contents of the file named brwsniff.js to
your web page. Now you can use the JavaScript stored in that file.
To use the JavaScript in brwsniff.js to determine the name and version of
the browser being used to view your web page, add these lines of JavaScript:
var browser_info = getBrowser();
var browser_name = browserInfo[0];
var browser_version = browserInfo[1];
Line calls a function in brwsniff.js that reads the navigator.userAgent
string and compares it to all the different browser version strings it knows.
Once it determines the name and version of the browser, the function loads
this information into a variable called browser_info. All the variables we’ve seen
so far store one piece of information—a string or a number, for example.
This browser_info variable is an array, a type of variable designed to hold
multiple items of related information. You’ll learn how to work with arrays
in Chapter 8. For now it’s enough to know that an array is a variable that
can store more than one piece of information. Line puts the first bit of
information stored in the array into a variable called browser_name. Line
puts the second piece of information stored in browser_info into a variable
named browser_version. Used together, these two variables tell you what kind
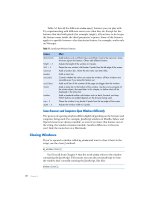
of browser is viewing the web page. Try the web page in Figure 3-3 on your
own browser.
NOTE
This <script> tag does not require the <!-- and //--> to hide it from older browsers
because there is no code between the opening and closing tags.
The quick but rough method of browser detection should work for most
situations, especially when you don’t need to know exactly which browser is
being used. For the cases in which you do need the exact name and version,
you should use a browser sniffer like the one just described.
36
Chapter 3
<html>
<head>
<title>I Know Which Browser You're Using!</title>
<script type = "text/javascript" src = "brwsniff.js"></script>
</head>
<body>
<script type = "text/javascript">
</script>
</body>
</html>
Figure 3-3: Finding the browser version number with a browser sniffer
Redirecting Visitors to Other Pages
Now that you understand browser detection, you can tailor your site to
provide information specific to each browser. There are two main ways
to do this. First, you can use document.write(), which we saw in the last
chapter, to display one message on your page if the site visitor is using
Netscape Navigator 4, and a different message on the same page for
Internet Explorer 6.0. Alternatively, you can redirect your visitors to
separate pages specifically tailored to different browsers. To redirect
visitors to another page, you’d write something like this:
window.location.href = " />
When JavaScript sees a line like this, it loads the page with the specified
URL into the browser.
NOTE
Are you wondering “What’s with all these periods in commands like window.location.href
and navigator.appName?” Never fear. I’ll address these when I discuss image swaps and
dot notation in Chapter 4.
In general, it’s probably best to use document.write() instead of redirecting
the user. Because there are so many browsers, trying to maintain a different
page for each one can quickly become burdensome. However, if you just want
to redirect someone with an older browser to a page that tells them to upgrade,
redirection is probably the best way to go.
G i v i n g th e B ro w s e r s W h a t T h e y W an t
37
if-then Statements
Now that you know which browser your visitor is using, you need to learn how
to tell JavaScript to write different things depending on the browser being
used—in other words, how to implement a logical test, choosing between
different actions based on specific information. Branching is a fundamental
technique in any programming or scripting language. Be sure to read this
section if you’re not already familiar with the concept.
To alter your web pages based on the browser a visitor is using, you tell
JavaScript something like, “If the visitor is using Internet Explorer, then write
this IE-tailored content.”
An if-then statement in JavaScript looks like this:
if (navigator.appName == "Microsoft Internet Explorer")
{
// write IE-specific content
document.write("Welcome, Internet Explorer user!");
}
Here’s the basic structure of an if-then statement:
if (some test)
{
statement_1;
statement_2;
statement_3;
...
}
NOTE
JavaScript is unforgiving: if must be lowercase, and you must put parentheses around
the test that follows it.
The test that appears between the parentheses must be either true or
false. If the variable navigator.appName equals "Microsoft Internet Explorer", the
test between the parentheses is true, and the statements located between the
curly brackets are executed. If the variable doesn’t equal "Microsoft Internet
Explorer", the test between the parentheses is false, and the statements
between the curly brackets aren’t executed.
Boolean Expressions
The test in the parentheses after if is a Boolean expression—an expression that’s
either true or false. In JavaScript, a Boolean expression is usually a statement
about the values of one or more variables. Table 3-1 lists some of the symbols
you’ll be using to form Boolean expressions in JavaScript.
NOTE
38
Chapter 3
Boolean expressions are named after George Boole (1815–1864), who invented a way
to express logical statements in mathematical form.
Table 3-1: Symbols in Boolean Expressions
Test
Meaning
Example (All of These Are True)
<
Less than
1 < 3
>
Greater than
3 > 1
==
The same as (equal)
"happy" == "happy", 3 == 3
!=
Different from (not equal)
"happy" != "crabby", 3 != 2
<=
Less than or equal to
2 <= 3, 2 <= 2
>=
Greater than or equal to
3 >= 1, 3 >= 3
Notice in Table 3-1 that you must use two equal signs when you want
JavaScript to test for equality in an if-then statement Boolean expression.
In fact, accidentally using one equal sign instead of two in an if-then statement is probably the major cause of mind-blowing programming errors. As
you learned in Chapter 2, a single equal sign is used to assign a value to a
variable. So if you accidentally use only one equal sign, JavaScript thinks
you mean to set the variable on the left of the equal sign to the value of
whatever is on the right of the equal sign, and it will act as if the test result
is always true.
Here’s an example of the trauma that this mistake can cause. Say you
want to write a JavaScript that puts Happy Birthday, Mom! on your web page
when it’s your mother’s birthday. If her birthday were August 6, you might
write something like Figure 3-4 (which contains the dreaded error).
If you try this script, you’ll see that it always prints Happy Birthday, Mom! to
the web page, which is great for Mom, but probably not what you want.
<script type = "text/javascript">
</script>
Figure 3-4: Mom’s birthday greeting—broken version
G i v i n g th e B ro w s e r s W h a t T h e y W an t
39
The script starts off correctly. When JavaScript sees
, it sets the variable
month to whatever month it is. If you’re running the script in March, it sets month
to 2. The problem arises in the next line, though:
if (month = 7)
Here JavaScript sees one equal sign and thinks you want to set the variable
month to the value 7. The script does what you’re telling it to do, and then acts
as if your test is true.
Since the result is true, JavaScript moves to the curly brackets, where it
finds , another if-then statement that incorrectly uses one equal sign instead
of two. This line sets the variable day to the value 6 and again results in a true
statement. JavaScript then moves to the second set of curly brackets, where it
sees that it’s supposed to write
Happy Birthday, Mom!
, which it does—
every time someone visits the page (see Figure 3-5).
Figure 3-5: Mom’s birthday greeting
NOTE
I remember the difference between one and two equal signs by thinking is the same as
instead of equals when I’m doing an if-then test, and remembering that is the
same as translates into two equal signs.
Nesting
Figure 3-4 is the first example I’ve used of nesting—one if-then statement
inside another. Although it sometimes makes sense to nest your if-then
statements, things get confusing if you start to get three or more levels deep
(one if-then statement inside the curly brackets of another if-then statement,
which itself is inside the curly brackets of a third if-then statement).
Try to write your code so that it doesn’t need more than two levels of nesting. If you find yourself with if-then statements more than two levels deep, it
often means that you’re doing something complicated enough to justify writing
a new function to handle some of the complexity. (More on that in Chapter 6.)
if-then-else Statements
There are a couple of fancier versions of the if-then statement. The first is
the if-then-else statement:
if (navigator.appName == "Microsoft Internet Explorer")
{
// write IE-specific content
40
Chapter 3
document.write("Welcome, Internet Explorer user!");
}
else
{
// write netscape specific content
document.write("Welcome, Netscape user!");
}
This reads nicely in English if you read else as otherwise: “If they’re using
Internet Explorer, show them IE-specific content, otherwise send them
Netscape-specific content.”
if-then-else-if Statements
The above code assumes that there are only two browser manufacturers in
the world, when in fact there are a multitude. We can solve this problem
with an if-then-else-if statement that, if a visitor has a browser other than
Netscape or Internet Explorer, displays content regarding unknown browsers.
if (navigator.appName == "Netscape")
{
// write netscape-specific content
document.write("Welcome, Netscape user!");
}
else if (navigator.appName == "Microsoft Internet Explorer")
{
// write IE-specific content
document.write("Welcome, Internet Explorer user!");
}
else
{
// write unknown browser content
document.write("Welcome, user of a fancy unknown browser!");
}
This code reads in English as: “If they’re using Netscape, send them
Netscape-specific content; if they’re using Internet Explorer, send them IEspecific content. Otherwise send them a message about having a mysterious
browser.”
When and Where to Place Curly Brackets
Notice in the examples above that curly brackets (braces) mark the beginning and end of the body of an if-then statement, enclosing the part where
you tell JavaScript what action(s) to take. You’ll also notice that I place my
beginning and ending curly brackets on their own lines, like this:
if (something == something_else)
{
blah_blah_blah;
}
G i v i n g th e B ro w s e r s W h a t T h e y W an t
41
This is my style, one that I think makes it easier to align pairs of beginning
and ending brackets. Other people prefer this slightly more compact style:
if (something == something_else) {
blah_blah_blah;
}
It’s up to you to choose where you put the curly brackets. Many studies
have tried to figure out which formatting style is most readable or which avoids
bugs. When you get right down to it, just decide what you think looks good
and go with that.
Sometimes curly brackets are not needed in an if-then statement, such as
when the body of the statement has only one line. For example, this is legal:
if (something == something_else)
alert("they're equal");
else
alert("they're different!");
Since each of the “then” parts of the clause is only one line (the alert
functions), the curly brackets around these statements are optional. However,
it’s always a good idea to include the braces anyway, because you might want
to add a second line to that else clause. If you do add a second line to the
else clause and forget to put the brackets around the two lines, your script
won’t work.
With curly brackets, the previous example would look like this:
if (something == something_else)
{
alert("they're equal");
}
else
{
alert("they're different!");
}
Or, if you prefer the more compact style:
if (something == something_else) {
alert("they're equal");
} else {
alert("they're different!");
}
OR and AND
The if-then statements we’ve seen so far are pretty simple. You might, however,
want to add more conditions to an if-then statement (for example, “If Joe is
in high school and is not doing his homework, then tell him to get to work”).
To add more conditions to an if-then statement, use the OR and AND operators.
42
Chapter 3
OR
Suppose you want to give different greetings to people who come to your
site, depending on who they are. You could, as in Figure 3-6, use a prompt
box to ask for a visitor’s name (Figure 3-7) and then use an if-then statement
to determine which greeting to give.
<script type = "text/javascript">
</script>
Figure 3-6: Asking for a visitor’s name with the prompt box
Figure 3-7: The prompt box asking for a visitor’s name
This example greets thau with “Welcome back, thau! Long time no see!”
(Figure 3-8) and everyone else with “Greetings, Name. Good to see you.”
Figure 3-8: thau’s greeting
To greet others the same way you greet thau, you could use a series of
if-then statements as in Figure 3-9.
if (the_name == "thau")
{
document.write("Welcome back, thau! Long time no see!");
}
else if (the_name == "dave")
{
document.write("Welcome back, dave! Long time no see!");
}
G i v i n g th e B ro w s e r s W h a t T h e y W an t
43
else if (the_name == "pugsly")
{
document.write("Welcome back, pugsly! Long time no see!");
}
else if (the_name == "gomez")
{
document.write("Welcome back, gomez! Long time no see!");
}
else
{
document.write("Greetings, " + the_name + ". Good to see you.");
}
Figure 3-9: Personalized greetings with a series of if-then statements
This would work, but there’s a lot of waste here: We repeat basically the
same document.write() line four times. What we really want to say is something
like: “If the_name is thau, or dave, or pugsly, or gomez, give the ‘Long time no
see’ greeting.” JavaScript has a feature called the OR operator, which comes
in handy here. Figure 3-10 shows OR in use:
if ((the_name == "thau") || (the_name == "dave") ||
(the_name == "pugsly") || (the_name == "gomez"))
{
document.write("Welcome back, " + the_name + "! Long time no see!");
}
Figure 3-10: The OR operator
The OR operator is represented by two vertical lines (||), called bars. You
will usually be able to type the bar (|) character as the shifted backslash (\)
key on your keyboard.
NOTE
Although each of the Boolean tests in Figure 3-10 (for example, the_name == "thau")
has its own parentheses, these aren’t strictly necessary. However, the set of parentheses
around all four Boolean tests is required, and it’s a good idea to include the other
parentheses for legibility’s sake.
AND
AND, another important operator, is represented by two ampersands (&&).
Figure 3-11 shows this operator in use.
var age = prompt("How old are you?", "");
var drinking = prompt("Are you drinking alcohol (yes or no)?", "yes");
if ((age < 21) && (drinking == "yes"))
{
document.write("Beat it!");
}
else
44
Chapter 3
{
document.write("Enjoy the show!");
}
Figure 3-11: The AND operator
When bars start using robot bouncers that run on JavaScript, this is the
kind of code they’ll be running. The script asks a person’s age and whether
he or she is drinking alcohol (Figure 3-12).
Figure 3-12: The bouncer’s questions
If the person is under 21 and is drinking alcohol, the bouncer tells him
or her to beat it. Otherwise, the visitor is perfectly legal and is welcome to stay
(Figure 3-13). (Never mind the fake IDs for now.)
o
Figure 3-13: The bouncer’s response
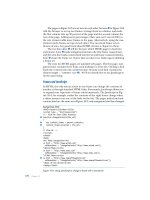
Putting It All Together
Here’s a script containing most of what’s been presented in the chapter so
far. The script in Figure 3-14 redirects users to one page if they’re using an
older version of Netscape (version 4 or earlier), another page if they’re using
an older version of Internet Explorer (version 5.5 or earlier), a third page for
browsers it’s unfamiliar with, and a fourth page for modern browsers it
knows about.
I’ve broken the code into two blocks of <script> tags. The first sets up the
variables and the second does the redirection.
NOTE
It’s a good idea to declare variables at the top of your script. That way, if you want to
change a variable later, you won’t have to go hunting through a lot of HTML and
JavaScript to find it.
<html><head><title>Redirection</title>
<script type = "text/javascript" src = "brwsniff.js"></script>
<script type = "text/javascript">
</script>
</head><body>
<SCRIPT type = "text/javascript">
</script>
Unknown Browser
Sorry, but this page only works for browsers Netscape 6.0 and later, and
Internet Explorer 5.5 and later.
</body>
</html>
Figure 3-14: Complete redirection code
46
Chapter 3
A Few More Details About Boolean Expressions
There are just a few more things you need to know about Boolean
expressions before you can call yourself a Boolean master. You already
know that you can create an if-then statement using code like this:
if (name == "thau") {
alert("Hello, thau!");
}
This says, “If it is true that the variable name contains the string thau, put
up an alert saying Hello, thau! ” What you may not know is that you can store
the value true or false in a variable and use it later. So, I could have done this
instead:
var thisIsThau = (name == "thau");
if (thisIsThau == true) {
alert("Hello, thau!");
}
The first line tests to see whether the variable name contains the string
"thau". If it does, the test is true. This true value is stored in the variable
thisIsThau. You can then test to see whether the variable thisIsThau is true, as
seen in the subsequent if-then statement. This can be shortened a bit to this:
var thisIsThau = (name == "thau");
if (thisIsThau) {
alert("Hello, thau!");
}
Notice that I’m not explicitly checking to see whether thisIsThau contains
the value true. Instead, I’m just putting the variable inside the if-then test
parentheses. The if-then rule states, “If the thing inside the parentheses is
true, do the action in the curly brackets.” In this case, the variable isThisThau
will be true if the variable name contains the value "thau".
If you wanted to do something in the case where the string stored in name
was something other than "thau" you could do this:
var thisIsThau = (name == "thau");
if (thisIsThau == false) {
alert("Hello, somebody other than thau!");
}
Here, we’re checking to see whether the value stored inside thisIsThau is
false, which it will be if the comparison of name and "thau" turned out to be false
in the line above (for example, if name equaled "pugsly").
The final shortcut involves using the special character !, which means not.
G i v i n g th e B ro w s e r s W h a t T h e y W an t
47
var thisIsThau = (name == "thau");
if (!thisIsThau) {
alert("Hello, somebody other than thau!");
}
The expression means “if thisIsThau is not true, then do the stuff in the
curly brackets.” These Boolean shortcuts are used quite frequently in the
scripts I’ve seen on the Web, so you should take some time to get used to them.
How Netscape Provides Browser-Specific Content
Now we’ve covered just about everything you need to know to understand
how Netscape serves up the browser-specific content illustrated at the beginning of the chapter (Figures 3-1 and 3-2). Here is a somewhat simplified and
modified version of the JavaScript on Netscape’s home page:
<script type = "text/javascript">
var agent = navigator.userAgent.toLowerCase();
var major = parseInt(navigator.appVersion);
var minor = parseFloat(navigator.appVersion);
var ns = ((agent.indexOf('mozilla') != -1) &&
(agent.indexOf('compatible') == -1));
var ns4 = (ns && (major == 4));
var ns7 = (ns && (agent.indexOf('netscape/7') != -1) );
var ie = (agent.indexOf("msie") != -1);
var ie4 = (ie && (this.major >= 4));
var ie6 = (ie && (agent.indexOf("msie 6.0") != -1));
var op3 = (agent.indexOf("opera") != -1);
</script>
Next comes all of the HTML. Inside the HTML, when you want to decide
whether or not to write something based on the browser being used, you do
something like this:
<script type = "text/javascript">
if (!ns4) document.write('<td>the stuff that puts in the numbers</td>');
</script>
The script starts by using the userAgent and appVersion variables to
determine the type of browser being used. Notice the use of parseInt() in .
This function works just like parseFloat(), except that it pulls the first integer
out of a string, rather than the first floating-point number. This will set the
variable major to a number like 4, 5, or 6.
The next line ( ) is jam-packed with information, so take it slow. The
first thing to notice is the use of the indexOf() function. We’ll see more of
indexOf() in Chapter 11 when we work with strings. The main thing to
know here is that indexOf() checks to see whether a string contains another
48
Chapter 3
string. To see if the word mozilla is part of the string stored in agent, we use
agent.indexOf('mozilla'). If mozilla is in the agent string, indexOf() will return
some number other than 1. If mozilla is not part of the agent string, indexOf()
will return 1. This can get a little confusing, so make sure you understand
that last rule.
Now, looking at , we see that there are two main parts. The first part
checks to see whether some application of the indexOf() function gives a
result different from 1. The next part checks to see if another application
of the indexOf() function gives a result that equals 1. If the first part is true,
and the second part is also true, then the whole thing is true, and the value
true is stored in the variable ns. If either of the comparisons is false, then the
whole thing will be false, and the value false will be stored in ns. Remember
the bouncer’s test:
if ((age < 21) && (drinking == "yes"))
If both statements were true—the person was under 21, and the person
was drinking—the person got bounced. If either part was not true, then they
were okay.
With all that in mind, let’s look to see what the two comparisons in are.
The first one will return the value true if indexOf() finds the string mozilla in
the variable agent. Take a long, hard look at the expression:
agent.indexOf('mozilla') != -1
Remember, if the string stored in variable agent contains the string
mozilla, indexOf() will return a value not equal to 1. So this test will be true
if the navigator.userAgent has the word mozilla (upper- or lowercase) in it.
The next part makes sure that the navigator.userAgent does not contain
the string compatible. This is because many browsers say they are Mozilla
compatible, and they’ll have both the words mozilla and compatible in their
navigator.userAgent string. Netscape just has the word mozilla in its string.
The end result of is that the variable ns will be true if the navigator.userAgent
contains the string mozilla but not the string compatible.
The next lines figure out which version of Netscape this might be.
Consider :
var ns4 = (ns && (major == 4));
This line says, “If the variable ns is true, and the variable major has a value
of 4, then put the value true in the variable ns4.” If it’s not true both that the
variable ns is true and that the variable major is 4, then ns4 will be false. The
other lines perform similar tests for Navigator 7 and other browsers. Each
one is a little different from the others, so make sure you take some time to
understand all of them.
G i v i n g th e B ro w s e r s W h a t T h e y W an t
49
Once the browser is known, the decision whether or not to display the
browser-specific feature (namely, the page number navigation links) happens
later in the code. Right at the place where you either write something to the
web page or not, depending on the browser being used, you use a line like :
if (!ns4) document.write('<td>the stuff that puts in the numbers</td>');
This says, “If this is not a Netscape 4 browser, write the code that puts
in the navigation element.” The variable ns will be true if the earlier code
determined that it was a Netscape 4 browser being used, and false otherwise.
Remember that this code must go between <script> and </script> tags.
Except for the part of the script that determines the type of browser being
used, the Netscape code is fairly simple. If you want to avoid the complexities
involved in determining the browser being used, use one of the browser
sniffer packages available for free on the Web, incorporating the software
into your page using JavaScript statements similar to those shown in the
section “More Accurate Browser Detection” on page 36.
Summary
Here are the things you should remember from this chapter:
JavaScript’s tools for identifying a visitor’s browser (navigator.appName,
navigator.appVersion, and navigator.userAgent)
How if-then, if-then-else, and if-then-else-if statements work
How Boolean expressions work
How to redirect your visitors to other web pages
How to import JavaScript from another file
Did you get all that? If so, here’s an assignment for you.
Assignment
Write a web page that asks for a visitor’s name. If the visitor is someone you
like, send him to your favorite page. If it’s someone you don’t know, send
him to a different page. And if it’s someone you don’t like, send him to yet
another page.
50
Chapter 3
WORKING WITH ROLLOVERS
You’ve seen rollovers a million times.
You mouse over an image, and the image
changes. You mouse off the image, and the
image changes back to its original state. Rollovers
are an easy way to make your site more interactive.
This chapter will show you how to create a good rollover. This involves:
Telling JavaScript to detect the mouse event that will trigger an
image swap
Telling JavaScript which of several images to swap in, based on the
mouse event
Replacing the old image with a new one
I’ll also teach you a new way to detect which browser a visitor is using.
A Real-World Example of Rollovers
To begin, let’s take a look at rollovers in action. Tin House (http://www
.tinhouse.com), one of my favorite literary journals, has a little house on its
home page that helps you navigate the site. When you first come to the page,
all the lights in the house are off (Figure 4-1); rolling over different parts of the
house lights those areas up (Figure 4-2). It may be a little silly, but I like it.
Figure 4-1: Tin House home page before mousing over the house
Figure 4-2: Tin House home page with mouse over the house
The Book of JavaScript home page also has a relatively straightforward and
uncomplicated implementation of an image swap. If you mouse over the
graphic that says Turn it over! the image of the front cover of the book will
52
Chapter 4
change to show the back of the book (see Figures 4-3 and 4-4). Mouse off the
Turn it over! image again and the book image switches back to the front cover.
There are many ways to script a rollover. Because rollovers don’t work in
old browsers, or when people turn JavaScript off, creating them also involves
browser detection, so in this chapter you’ll learn more ways to tailor JavaScripts
to the visitor’s browser.
You’ll also learn how quotation marks are handled in JavaScript and how
the hierarchical framework of a web page, known as the Document Object
Model (DOM), is reflected in JavaScript syntax.
Figure 4-3: An image from the Book of
JavaScript home page before mouseover
Figure 4-4: The same image after
mouseover
Triggering Events
So far all the JavaScript we’ve seen is triggered when a web page loads into a
browser. But JavaScript can also be event driven.
Event-driven JavaScript waits for your visitor to take a particular action,
such as mousing over an image, before it reacts. The key to coding eventdriven JavaScript is to know the names of events and how to use them.
Event Types
With JavaScript’s help, different parts of your web page can detect different
events. For example, a pull-down menu can know when it has changed (see
Chapter 7); a window when it has closed (see Chapter 5); and a link when a
visitor has clicked on it. In this chapter I’ll focus on link events.
A link can detect many kinds of events, all of which involve interactions
with the mouse. The link can detect when your mouse moves over it and when
your mouse moves off of it. The link knows when you click down on it, and
whether, while you’re over the link, you lift your finger back off the button
after clicking down. The link also knows whether the mouse moves while
over the link.
W or k in g w it h R ol l o v e r s
53
Like the other kinds of interactions that we’ll cover in later chapters, all
of these events are captured in the same way: using an event handler.
onClick
Figure 4-5 shows the basic format of a link that calls an alert after a visitor
clicks it.
Before adding JavaScript:
As you can see, moving the mouse over the link triggers onMouseOver. The
name) and is triggered when the mouse moves off of the link. You can use
onMouseOut, onMouseOver, and onClick in the same link, as in Figure 4-8.
Mayday! Mouse overboard! (Figure 4-9). Pressing ENTER to get rid of the first
code in the onClick.
the others. Try them yourself and see. The onMouseMove event handler is called
whenever the mouse is moved while it is over the link. The onMouseDown event
over a link. Similarly, the onMouseUp event handler is triggered when the mouse
button is lifted up again. An onClick event handler is triggered whenever an
onMouseDown event is followed by an onMouseUp event.
This example also demonstrates a new wrinkle in JavaScript syntax. Inside
semicolon and all. In previous chapters, we’ve placed all of our JavaScript
between opening <script> and closing </script> tags. The only exception to
this rule is when JavaScript is inside the quotes of an event. Your browser will
<script> and </script> tags in there.
Also note that the quotes in the alert are single quotes ('). If these were
with what. For example, if you wrote
which would confuse it and result in an error. Make sure that if you have
quotes inside quotes, one set is double and the other is single.
Apostrophes can also pose problems. For example, let’s say you want the
Here's the Book of JavaScript page. You're gonna love it!
onClick = "alert('Here's the Book of JavaScript page. You're gonna love it!');"
single quotes inside single quotes and gets confused. If you really want those
onClick = "alert('Here\'s the Book of JavaScript page. You\'re gonna love it!');"
JavaScript to print the item rather than interpret it.
quotes after the href, usually a URL. In Figure 4-5, for example, the tag is
In HTML, href is a required attribute of the anchor (<a>) tag, or link.
where to go. Usually that’s another page, but in this case you are not trying
to go anywhere. I might have just put nothing inside the quotes (href = ""),
something weird. Give it a try in your favorite browser. To avoid weird
link to go anywhere when clicked.
go anywhere when clicked: onClick = "return false;". Placing return false; in
the quotes after an onClick tells JavaScript to prevent the browser from following the URL inside the link’s href. This can be quite useful for dealing with
people who have JavaScript turned off in their browsers. For example, if
will ignore the onClick and happily follow the URL inside the href. This
tells the user how to turn JavaScript on. People who already have JavaScript
turned on will be treated to the contents of the onClick. They will see an alert
from following the URL in the href. Although very few people turn JavaScript
consideration.
You can do more with event handlers than simply triggering alert boxes.
background color.
the background to red or blue. When you type your response, the background
changes to that color. In fact, you can type whatever you want into that prompt
box, and your browser will try to guess the color you mean. (You can even do
what color your browser thinks you are. When I type thau into the prompt,