Life with qmail phần 3 potx
Bạn đang xem bản rút gọn của tài liệu. Xem và tải ngay bản đầy đủ của tài liệu tại đây (800.48 KB, 10 trang )
2.5.3. Create directories
Since qmail's installation program creates the subdirectories as they're needed, you only need to create
the qmail "home" directory:
mkdir /var/qmail
And on to the next section.
Note: If you want some or all of the qmail files to reside elsewhere than /var, this can be
accomplished by creating symbolic links under /var/qmail pointing to the other locations.
For example, the qmail configuration files can be stored in /etc/qmail by doing:
mkdir /etc/qmail
ln -s /etc/qmail /var/qmail/control
2.5.4. Create users and groups
The easiest way to create the necessary users and groups is to create a little script file to do it for you.
In the source directory you'll find a file called INSTALL.ids. It contains the command lines for
many platforms, so copying the file to another name and editing that is quick and easy.
cd /usr/local/src/netqmail-1.06
cp INSTALL.ids IDS
Then, using your favorite editor, remove all of the file except the lines you want. For example, here's
what IDS would look like for FreeBSD after editing:
pw groupadd nofiles
pw useradd qmaild -g nofiles -d /var/qmail -s /nonexistent
pw useradd alias -g nofiles -d /var/qmail/alias -s /nonexistent
pw useradd qmaill -g nofiles -d /var/qmail -s /nonexistent
pw useradd qmailp -g nofiles -d /var/qmail -s /nonexistent
pw groupadd qmail
pw useradd qmailq -g qmail -d /var/qmail -s /nonexistent
pw useradd qmailr -g qmail -d /var/qmail -s /nonexistent
pw useradd qmails -g qmail -d /var/qmail -s /nonexistent
Then to run it, either use chmod to make it executable or run it with sh:
First method:
chmod 700 IDS
./IDS
Second method:
/bin/sh IDS
Life with qmail
2.5. Build the source 15
When the script finishes, all of your users and groups will be created and you can go on to the next
section.
But what do you do if your system isn't listed in INSTALL.ids? You'll have to create them
manually. Start by using your favorite editor and editing /etc/group. You need to add the
following two lines to the end of the file:
qmail:*:2107:
nofiles:*:2108:
Note: Make sure that 2107 and 2108 aren't already used. If they are used, select two numbers that
aren't already in use.
Next, using vipw (most systems have it, if not you'll need to use your editor again but this time on
/etc/passwd) add these lines to the end of the file:
alias:*:7790:2108::/var/qmail/alias:/bin/true
qmaild:*:7791:2108::/var/qmail:/bin/true
qmaill:*:7792:2108::/var/qmail:/bin/true
qmailp:*:7793:2108::/var/qmail:/bin/true
qmailq:*:7794:2107::/var/qmail:/bin/true
qmailr:*:7795:2107::/var/qmail:/bin/true
qmails:*:7796:2107::/var/qmail:/bin/true
Note: Make sure 7790-7796 aren't already in use and that 2107 and 2108 are the same group ids you
used above. If any of these UID's are already being used, select numbers that aren't already in use.
You don't specifically need to add any of these lines to the end of the file, that's just the easiest way to
explain it here.
You're now ready to continue on to the next section.
2.5.5. Do the build
Now you can start building qmail. Change to the
/usr/local/src/netqmail-1.05/netqmail-1.05 directory and let's get started:
cd /usr/local/src/netqmail-1.06
In the Verify Build Environment section, you located your C compiler. If it's not called cc or the
directory it resides in isn't in your PATH environment variable, you'll need to edit conf-cc and
conf-ld. Say your compiler is gcc, and it's in your PATH. Simply edit conf-cc and conf-ld
and replace "cc" with "gcc".
Now type the following:
make setup check
After the build is complete, you'll need to do your post installation configuration. A couple of scripts
are provided to make this job a lot easier.
Life with qmail
16 2.5. Build the source
If your DNS is configured properly, this script should be all you need at this point:
./config
If, for some reason, config can't find your hostname in DNS, you'll have to run the config-fast
script:
./config-fast the.full.hostname
For example, if your domain is example.com and the hostname of your computer is dolphin, your
config-fast line would look like this:
./config-fast dolphin.example.com
Note: On a small local LAN you might want to use a pseudo domain such as ".local". E.g., if your
hostname is "mash", you could do ./config-fast mash.local. If you do this, be sure to
configure qmail to use a valid Internet domain name in return addresses. (See section 3,
Configuration.)
qmail is now installed on your system and is ready to be run! The next section will guide you through
the steps of starting and testing qmail.
2.6. Install ucspi-tcp
Earlier, you unpacked the qmail, ucspi-tcp, and daemontools tarballs. Now change to the ucspi-tcp
directory:
cd /usr/local/src/ucspi-tcp-0.88
In the Do the build section, if you modified conf-cc and conf-ld, you'll need to make the same
changes in this directory.
Then do:
patch < /usr/local/src/netqmail-1.06/other-patches/ucspi-tcp-0.88.errno.patch
make
make setup check
That's it. ucspi-tcp is installed.
2.7. Install daemontools
Change to the daemontools build directory:
cd /package/admin/daemontools-0.76
Once again, if you modified <conf-cc> and conf-ld during the qmail and ucspi-tcp builds, you'll
need to make the same changes in the src directory.
Then do:
Life with qmail
2.6. Install ucspi-tcp 17
cd src
patch < /usr/local/src/netqmail-1.06/other-patches/daemontools-0.76.errno.patch
cd
package/install
On BSD systems (no /etc/inittab), you'll need to reboot at this point to start svscan, the
master service control daemon.
Use "ps -ef | grep svscan" or "ps waux | grep svscan" to verify that svscan is
running.
Note: Under Solaris, you'll have to modify the /etc/inittab entry that starts svscan from:
SV:123456:respawn:/command/svscanboot
to:
SV:123456:respawn:/command/svscanboot </dev/null >/var/log/svscan 2>&1
or:
SV:123456:respawn:/command/svscanboot </dev/null >/dev/msglog 2>&1
Depending upon whether you want error messages resutling from starting svscan to be sent to a log
file or the system console. For an explanation of why this is necessary, see:
/>Note: A Slackware user reports that the SV /etc/inittab entry has to be moved before the x1
entry or svscan won't be started at boot-up.
2.8. Start qmail
2.8.1. /var/qmail/rc
The /var/qmail/boot directory contains example qmail boot scripts for different configurations:
/var/spool/mail vs. $HOME/Mailbox, using procmail or dot-forward, and various
combinations of these. Feel free to examine these, but for our installation, we'll use the following
script:
#!/bin/sh
# Using stdout for logging
# Using control/defaultdelivery from qmail-local to deliver messages by default
exec env - PATH="/var/qmail/bin:$PATH" \
qmail-start "`cat /var/qmail/control/defaultdelivery`"
Life with qmail
18 2.7. Install daemontools
Note: This script uses backquotes (`), not single quotes ('). For best results, copy and paste the
scripts in this guide instead of retyping them.
Use your editor to create the above /var/qmail/rc, then execute these commands:
chmod 755 /var/qmail/rc
mkdir /var/log/qmail
At this point you need to decide the default delivery mode for messages that aren't delivered by a
.qmail file. The following table outlines some common choices.
Mailbox
format
Name Location defaultdelivery Comments
mbox Mailbox $HOME ./Mailbox most common,
works with most
MUA's
maildir Maildir $HOME ./Maildir/ more reliable,
less MUA
support
mbox username /var/spool/mail See INSTALL.vsm traditional UNIX
mailbox
See INSTALL.mbox, INSTALL.maildir, and INSTALL.vsm for more information.
To select your default mailbox type, just enter the defaultdelivery value from the table into
/var/qmail/control/defaultdelivery. E.g., to select the standard qmail Mailbox
delivery, do:
echo ./Mailbox >/var/qmail/control/defaultdelivery
Note: defaultdelivery isn't a standard qmail control file. It's a feature of the above
/var/qmail/rc file. The defaultdelivery argument to qmail-start is the contents of a
.qmail file that specifies delivery instructions to be followed when no actual .qmail is found.
Putting these instructions in a separate control file eliminates the need to quote shell metacharacters in
the delivery instructions and avoids messy multi-line command arguments.
2.8.2. System start-up files
2.8.2.1. The qmailctl script
If you were to manually execute the /var/qmail/rc script, qmail would be partially started. But
we want qmail started up automatically every time the system is booted and we want it shut down
cleanly when the system is halted.
This is accomplished by creating a startup/shutdown script like the following in
/var/qmail/bin/qmailctl:
#!/bin/sh
# description: the qmail MTA
Life with qmail
2.8. Start qmail 19
PATH=/var/qmail/bin:/bin:/usr/bin:/usr/local/bin:/usr/local/sbin
export PATH
QMAILDUID=`id -u qmaild`
NOFILESGID=`id -g qmaild`
case "$1" in
start)
echo "Starting qmail"
if svok /service/qmail-send ; then
svc -u /service/qmail-send /service/qmail-send/log
else
echo "qmail-send supervise not running"
fi
if svok /service/qmail-smtpd ; then
svc -u /service/qmail-smtpd /service/qmail-smtpd/log
else
echo "qmail-smtpd supervise not running"
fi
if [ -d /var/lock/subsys ]; then
touch /var/lock/subsys/qmail
fi
;;
stop)
echo "Stopping qmail "
echo " qmail-smtpd"
svc -d /service/qmail-smtpd /service/qmail-smtpd/log
echo " qmail-send"
svc -d /service/qmail-send /service/qmail-send/log
if [ -f /var/lock/subsys/qmail ]; then
rm /var/lock/subsys/qmail
fi
;;
stat)
svstat /service/qmail-send
svstat /service/qmail-send/log
svstat /service/qmail-smtpd
svstat /service/qmail-smtpd/log
qmail-qstat
;;
doqueue|alrm|flush)
echo "Flushing timeout table and sending ALRM signal to qmail-send."
/var/qmail/bin/qmail-tcpok
svc -a /service/qmail-send
;;
queue)
qmail-qstat
qmail-qread
;;
reload|hup)
echo "Sending HUP signal to qmail-send."
Life with qmail
20 2.8. Start qmail
svc -h /service/qmail-send
;;
pause)
echo "Pausing qmail-send"
svc -p /service/qmail-send
echo "Pausing qmail-smtpd"
svc -p /service/qmail-smtpd
;;
cont)
echo "Continuing qmail-send"
svc -c /service/qmail-send
echo "Continuing qmail-smtpd"
svc -c /service/qmail-smtpd
;;
restart)
echo "Restarting qmail:"
echo "* Stopping qmail-smtpd."
svc -d /service/qmail-smtpd /service/qmail-smtpd/log
echo "* Sending qmail-send SIGTERM and restarting."
svc -t /service/qmail-send /service/qmail-send/log
echo "* Restarting qmail-smtpd."
svc -u /service/qmail-smtpd /service/qmail-smtpd/log
;;
cdb)
tcprules /etc/tcp.smtp.cdb /etc/tcp.smtp.tmp < /etc/tcp.smtp
chmod 644 /etc/tcp.smtp.cdb
echo "Reloaded /etc/tcp.smtp."
;;
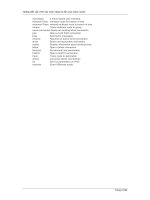
help)
cat <<HELP
stop stops mail service (smtp connections refused, nothing goes out)
start starts mail service (smtp connection accepted, mail can go out)
pause temporarily stops mail service (connections accepted, nothing leaves)
cont continues paused mail service
stat displays status of mail service
cdb rebuild the tcpserver cdb file for smtp
restart stops and restarts smtp, sends qmail-send a TERM & restarts it
doqueue schedules queued messages for immediate delivery
reload sends qmail-send HUP, rereading locals and virtualdomains
queue shows status of queue
alrm same as doqueue
flush same as doqueue
hup same as reload
HELP
;;
*)
echo "Usage: $0 {start|stop|restart|doqueue|flush|reload|stat|pause|cont|cdb|queue|help}"
exit 1
;;
esac
Life with qmail
2.8. Start qmail 21
exit 0
This script is available via />Create the script using your editor or by downloading it with your web browser (recommended).
Make the qmailctl script executable and link it to a directory in your path:
chmod 755 /var/qmail/bin/qmailctl
ln -s /var/qmail/bin/qmailctl /usr/bin
2.8.2.2. The supervise scripts
Now create the supervise directories for the qmail services:
mkdir -p /var/qmail/supervise/qmail-send/log
mkdir -p /var/qmail/supervise/qmail-smtpd/log
Create the /var/qmail/supervise/qmail-send/run file:
#!/bin/sh
exec /var/qmail/rc
Create the /var/qmail/supervise/qmail-send/log/run file:
#!/bin/sh
exec /usr/local/bin/setuidgid qmaill /usr/local/bin/multilog t /var/log/qmail
Create the /var/qmail/supervise/qmail-smtpd/run file:
#!/bin/sh
QMAILDUID=`id -u qmaild`
NOFILESGID=`id -g qmaild`
MAXSMTPD=`cat /var/qmail/control/concurrencyincoming`
LOCAL=`head -1 /var/qmail/control/me`
if [ -z "$QMAILDUID" -o -z "$NOFILESGID" -o -z "$MAXSMTPD" -o -z "$LOCAL" ]; then
echo QMAILDUID, NOFILESGID, MAXSMTPD, or LOCAL is unset in
echo /var/qmail/supervise/qmail-smtpd/run
exit 1
fi
if [ ! -f /var/qmail/control/rcpthosts ]; then
echo "No /var/qmail/control/rcpthosts!"
echo "Refusing to start SMTP listener because it'll create an open relay"
exit 1
fi
exec /usr/local/bin/softlimit -m 2000000 \
Life with qmail
22 2.8. Start qmail
/usr/local/bin/tcpserver -v -R -l "$LOCAL" -x /etc/tcp.smtp.cdb -c "$MAXSMTPD" \
-u "$QMAILDUID" -g "$NOFILESGID" 0 smtp /var/qmail/bin/qmail-smtpd 2>&1
Note: concurrencyincoming isn't a standard qmail control file. It's a feature of the above script.
Also, that's -1 (dash one) on the LOCAL line and -l (dash ell) on the tcpserver line.
Note: Under Solaris, the normal id program won't work right in this script. Instead of id, use
/usr/xpg4/bin/id, e.g.:
QMAILDUID=`/usr/xpg4/bin/id -u qmaild`
NOFILESGID=`/usr/xpg4/bin/id -g qmaild`
Note: The memory limit specified in the softlimit command may need to be raised depending
upon your operating system and hardware platform. If attempts to connect to port 25 fail or remote
systems are unable to send you mail, or you see a message like:
/usr/local/bin/tcpserver: error while loading shared libraries:
libc.so.6: failed to map segment from shared object: Cannot
allocate memory
try raising it to 3000000 or 4000000.
Create the concurrencyincoming control file:
echo 20 > /var/qmail/control/concurrencyincoming
chmod 644 /var/qmail/control/concurrencyincoming
Create the /var/qmail/supervise/qmail-smtpd/log/run file:
#!/bin/sh
exec /usr/local/bin/setuidgid qmaill /usr/local/bin/multilog t /var/log/qmail/smtpd
Make the run files executable:
chmod 755 /var/qmail/supervise/qmail-send/run
chmod 755 /var/qmail/supervise/qmail-send/log/run
chmod 755 /var/qmail/supervise/qmail-smtpd/run
chmod 755 /var/qmail/supervise/qmail-smtpd/log/run
Then set up the log directories:
mkdir -p /var/log/qmail/smtpd
chown qmaill /var/log/qmail /var/log/qmail/smtpd
Finally, link the supervise directories into /service:
ln -s /var/qmail/supervise/qmail-send /var/qmail/supervise/qmail-smtpd /service
Life with qmail
2.8. Start qmail 23
The /service directory is created when daemontools is installed.
Note: The qmail system will start automatically shortly after these links are created. If you don't want
it running yet, do:
qmailctl stop
2.8.2.3. SMTP Access Control
Allow the local host to inject mail via SMTP:
echo '127.:allow,RELAYCLIENT=""' >>/etc/tcp.smtp
qmailctl cdb
2.8.3. Stop and disable the installed MTA
Although it's possible to run both qmail and your existing MTA, which is probably Sendmail,
simultaneously, I don't recommend it unless you know what you're doing. And, frankly, if you're
reading this, you probably don't know what you're doing. :-)
If your existing MTA is Sendmail, you should be able to stop it by running the init.d script with
the "stop" argument. E.g., one of these should work:
/etc/init.d/sendmail stop
/sbin/init.d/sendmail stop
/etc/rc.d/init.d/sendmail stop
If you can't find an init.d/sendmail script, you can locate sendmail's PID using "ps
-ef|grep sendmail" or "ps waux|grep sendmail" and stop it using:
kill PID-of-sendmail
If your MTA isn't Sendmail, check its documentation for the correct shutdown procedure.
You should also consider removing the old MTA completely from the system. At least disable the
init.d script so it doesn't try to start up again when the system is rebooted.
For Red Hat Linux, removing Sendmail can be accomplished by:
rpm -e nodeps sendmail
Note: If you're using an RPM-based Linux distribution like Red Hat, removing the MTA package
might cause problems down the road. Utilities that update the system might try to reinstall Sendmail,
or MUA packages might not install because they can't tell an MTA is installed. Mate Wierdl provides
a stub package called "fake_mta" that can be installed to prevent these problems. Simply install the
RPM available from .
Verify that nothing is listening to the SMTP port (25). Culprits could be the old MTA, inetd, or
xinetd. The following command should produce no output (unless the qmail-smtpd service is
running):
Life with qmail
24 2.8. Start qmail