3D in Photoshop The Ultimate Guide for Creative Professionals PHẦN 5 pdf
Bạn đang xem bản rút gọn của tài liệu. Xem và tải ngay bản đầy đủ của tài liệu tại đây (1.29 MB, 22 trang )
7.3. Interactive Rendering
Interacting rendering is the rendering that occurs during operations where
the mouse button is down in the upper right corner of the 3D preferences.
The controls in the 3D preferences (shown in Figure 7.1) allow you to tune
the interactive rendering experience. The default state of these controls
allows for maximum performance during interaction, and in this section we
describe the ways (and reasons) to change it.
7.3.1. OpenGL (on by default)
In this mode, during interaction, rendering always switches to OpenGL mode,
even if rendering quality in the 3D panel is set to one of the Ray Trace
options. This allows for better performance, but will turn off Ray Tracer-only
effects, such as shadows.
7.3.2. Allow Direct To Screen (on by default)
With this on, OpenGL rendering will bypass the Photoshop layer blending
mechanism, and render the result directly to screen during interaction. This
setting allows for maximum possible speed and fully uses GPU acceleration.
7.3.3. Auto-Hide Layers (on by default)
If enabled, all other layers and the current 3D layer's Layer Effects are turned
off during interaction and the final composite is only displayed on mouse-up.
If disabled, Photoshop blending is active during interaction and while 3D
rendering is still performed with OpenGL, compositing overhead may result
in a noticeable performance decrease Auto-Hide Layers for Performance can
also be turned on and off from the 3D menu in Photoshop (Figure 7.3).
7.3.4. Ray Tracer (off by default)
This setting forces ray tracing during interaction, which will result in
a significant performance reduction depending on the number and speed of
your computer's cores. Shadows, Reflection and Refraction are effects that
can be individually turned on or off when choosing the Ray Tracer for
interaction. Each effect will cumulatively slowdown performance so it is not
recommended that you have all effects on when using the Ray Tracer for
interaction. The option to use the Ray Tracer during interaction showing just
Shadows, can be particularly useful when trying to get shadows to appear in
the right place but are generally slow to render.
7.4. Ray Trace Quality Threshold
Image quality thresho ld is specified as a number between 1 and 10. This
number defines the quality of a Ray Traced rendering when the Quality
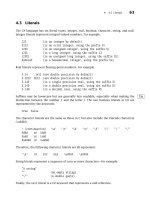
FIG 7.3 Auto-Hide Layers can be
turned on from the 3D menu to
maximize performance and GPU
acceleration.
Performance Settings and Optimization
|
73
menu item in the 3D Scene panel is set to Ray Traced Final (Figure 7.4).
Lower threshold values will stop the rendering sooner as a result of fewer
passes with the Ray Tracer. This has a direc t affect on the quality of Ray
Tracing effects such as soft shadows or depth of field. In general, if your
image remain s no isy after completing a Final Render, you m ay want to
increase the threshold to allow fo r more passes of rendering your scene.
7.5. 3D File Loading
These settings allow you to impose limits during loading of 3D files. Since
imported 3D files can potentially have a lot of light sources and materials,
loading and initial rendering of these scenes can take a very long time, and,
depending on your workflow, might be unnecessary.
7.5.1. Active Light Source Limit
Active Light Source Limit sets the limit for active lights. If the number of light
sources in the incoming 3D file exceeds the limit, some light sources will be
initially turned off. Note that you can still turn them on using the eye icon
next to the light source object in a Scene view or Lights view (Figure 7.5).
FIG 7.4 Ray Trace Quality setting in
the 3D Panel where quality is
dependent on the threshold deter-
mined in 3D Preferences.
FIG 7.5 The eye icon in the 3D
Lights Panel allow you to toggle
lights on and off.
|
3D in Photoshop
74
PART III
Workflows
CHAPTER 8 3D and Compositing with Bert Monroy 77
CHAPTER 9 Adobe Repoussé with Corey Barker 103
CHAPTER 10 Painting, Texturing and Lighting with Stephen Burns 153
CHAPTER 11 Creating Lenticulars with Russell Brown 187
In this part
Now that you have both an understanding of basic 3D concepts as well as an
introduction to how 3D works in Photoshop, you can start having some real
fun in this section. In Part III, we have several amazing artists that will walk
you through useful and fun techniques using 3D in Photoshop. For both
those new to 3D as well as the seasoned 3D user, you'll find great tips and
tricks on how to composite, create 3D objects, add effects, create lenticulars
and how to work with lighting, cameras, shadows and many more. Each artist
has different workflows that will give you a taste of what can be accom-
plished using all the great new 3D tools.
75
This page intentionally left blank
3D and Compositing
with Bert Monroy
With the introduction of 3D in Photoshop, I have been very curious as to how
this affected the average Photoshop user. I have found that many are
extremely curious as to what it is all about but doubt that it will be part of
their daily workflow. However, 3D has made its way into just about every
aspect of the graphic arts world. What started out as a gimmick to get people
into theaters back in the 1950s has evolved to become an integral part of TV
commercials, magazine ads and, of course, movies. We are now being
bombarded with advertising for 3D televisions! 3D has become the big kid on
the block.
The commercials and ads mentioned earlier are not the “pop off the screen”
effects that we get in movies, but rather the simple depiction of a product or
scene. Car commercials are a great example of this use of 3D. There is a TV
commercial where hundreds of automobiles are driving around forming
giant patterns and pictures to illustrate the narrator's comments. Think of the
logistical nightmare of having all those drivers synchronized to do the job
that is so easily accomplished with 3D models instead.
CHAPTER 8
|
3D in Photoshop. DOI: 10.1016/B978-0-240-81377-6.10008-0
Copyright Ó 2010 Elsevier Inc. All rights reserved.
77
“I will never have to create or use a 3D automobile,” you are probably thinking
right now. “I have no need for 3D objects at all” might be crossing your
thoughts as well. I want to share with you some places where the introduction
of a simple 3D effect has made things so much easier in my workflow.
In the creation of my latest painting there were two places where 3D
simplified an effect that used to require a lot of effort to create. I want to
share one of those instances with you here in this chapter.
Figure 8.1 shows the top frame of a storefront on New York's Times Square.
Notice the vertical blinds that run across the façade. To accomplish this in the
past, I resorted to Adobe Illustrator where I would create a single vertical line
of a thick weight for the blind closest to the viewer. I would then create
a second, thinner line for the blind furthest away. Using the Blend Tool in
Illustrator a blend was generated between the two lines giving the result of
the lines getting thinner as they moved away from the viewer. This was not
enough. The blend sets the additional lines equidistant from each other e
that is not the way it would look in real life. The lines would get thinner and
also appear to get closer together. To accomplish the latter, I would then
have to “expand” the blend then physically select each line and move it into
place. This was done by eye e constantly adjusting the lines until they looked
correct. That many steps were painstaking to say the least.
The 3D feature in Photoshop has turned this into a simple process that
almost requires no thought. A single line is turned into a pattern and a layer is
filled with that pattern (Figure 8.2).
That layer is converted into a 3D postcard (3D > New 3D Postcard From
Layer). The postcard is then moved into 3D space, accomplishing the desired
effect as seen in Figure 8.3.
FIG 8.1 Close up of MTV storefront from the painting “Times Square”.
|
3D in Photoshop
78
Since the content of the layer is being manipulated in actual three-dimen-
sional space, the lines get thinner and closer together as they travel away
from the point of view. Figure 8.4 shows the 3D postcard of the lines in
position over the window areas in the scene.
FIG 8.4 Lines in place prior to being clipped with the layer containing the windows.
FIG 8.3 3D Postcard layer angled into perspective.
FIG 8.2 Layer filled with a pattern of vertical lines.
3D and Compositing with Bert Monroy
|
79
After the 3D layer was correctly positioned where it needed to be, it was then
rasterized to convert it to a normal, pixel layer (3D > Rasterize). The layer was
then clipped with the layer containing the shapes of the windows where the
lines needed to appear (Figure 8.5).
This was accomplished by clicking between the layer of the window and the
layer with the lines above it in the Layer's panel while pressing the Option
key (Alt in Windows). In this case the 3D effect is so subtle, yet effective; not
quite what comes to mind when you think of 3D objects.
If you needed to construct an entire 3D environment for a game, movie or
such, it would be advisable to look into a 3D application that is specifically
designed to handle the amount of work and detail that such a project
would require. However, if you simply want to add an object to an
existing scene, the tools in Photoshop are extremely capable of handling
the job.
One very important thing to consider in compositing a 3D object into an
existing scene is that it has to look as if it was there in the first place. Copy
and paste is not enough to make it look like it belongs there. The object must
interact with its environment in order to achieve the necessary realism that
you might require.
Let's look at a simple 3D object created using one of the preset objects that
come with Photoshop. We will then put that object into a scene and make it
look like it was there when the original shot was taken. Basically we will be
creating a hypothetical ad for a wine maker whose Cabernet is invading
Venice. What is important to keep in mind is that it is not what is being done
but rather how and why it is being done. The thought processes and the
techniques are what you should concentrate on.
FIG 8.5 Vertical lines (vertical
blinds) clipped with window
layer.
|
3D in Photoshop
80
Figure 8.6 is a shot taken on a canal in Venice.
Figure 8.7 shows a Photoshop file where the art for our wine bottle label has
been put into a layer.
With the layer containing the wine label selected, “Wine Bottle” is chosen
from the 3D > New Shape From Layer menu (Figure 8.8).
FIG 8.6 Scene for wine ad composite.
FIG 8.8 Wine label layer is converted into the preset
shape “Wine Bottle”.
FIG 8.7 Art for wine label.
3D and Compositing with Bert Monroy
|
81
The result is a rather curious looking wine bottle with the label wrapped
around it (Figure 8.9).
Using the 3D Object Rotate Tool, our bottle has been spun into the position
we need for the ad (Figure 8.10).
Now we need to start playing with the look of the bottle. To alter its
appearance it will be necessary to call up the 3D panel from the Windows
menu. In the 3D Materials section of the 3D panel, the color for the glass is
changed to a deeper green to best simulate the color of a real wine bottle as
seen in Figure 8.11.
The cork is another story. The cork that is generated when you choose the
Wine Bottle preset is made of a solid, beige color. Color alone will not do the
trick. Cork has a very specific texture and look to it. Doing a Google search for
“cork,” you will find tons of images. The cork image in Figure 8.12 will serve
this purpose.
In the Materials section of the 3D panel the Cork Material is chosen
(Figure 8.13).
Under the pull-down menu to the right of Diffuse and the swatch of the cork
color, Load Texture is chosen. In the Open box that pops up, the texture for
FIG 8.9 The result of the 3D Wine Bottle created from wine label layer.
FIG 8.10 Wine bottle is rotated into the desired position for the ad.
|
3D in Photoshop
82
the cork is loaded. The small preview thumbnail displays the cork texture on
the surface.
Note: Clicking on the arrow to the right of the thumbnail displays some
textures that ship with Photoshop, but we want to be more precise in our
look so we'll use the an imported cork texture.
FIG 8.11 The material for the glass portion of the bottle is colorized.
FIG 8.12 Cork texture downloaded from the web. FIG 8.13 The cork texture is applied to the cork
object.
3D and Compositing with Bert Monroy
|
83
Now the glass portion of the bottle needs to look like glass. The color is right
but it needs to be transparent. In the Materials section of the 3D panel, the
Glass Material is chosen. The Opacity is lowered to 75%. Since the specific
material was given this opacity change, the cork and label will remain
completely opaque (Figure 8.14).
Next comes the lighting. Some models when generated will have light
sources attached to them automatically. Some 3D models you may down-
load from the web may contain multiple light sources. Others might have no
light whatsoever. The beauty of it all is that no matter what lights an object
may contain, you have total control over those lights, plus the ability to
create new ones.
As in photography, how you light your subject is very important. Lighting your
3D object is equally as important. Since our 3D object is going to be placed
into an existing scene it is crucial that we study the scene where the 3D object
will be placed. The intensity, color and direction of the light source(s) must
match or else it will look wrong. In the Venetian scene we are using for this
FIG 8.14 The material for the glass portion of the bottle is made transparent.
|
3D in Photoshop
84
chapter the sunlight is coming from the upper right, slightly behind the
viewer.
When you choose the preset of Wine Bottle, the resulting model contains two
infinite lights. Infinite light is a good lighting type since it is basically an
ambient light source like that produced by the sun. However, there is only
one sun in our solar system.
In the Lights section of the 3D panel, the second infinite light is turned off.
This is done by clicking on the eye icon to the left of the light source
(Figure 8.15).
Note: Moving the lights around is simple but you must use the tools
provided in the panel. Using the 3D tools in the Tools panel will move the
object.
Using the adjustment tools, the Infinite Light 1 was adjusted to point towards
the bottle in the same direction as the sun in the Venetian scene.
FIG 8.15 The lighting for the bottle is altered to match the lighting in the scene.
3D and Compositing with Bert Monroy
|
85
With the bottle now complete, we switch to the Scene section of the 3D
panel and set the Quality to Ray Traced Final (Figure 8.16).
This will take a few seconds but what it does is render the image as perfectly
as possible within the resolution of the file.
Now the finished bottle can be exported into the Venetian scene. In
Figure 8.17 you see the bottle in place.
It looks fairly believable if you wanted the bottle to float in the air. This job,
however, calls for the bottle to be floating in the water.
This is where careful planning comes into play. If you are not sure what
attributes your object should have, you can use any similar object from your
studio or house to study how the material reacts to its environment.
We know our wine bottle is transparent glass. That effect was created within
the 3D features of Photoshop. How that transparent glass will look within the
new scene requires careful study of an actual glass bottle to see how it
should look.
Let's take it step-by-step.
The first thing to do is to make the bottle appear to be floating in the water.
Applying a layer mask to the layer will do the trick (Layer > Layer Mask >
Reveal All). This adds a layer mask that is white allowing the contents to be
visible. Using the Paintbrush Tool and black for the Foreground Color, the
mask is painted to hide the bottom part of the bottle as seen in Figure 8.18.
FIG 8.16 The render mode is set to Ray Traced Final to get the best resolution for the object.
|
3D in Photoshop
86
FIG 8.18 The bottom portion of the bottle is masked to make the bottle appear to be floating on the water.
FIG 8.17 The final bottle is imported into the file with the background scene.
3D and Compositing with Bert Monroy
|
87
The glass portion of the bottle is transparent so you should be able to see the
building in the background through it. Duplicate the background layer that
contains the scene.
Using the Magic Wand or whatever tool works best in your situation, select
the top, green glass portion of the bottle.
Make sure you are in the duplicate layer of the background and click the Add
Layer Mask button at the bottom of the Layer's panel. This will make a mask
that shows the contents of the layer only through the selected area.
Due to the shape of the bottle, the glass will distort what you see through it.
Unlink the layer from the mask by clicking on the link icon between the layer
and its mask in the Layer's panel. The reason for this is that you want to
distort the contents of the layer but want to keep the mask where it is.
Still in the duplicate background layer, make sure you select the layer and not
the mask for that layer. You will know you have the layer selected when the
frame that surrounds the currently selected item is framing the layer, and,
using the Warp Tool (Edit > Transform > Warp), twist the contents of the
layer here and there to get a realistic distortion as shown in Figure 8.19.
Again, if you are not sure how this should look, pick up a real bottle and look
through it to see what happens.
Next, the bottle needs to be reflected in the water.
FIG 8.19 The Background is duplicated, masked to the bottle shape and Warped to simulate the distortion
caused by the shape of the glass.
|
3D in Photoshop
88
Duplicate the layer of the bottle. Delete its mask and flip it vertically (Edit >
Transform > Flip Vertical) as seen in Figure 8.20.
Put the layer behind the layer containing the floating bottle. Reposition it to
fall directly below the bottle (Figure 8.21).
FIG 8.20 The bottle layer is duplicated and
flipped vertically to be used as the reflection of
the bottle in the water.
FIG 8.21 The duplicate bottle is placed in
position under the original bottle.
3D and Compositing with Bert Monroy
|
89
Since the bottle is angled backward, it is necessary to distort the reflection
slightly. Using the Distort Tool (Edit > Transform > Distort), the reflection is
altered to the desired result as seen in Figure 8.22.
A layer mask is applied to the layer with a gradient ranging from a gray at the
bottom to white at the edge where the reflected bottle meets the floating
bottle (Figure 8.23).
FIG 8.22 The reflection bottle is
distorted to match the angle of
the bottle it is reflecting.
FIG 8.23 A layer mask is applied
to make the reflection fade as it
gets further from the original
bottle.
Notes: Gray is used
instead of black
because you want the
reflection to softly
fade away. If black
were used for the
second color of the
gradient then the
reflection would
disappear completely
where the contents of
the mask are black.
|
3D in Photoshop
90
Lowering the opacity for the layer will complete this stage of the reflection as
seen in Figure 8.24.
The reflection needs to be distorted by the ripples in the water. To achieve
this effect the Ripple filter is applied (Filter > Distort > Ripple). In Figure 8.25
you see the particular settings that were used for this example; yours may
vary. Perhaps Ocean Ripple or one of the other distortion filters will work
better for your image.
The final touch for the reflection is to make it visible only through the faces of
the ripples in the water that face the bottle. The faces of the ripples that face
the viewer should not show the reflection. To get this tricky effect the layer
styles for the reflection layer are brought into action. In the Blend If section, at
the bottom of the Blending Options (Figure 8.26), the dark tones for the
underlying layer are protected by moving the Dark slider until the dark tones
in the water show through the reflection. Pressing the Option key (Alt in
Windows), the slider is separated, making the transition between adjoining
tones smoother and thus look more realistic.
What's next? A shadow. The sun is bright. You can see the shadows caused by
the protrusions of the balconies on the buildings in the scene. Your bottle
must also cast a shadow. The easiest way to create a shadow in this case is to
give the bottle layer a layer style of Drop Shadow. Of course the resulting
shadow looks like the bottle is against a picture of the scene rather than the
actual place. To make the shadow look the way it should you need to separate
it from the layer. Choosing Layer > Layer Style > Create Layer will put the drop
FIG 8.24 The opacity is lowered for the reflection.
FIG 8.25 The Ripple filter gives the reflection the needed distortion
caused by the rippling water.
3D and Compositing with Bert Monroy
|
91
shadow into its own layer behind the layer of the bottle. Now that the shadow
is in its own layer it can be distorted into place as seen in Figure 8.27.
The Ripple filter is applied to the layer of the shadow using a different setting
than the one used for the reflection, as shown in Figure 8.28.
FIG 8.26 The dark tones of the underlying layer are allowed to show through to make the reflection more
realistic.
FIG 8.27 The bottle is given a Drop Shadow layer style. The style is
separated from the layer and distorted to match the angles in the scene.
FIG 8.28 The bottle shadow layer is given the Ripple filter to match
the water surface.
|
3D in Photoshop
92
“Small” is used for the size because the shadow is further from us than the
reflection. Lowering the opacity will complete the shadow.
Now comes the final touch e reflections on the glass. Yes the bottle is
reflective just like the water, but in the case of these particular reflections,
a completely different strategy must be employed.
The reflections on the bottle are mostly of elements out of the view of the
image e the scene behind the viewer.
For this reflection you will resort to a new image that represents what the rest
of the scene looks like behind your point of view. Accuracy is only crucial on
the edge of the bottle that shows the building directly to the right of the
bottle. Total accuracy? No. The end result will be so distorted it will not be
noticeable. For our wine ad image we will use a different image of another
canal in Venice (Figure 8.29).
FIG 8.29 A new scene will serve as the reflection of the environment on the bottle’sreflective surface.
3D and Compositing with Bert Monroy
|
93
The image is imported into the document of the wine ad. It is scaled (Edit >
Transform > Scale) to a size that is close to the size of the ad as seen in
Figure 8.30. What is important here is that you have enough image to distort
it tightly around the bottle.
The sky area is erased from the image as shown in Figure 8.31.
FIG 8.30 The new scene is imported into the document with the bottle.
FIG 8.31 The sky area is removed from the scene for the reflection.
|
3D in Photoshop
94