Hacking Windows XP 2004 phần 8 pptx
Bạn đang xem bản rút gọn của tài liệu. Xem và tải ngay bản đầy đủ của tài liệu tại đây (1.23 MB, 38 trang )
244
Part II — Increasing Your System’s Performance
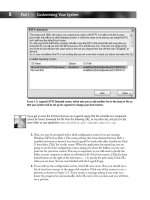
Disable Indexing Service
The Windows Indexing Service is a service that is designed to index all of the files on your
computer into a database. Your computer can then search through all of your files faster. The
idea behind the service is great; it will drastically cut down on the amount of time that is
needed to search your hard drive. Although this is a great benefit, you have to consider the
downside of this feature. In order to create a database of files, the service has to continuously
monitor the files on your computer and import basic file details into its database when new
files are found. The monitoring is not always done in real time, but at times you will notice it
running. The most common symptom of this service working is when you are reading some-
thing on your computer and all of a sudden your hard drive starts making a lot of noise as if it
is working really hard. That is because it is working hard to update the Indexing Service’s
database.
Just like any other service that starts up when the system does, the Indexing Service takes up
memory—quite a bit of memory compared to other services. In fact, the service takes up
exactly 4364KB of memory when the service first starts up on your computer. Eventually, about
30 seconds after the service has started, the amount of memory used decreases to 306KB. This
F
IGURE
10-8: Indexing Service Properties.
WY026-P10[231-246].qxd 23/6/2004 5:38 PM Page 244 Quark09 Quark09:Books:WY026-Sinchak:Chapter:
245
Chapter 10 — Making Your Computer More Responsive
looks good, but after you use your computer for a little while, the memory usage will start to
creep up again. On average, the service takes up about 1316KB of memory.
When the service is idle on your computer, it is just taking up memory. Also, it is running at
the lowest CPU priority, so you can be sure that it won’t interfere with other applications very
much at all.
Personally, I rarely use the Search feature of Windows XP and would much rather disable the
Indexing Service and take the performance hit the one time every few months that I actually
do need to search for a file. In return, I get more free memory space that can be used for more
useful services and applications. Follow these steps if you rarely search for files and would like
some more free memory:
F
IGURE
10-9: Setting the Indexing Service to Disabled.
WY026-P10[231-246].qxd 23/6/2004 5:38 PM Page 245 Quark09 Quark09:Books:WY026-Sinchak:Chapter:
246
Part II — Increasing Your System’s Performance
1.
Click the Start Menu and select Run. Then key in services.msc in the box and click
OK.
2.
This will start up the Services snap-in control, where you can manage all of the services
on the system. Look for the Indexing Service on the list, right-click it, and select
Properties, as shown in Figure 10-8.
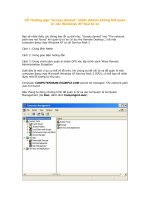
3.
Once you see Indexing Service Properties, click the Stop button, if the service is already
running. Then, click the Startup Type drop-down box and select Disabled, as shown in
Figure 10-9.
4.
Click the OK button and you are finished!
Now you don’t have to worry about the Indexing Service using any more of your memory.
Summary
The things you have done to your computer in this chapter may make seemingly minor
changes to the performance of your computer, but these hacks do work and you will benefit
from them. Tweaking the file system settings, removing unneeded delays, fine-tuning the visual
settings, and getting rid of seldom-used or never-used services are all valuable skills to have
when you are trying to make your computer run at top performance.
WY026-P10[231-246].qxd 23/6/2004 5:38 PM Page 246 Quark09 Quark09:Books:WY026-Sinchak:Chapter:
Speeding Up Your
Computer
T
he last three chapters have all been about speeding up your
computer. Chapter 8 discussed speeding up the boot; Chapter 9
examined speeding up the startup; and Chapter 10 explored hacks
that will make your computer more responsive. Now, Chapter 11 will show
you several cool hacks and tips that will speed up your computer even
further by increasing the performance of your applications.
To do so, you will be working with the many different parts of the operating
system that affect the speed of your applications. The amount of memory
the system has, how the system is using that memory, the location of the
files on the hard disk, and system performance-enhancing features are all
factors that influence the performance of your applications.
This chapter will guide you through the steps of optimizing all of these
factors so that your system will be running in top shape.
Working with the Windows Prefetcher
What is the Prefetcher? It is a very nifty component of Windows XP that
can seemingly read your mind and will start loading your program seconds
before you actually start it to boost the startup of the application.
Although the Prefetcher keeps track of the applications that you run,
creates optimized copies of them, and stores them in a special cache on your
computer, this special cache is simply a location on your hard disk that has
no, or very few, file fragments and stores application setting files. The next
time you start your program, Windows will load it out of the Prefetcher
cache, which is what causes the application to start up quicker.
If you really want to investigate this matter further, take a look at the
Prefetcher cache. It is located in the Windows directory inside the
Prefetcher folder. You will notice that the cache does not have an exact copy
of each application because the files are a fraction of the size of the actual
application executable file. Rather, it just has fragments of applications that
are used to boost the performance of the startup.
Hacking the
Prefetcher
Intel Application
Accelerator
Working with the
Paging File
Defragmenting
Adjusting Priorities
Speeding Up Your
Network and
Internet Connection
chapter
in this chapter
WY026-P11[247-276].qxd 23/6/2004 5:41 PM Page 247 Quark09 Quark09:Books:WY026-Sinchak:Chapter:
248
Part II — Increasing Your System’s Performance
The Windows Prefetcher is the same Prefetcher that was discussed previously in Chapter 8
with the boot defrag. The Prefetcher constantly monitors what applications you are running,
even during parts of the bootup. That information is then passed on to help the disk defrag-
menter optimize the boot files.
The Prefetcher is a very complex component. The majority of the settings can be changed by
hacking the registry; however, due to a lack of documentation on these settings, changing them
without any guidance would be very risky. Thankfully, a few tips have surfaced in the vast doc-
umentation buried at Microsoft’s site and revealed in Microsoft’s applications.
The paragraphs that follow will explore some of these.
Hacking the registry to optimize the Prefetcher
Located inside the System Registry are the settings for the Prefetcher component of Windows
XP. Several different settings can be changed, such as the mode that the Prefetcher is running
in, the number of items that are tracked by the Prefetcher, and where the Prefetcher cache is
located. Several more can be manipulated, as shown in Figure 11-1.
Almost all of these settings are not published in documentation available to the public. The
only setting that Microsoft has said anything about is the EnablePrefetcher setting. Some users
of Windows XP were having trouble with the Prefetcher, which caused problems with certain
F
IGURE
11-1: Registry Editor displaying the Prefetcher settings.
WY026-P11[247-276].qxd 23/6/2004 5:41 PM Page 248 Quark09 Quark09:Books:WY026-Sinchak:Chapter:
249
Chapter 11 — Speeding Up Your Computer
unknown applications, so Microsoft released information on how to disable the Prefetcher.
Also, around the same time, information became available on how to disable or enable certain
parts of the Prefetcher.
The Prefetcher can be either disabled or set to optimize the boot only, to optimize applications
only, or to optimize both applications and the boot. By default, the Prefetcher is set to optimize
both. This default mode sounds like it is the best one for all users, but some people have dis-
covered better performance by experimenting with the different modes. To change the modes
of the Prefetcher, follow these steps:
1.
Start the Registry Editor by clicking the Start Menu and then selecting Run. In the text
box, type regedit, then click the OK button.
2.
This will load the Registry Editor. Once it has loaded, expand HKEY_LOCAL
_MACHINE.
3.
Expand SYSTEM.
4.
Expand ControlSet001.
5.
Expand Control next.
6.
Now you will see Session Manager. Expand that as well.
7.
Because you will be changing the setting for memory, expand Memory Management.
8.
Finally, open PrefetchParameters and you will see all of the Prefetcher settings.
9.
Locate the EnablePrefetcher doubleword value and right-click it and select Modify, as
shown in Figure 11-2.
10.
Once the Edit DWORD Value box is shown, update the number with the correspond-
ing number. Which number you use depends on how you want the Prefetcher to act.
Refer to Table 11-1 for all of the options and their meanings for this value.
11.
Click the OK button after you have updated the value and restart your computer.
Experiment with these different settings on your computer to see which ones work best for
you. I highly recommend that you do not disable your boot prefetch, as the prefetch informa-
tion used by this mode is also used in other parts of the operating system to improve speed. For
example, it is used by the boot defrag, which is discussed in Chapter 8.
Feel free to experiment with other settings, such as AppLaunchMaxNumPages,
AppLaunchMaxNumSections, BootMaxNumPages, and BootMaxNumSections. I would leave
all of the other settings alone because they are all in hexadecimal format, which can be difficult
to work with. But make sure that before you do any tampering, you use system restore to create
a restore point so that any problems that you may cause can be easily undone.
Accelerate specific applications with prefetch
How the prefetch system operates is often mysterious. Much about the technology is undocu-
mented, so the general public does not know much about it. Sometimes the only way we find
out about features of the operating system is when Microsoft uses them. One example of this
WY026-P11[247-276].qxd 23/6/2004 5:41 PM Page 249 Quark09 Quark09:Books:WY026-Sinchak:Chapter:
250
Part II — Increasing Your System’s Performance
is with the release of Windows Media Player 9.0. On top of all of the new multimedia tech-
nologies that this release brought to Windows was an insight into the unknown world of the
Prefetcher. Hidden away in the shortcut to the application in the Start Menu was an applica-
tion flag that appears to be an option flag for the Windows Prefetcher system.
What does the shortcut look like?
C:\Program Files\Windows Media Player\
wmplayer.exe” /prefetch:1.
F
IGURE
11-2: Registry Editor EnablePrefetcher DWORD options.
Table 11-1 EnablePrefetcher Options
Value Meaning
0 Prefetching Disable
1 Application prefetch only
2 Boot prefetch only
3 Prefetch both (Default value)
WY026-P11[247-276].qxd 23/6/2004 5:41 PM Page 250 Quark09 Quark09:Books:WY026-Sinchak:Chapter:
251
Chapter 11 — Speeding Up Your Computer
The /prefetch:1 flag does not appear in any documentation released by Microsoft. The only
way to investigate what this flag does is to experiment.
Because I am a very curious person, I tried to apply this flag to all of the popular programs that
I use. When doing so, I noticed an increase in loading time during the second application
launch, even after a reboot. It is clear that this flag positively affects the loading time of an
application. How it does this is unknown, and will remain unknown unless Microsoft decides
to share with us the inner workings of the Prefetcher.
During my experimentation, I have found that this option flag does not work on all applications.
The applications that it does not work on tend to be programs that get the option flag confused
with a file that you want it to open. For example, when you type mspaint /prefetch:1 at the com-
mand prompt, Microsoft Paint will open, giving you an error that it can’t load the prefetch bitmap
file because it thinks you are trying to send it a bitmap file to open. You will experience this prob-
lem with other applications as well, but the vast majority of programs work well with the flag.
I recommend that you play around with this flag and see if it helps your applications. If you are
unclear how to add the flag, follow these steps:
1.
Locate the shortcut file that you are interested in modifying to use the prefetch flag.
2.
Right-click the Shortcut file and select Properties.
3.
Click at the end of the text in the Target textbox and type in /prefetch:1 or any variation
of this that you would like to try, such as /prefetch:22. If your shortcut has quotes
around the path to the program, place the option flag on the outside of the quotes, as
shown in Figure 11-3.
4.
Click OK and that’s it.
Unfortunately, no list is available of what programs will work with this and what programs will
not. If you load a program after modifying a shortcut and you get an error, just remove the
option flag that you added and you will be back to normal.
How much improvement in loading time you observe will vary, depending on the speed of your
computer, how your PC is configured, and the like, but it’s definitely worth a try.
Using the Intel Application Accelerator
The Intel Application Accelerator is a great program, released by Intel, that will boost the
performance of a user’s system by optimizing the flow of information between the CPU and
the storage devices. This improvement is accomplished by replacing the storage drivers that
come with Windows XP with drivers that are optimized for their motherboards. According to
Intel, the Application Accelerator will eliminate the data storage system bottleneck on the
motherboard, which will allow the CPU to be more efficient and will speed up various aspects
of the system.
On top of the bottleneck solution, which improves system performance, the Application
Accelerator claims to increase application and even game performance because it will increase
WY026-P11[247-276].qxd 23/6/2004 5:41 PM Page 251 Quark09 Quark09:Books:WY026-Sinchak:Chapter:
252
Part II — Increasing Your System’s Performance
the speed of disk inputs and outputs. In other words, the applications and games can read and
write data faster.
Additionally, the Application Accelerator is optimized for the Intel Pentium 4 processor, and it
therefore uses new high-speed Pentium 4 extensions to accomplish the high speeds. On top of
this, the Application Accelerator also promises to decrease your boot time. This seems to be a
by-product of the elimination of the bottleneck and faster disk reads.
But that’s not all. The Intel application acceleration also includes 48-bit logical block
addressing. That means that you can use hard disks larger than 137GB. In addition, the
Application Accelerator will automatically detect and optimize the transfer modes of your
storage devices as high as possible to ensure that your hardware is running at top speed.
F
IGURE
11-3: Shortcut properties with prefetch option added.
WY026-P11[247-276].qxd 23/6/2004 5:41 PM Page 252 Quark09 Quark09:Books:WY026-Sinchak:Chapter:
253
Chapter 11 — Speeding Up Your Computer
The Intel Application Accelerator seems almost too good to be true. Did I mention that this
utility is free too? Intel has made some very bold claims about their application. Are these
claims true? Find out by reading the next section.
How well does the Intel Application Accelerator work?
The Intel Application Accelerator works surprisingly well. I never thought that a software pro-
gram could improve the performance of a computer so much. According to Intel performance
benchmarks, users of the Application Accelerator will significantly increase the speed of their
computer. Intel tested the application accelerator by running the popular benchmark program
Winbench99 on a machine with a 2.0 GHz P4 CPU. The score of the machine after installing
the Intel Application Accelerator was 34 percent faster than when the Application Accelerator
was not installed. Additionally, the boot time of the same computer was 58 percent faster after
the program was installed.
The Application Accelerator program actually works as promised. Searching the Web, you will
find hundreds of success stories for users that have installed the Application Accelerator with
very good results. Users have reported their applications starting up twice as fast as before, and
having many seconds shaved off of their boot time.
What are the system requirements?
Unfortunately, the Intel Application Accelerator will only run on certain systems, and your sys-
tem must meet the strict requirements for it to run without causing problems. After all, the
reason why it works so well is because it can optimize the storage driver to work at peak perfor-
mance for a specific motherboard.
Basically, your PC must meet the following three different qualifications:
1.
Your PC must be running an Intel CPU: the Pentium II, III, IIII, as well as the Celeron-
based processors and Xeon series of processors. Sorry, AMD users.
2.
You must have the Intel Chipset Installation Utility installed, if your chipset requires it.
Visit
www.intel.com/support/chipsets/inf/inf.htm to view a table of moth-
erboard chipsets that need to be installed. It your motherboard requires it to be installed for
the system to correctly identify your chipset, visit
el
.com/scripts-df/Product_Filter.asp?ProductIDϭ816
to download a copy.
3.
The last qualification to use the Intel Application Accelerator is that you must have a
supported motherboard chipset. Refer to Table 11-2 to see what chipsets are supported.
If you do not know what kind of chipset your motherboard has, Intel has a free utility that will
detect your chipset and display the model number for you. Visit www.intel.com/support/
chipsets/inf/chipsetid.htm to download a copy of this utility.
If your chipset is not listed, then check the Intel Application Accelerator Web site, which is
located at
www.intel.com/support/chipsets/IAA/.
WY026-P11[247-276].qxd 23/6/2004 5:41 PM Page 253 Quark09 Quark09:Books:WY026-Sinchak:Chapter:
254
Part II — Increasing Your System’s Performance
Table 11-2 Intel Application Accelerator Compatibility
Chipset Support
440 Not Supported
810 Supported
810E Supported
810E2 Supported
810L Supported
815 Supported
815E Supported
815EM Not Supported
815EP Supported
815G Supported
815EG Supported
815P Supported
820 Supported
820E Supported
840 Supported
845 Supported
845E Supported
845G Supported
845GE Supported
845GL Supported
845GV Supported
845PE Supported
848P Not Supported
850 Supported
850E Supported
852GM Not Supported
852GME Not Supported
855GM Not Supported
855GME Not Supported
WY026-P11[247-276].qxd 23/6/2004 5:41 PM Page 254 Quark09 Quark09:Books:WY026-Sinchak:Chapter:
255
Chapter 11 — Speeding Up Your Computer
Also, if your chipset is not currently supported, there is always the chance that someday Intel
might add support.
If your chipset is listed on Table 11-2 as not supported and is also listed on the Intel Web page as
not supported, installing the Application Accelerator on your computer will result in big prob-
lems. Doing so will screw up your computer so much that it will not boot.
Additionally, Intel Application Accelerator has been confirmed by Intel to work with Windows
XP SP1 Home/Pro. Windows XP SP2 Home/Pro has not yet been officially confirmed to
work on supported Intel hardware but it is still worth giving it a try. Just make sure that you are
using system restore to make backups so that you can easily revert to your previous settings.
How to install Intel Application Accelerator
Installing the Intel Application Accelerator is very simple. This cool application will be
running on your computer in no time if you just do the following:
1.
Visit />.asp?ProductIDϭ663
to download a copy of the Application Accelerator.
2.
Then once you have the file downloaded, install the application by following the
onscreen directions.
3.
After the install is completed, reboot, and the Application Accelerator will be installed
and running.
If you have a laptop that has a supported chipset, you should be aware that in the recent version
of the Intel Application Accelerator, version 2.3, support for mobile devices was removed. You
will have to install version 2.2.2 instead.
Fine-Tuning the Windows Paging File
The Windows paging file, also known as the swap file and virtual memory, is very important to
the operation of the operating system. Providing a critical memory feature by allowing the
Chipset Support
855MP Not Supported
860 Supported
865G Not Supported
865P Not Supported
865PE Not Supported
875P Not Supported
WY026-P11[247-276].qxd 23/6/2004 5:41 PM Page 255 Quark09 Quark09:Books:WY026-Sinchak:Chapter:
256
Part II — Increasing Your System’s Performance
operating system to use more random access memory (RAM) than the computer actually has
allows users to use more robust programs without having to upgrade their memory.
The paging file can be thought of as a large file on the hard disk that is a collection of system
memory used by open applications and operating system components. As more and more
applications are started, the amount of free space in the system memory, the RAM, decreases
and can eventually be completely used up. When a user starts a program and the RAM used is
full, the operating system still loads an application into memory. Before it can do that, it must
first make room, and so it pushes a page of low-priority memory out of the RAM and into the
paging file.
The exact method that the system uses to decide what programs will stay in the physical RAM
and what programs will go is unknown. However, there are several paging file hacks that will
help you optimize your computer’s use of the paging file. With the help of hacks to the System
Registry, you can prevent certain files from being pushed into the paging as well as completely
disabling the paging file.
This next section will guide you through the steps of optimizing the paging file for your
computer.
Disabling the paging file
Users of computers with a large amount of RAM have the ability to stop the operating system
from pushing any data out into the paging file. This will allow for the faster memory manage-
ment and memory access that is physically possible for your RAM. Reading and writing
directly to the RAM is always significantly faster than having to use the page file. Reading and
writing to the paging file requires multiple steps and that takes time. Moreover, reading from
the hard drive is nowhere as fast as reading from the RAM.
If your system has a large amount of RAM, over 1 gigabytes, then you can consider disabling
the paging file. If you have less than 1 gigabyte of RAM, do not even consider disabling the
paging file or else you will be running into problems.
What can happen if you disable your paging file? If you have enough RAM, then nothing.
But if you do not have enough RAM, then if you run a large program such as Photoshop and
are working on a large image, you will run into “out of memory” errors and the application
will crash, causing you to lose all of your work. This is a pretty extreme example, but it can
happen.
Basically, stick to the 1 gigabyte minimum and you will have no problems. But be aware that if
you ever choose to run some memory-intensive applications, such as rendering a two-hour 3D
movie, you could run out of memory easily.
So, now that I have warned you, you are ready to follow these steps to disable the paging file:
1.
Enter System Properties, either by right-clicking the My Computer icon on the desktop
and selecting Properties or by doing the same to the My Computer icon in the Start
Menu.
WY026-P11[247-276].qxd 23/6/2004 5:41 PM Page 256 Quark09 Quark09:Books:WY026-Sinchak:Chapter:
257
Chapter 11 — Speeding Up Your Computer
2.
Once the System Properties window has loaded, click the Advanced tab and then click
the Settings button under Performance, as shown in Figure 11-4.
3.
Once you are in the performance options, click the Advanced tab again.
4.
Click the Change button that is located under the Virtual Memory section.
5.
This will load the Virtual Memory screen. Locate and select the No Paging File radio
button, as shown in Figure 11-5, under the Paging File Size for Selected Drive section.
6.
Click the Set button and then click OK three times and you are finished. After you
reboot, your page file will be disabled.
F
IGURE
11-4: System Properties Advanced Settings.
WY026-P11[247-276].qxd 23/6/2004 5:41 PM Page 257 Quark09 Quark09:Books:WY026-Sinchak:Chapter:
258
Part II — Increasing Your System’s Performance
Feel free to delete the pagefile.sys file from your hard drive after you reboot to claim
some extra few hundred megabytes of free space.
If you do not have enough RAM to disable the paging file completely, follow the directions in
the next section to adjust the size of the paging file for best performance.
Adjusting the size of the paging file
The size of the page file can automatically be set by the system or it can be set by the user. In
some situations, having the page file managed by the system is a good idea, but in others, it is
better to manage the paging file yourself.
The biggest argument for setting the paging file size and limit manually is to eliminate the
growing on the page file when it is set by the system. When the system is managing the size of
the paging file, it will monitor the size of the file and will then automatically make it larger
F
IGURE
11-5: Virtual Memory No Paging File option.
WY026-P11[247-276].qxd 23/6/2004 5:41 PM Page 258 Quark09 Quark09:Books:WY026-Sinchak:Chapter:
259
Chapter 11 — Speeding Up Your Computer
when it is needed. This causes two problems. First of all, it causes a noticeable delay for all
applications running on your computer because the computer has to expand the paging file and
this is a hard disk–intensive operation. Secondly, allowing the system to grow and shrink the
paging file causes fragmentation errors.
For the sake of having enough speed, your page file should not have any file fragments. In the
next section on defragmenting, you will learn exactly how to do this. But before the defrag-
mentation can be successful, the page file needs to have a constant size. If the page file will be
growing frequently, and because the defrag utility has no clue by how much, it cannot put the
file in a place on the hard disk so that it will never get fragmented, as is the case when you set
the page file manually to Constant Size.
Setting the paging file to a constant size does have some disadvantages. For example, the lost
disk space taken up by the paging file can be as high as 1 gigabyte. Additionally, when you set
the maximum paging file size manually, you are setting a limit that your computer can never go
above. Should you run some extremely memory-intensive application and your limit is too low,
your paging file will fill up and you will be out of luck.
The previous example is why setting the correct paging file size is so important. A real easy way
to calculate the maximum size of your page file will be to take the recommended size of the
page file from the Virtual Memory Settings window, as shown in Figure 11-6, and multiply it
by 2.5. If you are having problems finding where your computer states the recommended size,
perform the following steps for changing the paging file to a constant size, because this value is
on the same screen as that on which you will be working.
Now that you are ready to optimize the paging file to a constant size, follow these steps:
1.
Get inside the System Properties again. Do so by right-clicking one of the My
Computer icons that is either in the Start Menu or the desktop and selecting Properties.
2.
Next, click the Advanced tab and click the Settings button under the Performance
section.
3.
On the Performance Options window, click the Advanced tab and then click the Change
button under the Virtual Memory section.
4.
This will bring up all of the page file settings. Once this information is shown, you will
want to modify the custom values so that the initial and maximum sizes are the same.
Enter in the value that you calculated in these two boxes, as shown in Figure 11-7. If you
have not yet calculated what your size should be, you will find the recommended size on
the bottom of this window, as was shown in Figure 11-5.
5.
Click the Set button and then click OK three times to close all of the windows and save
your settings.
Once you restart, you will be using the new constant size paging file. You are now ready to run
your defragmenter to defragment the paging file to ensure optimal performance.
Be aware: The method that I use to calculate the size of the constant paging file is a very con-
servative approach. I figure it would be better to be safe than sorry. The method of calculating
the size is an effective one. However, if you feel the need for more free disk space, feel free to
WY026-P11[247-276].qxd 23/6/2004 5:41 PM Page 259 Quark09 Quark09:Books:WY026-Sinchak:Chapter:
260
Part II — Increasing Your System’s Performance
play around with the calculation, such as only multiplying the recommended amount by 2 or
maybe even 1.5. Although if you do that, keep in mind that you will be increasing your chances
of maxing out your paging file.
Changing the location of the paging file
The paging file can be placed all over your machine. If you really wanted to, your PC could
move it to one of those keychain USB thumb drives that use a compact flash card. Although
this would be insane because compact flash cards are extremely slow compared to hard drives, it
is possible.
If you have multiple hard drives in your system, and I am not talking about multiple partitions
on the same drive, you may see a performance increase if you move your paging file off the
main system drive.
F
IGURE
11-6: Virtual Memory settings, showing the recommended
Paging File Size.
WY026-P11[247-276].qxd 23/6/2004 5:41 PM Page 260 Quark09 Quark09:Books:WY026-Sinchak:Chapter:
261
Chapter 11 — Speeding Up Your Computer
Moving the paging file off your main drive will allow it to be accessed faster in situations in
which your primary hard drive is busy. Also, often when users add hard drives to their comput-
ers, they were purchased after their computer was made and usually are faster because hard
drives, just like everything else in the computer, get faster as time passes. Moving your paging
file to the faster hard drive will also help performance.
Changing the location of the paging file is very easy. Just follow these steps and you will have it
done in no time:
1.
Once again, you will want to get back to the Virtual Memory settings. If you can get
there on your own, feel free to skip to step 4. For those of you that would like directions
one more time, follow this and the next two steps. Right-click the My Computer icon
located on the desktop in the Start Menu and select Properties.
2.
Then click the Advanced tab and click the Settings button under the Performance section.
F
IGURE
11-7: Virtual Memory settings, showing a constant paging file setup.
WY026-P11[247-276].qxd 23/6/2004 5:41 PM Page 261 Quark09 Quark09:Books:WY026-Sinchak:Chapter:
262
Part II — Increasing Your System’s Performance
3.
Next, click the Advanced tab and then click the Change button under the Virtual
Memory section.
4.
Now that you have the Virtual Memory settings displayed, you will want to select the
drive on which your current paging file is located from the list of drives, as shown in
Figure 11-8.
5.
Before you make any changes, write down what the initial and maximum size text boxes
contain, if your page file is set to the custom setting. Then, click the No Paging File
option and click the Set button.
6.
Select the hard drive on which you want your new paging file to be placed from the list
of drives (see Figure 11-8) by clicking it.
7.
When the new hard drive is highlighted, click the Custom Size radio box and enter in
the number that you wrote down before. If you are not using the Custom Size mode,
F
IGURE
11-8: Virtual Memory Drive setting.
WY026-P11[247-276].qxd 23/6/2004 5:41 PM Page 262 Quark09 Quark09:Books:WY026-Sinchak:Chapter:
263
Chapter 11 — Speeding Up Your Computer
then click the System Managed Size mode but reconsider what was talked about in the
last section, because it will really help your performance.
8.
Click the Set button and then click OK three times to close all of the settings windows,
and you are finished.
After a reboot, your system will be using the paging file on the new hard drive. Feel free to
delete
pagefile.sys from your old hard drive location because it is no longer needed there.
Defragmenting Your Drive
Fragmentation is everything when it comes to maintaining your hard drive. Over time, as your
hard drive fills up and you install and uninstall programs and games, the files on your hard
drive can become fragmented, as Windows has to find open spots on your hard drive to place
the file. Often the file is broken up into thousands of little pieces and scattered all over the hard
drive. This cannot cause any significant problems for your computer, but it can cause a notice-
able performance slowdown, which can be easily cured by running a software program known
as a defragmenter.
Defragmenters do a very simple task of just moving the bits of the files around on the hard
drives so that they are all placed together. This arrangement allows the hard drive to load a file
faster because the head, which is the arm that reads the data off the plates inside the drive, does
not have to scatter all over the place to read the data.
In Chapter 8, I discussed using several utilities to defragment the boot files. The same utilities
can be used to defragment the whole drive as well as the special files. This next section will
concentrate on two of those special files because defragmenting the whole drive is done at the
same time.
Defragmenting the Windows paging file
The Windows paging file can be quite large, as you know from the previous sections. Once you
have created a constant size paging file, or if you just want to defragment the paging file, you
can defragment the file during the next system boot. Windows will not allow any program to
move the paging file around on the hard drive when the operating system is in use. The main
reason why Windows does not allow this is because other programs are running in the back-
ground as well as operating system services that will depend on the paging file. This is why the
defragmentation can only be done during the boot, because very few files are in use then.
The built-in Windows XP defragmenter does not defragment the paging file during a normal
defrag. Microsoft has a workaround for this limitation. It tells users to do a normal defrag first,
then after the free space is consolidated, to delete the paging file by disabling it and then re-
creating it right after a fresh defrag. Doing so will cause the operating system to create one big,
continuous file on the hard drive.
There is nothing wrong with Microsoft’s approach, since it will accomplish the task, but there
is an easier way to do this. I recommend that, if you have not already done so, you download
WY026-P11[247-276].qxd 23/6/2004 5:41 PM Page 263 Quark09 Quark09:Books:WY026-Sinchak:Chapter:
264
Part II — Increasing Your System’s Performance
the disk defragmenter utility called Diskeeper, by Executive Software
(
www.executive.com), which was discussed in Chapter 8. All you have to do in order to
defragment the paging file is to run a boot defrag. By default, the option to defragment the
paging file is already set. If you do not remember how to do a boot defrag, go back to Chapter
8 and review the step-by-step instructions in the section Boot time system defrag with Diskeeper.
Defragmenting the NTFS master file table
The master file table, or MFT, is very important to the operation of the file system on your
computer. Think of it as a phone directory of all the files on your computer. It is a big database
of every file on your computer and it is stored on the hard drive. As the number of files and
directories on your computer increase, so does the master file table. Over time, the master file
table can also become fragmented. Because the master file table is so important to computer
operations, it is used any time you want data from the hard drive. Defragmenting it will help
your performance.
The built-in defragmenter will not defragment the MFT. Microsoft recommends that you
adjust the amount of space that is reserved for the MFT, then back up your drive, and then do a
full reformat and then restore your whole drive. This seems like way too much effort expended
to me. Once again, Diskeeper by Executive Software comes to the rescue. Also, by default, when
you perform a boot defrag, the option to defragment the master file table is already selected.
Using the Diskeeper method, instead of the Microsoft method, will save you hours of time
wasted backing up and restoring your drive.
Adjusting Your Application Priorities
Ever since the introduction of the multitasking processor, operating systems have been able to
handle running multiple programs at once using the new task switching and segmentation fea-
tures provided by the CPU. These new technologies are what made it possible for an operating
system like the Windows series to be made. Even though PCs nowadays are able to multitask,
they really only can do one thing at a time. In order for the operating system to support run-
ning hundreds of applications at once, it has to slice up all of the available processing time and
give each application a turn.
Operating systems use a variety of techniques to determine which application will get the next
available slot to use the CPU. One of the factors that determines this for Windows XP is the
priority level at which the application is running.
Every application that runs on your computer has a priority level attached to its runtime
record. By default, the operating system starts each application at normal priority, which is
right in the middle of the priority spectrum. Applications can run and be assigned six different
priority levels ranked highest to lowest: real time, high, above normal, normal, below normal,
and low. Because the CPU can only do one thing at a time, the different priority levels allow
the operating system to decide which application will get the next CPU burst. If an application
is running at high or above normal priority level, it will get more CPU time than an applica-
tion running at normal.
WY026-P11[247-276].qxd 23/6/2004 5:41 PM Page 264 Quark09 Quark09:Books:WY026-Sinchak:Chapter:
265
Chapter 11 — Speeding Up Your Computer
As you can see, the priority you give an application can impact how fast the program runs.
Using Task Manager to adjust priorities
The Windows Task Manager is something that we all have experience with when we have
problems with a frozen program. The Task Manager is actually a very useful utility, as was dis-
cussed in Chapter 7. Another use of the Task Manager is to change the priority at which an
application is running while it is running.The Task Manager makes it possible to dynamically
change the priority of application. This capability can be very useful when you have a lot of
programs running on your computer.
Setting any application to real time can be dangerous, because doing so will allow the application
to hog all of the CPU time and will make exiting a program that is running at this high priority
impossible, if for some reason it crashes. Because the program is hogging all of the CPU time, it
takes a very long time to just load the Task Manager to end the application.
If you have a program that is doing a lot of CPU-intensive operations, such as rendering a
video clip or a game, you can adjust the priority of the application by following these steps:
1.
Load the Task Manager by clicking the Start Menu and selecting Run. Then type
taskmgr.exe in the text box and click the OK button.
2.
Once Task Manager loads, click the Processes tab.
3.
Right-click the name of the process for which you would like to adjust the priority, select
Set Priority, and then select the level, as shown in Figure 11-9.
4.
After you click the priority level, your change is complete.
If your computer has multiple processors or supports hyperthreading, then you will notice an
extra option when you right-click a process called Set Affinity. This option will allow you to spec-
ify on which CPU the application will run (or which virtual CPU, in the case of hyperthreading
users).
Using the Task Manager to change the priority levels is great. However, there is one downside.
When an application on which you have altered its priority level is closed, the priority level it
was running at will be lost. The next time the program is started up, it will be running back at
the default level. This can be a real annoyance for some users; however, there is a great trick to
fix this problem, which will be shown in the next section.
Starting applications with a user set priority
Using a wonderful command built into Windows XP allows you to start any program and
specify what priority it should be run at. This cool utility is called the Start command. Using
the Start command with priority flags, followed by the executable, will allow any program to
start at the priority level at which you want it to start.
WY026-P11[247-276].qxd 23/6/2004 5:41 PM Page 265 Quark09 Quark09:Books:WY026-Sinchak:Chapter:
266
Part II — Increasing Your System’s Performance
For the sake of demonstrating how to use the command, assume that the calculator is set at
high CPU priority. Follow these steps to set the command:
1.
First, open Notepad so that you can type in the command so that it can be turned into a
batch script file. This can be done by starting Notepad from the Accessories item in the
Start Menu’s All Program entry.
2.
Once Notepad is open, key in start /high calc.exe. If you want to start the calculator at a
different priority, you can replace /high with /low, /normal, /realtime/, /abovenormal,
and /belownormal.
3.
Once you have the priority level keyed in, click the File menu bar item in Notepad and
select Save As. Change the file Save As Type to All Files and type launchcalc.bat in the
filename box. You can call the file anything you want, but make sure that it has the
.bat file extension so that Windows knows to execute the commands in the file.
4.
Then specify a location on your hard drive to save it, such as your Desktop, and click the
Save button. You are now finished and may exit Notepad.
F
IGURE
11-9: Task Manager adjusting application priorities.
WY026-P11[247-276].qxd 23/6/2004 5:41 PM Page 266 Quark09 Quark09:Books:WY026-Sinchak:Chapter:
267
Chapter 11 — Speeding Up Your Computer
Now that you have the batch command file created, just double-click the file to launch the
calculator application at the high-priority level.
The same technique can be applied to any program on your computer. Instead of typing calc.exe
at the end of the command, type the name of the executable of the program that you want to
start. Additionally, this command can be used on nonexecutable files such as documents.
For example, you can type in start /high mydocument.doc and it will start Microsoft Word in
high priority with your document opened.
Using WinTasks to profile your priorities
Another great utility, made by LIUtilities, is called WinTasks Pro.This utility is like the
Windows Task Manager, but on steroids. It offers tons of new features that the Windows Task
Manager does not have, such as the ability to see individual CPU and memory graphs for each
application, scripting capabilities that allow the user to set up triggers based on CPU and
memory activity for each application, and most importantly, the ability to have preset profiles
for application priority levels. Also, on top of these features, it has built-in information about
quite a few commonly known processes to help users figure out each process that is listed
because they are often not easily identified by the process name.
The ability to have a profile for your open application priority levels enables you to automatically
change the priority of several applications at the click of one button.
WinTasks 4 professional can be downloaded from
www.liutilities.com/support/
downloads/
. Download a copy now and install it if you would like to follow along with these
steps, which will guide you through creating a profile of your priorities:
1.
Start WinTasks by clicking the Start button, expanding All Programs, and selecting
Start WinTasks from the WinTasks folder.
2.
When WinTasks is loaded, you will see a list of all of the different processes running on your
computer. You can adjust the priority at which each process is running by right-clicking the
process and then selecting either Increase or Decrease Priority. Go ahead and change the pri-
orities of all of the applications that you have running to what you would like them to be.
3.
When you are satisfied with all of your priority changes and are ready to create a profile
of them, click the little key icons in the Presets toolbar, as shown in Figure 11-10.
4.
Type in a name to save the state of all of the priorities, as in the Save Preset window, and
press OK.
5.
Next to the key icon that you pressed, you will notice the name showing up in the button
to the right of it. Every time you press this button, it will reset all of the priorities to
what you changed them to for this preset.
6.
Repeat the previous steps, changing the priority levels for each application to a different
value, and then click a different key icon to save the new preset again.
Now that you have multiple presets of application priority levels, you can easily switch between
them by clicking the buttons.
WY026-P11[247-276].qxd 23/6/2004 5:41 PM Page 267 Quark09 Quark09:Books:WY026-Sinchak:Chapter:
268
Part II — Increasing Your System’s Performance
The capability to create separate presets of priority levels for different applications allows you
to optimize certain programs, depending on what you are doing. For example, you can create a
profile for your processes when you want to play a game.To do that, you could decrease the
priority of many of the system processes and applications running in the background so that a
game running at normal or higher priority will have more CPU time.
Lower the priorities of all of the other background applications, such as your instant messaging
programs and other programs that run in the background. This will allow your game to run
faster, because these other background applications will have a lower priority.
Speeding Up Your Network
The speed of your network connection does not just depend on the speed of your hardware.
Windows is an operating system that is designed to work on a variety of different hardware and
network setups. Because of the abstract nature of the operating system, it cannot be optimized
for user-specific hardware setups.
Depending on the type of network connection you have, you might be able to tweak your
connection so that the speed of your Internet, as well as your local area network, will be faster.
F
IGURE
11-10: WinTasks Professional Presets save icon.
WY026-P11[247-276].qxd 23/6/2004 5:41 PM Page 268 Quark09 Quark09:Books:WY026-Sinchak:Chapter: