mcts training kit 70 - 685 Windows 7 Enterprise Desktop Support Technician phần 3 pot
Bạn đang xem bản rút gọn của tài liệu. Xem và tải ngay bản đầy đủ của tài liệu tại đây (877.9 KB, 68 trang )
Client computers connecting to the shared printer require the Workstation service and
the Print Spooler service. If a required service does not start, verify that all the service’s
prerequisite services are started. Then, review events in the System event log and the
Applications And Services Logs\Microsoft\Windows\PrintService\Admin event log.
How to Share a Printer
In Windows Server 2008 R2 or Windows 7, follow these steps to manage a shared printer:
1.
Click Start, and then click Devices And Printers.
2.
Right-click the printer and then click Printer Properties. Do not click Properties;
Printer Properties is in the middle of the shortcut list.
3.
On the Sharing tab, select the Share This Printer check box. You then have three
additional options:
■
Select the Render Print Jobs On Client Computers setting to reduce the processor
performance impact on the server by forcing the client to do more of the print
rendering. If your print server has more processing power than client computers
and print performance does not suffer, clear this check box.
■
If you are part of an AD DS environment, you can select the List In Directory check
box. This publishes the printer to AD DS, so that users can browse to find printers
near their location.
■
Click Additional Drivers to select other processor types to store drivers for. Clients
can download a driver automatically from the server if the driver type is available.
When you click OK, you might be prompted to select a path where the driver is
located. Click OK.
How to Manage Print Jobs on a Printer
In Windows Server 2008 R2 or Windows 7, follow these steps to manage a shared printer:
1.
Click Start, and then click Devices And Printers.
2.
Double-click the printer you want to manage.
3.
Click See What’s Printing.
4.
Windows displays the print queue, a first-in, first-out collection of documents waiting to
be printed. You can right-click any document and then click Pause, Restart, or Cancel.
Troubleshooting the Print Queue
If you ever encounter a document that won’t leave the print queue, you can clear it by
restarting the Print Spooler service. You can use the Services node in the Computer
Management tool, or you can run net stop spooler and net start spooler from an
administrative command prompt. To restart the Print Spooler service in a single command,
run net stop spooler && net start spooler.
112
C03627093.indd 112
CHAPTER 3
Printers
1/18/2010 12:04:50 PM
If restarting the print spooler does not remove unwanted documents from the print
queue, you can remove them manually by following these steps:
1.
First, stop the Print Spooler service, as described earlier in this section.
2.
Next, use Windows Explorer to delete all files in the %WinDir%\System32\Spool\
Printers folder. This folder has two files for every document in the print queue:
one .SHD file, and one .SPL file.
3.
Start the Print Spooler service.
EXAM TIP
You must understand the importance of the Print Spooler service for the exam. The service
must be running on both the client and the server to be able to print or manage printers.
Restarting the Print Spooler service clears the print queue, which can resolve the problem
of a document that won’t print and prevents other documents from printing.
Troubleshooting Driver Problems
Drivers handle communications between Windows and any piece of hardware. For example,
Windows has drivers for video adapters, keyboards, mice, and monitors, in addition to printer
drivers. For most hardware components, you use Device Manager to manage printer drivers.
For printers, however, you use the printer properties dialog box.
How to Update a Driver for the Print Server
When you connect a new printer, Windows 7 detects the new hardware and attempts to
install a driver automatically. If the standard driver causes problems, follow these steps
to install a different driver:
1.
Click Start, and then click Devices And Printers.
2.
Right-click the printer you want to manage and then click Printer Properties.
3.
On the Advanced tab, click New Driver to add a driver.
4.
The Add Printer Driver Wizard guides you through the process. You can select a driver
built in to Windows, download a driver from Windows Update, or choose a driver that
you have saved to the hard disk.
Occasionally, a driver installation fails, causing the printer to stop working. The quickest
way to reinstall the driver is to reinstall the printer by following these steps:
1.
Remove any documents from the print queue, as described in the section entitled
“Troubleshooting the Print Queue,” earlier in this lesson.
2.
Remove the printer by right-clicking it and then clicking Remove Device.
3.
Use the Uninstall A Program tool in Control Panel to uninstall any printer-related
software.
4.
Reinstall the printer with the latest version of the driver. In the Devices And Printers
window, click Add A Printer and follow the prompts that appear.
Lesson 1: Troubleshooting Network Printers
C03627093.indd 113
CHAPTER 3
113
1/18/2010 12:04:50 PM
If reinstalling the printer does not solve the problem, you might need to remove files
related to the driver installation manually by following these steps:
1.
First, stop the Print Spooler service.
2.
Use Windows Explorer to browse to either the %WinDir%\System32\Spool\Drivers\
W32x86\3\ folder (or 32-bit versions of Windows) or the %WinDir%\System32\Spool\
Drivers\x64\3\ folder (or 64-bit versions of Windows).
3.
Inside the selected folder, remove any numbered subfolders.
4.
Finally, start the Print Spooler service.
For information about troubleshooting non-driver-related hardware problems, refer to
Chapter 1, “Troubleshooting Hardware Failures.”
How to Add Drivers for Shared Printer Clients
When connecting to a new printer, clients running Windows can install automatically drivers
that are stored on the print server. By default, the print server has only the drivers required
for the print server to print. For example, a 64-bit print server running Windows 7 has
64-bit printer drivers but not 32-bit printer drivers. Therefore, 64-bit clients running
Windows 7 automatically install the driver from the print server, but 32-bit clients running
Windows 7 need to download a driver from Windows Update or prompt users to provide
their own drivers.
While managing the print server, you can store drivers for different processor architectures
for a specific printer, or you can store drivers for any model of printer you specify. For example,
you can add a 32-bit printer driver to a 64-bit print server and allow 32-bit Windows 7 clients
to automatically download the driver.
To store drivers for different processor architectures, follow these steps:
1.
2.
On the Sharing tab, click Additional Drivers.
4.
In the Additional Drivers dialog box, select the processor architectures for which you
want to store drivers. By default, only the driver for the server’s processor architecture
is available. Click OK.
5.
C03627093.indd 114
Right-click the printer and then click Printer Properties.
3.
114
Click Start, and then click Devices And Printers.
In the Install Print Drivers dialog box, select a path with the driver. For example, if you
have installed the 32-bit version of Windows 7 and you want to provide the printer
driver automatically to clients running the 64-bit version of Windows 7, you should
download the 64-bit version of the driver and select it now. Click OK twice.
CHAPTER 3
Printers
1/18/2010 12:04:50 PM
NOTE
FINDING DRIVERS
You cannot select Windows drivers directly from the Windows 7 DVD because all
system files are contained within the \Sources\Install.wim file. To browse a .wim file,
install the Windows Automated Installation Kit (AIK; available as a free download
from Microsoft.com) and use the ImageX command-line tool to mount the .wim file as
a folder. For example, to mount the Install.wim file to an empty C:\Win7 folder, you run
the command imagex /mount D:\sources\install.wim 1 C:\Win7. If a hardware vendor
provides only executable files to install drivers, install the driver on a client computer
with the required processor architecture, and then copy the driver from that computer.
To store drivers for any printer, follow these steps:
1.
Click Start, and then click Devices And Printers.
2.
Click any printer, and then click Print Server Properties on the toolbar.
3.
On the Drivers tab of the Print Server Properties dialog box, click Add.
The Add Printer Driver Wizard appears.
4.
On the Welcome To The Add Printer Driver Wizard page, click Next.
5.
On the Processor And Operating System Selection page, select the processor
architectures for which you want to install drivers. Click Next.
6.
On the Printer Driver Selection page, select the driver that you want to install from
the list of drivers included with Windows 7. If the driver that you want to install is not
available, you can download the driver and click Have Disk to select the driver. Click Next.
7.
Click Finish.
8.
If prompted, provide a path for printer drivers.
If updating the driver does not solve the problem, or only one version of the driver is
available, you should determine whether disabling advanced printing features resolves the
problem. To disable advanced printing features for a printer, follow these steps:
1.
Click Start, and then click Devices And Printers.
2.
Right-click the printer and then click Printer Properties.
3.
On the Advanced tab of the printer properties dialog box, clear the Enable Advanced
Printing Features check box and click OK.
Troubleshooting Point And Print
By default, Windows 7 allows standard users to install only trustworthy drivers. Windows 7
considers drivers provided with Windows or drivers provided in digitally signed printer-driver
packages trustworthy. By limiting users to install only trustworthy drivers, you reduce the risk that
Lesson 1: Troubleshooting Network Printers
C03627093.indd 115
CHAPTER 3
115
1/18/2010 12:04:51 PM
a non-trustworthy driver will decrease system stability (because the driver is unreliable) or perform
malicious acts (because the driver is malware). Windows 7 includes a large number of printer
drivers, so most users can connect to printers while they travel and install drivers on demand.
In Windows Vista and Windows 7, the ability to install printer drivers automatically is
called Point And Print. You can use the Point And Print Restrictions Group Policy setting and
the Package Point And Print – Approved Servers Group Policy setting to restrict Point And
Print to specific servers. If you find that Point And Print fails, verify that the Point And Print
Restrictions setting is not enabled, or add the print server to the list of approved Point And
Print print servers.
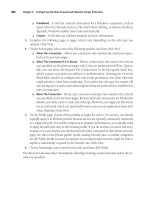
If users receive unwanted User Account Control (UAC) prompts, enable the Point And Print
Restrictions policy, and adjust the Security Prompts settings, as shown in Figure 3-3.
FIGURE 3-3 Point And Print Restrictions can cause problems printing to new printers.
Troubleshooting Network Problems
Problems connecting to shared printers can be caused by several different factors:
■
■
C03627093.indd 116
A firewall is preventing the client from connecting to the server.
■
116
The client can’t find the server because of a name resolution problem.
The server is rejecting the user’s credentials.
CHAPTER 3
Printers
1/18/2010 12:04:51 PM
In most cases, printer troubleshooting begins when a user calls to complain. Therefore, you
typically begin troubleshooting from the client computer. Depending on the nature of the
problem, you might also have to log on to the print server. The following sections describe
the troubleshooting process, assuming that the client and server are domain members.
For more information about troubleshooting network problems, read Chapter 2,
“Networking.” Also, refer to Chapter 31, “Troubleshooting Network Issues,” in the Windows 7
Resource Kit by Mitch Tulloch, Tony Northrup, and Jerry Honeycutt (Microsoft Press, 2009).
How to Troubleshoot Printer Sharing from the Client
Perform these steps to troubleshoot problems connecting to shared printers:
1.
Stop the Offline Files service if it is started. If the Offline Files service is running,
Windows might report that it can connect to a remote server even though the server
is not available. You can stop the Offline Files service from the Services console or by
running the command net stop cscservice from an administrative command prompt.
2.
If you are connecting using File And Printer Sharing, instead of using Internet Printing
Protocol (IPP) or Line Printer Daemon/Line Printer Remote (LPD/LPR), attempt to
establish a NetBIOS connection manually. Open a command prompt and issue the
command net view \\server. If the connection succeeds, it tells you the exact name
of the shared printer, and you know there is not a network or firewall connectivity
problem. If you receive an “Access is denied” message when attempting to connect to
the printer, the user account lacks sufficient permissions to access the shared printer.
Depending on the server configuration, you might be able to identify authentication
problems by viewing the Security event log on the server. For more information
about security auditing, see the section entitled “Monitoring Printer Events,” earlier in
this lesson. For more information about adjusting privileges, see the section entitled
“How to Troubleshoot Printer Sharing from the Server,” later in this lesson.
3.
If you stopped the Offline Files service in step 1, restart it now using the Services
console or by running the command net start cscservice from an administrative
command prompt.
4.
Verify that you can resolve the server’s name, as described in Lesson 2, “Troubleshooting
Name Resolution,” of Chapter 2. If you cannot resolve the server’s name because the
Domain Name System (DNS) server is offline, you can work around the name resolution
problem by connecting using the server’s Internet Protocol (IP) address rather than the
server’s host name. For example, instead of connecting to \\servername\printer, you
might connect to \\10.1.42.22\printer.
5.
If you are connecting using File And Printer Sharing, use PortQry to test whether the
client can connect to TCP port 445 or TCP port 139 on the server. If you are connecting
with IPP, test whether the client can connect to TCP port 80 on the server.
If you are still unable to connect, continue troubleshooting from the server, as described in
the next section.
Lesson 1: Troubleshooting Network Printers
C03627093.indd 117
CHAPTER 3
117
1/18/2010 12:04:51 PM
Q
Quick Check
■
Which tools can you use to verify that a firewall is not preventing you from
connecting across the network to a shared printer?
Quick Check Answer
■
You can use the net use command to connect to the print server, or you can use
the PortQry command to verify that the server is listening for incoming network
y
connections on the ports used by printer sharing (primarily TCP 445 or TCP 139).
How to Troubleshoot Printer Sharing from the Server
If you are sharing a printer from a computer running Windows 7, you can troubleshoot it by
performing these steps:
1.
Verify that you can print from the print server. If you cannot print, the problem is not
related to printer sharing. Instead, you should troubleshoot the problem as a local
printer problem. Start by using the Printer Troubleshooter, as described in the section
entitled “Using the Printer Troubleshooter,” earlier in this lesson. Clear the print queue,
as described in the section entitled “Troubleshooting the Print Queue,” earlier in this
lesson, and then attempt to print again. If you are still unable to print, reinstall the
printer with the latest driver, as described in the section entitled “How to Update
a Driver for the Print Server,” earlier in this lesson.
2.
Verify that the folder or printer is shared. To do this, right-click the printer and then
click Printer Properties. Then, click the Sharing tab, and verify that Share This Printer is
selected.
3.
Though the Printer Troubleshooter already should have verified this, you can verify
manually that the Server and Print Spooler services are running. To do this, click Start,
right-click Computer, and then click Manage. Under Services And Applications, select
the Services node. Verify that the Server and Print Spooler services are started and the
Startup Type is set to Automatic.
4.
Verify that users have the necessary permission to access the resources. To do this,
right-click the printer and then click Printer Properties. In the printer properties dialog
box, click the Security tab. Verify that the user account is a member of a group that
appears on the list and that the Print Allow check box is selected. If the account is not
on the list, add it to the list and grant the Print Allow permission.
5.
Check the Windows Firewall exceptions to verify that they are configured properly by
performing the following steps:
a. Click Start and then click Control Panel.
b. Click System And Security and then click Windows Firewall.
118
C03627093.indd 118
CHAPTER 3
Printers
1/18/2010 12:04:51 PM
c.
In the Windows Firewall dialog box, note the Network Location. Click Allow A
Program Or Feature Through Windows Firewall.
d. On the Allowed Programs window, determine whether the File And Printer Sharing
check box is selected. If it is not selected, click Change Settings and select it for
the current network location. If it is selected, verify that no other firewall rule is
blocking File And Printer Sharing. Click OK.
Firewall Configuration
F
irewalls, including Windows Firewall, selectively block network traffic that
has not been allowed explicitly. Most firewalls block incoming connections
(connections sent from a client to a server) by default, and allow all outgoing
connections (connections sent from a server to a client). Therefore, if printer sharing
has not been allowed explicitly on a print server, clients are unable to connect.
If clients are unable to connect to a print server, you should check the firewall
configuration on the print server. If the client and server are not on the same local
area network (LAN), you must also check the configuration of any firewalls that
might block traffic between the client and server.
How you configure the firewall depends on the network protocol used to connect
to the print server:
■
File And Printer Sharing This type of printer connection uses a Universal Naming
Convention (UNC) path such as \\servername\printer or \\192.168.1.10\printer.
e
If the File And Printer Sharing exception is enabled on the print server, as shown in
Figure 3-4, Windows Firewall allows connections to the shared printer. This firewall
exception is enabled automatically when you share a printer; however, administrators
might have removed the exception either manually or by using Group Policy.
■
Internet Printing Protocol (IPP) This type of printer connection uses a Universal
Resource Locator (URL) path such as http://server/printers/printer/.printer. Windows
r
Vista and Windows 7 can only act as an IPP client; they cannot share a printer using
IPP. However, Windows XP, Windows Server 2003, and Windows Server 2008 can
share printers using IPP. For HTTP connections, the server must allow incoming
connections using TCP port 80. For HTTPS connections, the server must allow
incoming connections using TCP port 443.
Lesson 1: Troubleshooting Network Printers
C03627093.indd 119
CHAPTER 3
119
1/18/2010 12:04:51 PM
FIGURE 3-4 Verify that the File And Printer Sharing firewall exception is enabled.
PR ACTICE
Troubleshooting Printer Problems
In this practice, you troubleshoot two different printer problems.
E XERCISE 1
Troubleshooting Printer Sharing
In this exercise, you troubleshoot a client computer that cannot print to a print server.
1.
Connect a printer to your domain controller, DC1. Alternatively, you can connect
a printer to any computer running Windows 7 or Windows Server 2008 R2 in your test
environment. The computer should not be part of a production environment, however.
If you do not have a printer, you can install a printer driver manually for a printer that
is not connected.
2.
Share the printer from DC1 by following these steps:
a. On DC1, click Start and then click Devices And Printers.
b. Right-click the printer and then click Printer Properties.
c.
3.
On the Sharing tab, select the Share This Printer check box and the List In The
Directory check box. Click OK.
Connect to the printer from CLIENT1 by following these steps:
a. On CLIENT1, click Start and then click Devices And Printers.
b. Click Add A Printer.
120
C03627093.indd 120
CHAPTER 3
Printers
1/18/2010 12:04:52 PM
The Add Printer wizard appears.
a. On the What Type Of Printer Do You Want To Install? page, click Add A Network,
Wireless, Or Bluetooth Printer.
b. On the next page, click the printer you shared from DC1, and then click Next.
c.
On the You’ve Successfully Added page, click Next.
d. Click Print A Test Page to verify that the printer is installed successfully. Then, click
Finish.
4.
On DC1, verify that the page prints successfully. If you do not have a physical
printer, double-click the printer from the Devices And Printers page and verify that
a document is in the queue.
5.
Right-click the script Ch3-lesson1-ex1-script1.cmd and then click Run As Administrator
to introduce a printer problem that you will solve in the steps that follow.
6.
From CLIENT1, attempt to print again. You can print by double-clicking the printer
from the Devices And Printers page, clicking Customize Your Printer, and then clicking
Print Test Page from the General tab of the Printer Properties dialog box. Notice that
the document is added to the print queue on CLIENT1, but it does not appear on the
print queue in DC1. This indicates that the connection between the client and server is
unavailable.
7.
From CLIENT1, troubleshoot the network connectivity problem by performing the
following steps:
a. Open an administrative command prompt and attempt to ping DC1 from CLIENT1.
You should be able to ping DC1 successfully, indicating that CLIENT1 and DC1 can
communicate.
b. While still at the command prompt on CLIENT1, attempt to stop the Offline Files
service by running the command net stop cscservice. Make note of whether the
service was already stopped or whether Windows 7 had to stop it.
c.
While still at the command prompt on CLIENT1, attempt to establish a NetBIOS
connection by running the command net view \\dc1. Notice that the connection
attempt fails with the message “The network name cannot be found.” This indicates
that CLIENT1 cannot connect to the Server service on DC1. You know the computer
must be online and connected to the network because the previous ping attempt
succeeded; therefore, you can conclude that the Server service is unavailable.
d. If you had to stop the Offline Files service in step b, restart it by running the command
net start cscservice at the administrative command prompt on CLIENT1.
e. Verify that the Server service is running. To do this, on DC1, click Start, right-click
Computer, and then click Manage. In the Computer Management console, select
the Services And Applications\Services node. Scroll to the Server service and verify
that it is running and that the Startup Type is set to Automatic.
Lesson 1: Troubleshooting Network Printers
C03627093.indd 121
CHAPTER 3
121
1/18/2010 12:04:52 PM
f.
Verify that File And Printer Sharing is allowed in Windows Firewall. Click Start and
then click Control Panel. Click System And Security, and then click Allow A Program
Through Windows Firewall. Verify that File And Printer Sharing is selected.
g. While still in the Windows Firewall Allowed Programs window, examine other firewall
rules, and notice the rule named Block File And Printer Sharing. As indicated by the
name, this firewall rule might be blocking the connection attempt. Click Change
Settings, and then clear the Block File And Printer Sharing check box. Click OK.
8.
On DC1, switch to the printer window. Notice that the document you printed earlier is
now in the queue or is already printing, indicating that you solved the problem.
9.
Finally, right-click the script Ch3-lesson1-ex1-script2.cmd and then click Run As
Administrator to remove the firewall rule that the first script added. Then, remove the
printer that you added in step 1 of this exercise.
E XERCISE 2
Troubleshooting a Local Printer
In this exercise, you install a printer and troubleshoot problems printing locally.
1.
Connect a printer to your computer running Windows 7, CLIENT1. Alternatively, you can
connect a printer to any computer running Windows 7 or Windows Server 2008 R2 in
your test environment. The computer should not be part of a production environment,
however. If you do not have a printer, you can install a printer driver manually for
a printer that is not connected. When you install the printer, choose to print a test page
and verify that the printer functions correctly.
2.
Right-click the script Ch3-lesson1-ex2-script1.cmd and then click Run As Administrator
to introduce a printer problem that you will solve in the steps that follow.
3.
From CLIENT1, open Windows Internet Explorer. Then, press Ctrl+P to print the current
Web page. Notice that you receive an error indicating that you do not have a printer
installed. Click OK, and then click Cancel.
4.
From CLIENT1, troubleshoot the local printer problem by performing the following
steps:
a. Verify that your printer is still installed. Click Start, and then click Devices And
Printers. Notice that no printers are listed. This can happen if either all printers
were deleted or if the Print Spooler service is not running.
b. Verify that the Print Spooler service is running. Click Start, right-click Computer,
and then click Manage. In the Computer Management console, select the Services
And Applications\Services node. Scroll to the Print Spooler service and notice that
it does not have a Status of Started. Right-click the service and then click Start.
5.
6.
122
C03627093.indd 122
Return to Internet Explorer and press Ctrl+P again to print the current Web page. Click
Print to verify that you can print successfully.
Finally, remove the printer that you added in step 1 of this exercise.
CHAPTER 3
Printers
1/18/2010 12:04:52 PM
Lesson Summary
■
Use the Printer Troubleshooter built into Windows 7 to diagnose and solve common
problems quickly.
■
Use the Applications And Services Logs\Microsoft\Windows\PrintService\Admin event
log to determine whether Windows 7 has added any printer-related events. If the print
server is running Windows Server 2008 R2, you can enable object access auditing to
add events to the Security event log when users access printers.
■
You can configure several Group Policy settings to facilitate printer troubleshooting,
especially for driver-related problems.
■
Print servers must have both the Print Spooler and the Server services running to share
a printer. The most common print server-related problem is a print queue that stops
processing print jobs. To resolve that issue, restart the Print Spooler service.
■
Both the print server and the client must have a printer driver installed. You can
update drivers from the printer properties dialog box. If a driver update fails to install
correctly, remove the printer and then reinstall it.
■
Troubleshoot problems connecting across the network to a shared printer by verifying
that the client can resolve the name of the server, that no firewall is blocking file and
printer sharing communications, and that the client can establish a file and printer
sharing connection to the server.
Lesson Review
You can use the following questions to test your knowledge of the information in Lesson 1,
“Troubleshooting Network Printers.” The questions are also available on the companion CD
if you prefer to review them in electronic form.
NOTE
E
ANSWERS
Answers to these questions and explanations of why each answer choice is correct or incorrect
are located in the “Answers” section at the end of the book.
1.
A user is attempting to connect to a network printer using the UNC name
\\servername\printer. The user receives the error message “Windows couldn’t connect
to the printer.” Which of the following might be the cause of the problem?
A. The Server service is not started on the client.
B. The Workstation service is not started on the server.
C. The File And Printer Sharing firewall exception is not enabled on the server.
D. The File And Printer Sharing firewall exception is not enabled on the client.
Lesson 1: Troubleshooting Network Printers
C03627093.indd 123
CHAPTER 3
123
1/18/2010 12:04:52 PM
2.
A user previously has been able to print to a network printer, but the printer appears
to be unavailable. You want to verify that all the required services are running. Which
of the following services are required on the print server? (Choose all that apply.)
A. Workstation
B. Print Spooler
C. Server
D. Peer Name Resolution Protocol
3.
A user calls to complain that she is experiencing a problem with her printer. When
she prints a large print job, the printer adds a blank page between each printed
page. You research the problem and discover that it is driver-related. The hardware
manufacturer recommends using a driver for a different printer to resolve the problem.
Which tool should you use to change the driver?
A. Services
B. Device Manager
C. Event Viewer
D. Printer Properties dialog box
124
C03627093.indd 124
CHAPTER 3
Printers
1/18/2010 12:04:53 PM
Chapter Review
To further practice and reinforce the skills you learned in this chapter, you can perform the
following tasks:
■
Review the chapter summary.
■
Review the list of key terms introduced in this chapter.
■
Complete the case scenarios. These scenarios set up real-world situations involving
the topics of this chapter and ask you to create a solution.
■
Complete the suggested practices.
■
Take a practice test.
Chapter Summary
■
Problems with network printers can have several different sources: client or server
print drivers, the print queue, printer permissions, and network connectivity.
■
To solve driver problems, add the latest driver version to the print server, or replace
the driver by reinstalling the printer. In addition, you can store printer drivers on the
print server so new clients can install the printer driver automatically.
■
To solve print queue problems, restart the Print Spooler service.
■
To diagnose problems related to printer permissions, enable security and examine the
Security event log. To resolve the security problems, adjust the printer permissions.
■
You can use standard network troubleshooting tools to troubleshoot network
connectivity. To verify that you can establish a connection to a print server, use the
net use command.
Key Terms
Do you know what these key terms mean? You can check your answers by looking up the
terms in the glossary at the end of the book.
■
print queue
■
Point And Print
Case Scenarios
In the following case scenarios, you apply what you’ve learned about subjects of this chapter.
You can find answers to these questions in the “Answers” section at the end of this book.
Case Scenarios
C03627093.indd 125
CHAPTER 3
125
1/18/2010 12:04:53 PM
Case Scenario 1: Troubleshooting Insufficient Privileges
Your manager calls you into his office because he is unable to connect to a network printer.
The printer appears as an option in the Add Printer Wizard, but when he selects it, the wizard
prompts him for a user name and password. When he provides his AD DS user name and
password, he receives the message “The credentials supplied are not sufficient to access this
printer.”
Answer the following questions for your manager:
1.
Why is he receiving the error message?
2.
How can you solve the problem?
Case Scenario 2: Troubleshooting a Printer Problem
A user calls to complain that she is unable to print to a network printer. You are familiar
with the printer, and you know that it is being shared from a computer running Windows
Server 2008 R2. The user previously has printed to the printer successfully.
You log on to the print server and verify that you can print from the server itself. You also
verify that the user has sufficient privileges.
Answer the following questions related to the troubleshooting process:
1.
What questions should you ask the user?
2.
How would you narrow down the cause of the problem?
3.
What are some possible causes of the problem?
Suggested Practices
To help you master the exam objectives presented in this chapter, complete the following
tasks.
Identify and Resolve Network Printer Issues
Troubleshooting is a skill that requires real-world experience. Although this chapter can
discuss concepts and tools, only practice gives you the skills that you need to troubleshoot
network printer problems and pass the exam. Perform as many of these practices as possible
to build your troubleshooting skills.
Visit and
browse the questions related to printing. Read the posts to determine how people
solved their printing problems.
■
■
126
C03627093.indd 126
Practice 1
Practice 2 Connect to a shared printer and simulate different hardware problems
to see how the client communicates the error to the user. First, disconnect the shared
printer from the print server. Next, remove all paper from the printer. Finally, stop
sharing the printer.
CHAPTER 3
Printers
1/18/2010 12:04:53 PM
■
Practice 3 Use the net use command-line command to establish a connection from
a Windows 7 client to a server.
■
Share a printer. Add printer drivers for a different processor architecture to
allow clients with that processor architecture to install the printer driver automatically.
Practice 4
Take a Practice Test
The practice tests on this book’s companion CD offer many options. For example, you can test
yourself on just one exam objective, or you can test yourself on all the 70-685 certification
exam content. You can set up the test so that it closely simulates the experience of taking
a certification exam, or you can set it up in study mode so that you can look at the correct
answers and explanations after you answer each question.
MORE INFO
PRACTICE TESTS
For details about all the practice test options available, see the section entitled “How to
Use the Practice Tests,” in the Introduction to this book.
Take a Practice Test
C03627093.indd 127
CHAPTER 3
127
1/18/2010 12:04:53 PM
C03627093.indd 128
1/18/2010 12:04:53 PM
CHAPTER 4
Security
F
or some users, problems begin before they even log on. Authentication, the process of
identifying users and validating their credentials, can be very complex in a Windows 7
environment. Although home users might never run into problems typing their user names
and passwords, in Active Directory Directory Services (AD DS) environments, users authenticate
to domain controllers and other servers on the network. In addition, authentication can use
smart cards or biometrics as well as passwords. User Account Control (UAC) adds another layer
of complexity because a user might use multiple sets of credentials within a single session.
In recent years, more and more security compromises are initiated when users visit
a Web site. For example, Web sites might trick the user into providing confidential
information, or they might exploit a vulnerability in the browser to run code without the
user’s explicit permission. In Windows 7, Windows Internet Explorer 8.0 includes several
features to reduce this risk.
Though network attacks are the most widespread, the increase in mobile users has led
to an increase in physical data theft. If someone steals a computer, he or she can bypass all
your security controls except encryption. Windows 7 provides two ways to encrypt the files
on your computer: Encrypting File System (EFS), which encrypts individual files and folders
on a per-user basis, and BitLocker, which encrypts entire volumes.
This chapter describes how to configure and troubleshoot authentication, Internet
Explorer, EFS, and BitLocker.
Exam objectives in this chapter:
■
Identify and resolve logon issues.
■
Identify and resolve Windows Internet Explorer security issues.
■
Identify and resolve encryption issues.
Lessons in this chapter:
■
Lesson 1: Authenticating Users
■
Lesson 2: Configuring and Troubleshooting Internet Explorer Security
■
Lesson 3: Using Encryption to Control Access to Data
132
147
167
CHAPTER 4
C04627093.indd 129
129
1/28/2010 9:36:03 AM
Before You Begin
To complete the lessons in this chapter, you should be familiar with Windows 7 and be
comfortable with the following tasks:
■
Installing Windows 7
■
Connecting a computer physically to a network
■
Performing basic administration tasks on a Windows Server 2008 R2–based domain
controller
REAL WORLD
Tony Northrup
T
o businesses, security is a math problem: if a countermeasure reduces risk by
more than it costs, then they use it.
Unfortunately, calculating risk and cost is rarely straightforward. For example,
consider the risk of an attacker stealing a mobile computer and misusing
confidential files. I’m making very rough estimates, but a mobile computer might
have a 2 percent chance of being stolen in a given year. Out of those laptops,
perhaps 10 percent of thieves find and abuse confidential information. Therefore,
there is a 0.2 percent chance of confidential data being abused annually per laptop.
However, the cost can be significant. To a big business, such a compromise could
cost millions—so let’s estimate that a single compromise would cost $10 million.
If the business has 100 computers with confidential data on them, the total risk is
$2 million annually.
If the risk is $2 million annually, you wouldn’t want to spend more than that to
mitigate it. Windows 7 includes BitLocker Drive Encryption to mitigate the risk of
a stolen computer. However, it’s not effective if a user is currently logged in, if the
attacker also steals the universal serial bus (USB) flash drive, or if the attacker can
guess the user’s personal identification number (PIN). For the sake of this example,
let’s assume that properly training users, automatically locking computers that are
not in use, and requiring BitLocker Drive Encryption with either a USB flash drive
or a PIN as a startup key is 80 percent effective at mitigating the risk of stolen
computers.
130
C04627093.indd 130
CHAPTER 4
Security
1/28/2010 9:36:08 AM
By reducing the $2 million dollar risk by 80 percent, you’ve just saved the fictional
company $1.6 million annually. You’ve incurred some cost, though. IT needs to
upgrade computers with confidential data to Windows 7, upgrade hardware where
necessary, and spend time training users. Let’s estimate that this will cost $3,000
per user up front. If the computer stays in service for three years, the cost is $1,000
per user annually, or $100,000 total—reducing the annual savings from $1.6 million
to $1.5 million. BitLocker has ongoing costs, too, especially if you require a startup
key, because some users will forget their USB flash drive or PIN and be locked out of
their computers, losing productivity and incurring a call to IT. These costs get very
difficult to estimate, but if 10 percent of the 100 users with confidential data have
a problem in one year, and the lost productivity and support call cost $500 per user,
then the cost is $5,000 per year.
Given those estimates of risk and cost, BitLocker is a very worthwhile to this fictional
company. Not all security features are worthwhile, though. The next time you’re
troubleshooting a security problem, think about whether the time you’re spending
troubleshooting the problem and the productivity that users are losing are worth
the benefits of the security feature. For more information, read the Security Risk
Management Guide at />x
Before You Begin
C04627093.indd 131
CHAPTER 4
131
1/28/2010 9:36:08 AM
Lesson 1: Authenticating Users
Before a user can log on to a computer running Windows 7, connect to a shared folder,
or browse a protected Web site, the resource must validate the user’s identity using a
process known as authentication. Windows 7 supports a variety of authentication techniques,
including the traditional user name and password, smart cards, and third-party authentication
components. In addition, Windows 7 can authenticate users with the local user database or
an AD DS domain.
This lesson provides a basic background in authentication technologies and then describes
how to audit logons and troubleshoot authentication problems.
After this lesson, you will be able to:
■
Describe authentication and list common authentication techniques.
■
Add user names and passwords manually to Credential Manager to enable
automatic authentication to network resources.
■
Troubleshoot authentication issues.
Estimated lesson time: 25 minutes
What Is Authentication?
Authentication is the process of identifying a user. In home environments, authentication is
often as simple as clicking a user name at the Windows 7 logon screen. However, in enterprise
environments, almost all authentication requests require users to provide both a user name
(to identify themselves) and a password (to prove that they really are the user they claim to be).
Windows 7 also supports authentication using a smart card. The smart card, which is
about the size of a credit card, contains a chip with a certificate that uniquely identifies the
user. So long as a user doesn’t give the smart card to someone else, inserting the smart
card into a computer sufficiently proves the user’s identity. Typically, users also need to type
a password or PIN to prove that they aren’t using someone else’s smart card. When you
combine two forms of authentication (such as both typing a password and providing a smart
card), it’s called multifactor authentication. Multifactor authentication is much more secure
than single-factor authentication.
Biometrics is another popular form of authentication. Although a password proves your
identity by testing “something you know” and a smart card tests “something you have,”
biometrics test “something you are” by examining a unique feature of your physiology. Today
the most common biometric authentication mechanisms are fingerprint readers (now built
into many mobile computers) and retinal scanners.
132
C04627093.indd 132
CHAPTER 4
Security
1/28/2010 9:36:08 AM
NOTE
E
BIOMETRICS
Biometrics are the most secure and reliable authentication method because you cannot
lose or forget your authentication. However, it’s also the least commonly used. Reliable
biometric readers are too expensive for many organizations, and some users dislike
biometric readers because they feel the devices violate their privacy.
How to Use Credential Manager
Credential Manager is a single-sign on feature, originally for Windows Server 2003 and
Windows XP, that enables users to input user names and passwords for multiple network
resources and applications. When different resources require authentication, Windows can
then automatically provide the credentials without requiring the user to type them.
In Windows Vista and Windows 7, Credential Manager can roam stored user names and
passwords between multiple Windows computers in an AD DS domain. Windows stores
credentials in the user’s AD DS user object. This enables users to store credentials once and
use them from any logon session within the AD DS domain. For example, if you connect to
a password-protected Web server and you select the Remember My Password check box,
Internet Explorer will be able to retrieve your saved password later, even if you log on to
a different computer running Windows Vista or Windows 7.
Users can take advantage of Credential Manager without even being aware of it. For
example, each time a user connects to a shared folder or printer and selects the Reconnect
At Logon check box, Windows automatically stores that user’s credentials within Credential
Manager. Similarly, if a user authenticates to a Web site that requires authentication and
selects the Remember My Password check box in the Internet Explorer authentication dialog
box, Internet Explorer stores the user name and password in Credential Manager.
NOTE
CREDENTIAL ROAMING
For detailed information about credential roaming, read “Configuring and Troubleshooting
Certificate Services Client-Credential Roaming” at />security/guidance/cryptographyetc/client-credential-roaming/implementationdifferences.mspx.
x
Windows automatically adds credentials used to connect to shared folders to the
Credential Manager. However, you might want to add a user name and password manually
so that Windows can provide those credentials automatically for a group of computers in
a different domain. To add a user name and password manually to Credential Manager,
follow these steps:
1.
Click Start, and then click Control Panel.
2.
Click the User Accounts link twice.
3.
In the left pane, click the Manage Your Credentials link.
Lesson 1: Authenticating Users
C04627093.indd 133
CHAPTER 4
133
1/28/2010 9:36:08 AM
The Credentials Manager window appears, as shown in Figure 4-1.
FIGURE 4-1 Using Credential Manager to authenticate automatically to resources that
require credentials other than those you use to log on
4.
Click Add A Windows Credential. Note that you can also add certificate-based
credentials and generic credentials.
5.
In the Internet Or Network Address box, type the server name. You can use an
asterisk (*) as a wildcard. For example, to use the credential for all resources in the
contoso.com domain, you could type *.contoso.com.
6.
In the User Name and Password boxes, type your user credentials. Click OK.
NOTE
WEB SITES THAT CREDENTIAL MANAGER CAN AUTHENTICATE
TO AUTOMATICALLY
The only Web sites that Credential Manager can authenticate to automatically are those
that use Hypertext Transfer Protocol (HTTP) authentication. When visiting the site, the
Web browser opens a dialog box to prompt for credentials. Credential Manager cannot
remember your user name and password for Web sites that use a Hypertext Markup
Language (HTML) form of authentication (such as those that have a logon page), which is
much more common. Credential Manager can also remember .NET Passport credentials.
You can also back up and restore credentials manually in Credential Manager.
134
C04627093.indd 134
CHAPTER 4
Security
1/28/2010 9:36:09 AM
How to Troubleshoot Authentication Issues
Sometimes, users might experience problems authenticating to resources that have more
complex causes than mistyping a password or leaving the Caps Lock key on. The sections that
follow describe troubleshooting techniques that can help you better isolate authentication
problems.
UAC Compatibility Problems
U
sers often confuse authentication and authorization issues. This isn’t a surprise
because both types of problems can show the exact same error message:
“Access is denied.” Because UAC limits the user’s privileges and many applications
were not designed to work with UAC, security errors are bound to be even more
frequent in Windows Vista and Windows 7 than they were in Windows XP.
Most UAC-related problems are authorization-related, not authentication-related.
If the user doesn’t receive a UAC prompt at all but still receives a security error,
it’s definitely an authorization problem. If the user receives a UAC prompt and the
user’s credentials are accepted (or if the user logs on as an administrator and only
needs to click Continue), it’s definitely an authorization problem. UAC problems are
authentication-related only if UAC prompts a user for credentials and rejects the
user’s password.
Identifying Logon Restrictions
Often, authentication problems occur because administrators have configured logon
restrictions to enforce the organization’s security requirements. Logon restrictions include
locking accounts after several incorrect attempts at typing a password, allowing users to log
on only during specific hours, requiring users to change their passwords regularly, disabling
accounts, and accounts that expire on a specific date. The sections that follow describe each
of these types of logon restrictions.
NOTE
DETERMINING LOGON CONTEXT
Users can authenticate to the local user database or an AD DS domain. Logon restrictions
defined for the domain only apply to domain accounts, and vice versa. Therefore, when
examining logon restrictions for users, you must determine their logon context.
The quickest way to do this is to open a command prompt and run the command set
to display all environment variables. Then, look for the USERDOMAIN line. If the user
logged on with a local user account, this will be the computer name (shown on the
COMPUTERNAME line). If the user logged on with an AD DS user account, this will be the
name of the domain. You can also check the LOGONSERVER line to determine whether
a domain controller or the local computer authenticated the user.
Lesson 1: Authenticating Users
C04627093.indd 135
CHAPTER 4
135
1/28/2010 9:36:09 AM
ACCOUNT LOCKOUT
If a user provides incorrect credentials several times in a row (for example, if an attacker is
attempting to guess a user’s password, or if a user repeatedly mistypes a password), Windows
can block all authentication attempts for a specific amount of time.
Account lockout settings are defined by Group Policy settings in the Computer
Configuration\Windows Settings\Security Settings\Account Policies\Account Lockout Policies\
node as follows:
■
The number of incorrect attempts is defined by the Account Lockout Threshold setting.
■
The time that the number of attempts must occur within is defined by the Reset
Account Lockout Counter After policy.
■
The time that the account is locked out is defined by the Account Lockout Duration
policy.
Use the Resultant Set Of Policy tool (Rsop.msc) to identify a computer’s effective Group
Policy settings. To use the Resultant Set Of Policy tool, follow these steps:
1.
Click Start, type rsop.msc, and press Enter.
2.
In the Resultant Set Of Policy window, within the Computer Configuration\Windows
Settings\Security Settings\Account Policies\Account Lockout Policies\ node.
3.
The Details pane shows only the account lockout policy settings that have been
defined, and which Group Policy object defined them.
If a user receives an error message indicating that her account is locked out, or she cannot
log in even if she thinks she has typed her password correctly, you should validate the user’s
identity and then unlock the user’s account. To unlock a user’s account, view the user’s
Properties dialog box, and clear the Account Is Locked Out check box (for local Windows 7
user accounts) or the Unlock Account check box (for Windows Server 2008 R2 AD DS
accounts), as shown in Figure 4-2. Then, click Apply.
You can identify locked out accounts by examining logon audit failures in the domain
controller’s Security event log with Event ID 4625.
LOGON HOUR RESTRICTIONS
Administrators can also use the Account tab of an AD DS user’s properties to restrict logon
hours. This is useful when administrators do not want a user to log on outside his normal
working hours.
If a user attempts to log on outside his allowed hours, Windows 7 displays the error
message “Your account has time restrictions that prevent you from logging on at this time.
Please try again later.” The only way to resolve this problem is to adjust the user’s logon hours
by clicking the Logon Hours button on the Account tab of the user’s Properties dialog box.
Figure 4-3 shows a user who is allowed to log on between the hours of 10 and 6, Monday
through Friday.
136
C04627093.indd 136
CHAPTER 4
Security
1/28/2010 9:36:10 AM