mcts training kit 70 - 685 Windows 7 Enterprise Desktop Support Technician phần 4 doc
Bạn đang xem bản rút gọn của tài liệu. Xem và tải ngay bản đầy đủ của tài liệu tại đây (1023.22 KB, 68 trang )
180 CHAPTER 4 Security
8. On the Save The Recovery Password page, choose the destination (a USB drive, a local
or remote folder, or a printer) to save your recovery password. The recovery password
is a small text fi le containing brief instructions, a drive label and password ID, and
the 48-digit recovery password. Save the password and the recovery key on separate
devices and store them in different locations. Click Next.
9. On the Encrypt The Volume page, select the Run BitLocker System Check check box
and click Continue if you are ready to begin encryption. Click Restart Now. Upon
rebooting, BitLocker ensures that the computer is fully compatible and ready to be
encrypted.
10. BitLocker displays a special screen confi rming that the key material was loaded.
Now that this has been confi rmed, BitLocker begins encrypting the C:\ drive after
Windows 7 starts, and BitLocker is enabled.
BitLocker encrypts the drive in the background so that you can continue using the
computer.
How to Manage BitLocker Keys on a Local Computer
To manage keys on the local computer, follow these steps:
1. Open Control Panel and click the System And Security link. Under BitLocker Drive
Encryption, click the Manage BitLocker link.
2. In the BitLocker Drive Encryption window, click Manage BitLocker.
Using this tool, you can perform the following actions (which vary depending on the
authentication type chosen):
■
Save Or Print Recovery Key Again Provides the following options:
••
Save The Recovery Key To A USB Flash Drive
••
Save The Recovery Key To A File
••
Print The Recovery Key
■
Duplicate The Startup Key When you use a USB startup key for authentication, this
allows you to create a second USB startup key with an identical key.
■
Reset The PIN When you use a PIN for authentication, this allows you to change
the PIN.
To manage BitLocker from an elevated command prompt or from a remote computer,
use the Manage-bde tool, which replaces the Manage-bde.wsf script in Windows Vista.
For example, to view the current BitLocker confi guration, run manage-bde –status. The
following example demonstrates the confi guration of a computer with one decrypted data
drive and one encrypted system drive:
manage-bde -status
BitLocker Drive Encryption: Configuration Tool version 6.1.7600
Copyright (C) Microsoft Corporation. All rights reserved.
C04627093.indd 180C04627093.indd 180 1/28/2010 9:36:16 AM1/28/2010 9:36:16 AM
Lesson 3: Using Encryption to Control Access to Data CHAPTER 4 181
Disk volumes that can be protected with
BitLocker Drive Encryption:
Volume E: [Flash]
[Data Volume]
Size: 0.12 GB
BitLocker Version: None
Conversion Status: Fully Decrypted
Percentage Encrypted: 0%
Encryption Method: None
Protection Status: Protection Off
Lock Status: Unlocked
Identification Field: None
Automatic Unlock: Disabled
Key Protectors: None Found
Volume C: []
[OS Volume]
Size: 126.90 GB
BitLocker Version: Windows 7
Conversion Status: Fully Encrypted
Percentage Encrypted: 100%
Encryption Method: AES 128 with Diffuser
Protection Status: Protection On
Lock Status: Unlocked
Identification Field: None
Key Protectors:
External Key
Numerical Password
For detailed information about how to use Manage-bde, run manage-bde -? at
a command prompt.
How to Recover Data Protected by BitLocker
When you use BitLocker to protect the system partition, the partition will be locked if the
encryption key is not available, causing BitLocker to enter recovery mode. Likely causes of the
encryption key not being available include:
■
One of the boot fi les is modifi ed.
■
BIOS is modifi ed and the TPM disabled.
■
The TPM is cleared.
■
An attempt is made to boot without the TPM, PIN, or USB key being available.
■
The BitLocker-encrypted disk is moved to a new computer.
C04627093.indd 181C04627093.indd 181 1/28/2010 9:36:16 AM1/28/2010 9:36:16 AM
182 CHAPTER 4 Security
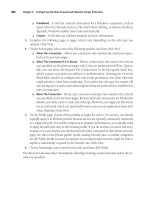
After the drive is locked, you can boot only to recovery mode, as shown in Figure 4-16.
On most keyboards, you can use the standard number keys from 0–9. However, on some
non-English keyboards, you need to use the function keys by pressing F1 for the digit 1, F2
for the digit 2, and so on, with F10 being the digit 0.
FIGURE 4-16 Gaining access to a BitLocker-encrypted drive by typing a 48-character recovery password
If you have the recovery key on a USB fl ash drive, you can insert the recovery key and
press the Esc key to restart the computer. BitLocker reads the recovery key automatically
during startup.
If you cancel out of recovery, the Windows Boot Manager might provide instructions for
using Startup Repair to fi x a startup problem automatically. Do not follow these instructions;
Startup Repair cannot access the encrypted volume. Instead, restart the computer and enter
the recovery key.
As a last resort, you can use the BitLocker Repair Tool (Repair-bde) to help recover data
from an encrypted volume. The BitLocker Repair Tool was a separate download for earlier
versions of Windows, but it is included in Windows 7 and Windows Server 2008 R2.
You can use the BitLocker Repair Tool to copy the decrypted contents of an encrypted
volume to a different volume. For example, if you have used BitLocker to protect the D:\ data
volume and the volume has become corrupted, you might be able to use the BitLocker Repair
C04627093.indd 182C04627093.indd 182 1/28/2010 9:36:16 AM1/28/2010 9:36:16 AM
Lesson 3: Using Encryption to Control Access to Data CHAPTER 4 183
Tool to decrypt the contents and copy them to the E:\ volume, if you can provide a recovery
key or password. The following command would attempt this:
repair-bde D: E: -RecoveryPassword 111111-222222-333333-444444-5555555-6666666-7777777-
888888
You can also attempt to repair a volume without copying the data by using the
–NoOutputVolume parameter, as the following command demonstrates:
repair-bde C: -NoOutputVolume –RecoveryKey D:\RecoveryKey.bek
If the system volume becomes corrupted, you can start Windows 7 Setup from the
Windows 7 DVD, start the repair tools, and open a command prompt to run the BitLocker
Repair Tool. Alternatively, you could attempt to mount the volume to a different computer
and run the BitLocker Repair Tool.
NOTE BACKING UP ENCRYPTED DRIVES
Because it can be diffi cult or impossible to recover a corrupted BitLocker-protected
drive, it’s especially important to back up BitLocker-protected drives regularly. Note,
however, that your backups might not be encrypted by default. This applies to system
image backups, as well. Although system image backups make a copy of your entire disk,
BitLocker functions at a lower level than system image backups. Therefore, when system
image backup reads the disk, it reads the BitLocker-decrypted version of the disk.
How to Disable or Remove BitLocker Drive Encryption
Because BitLocker intercepts the boot process and looks for changes to any of the early boot
fi les, it can cause problems in the following nonattack scenarios:
■
Upgrading or replacing the motherboard or TPM
■
Installing a new operating system that changes the master boot record or the boot
manager
■
Moving a BitLocker-encrypted disk to another TPM-enabled computer
■
Repartitioning the hard disk
■
Updating the BIOS
■
Third-party updates that occur outside the operating system (such as hardware
fi rmware updates)
To avoid entering BitLocker recovery mode, you can disable BitLocker temporarily, which
allows you to change the TPM and upgrade the operating system. When you
re-enable BitLocker, the same encryption keys will be used. You can also choose to decrypt
the BitLocker-protected volume, which will completely remove BitLocker protection. You
can re-enable BitLocker only by repeating the process to create new keys and reencrypt the
volume.
N
OTE
B
ACKING UP ENCRYPTED DRIVES
Because it can be diffi cult or impossible to recover a corrupted BitLocker-protected
dr
i
ve,
i
t’s espec
i
ally
i
mportant to back up B
i
tLocker-protected dr
i
ves regularly. Note,
however, that
y
our backups mi
g
ht not be encr
y
pted b
y
default. This applies to s
y
stem
image backups, as well. Although system image backups make a copy of your entire disk,
BitLocker
f
unctions at a lower level than s
y
stem ima
g
e backups. There
f
ore, when s
y
stem
image backup reads the disk, it reads the BitLocker-decrypted version of the disk.
C04627093.indd 183C04627093.indd 183 1/28/2010 9:36:16 AM1/28/2010 9:36:16 AM
184 CHAPTER 4 Security
To disable BitLocker temporarily or decrypt the BitLocker-protected volume permanently,
perform these steps:
1. Log on to the computer as Administrator.
2. From Control Panel, open BitLocker Drive Encryption.
3. Click Suspend Protection for the volume that has BitLocker enabled to use a clear key.
To remove BitLocker completely, click Turn Off BitLocker.
Troubleshooting BitLocker Problems
Several common BitLocker problems are actually “features.” The problems occur because
BitLocker is designed to provide protection from specifi c types of attacks. Often these
legitimate uses resemble attacks and cause BitLocker to refuse to allow the computer to start
or the BitLocker encryption to prevent you from accessing fi les:
■
The operating system fails to start in a dual-boot confi guration You can dual-boot
a computer after enabling BitLocker. However, the second operating system instance
must be confi gured on a different partition. You cannot dual-boot to a second
operating system installed on the same partition.
■
The operating system fails to start if you move the hard disk to a different
computer
BitLocker is designed to protect data from offl ine attacks, such as attacks
that bypass operating system security by connecting the hard disk to a different
computer. The new computer will be unable to decrypt the data (even if it has a TPM
chip in it). Before moving a BitLocker-encrypted disk to a different computer, disable
BitLocker. Re-enable BitLocker after transferring the disk. Alternatively, you can use the
recovery key to start Windows after moving the hard disk to the new computer.
■
The data on the hard disk is unreadable using standard disk recovery tools For
the same reasons stated in the previous bullet point, BitLocker fi les are unreadable
using standard disk recovery tools. Some day recovery tools that support decrypting
BitLocker fi les using a recovery key might be available. As of the time of this writing,
your only opportunity for recovering BitLocker encrypted fi les is to start Windows 7
using the BitLocker recovery key. For this reason it is very important to regularly back
up BitLocker-encrypted volumes.
PRACTICE Encrypt and Recover Encrypted Data
In this practice, you simulate the recovery of a lost EFS encryption certifi cate.
EXERCISE 1 Encrypt Data
In this exercise, you encrypt a fi le. Windows 7 automatically generates an EFS key if you don’t
already have one.
1. Log on to a computer running Windows 7 as a standard user.
2. Create a fi le named Encrypted.txt in your Documents folder.
C04627093.indd 184C04627093.indd 184 1/28/2010 9:36:17 AM1/28/2010 9:36:17 AM
Lesson 3: Using Encryption to Control Access to Data CHAPTER 4 185
3. Right-click the Encrypted.txt fi le, and then click Properties.
4. On the General tab of the Properties dialog box, click Advanced.
5. Select the Encrypt Contents To Secure Data check box, and then click OK twice.
6. In the Encryption Warning dialog box, select Encrypt The File Only, and then click OK.
Notice that Windows Explorer displays the Encrypted.txt fi le in green.
7. Double-click the Encrypted.txt fi le to open it in Microsoft Notepad. Then add the text
“This fi le is encrypted.” Save the fi le and close Notepad.
8. Double-click the fi le to verify that you can open it, and then close Notepad again.
Now you have encrypted a fi le, and no user can access it without your EFS key.
EXERCISE 2 Back Up an EFS Key
In Exercise 1, you encrypted a fi le. In this exercise, you back up the EFS key that was generated
automatically when you encrypted the fi le. Then you delete the original key and determine
whether you can access the EFS-encrypted fi le. To complete this practice, you must have
completed Exercise 1.
1. Click Start, and then click Control Panel.
2. Click the User Accounts link twice.
3. In the left pane, click the Manage Your File Encryption Certifi cates link.
The Encrypting File System Wizard appears.
4. On the Manage Your File Encryption Certifi cates page, click Next.
5. On the Select Or Create A File Encryption Certifi cate page, leave the default certifi cate
(your EFS certifi cate) selected, and then click Next.
6. On the Back Up The Certifi cate And Key page, click Browse and select the Documents
folder. For the fi le name, type EFS-cert-backup.pfx. Click Save, and then type
a complex password in the Password and Confi rm Password fi elds. Click Next.
7. If the Update Your Previously Encrypted Files page appears, leave all check boxes
cleared and then click Next.
8. On the Encrypting File System page, click Close.
9. In Windows Explorer, open your Documents folder and verify that the EFS certifi cate
was exported correctly.
Now that you have backed up your EFS key, you can lose it safely. Simulate a corrupted
or lost key by following these steps to delete it:
10. Click Start, type mmc, and then press Enter to open a blank MMC.
11. Click File, and then click Add/Remove Snap-in.
12. Select Certifi cates and click Add.
13. Select My User Account, and then click Finish.
14. Click OK.
C04627093.indd 185C04627093.indd 185 1/28/2010 9:36:17 AM1/28/2010 9:36:17 AM
186 CHAPTER 4 Security
15. Expand Certifi cates – Current User, expand Personal, and then select Certifi cates.
16. In the middle pane, right-click your EFS certifi cate, and then click Delete.
17. In the Certifi cates dialog box, click Yes to confi rm that you want to delete the
certifi cate.
18. Log off the current desktop session and then log back on. Windows 7 caches the user’s
EFS certifi cate. Thus, if you remained logged on, you would still be able to open your
encrypted fi le.
19. Open the Documents folder and double-click the Encrypted.txt fi le. Notepad should
appear and display an “Access is denied” error message. This indicates that the fi le is
encrypted but you don’t have a valid EFS certifi cate.
EXERCISE 3 Recover Encrypted Data
In this exercise, you recover a lost EFS key and use it to access encrypted data. To complete
this exercise, you must have completed Exercises 1 and 2.
1. In the Documents folder, double-click the EFS-cert-backup.pfx fi le that you created in
Exercise 2.
The Certifi cate Import Wizard appears.
2. On the Welcome To The Certifi cate Import Wizard page, click Next.
3. On the File To Import page, click Next.
4. On the Password page, type the password you assigned to the certifi cate. Then click
Next.
5. On the Certifi cate Store page, click Next.
6. On the Completing The Certifi cate Import Wizard page, click Finish.
7. Click OK to confi rm that the import was successful.
8. Open the Documents folder and double-click the Encrypted.txt fi le. Notepad should
appear and display the contents of the fi le, indicating that you successfully recovered
the EFS key and can now access encrypted fi les.
Lesson Summary
■
Use EFS to encrypt individual fi les and folders. Because encrypted fi les are unavailable
if the user loses his or her EFS certifi cate, it’s important to have a backup EFS certifi cate
and a recovery key. In environments where multiple users log on to a single computer,
you can grant multiple users access to EFS-encrypted fi les.
■
Use BitLocker to encrypt the entire system volume. If available, BitLocker makes use of
TPM hardware to seal the encryption key. BitLocker then works with the TPM hardware
during computer startup to verify the integrity of the computer and operating system.
If TPM hardware is available, you can optionally require the user to insert a USB fl ash
drive with a special key or type a password to gain access to the BitLocker-encrypted
volume. BitLocker is disabled by default on computers without TPM hardware, but you
C04627093.indd 186C04627093.indd 186 1/28/2010 9:36:17 AM1/28/2010 9:36:17 AM
Lesson 3: Using Encryption to Control Access to Data CHAPTER 4 187
can enable BitLocker without TPM hardware by using Group Policy settings. If TPM
hardware is not available, users are required to insert a USB fl ash drive or a recovery
key to start Windows 7.
Lesson Review
You can use the following questions to test your knowledge of the information in Lesson 3,
“Using Encryption to Control Access to Data.” The questions are also available on the com-
panion CD if you prefer to review them in electronic form.
NOTE ANSWERS
Answers to these questions and explanations of why each answer choice is right or wrong
are located in the “Answers” section at the end of the book.
1. Which tool would you use to back up an EFS certifi cate?
A. BitLocker Drive Encryption
B. Computer Management
C. Certifi cates
D. Services
2. In the Certifi cates console, which node would you access to back up the DRA
certifi cate?
A. Certifi cates – Current User\Personal\Certifi cates
B. Certifi cates – Current User\Active Directory User Object
C. Certifi cates (Local Computer)\Personal\Certifi cates
D. Certifi cates (Local Computer)\Active Directory User Object
3. Which of the following confi gurations does BitLocker support? (Choose all that apply.)
A. Use BitLocker with a TPM but without additional keys
B. Use BitLocker with a TPM and require a PIN at every startup
C. Use BitLocker without a TPM and require a PIN at every startup
D. Use BitLocker without a TPM and require a USB key at every startup
N
OT
E
ANSWERS
E
Answers to these questions and explanations of why each answer choice is right or wron
g
a
re located in the “Answers” section at the end o
f
the book.
C04627093.indd 187C04627093.indd 187 1/28/2010 9:36:17 AM1/28/2010 9:36:17 AM
188 CHAPTER 4 Security
Chapter Review
To further practice and reinforce the skills you learned in this chapter, you can perform the
following tasks:
■
Review the chapter summary.
■
Review the list of key terms introduced in this chapter.
■
Complete the case scenarios. These scenarios set up real-world situations involving the
topics of this chapter and ask you to create a solution.
■
Complete the suggested practices.
■
Take a practice test.
Chapter Summary
■
Authentication is the process of identifying a user and validating the user’s identity.
To troubleshoot authentication problems, fi rst verify that the user does not have
a logon restriction, such as a locked-out account, an expired password, or a disabled
account. If you need to monitor authentication errors, enable failure auditing for
Account Logon Events and then examine the Security event log. If a computer account
becomes untrusted, you can either leave and rejoin the domain or reestablish the trust
with the Netdom tool.
■
Internet Explorer is one of the most important tools in Windows because it provides
users access to Web applications and the Internet. Therefore, it’s vital that you know
how to confi gure Internet Explorer and troubleshoot common problems. Historically,
many users have experienced problems with add-ons, which extend Internet Explorer’s
capabilities but also have the potential to behave unreliably or maliciously. Fortunately,
Internet Explorer gives administrators complete control over which add-ons can
be installed, as well as the capability to quickly start Internet Explorer without any
add-ons. To reduce security risks when using Internet Explorer, Protected Mode runs
Internet Explorer with minimal privileges. If a Web page, Internet Explorer, an add-on,
or any process launched from within Internet Explorer requires elevated privileges,
the elevation must be approved before Internet Explorer can take action. To provide
privacy and authentication, many Web sites use SSL certifi cates. Therefore, it’s vital
that you understand the causes of common certifi cate problems and how to fi x these
problems.
■
Encryption provides data protection even if an attacker bypasses operating system
security. Windows Vista includes two encryption technologies: EFS and BitLocker. EFS
encrypts individual fi les and folders, while BitLocker encrypts the entire system volume.
If a user loses their key, they will be unable to access encrypted fi les. Therefore, it is
important to maintain EFS data recovery agents and BitLocker recovery keys, as well
C04627093.indd 188C04627093.indd 188 1/28/2010 9:36:17 AM1/28/2010 9:36:17 AM
Case Scenarios CHAPTER 4 189
as data backups. To manage BitLocker from a command prompt, use the Manage-bde
tool. To repair BitLocker from a command prompt, use the Repair-bde tool.
Key Terms
Do you know what these key terms mean? You can check your answers by looking up the
terms in the glossary at the end of the book.
■
ActiveX
■
BitLocker Drive Encryption
■
Encrypting File System (EFS)
■
Mandatory Integrity Control (MIC)
■
Multifactor Authentication
■
Protected Mode
■
Protected Mode Compatibility Layer
■
Rootkit
Case Scenarios
In the following case scenarios, you apply what you’ve learned about subjects of this chapter.
You can fi nd answers to these questions in the “Answers” section at the end of this book.
Case Scenario 1: Recommend Data Protection Technologies
You are a desktop support technician at Wingtip Toys. Recently, Adina Hagege, your
organization’s CEO, stopped you in the hallway to ask a couple of quick questions.
Questions
Answer the following questions for your CEO:
1. “Can you give me a quick second opinion about something? I travel almost constantly,
and I keep the company fi nancials and all the plans for our new toys on my laptop. The
IT department says they have fi le permissions set up so that only I can view these fi les.
Is that good enough to protect me if someone steals my laptop?”
2. “Is there some way I can protect my data even if my laptop is stolen? What are my
options?”
3. “Sometimes I share fi les with people across the network. Which of those technologies
will allow me to share fi les this way?”
C04627093.indd 189C04627093.indd 189 1/28/2010 9:36:17 AM1/28/2010 9:36:17 AM
190 CHAPTER 4 Security
Case Scenario 2: Unwanted Internet Explorer Add-On
You are a systems administrator for Humongous Insurance. Recently, one of your brokers
called the support desk because he was experiencing odd problems when using Internet
Explorer. Specifi cally, his home page had changed and the pop-up blocker no longer seemed
to be working.
Your manager is concerned that this will be more than an isolated incident and asks you
to interview key people and then come to his offi ce to make recommendations about how to
deal with this type of problem in the future.
Interviews
Following is a list of company personnel interviewed and their statements:
■
David Barber, Broker “I had installed an add-on because it said it would make
browsing the Web faster. I didn’t notice any improvement. After that, though, my
Internet Explorer home page changed and I began to get a lot of advertisements
popping up on my screen.”
■
Julian Price, Internet Development Project Manager “We recently converted all of
our internal software to the ASP.NET Web application platform. To do some of the
more complicated stuff, we install custom client-side add-ons in Internet Explorer.
So, whatever you do, don’t block all add-ons. We use add-ons internally, and we update
them regularly, so we really need users to be able to install the add-ons automatically.”
Questions
Answer the following questions for your manager:
1. If this comes up again, what’s the best way to remove the unwanted add-on?
2. Are there any features enabled by default in Windows 7 that protect users from
unwanted add-ons? What are they?
3. What’s the best way to prevent unwanted add-ons in the future?
Suggested Practices
To help you master the exam objectives presented in this chapter, complete the following
tasks.
Identify and Resolve Logon Issues
For this task, you should complete both practices.
■
Practice 1 Visit
and browse the Security, Privacy, And User Accounts newsgroup. Read the posts to
determine how administrators solved authentication problems.
C04627093.indd 190C04627093.indd 190 1/28/2010 9:36:17 AM1/28/2010 9:36:17 AM
Suggested Practices CHAPTER 4 191
■
Practice 2 On your production computer, enable success and failure auditing for the
Audit Logon Events policy. Leave this enabled for several days, and then analyze the
audit events in the Security event log to identify the types of events that are added
during normal computer usage.
Identify and Resolve Encryption Issues
For this task, you should complete Practice 1. If you want a better understanding of BitLocker,
complete Practices 2 and 3.
■
Practice 1 In a domain environment, use EFS to encrypt a fi le. Then, copy the domain
DRA key to that computer and use a different account to recover the encrypted fi le.
■
Practice 2 Enable BitLocker Drive Encryption on a computer running Windows 7.
Then, search the Internet for a free .ISO fi le for a bootable operating system and
burn the .ISO fi le to a CD or DVD. Restart the computer from the bootable media and
attempt to view fi les on the BitLocker-protected volume.
■
Practice 3 Enable BitLocker Drive Encryption on a computer running Windows 7.
Then, connect the hard disk to a different computer and attempt to load Windows.
When prompted, provide the recovery key.
Identify and Resolve Windows Internet Explorer
Security Issues
For this task, you should complete at least Practices 1 through 3. If you want in-depth
knowledge of how Internet Explorer handles both legitimate and malicious changes,
complete Practice 4 as well.
■
Practice 1 On your day-to-day computer, open Internet Explorer and view the
Manage Add-Ons dialog box. Examine the different add-ons that are already installed.
■
Practice 2 Start Internet Explorer with add-ons disabled. Browse to your favorite Web
sites and notice any differences caused by the missing add-ons.
■
Practice 3 On your day-to-day computer, use Explorer to browse \%userprofi le%\
AppData\Local\Microsoft\Windows\Temporary Internet Files\Virtualized\ and its
subfolders. The folder is hidden, so you will need to type the full path. Make note of
the applications that the Internet Explorer compatibility layer has virtualized and the
types of fi les that were virtualized.
■
Practice 4 Perform a fresh installation of Windows 7 on a computer used only
for testing. Browse to your favorite Web sites and notice how the Information
Bar, Protected Mode, and UAC work together to protect the user from potentially
unwanted add-ons. Next, use Internet Explorer to browse to potentially dangerous
Web sites that might try to install malicious software and view how Internet Explorer
responds (Hint: search for combinations of words such as “crack,” “hack,” “warez,”
and “serials”).
C04627093.indd 191C04627093.indd 191 1/28/2010 9:36:17 AM1/28/2010 9:36:17 AM
192 CHAPTER 4 Security
Take a Practice Test
The practice tests on this book’s companion CD offer many options. For example, you can test
yourself on just one exam objective, or you can test yourself on all the 70-685 certifi cation
exam content. You can set up the test so that it closely simulates the experience of taking
a certifi cation exam, or you can set it up in study mode so that you can look at the correct
answers and explanations after you answer each question.
MORE INFO PRACTICE TESTS
For details about all the practice test options available, see the section entitled “How to
Use the Practice Tests,” in the Introduction to this book.
M
O
RE INF
O
PRACTICE TEST
S
F
or details about all the practice test options available, see the section entitled “How to
U
se the Pract
i
ce Tests,”
i
n the Introduct
i
on to th
i
s book
.
C04627093.indd 192C04627093.indd 192 1/28/2010 9:36:17 AM1/28/2010 9:36:17 AM
CHAPTER 5 193
CHAPTER 5
Protecting Client Systems
A
ny computer that is connected to the Internet faces a barrage of network-based threats
in the form of malicious software attacks. These threats are growing in number and
sophistication every year, and as an enterprise support technician, you are responsible for
protecting client systems from these evolving dangers.
As part of your company’s broad defense strategy, you need to know how to confi gure
in Windows 7 the features whose purpose is to protect your clients. Specifi cally, you need
to know how to minimize the risk of damage from malware by implementing User Account
Control (UAC) at an appropriate level, by using Windows Defender, and by removing
unwanted software if it is discovered.
Exam objective in this chapter:
■
Identify and resolve issues due to malicious software.
Lesson in this chapter:
■
Lesson 1: Resolving Malware Issues 195
Before You Begin
To perform the exercises in this chapter, you need:
■
A domain controller running Windows Server 2008 R2
■
A client computer running Windows 7 that is a member of the same domain
REAL WORLD
J.C. Mackin
I
often hear people repeating a number of misconceptions about viruses and other
malware, and I’m convinced that these misconceptions have lulled users and
administrators into a false sense of security about the dangers their systems face.
Often these misconceptions are based on an accurate understanding of what was
the state of malware threats about 10 years ago. But the nature of these threats has
evolved signifi cantly, and it continues to evolve. So in the interest of learning how best
to defend ourselves today, let’s deal with the most common of these misconceptions.
REAL WORLD
J
.C. Mack
in
I
often hear people repeatin
g
a number of misconceptions about viruses and other
malware, and I’m conv
i
nced that these m
i
sconce
p
t
i
ons have lulled users and
a
dministrators into a false sense of securit
y
about the dan
g
ers their s
y
stems face.
O
f
ten these misconceptions are based on an accurate understanding o
f
what
was
the state o
f
malware threats about 10
y
ears a
g
o. But the nature o
f
these threats has
evolved signifi cantly, and it continues to evolve. So in the interest of learning how best
to de
f
end ourselves toda
y
, let’s deal with the most common o
f
these misconceptions.
C05627093.indd 193C05627093.indd 193 2/18/2010 4:22:39 PM2/18/2010 4:22:39 PM
194 CHAPTER 5 Protecting Client Systems
■
“As long as you keep Windows updated, you’re fi ne.”
It’s certainly true that you need to keep Microsoft Windows updated, but
you need to keep all your software updated. Security holes can be found
in applications as easily as they can be found in operating systems, and the
security holes in many of these can be exploited to completely compromise
a system. Microsoft Offi ce applications in particular are often targeted.
Remember that your systems are not safe from exploits if you are keeping only
Windows updated.
■
“As long as you aren’t tricked into opening anything, you’re fi ne.”
A long time ago, it was true that malicious software needed user assistance
to be installed on a system. Now, the situation is completely different.
Merely browsing to the wrong site, for example, can lead to a secret drive-
by download of malicious software. Even worse, some of the most harmful
attacks come from Internet worms, which need no user involvement
whatsoever. It is still essential for users to avoid opening unknown software,
but this preventative measure alone is not enough to keep your systems safe
from infection.
■
“As long as you keep your antivirus software up to date and scan daily, you’re fi ne.”
This might be the most common of all misconceptions regarding malware.
While it’s true that a robust anti-malware solution is one of the essential pillars
of a sound client protection strategy, the sad truth is that such software has its
limitations. Malware developers who are serious about exploiting computers
naturally design their programs in a way that avoids detection by antivirus
solutions. For example, a rootkit is a relatively new type of malware that—so
far—few anti-malware applications have had good success in detecting. But
even more familiar types of malware can be designed to evade detection. As
a result, when your antivirus software fails to detect malware on a system, you
should know that the system still could very easily be infected.
These three misconceptions all have a common thread running through them: the
belief that you can protect your systems by adopting a small number of well-known
defenses against malware. In truth, adequately protecting client systems requires
your company to adopt a wide array of strategies that include effective software
updates, antivirus software, user education, fi rewalls, and most important of all,
effective management of these and other security features.
■
“As long as you keep Windows updated, you’re
fi
ne.”
It’s certainly true that you need to keep Microsoft Windows updated, but
y
ou nee
d
to
k
eep
all
your software updated. Security holes can be found
l
in applications as easily as they can be found in operating systems, and the
s
ecurity holes in many o
f
these can be exploited to completely compromise
a
s
y
stem. Microsoft Offi ce applications in particular are often tar
g
eted.
Remember that your systems are not sa
f
e
f
rom exploits i
f
you are keeping only
W
indows updated
.
■
“As long as you aren’t tricked into opening anything, you’re
fi
ne.”
A
long time ago, it was true that malicious software needed user assistance
to be installed on a system. Now, the situation is completely di
ff
erent.
Merel
y
browsin
g
to the wron
g
site, for example, can lead to a secret drive-
by download o
f
malicious so
f
tware. Even worse, some o
f
the most harm
f
ul
a
ttacks come from Internet worms
,
which need no user involvement
w
hatsoever. It is still essential
f
or users to avoid opening unknown so
f
tware,
but this preventative measure alone is not enou
g
h to keep
y
our s
y
stems sa
f
e
from infection.
■
“As lon
g
as
y
ou keep
y
our antivirus so
f
tware up to date and scan dail
y
,
y
ou’re
fi
ne.
”
This might be the most common o
f
all misconceptions regarding malware.
W
hile it’s true that a robust anti-malware solution is one of the essential pillars
o
f
a sound client protection strategy, the sad truth is that such so
f
tware has its
limitations. Malware developers who are serious about exploitin
g
computers
naturally des
i
gn the
i
r programs
i
n a way that avo
i
ds detect
i
on by ant
i
v
i
rus
s
olutions. For example, a rootkit is a relativel
y
new t
y
pe o
f
malware that—so
far—few anti-malware applications have had good success in detecting. But
even more
f
amiliar types o
f
malware can be designed to evade detection. As
a
result, when
y
our antivirus software fails to detect malware on a s
y
stem,
y
ou
s
hould know that the system still could very easily be in
f
ected
.
These three misconceptions all have a common thread runnin
g
throu
g
h them: the
b
elie
f
that you can protect your systems by adopting a small number o
f
well-known
de
f
enses a
g
ainst malware. In truth, adequatel
y
protectin
g
client s
y
stems requires
your company to adopt a wide array of strategies that include effective software
up
dates, antivirus so
f
tware, user education,
fi
rewalls, and most im
p
ortant o
f
all,
effective management of these and other security features.
C05627093.indd 194C05627093.indd 194 2/18/2010 4:22:42 PM2/18/2010 4:22:42 PM
Lesson 1: Resolving Malware Issues CHAPTER 5 195
Lesson 1: Resolving Malware Issues
The number of new malware applications being released today actually exceeds that of new
legitimate applications. As an enterprise support technician, you need to adequately protect
your clients from these mounting threats and know how to handle malware infections once
they are discovered.
Windows 7 includes two features that assist you in this fi ght against malware. User Account
Control (UAC) helps prevent programs from secretly altering protected areas of the operating
system, and Windows Defender scans your system for spyware and offers to remove any
unwanted software that is detected.
Though you will need to use additional applications such as Microsoft Forefront and
a managed anti-malware solution to protect your network, understanding how to use and
confi gure these built-in features of Windows 7 represents part of the essential skill set you
need on your job.
After this lesson, you will be able to:
■
Confi gure User Account Control (UAC) to display notifi cations in a way that
suits the needs of your organization.
■
Confi gure Windows Defender settings.
■
Detect and remove some malware manually in case your anti-malware
applications fail.
Estimated lesson time: 30 minutes
Understanding Malware
Malware is an umbrella term for many different types of unwanted software. It’s important
to understand the nature of these different threats, but it’s also important to recognize that
many malware applications blend features from more than one of these malware types.
The following list discusses the most common types of malware:
■
Virus A virus is a self-replicating program that can install itself on a target computer.
Viruses do not propagate over networks automatically; they need to be spread
through e-mail or another means. Once installed, viruses usually alter, damage,
or compromise a system in some way.
■
Worm A worm is a self-replicating program that can spread automatically over
a network without any help from a user or a program such as an e-mail client or Web
browser. Worms vary greatly in the potential damage they can cause. Some worms
simply replicate and do little other than consume network bandwidth. Others can be
used to compromise a system completely.
Af
ter this lesson,
y
ou will be able to:
■
Confi
g
ure User Account Control (UAC) to displa
y
notifi cations in a wa
y
that
suits the needs of
y
our or
g
anization
.
■
Confi
g
ure Windows Defender settin
g
s.
■
Detect an
d
remove some ma
l
ware manua
ll
y in case your anti-ma
l
ware
applications fail
.
E
st
i
mated lesson t
i
me: 30 m
i
nute
s
C05627093.indd 195C05627093.indd 195 2/18/2010 4:22:42 PM2/18/2010 4:22:42 PM
196 CHAPTER 5 Protecting Client Systems
■
Trojan horse A Trojan horse is a program that is presented to users as a desirable
application but that is intentionally written to harm a system. Unlike viruses and
worms, Trojan horses do not copy themselves automatically or install themselves
automatically; they rely on users to install them.
■
Spyware Spyware is a type of privacy-invasive software that secretly records
information about user behavior, often for the purposes of market research. Typically
spyware is injected into a system when a user installs a free tool or visits a Web site
with browser security settings set to a low level. The most common function of such
spyware is to record the Web sites that a user visits. More rarely, some spyware, such
as keyloggers (which record every keystroke), can be installed deliberately by a third
party and be used to gather personal information. The biggest threat posed by most
spyware is system performance degradation. All types of spyware reduce system
performance by hijacking the resources of the computer for their own purposes. Unlike
viruses and worms, spyware does not self-replicate.
■
Adware Adware is similar to spyware and is often installed alongside it. The purpose
of adware is to display unsolicited advertisements to the user in the form of pop-up
windows or Web browser alterations. Adware can also download and install spyware.
NOTE SPYWARE AND ADWARE
The term spyware is often used as a general term for all unwanted software that runs in
the background and that gathers market research information, displays advertisements,
or alters the behavior of applications such as Web browsers. Microsoft uses the phrase
“spyware and potentially unwanted software” to refer to the type of software that is
unwanted but is not unambiguously harmful.
■
Backdoor A backdoor is a program that gives a remote, unauthorized party complete
control over a system by bypassing the normal authentication mechanism of that
system. Backdoors have been known to be installed by worms that exploit a weakness
in a well-known program. To protect your system against backdoors, it is essential to
keep your applications (not just your operating system) updated.
■
Rootkit A rootkit is a persistent type of malware that injects itself beneath the
application level and that as a result, tends to be much harder to detect from within
the operating system. A rootkit can alter the core functionality of the operating
system, or it can install itself as its own operating system invisible to the user and to
most anti-malware software. Other rootkits can operate at the fi rmware (BIOS) level.
Typically, a rootkit is used to provide a backdoor to a system.
Although malware has been proliferating in type and number, the defenses against these
threats have improved as well. When UAC is enabled in Windows 7, for example, a malware
application cannot install itself easily without the user's knowledge. This next section provides an
overview of UAC, which was introduced in Windows Vista and has been refi ned in Windows 7.
N
OT
E
SPYWARE AND ADWARE
E
The term
spy
w
are
is often used as a
g
eneral term for all unwanted software that runs in
the background and that gathers market research in
f
ormation, displays advertisements,
or alters the behavior of applications such as Web browsers. Microsoft uses the phrase
“spyware and potentially unwanted so
f
tware” to re
f
er to the type o
f
so
f
tware that is
unwanted but is not unambi
g
uousl
y
harmful.
C05627093.indd 196C05627093.indd 196 2/18/2010 4:22:42 PM2/18/2010 4:22:42 PM
Lesson 1: Resolving Malware Issues CHAPTER 5 197
Understanding UAC
UAC is a set of security features designed to minimize the danger of running Windows as an
administrator and to maximize the convenience of running Windows as a standard user. In
versions of Windows before Windows Vista, the risks of logging on as an administrator were
signifi cant, yet the practice of doing so was widespread. Meanwhile, running as a standard
user was generally safe, but the inconveniences prevented many from adopting the practice.
In versions of Windows before Windows Vista, malware could use the credentials of
a locally logged-on administrator to damage a system. For example, if you were logged
on to Windows XP as an administrator and unknowingly downloaded a Trojan horse from
a network source, this malware could use your administrative privileges to reformat your hard
disk drive, delete all your fi les, or create a hidden administrator account on the local system.
The main reason that users in previous versions of Windows often ran as administrators
despite these dangers is that many common tasks, such as installing an application or adding
a printer, required a user to have administrator privileges on the local machine. Because
in previous versions of Windows there was no easy way to log on as a standard user and
“elevate” to an administrator only when necessary, organizations whose users occasionally
needed administrator privileges simply tended to confi gure their users as administrators on
their local machines.
NOTE WHAT IS ELEVATION?
The term elevation is used when a user adopts administrator privileges to perform a task.
How Does UAC Address the Problem of Administrator Privileges?
UAC is the result of a new Windows security design in which both standard users and
administrators use the limited privileges of a standard user to perform most actions. When
users are logged on, UAC prompts them in different ways to confi rm actions that make
important changes to the computer. If an administrator is logged on, the action is performed
only if he or she confi rms it. If a standard user is logged on, the action is performed only if
he or she can provide administrator credentials. In both cases, the elevation to administrator-
level privileges is temporary and used to perform only the action required. Through this new
system, UAC inhibits malware from secretly using a logged-on administrator’s privileges.
Understanding UAC Notifi cations for Administrators
By default, UAC is confi gured to notify administrators only when programs request elevation.
For example, administrators see UAC notifi cation when they attempt to run a program
(such as Cmd.exe) at elevated administrator privileges, as shown in Figure 5-1. According to
this default setting, administrators in Windows 7 do not see a UAC notifi cation when they
adjust Windows settings that require administrator privileges.
N
OTE
W
HAT I
S
ELEVATI
O
N?
The term
e
levation is used when a user adopts administrator privileges to perform a task
.
C05627093.indd 197C05627093.indd 197 2/18/2010 4:22:42 PM2/18/2010 4:22:42 PM
198 CHAPTER 5 Protecting Client Systems
FIGURE 5-1 Opening an elevated command prompt
NOTE CHANGES IN WINDOWS 7 UAC BEHAVIOR
For administrators, the default behavior of UAC in Windows 7 has changed signifi cantly
from that in Windows Vista and Windows Server 2008. In those operating systems, UAC
generated a prompt by default whenever any type of elevation was requested, including
when an administrator attempted to change Windows settings. Administrators see UAC
prompts less frequently in Windows 7.
The UAC notifi cation that normally appears for administrators is called a consent prompt
and is shown in Figure 5-2. Note that by default, the entire screen darkens when the
notifi cation appears and freezes until the user responds to the prompt. This feature is called
the Secure Desktop and can be disabled.
NOTE EDUCATE USERS ABOUT UAC PROMPTS!
The point of UAC notifi cations is to alert users when malware might be harming your
computer. If malware were to request elevation for a particular purpose, it too would
generate a notifi cation such as the one shown in Figures 5-2 or 5-3. Consequently,
an essential factor in the ability of UAC to thwart malware is appropriate user response. You
need to educate users—and gently remind your fellow administrators—that they should
click No or Cancel whenever they see a UAC notifi cation message that they did not initiate.
N
O
T
E
C
HAN
G
E
S
IN WIND
O
W
S
7
U
A
C
BEHAVI
O
R
F
or administrators, the de
f
ault behavior o
f
UAC in Windows 7 has changed signi
fi
cantly
f
rom that in Windows Vista and Windows Server 2008. In those operatin
g
s
y
stems, UAC
g
enerated a prompt by de
f
ault whenever any type o
f
elevation was requested, including
when an administrator attempted to chan
g
e Windows settin
g
s. Administrators see UAC
p
rompts less frequently in Windows 7.
NOT
E
EDUCATE USERS ABOUT UAC PROMPTS!
E
T
he point of UAC notifi cations is to alert users when malware might be harming your
computer. I
f
malware were to request elevation
f
or a particular purpose, it too would
generate a notifi cation such as the one shown in Figures 5-2 or 5-3. Consequently,
an essential
f
actor in the abilit
y
o
f
UAC to thwart malware is appropriate user response. You
n
eed to educate users—and
g
entl
y
remind
y
our fellow administrators—that the
y
should
c
lick No or Cancel whenever they see a UAC noti
fi
cation message that they did not initiate
.
C05627093.indd 198C05627093.indd 198 2/18/2010 4:22:43 PM2/18/2010 4:22:43 PM
Lesson 1: Resolving Malware Issues CHAPTER 5 199
FIGURE 5-2 By default, UAC displays a consent prompt on a Secure Desktop to administrators who
request to run a program with elevation.
Understanding UAC Notifi cations for Standard Users
The UAC notifi cations shown to standard users are distinct from those shown to
administrators in that the notifi cations for standard users prompt these users to provide
administrator credentials. As with administrators, standard users by default receive UAC
notifi cations when they attempt to run a program such as a command prompt at elevated
privileges, or when a program independently requests elevation. In addition, standard users
by default receive UAC notifi cations when they attempt to make changes on the system that
require administrator privileges. For example, if standard users open the System page in
Control Panel and click Remote Settings, they see the credential prompt shown in Figure 5-3.
NOTE THE DEFAULT BEHAVIOR OF UAC IS THE SAME FOR STANDARD
USERS IN WINDOWS 7
Although UAC in Windows 7 offers many notifi cation levels that did not exist in Windows
Vista or Windows Server 2008, the default behavior for standard users is the same.
Whenever standard users attempt to make a change that requires administrator privileges,
a credential prompt appears on a Secure Desktop.
NO
T
E
THE DEFAULT BEHAVIOR OF UAC IS THE SAME FOR STANDARD
E
U
SERS IN WINDOWS 7
Althou
g
h UAC in Windows 7 offers man
y
notifi cation levels that did not exist in Windows
Vista or Windows Server 2008, the de
f
ault behavior
f
or standard users is the same.
Whenever standard users attempt to make a chan
g
e that requires administrator privile
g
es,
a
credent
i
al
p
rom
p
t a
pp
ears on a Secure Deskto
p
.
C05627093.indd 199C05627093.indd 199 2/18/2010 4:22:43 PM2/18/2010 4:22:43 PM
200 CHAPTER 5 Protecting Client Systems
FIGURE 5-3 By default, UAC displays a credential prompt on a Secure Desktop to standard users who
request elevation.
Confi guring UAC in Control Panel
In a domain environment, it is recommended that UAC be controlled centrally by Group
Policy instead of by confi guration settings on each local machine. However, in workgroup
environments or in domain environments in which Group Policy allows local UAC
confi guration, you can confi gure UAC through Control Panel.
To confi gure UAC in Control Panel, perform the following steps:
1. In Control Panel, click System and Security.
2. Under Action Center, click Change User Account Control Settings, as shown in Figure 5-4.
FIGURE 5-4 You can access UAC settings through the Action Center.
C05627093.indd 200C05627093.indd 200 2/18/2010 4:22:43 PM2/18/2010 4:22:43 PM
Lesson 1: Resolving Malware Issues CHAPTER 5 201
This step opens the User Account Settings window, one version of which is shown in
Figure 5-5. Note that the set of options that appears is different for administrators and
standard users, and that each user type has a different default setting.
FIGURE 5-5 UAC allows you to choose among four notification levels.
3. Choose one of the following notifi cation levels:
■
Always Notify This level is the default for standard users, and it confi gures UAC
to act as it does in Windows Vista. At this level, users are notifi ed whenever any
changes that require administrator privileges are attempted on the system.
■
Notify Me Only When Programs Try To Make Changes To My Computer This
level is the default for administrators and is not available for standard users.
At this level, administrators are not notifi ed when they make changes that require
administrator privileges. However, users are notifi ed through a consent prompt
when a program requests elevation.
■
Always Notify Me (And Do Not Dim My Desktop) This level is not available for
administrators. It is similar to the default setting for standard users, except that at
this particular level, the Secure Desktop is never displayed. Disabling the Secure
Desktop tends to reduce protection against malware, but it improves the user
experience. This setting might be suitable for standard users who very frequently
need to request elevation.
C05627093.indd 201C05627093.indd 201 2/18/2010 4:22:44 PM2/18/2010 4:22:44 PM
202 CHAPTER 5 Protecting Client Systems
■
Notify Me Only When Programs Try To Make Changes To My Computer
(Do Not Dim The Desktop)
This level is available for both standard users
and administrators. At this level, the behavior is the same as with the default
administrator level (“Notify me only when programs try to make changes to my
computer”), but with this option the Secure Desktop is not displayed.
■
Never Notify This level disables notifi cations in UAC. Users are not notifi ed of
any changes made to Windows settings or when software is installed. This option is
appropriate only when you need to use programs that are incompatible with UAC.
4. Click OK.
Confi guring UAC Through Group Policy
You can confi gure UAC through Local Security Policy or Group Policy settings. To fi nd
UAC-related policy settings in a GPO, navigate to the following node:
Computer Confi guration\Policies\Windows Settings\Security Settings\Local Policies
\Security Options
This location is shown in Figure 5-6.
FIGURE 5-6 You can find UAC settings in Security Options in a GPO or in Local Security Policy
The following 10 UAC-related policy settings are available. The next section describes each
of these confi gurable settings.
C05627093.indd 202C05627093.indd 202 2/18/2010 4:22:44 PM2/18/2010 4:22:44 PM
Lesson 1: Resolving Malware Issues CHAPTER 5 203
■
User Account Control: Admin Approval Mode For The Built-in Administrator
Account
This policy applies only to the built-in Administrator account, and not to
other accounts that are members of the local Administrators group. When you enable
this policy setting, the built-in Administrator account sees UAC notifi cations just as other
administrative accounts do. When you disable the setting, the built-in Administrator
account behaves just like it does in Windows XP, and all processes run using
Administrator privileges. This setting is disabled in Local Security Policy by default.
■
User Account Control: Allow UIAccess Applications to Prompt For Elevation Without
Using The Secure Desktop
This setting controls whether user Interface Accessibility
(UIAccess) programs can disable the Secure Desktop automatically. When enabled,
UIAccess applications (such as Remote Assistance) automatically disable the Secure
Desktop for elevation prompts. Disabling the Secure Desktop causes elevation prompts to
appear on the standard desktop. By default, this setting is disabled in Local Security Policy.
■
User Account Control: Behavior Of The Elevation Prompt For Administrators In
Admin Approval Mode
This policy setting controls the behavior of the elevation
prompt for administrators. Six options are available:
••
Elevate Without Prompting With this option, administrators never see elevation
prompts.
••
Prompt For Credentials On The Secure Desktop When this option is chosen,
administrators see credential prompts on a Secure Desktop when elevation is
requested.
••
Prompt For Consent On The Secure Desktop With this option, administrators
see a consent prompt on a Secure Desktop when elevation is requested.
••
Prompt For Credentials When this option is selected, administrators see
a credential prompt on a normal desktop when elevation is requested.
••
Prompt For Consent When this option is selected, administrators see a consent
prompt on a normal desktop when elevation is requested.
••
Prompt For Consent For Non-Windows Binaries This option is the default
setting in Local Security Policy. It causes a consent prompt to appear any time
an application requests elevation.
■
User Account Control: Behavior Of The Elevation Prompt For Standard Users This
policy setting controls the behavior of the elevation prompt for standard users. Three
options are available:
••
Automatically Deny Elevation Requests When this option is enforced, standard
users are not able to perform tasks that require elevation.
••
Prompt For Credentials On The Secure Desktop With this option (the default
setting in Local Security Policy), standards users see a credential prompt on the
Secure Desktop when elevation is requested.
••
Prompt For Credentials When this option is chosen, standard users see
a credential prompt on the normal desktop whenever elevation is requested.
C05627093.indd 203C05627093.indd 203 2/18/2010 4:22:44 PM2/18/2010 4:22:44 PM
204 CHAPTER 5 Protecting Client Systems
■
User Account Control: Detect Application Installations And Prompt For
Elevation
When enabled, this policy setting confi gures UAC to prompt for
administrative credentials when the user attempts to install an application that
makes changes to protected aspects of the system. When disabled, the prompt won’t
appear. Domain environments that use delegated installation technologies such as
Group Policy Software Install (GPSI) or Microsoft Systems Management Server (SMS)
can disable this feature safely because installation processes can escalate privileges
automatically without user intervention. By default, this setting is enabled in Local
Security Policy.
■
User Account Control: Only Elevate Executables That Are Signed And
Validated
When this policy setting is enabled, Windows 7 refuses to run any
executable that isn’t signed with a trusted certifi cate, such as a certifi cate generated
by an internal Public Key Infrastructure (PKI). When disabled, this policy setting allows
users to run any executable, potentially including malware. If your environment
requires all applications to be signed and validated with a trusted certifi cate, including
internally developed applications, you can enable this policy to increase security
greatly in your organization. This setting is disabled in Local Security Policy by default.
■
User Account Control: Only Elevate UIAccess Applications That Are Installed In
Secure Locations
When enabled, this policy setting causes Windows 7 to grant
user interface access only to those applications that are started from Program Files
or subfolders, from Program Files (x86) or subfolders, or from \Windows\System32\.
When disabled, the policy setting grants user interface access to applications
regardless of where they are started in the fi le structure. This policy setting is enabled
by default in Local Security Policy.
■
User Account Control: Run All Administrators In Admin Approval Mode This
policy setting, enabled by default in Local Security Policy, causes all accounts with
administrator privileges except for the local Administrator account to see consent
prompts when elevation is requested. If you disable this setting, administrators never
see consent prompts and the Security Center displays a warning message.
■
User Account Control: Switch To The Secure Desktop When Prompting For
Elevation
The Secure Desktop is a feature that darkens the screen and freezes
all activity except for the UAC prompt. It reduces the possibility that malware can
function, but some users might fi nd that the feature slows down their work too much.
When enabled, this policy setting causes the Secure Desktop to appear with a UAC
prompt. When disabled, this policy setting allows UAC prompts to appear on a normal
desktop. This policy setting is enabled by default in Local Security Policy.
■
User Account Control: Virtualize File And Registry Write Failures To Per-User
Locations
This policy setting, enabled by default in Local Security Policy, improves
compatibility with applications not developed for UAC by redirecting requests for
protected resources. When disabled, this policy setting allows applications not
developed for UAC to fail.
C05627093.indd 204C05627093.indd 204 2/18/2010 4:22:44 PM2/18/2010 4:22:44 PM