SketchUp 7.1 for Architectural Visualization Beginner''''s Guide phần 1 pot
Bạn đang xem bản rút gọn của tài liệu. Xem và tải ngay bản đầy đủ của tài liệu tại đây (1.17 MB, 41 trang )
SketchUp 7.1 for Architectural
Visualization
Beginner's Guide
Create stunning photo-realisc and arsc visuals of your
SketchUp models
Robin de Jongh
BIRMINGHAM - MUMBAI
SketchUp 7.1 for Architectural Visualization
Beginner's Guide
Copyright © 2010 Packt Publishing
All rights reserved. No part of this book may be reproduced, stored in a retrieval system,
or transmied in any form or by any means, without the prior wrien permission of the
publisher, except in the case of brief quotaons embedded in crical arcles or reviews.
Every eort has been made in the preparaon of this book to ensure the accuracy of the
informaon presented. However, the informaon contained in this book is sold without
warranty, either express or implied. Neither the author, nor Packt Publishing, and its dealers
and distributors will be held liable for any damages caused or alleged to be caused directly or
indirectly by this book.
Packt Publishing has endeavored to provide trademark informaon about all of the
companies and products menoned in this book by the appropriate use of capitals. However,
Packt Publishing cannot guarantee the accuracy of this informaon.
First published: April 2010
Producon Reference: 1210410
Published by Packt Publishing Ltd.
32 Lincoln Road
Olton
Birmingham, B27 6PA, UK.
ISBN 978-1-847199-46-1
www.packtpub.com
Cover Image by Robin de Jongh
Credits
Author
Robin de Jongh
Reviewers
Thomas Bleicher
Colin Holgate
Acquision Editor
David Barnes
Development Editor
Rakesh Shejwal
Technical Editor
Tariq Rakhange
Indexer
Hemangini Bari
Editorial Team Leader
Mithun Sehgal
Project Team Leader
Lata Basantani
Project Coordinator
Poorvi Nair
Proofreader
Aaron Nash
Graphics
Geetanjali Sawant
Producon Coordinator
Adline Swetha Jesuthas
Cover Work
Adline Swetha Jesuthas
Foreword
Unwingly about four years ago I woke up to be an Internet celebrity. I discovered that an idea
I had previously le up for review on a SketchUp Gallery forum had grown to be the largest
thread on the site. It was about a non-photo real visualizaon technique -people were actually
calling it in my honor "the Dennis Method", and now I was receiving requests to give speeches
and teach seminars. The technique lives on to be included in this book along with the other
gems of visualizaon wisdom meculously collected for your reading pleasure.
This is the rst book ever on SketchUp that goes beyond the basic modeling exercises that
you can typically nd in the online video tutorials. It contains a kind of instant informaon
that anyone using SketchUp needs to deliver a knock out visual punch.
As a registered architect I oen rely on the power of SketchUp generated imagery to help a
client to become comfortable with a soluon that I am proposing. "Seeing is believing", says
the proverb, well done visualizaon helps people to believe in the possibility of the design.
Personal proof of this for me came recently when I had to sell an idea of an underground
shopping mall to provincial Chinese ocials. The prospect of having to educate them
for hours on paerns of pedestrian retail trac; means of vercal circulaon and the
importance of natural light, especially if you consider my less than perfect Mandarin,
was rather daunng. However, an eecve visualizaon did all the work for me and
secured the client.
This book shows you how to set up your work and dress it up for a kill in such a way that it
jumps o your screen, grabs your audience by the guts and never lets them go.
The newest gems of SketchUp visualizaon wisdom are here for the taking. Read on, my
friends, and see your models shine like they never did before.
Dennis Nikolaev, AIA
About the Author
Robin de Jongh is a consulng engineer and designer who has successfully used SketchUp
for mul-million pound new developments, and a whole bunch of smaller projects, from
steel staircases to new product prototypes. He previously ran an architectural and product
visualizaon company. Robin holds a degree in Computer Aided Product Design and is a
professional engineer registered with the Instuon of Engineering Designers in the UK. He
writes a blog about SketchUp for design professionals at www.provelo.co.uk.
I would like to thank my wife for her unfailing support during the wring of
this book. As a divergent thinker I come up with scores of ideas daily, only
a few of which will come to fruion. This book is one of them and I thank
her and my commissioning editor for believing in the book proposal in the
rst place-and of course rejecng the bad ideas. My thanks go to all the
SketchUp newbies whose faces light up when the soware is demonstrated
to them; I hope my enthusiasm for bringing the power and simplicity of
SketchUp to you comes across in this book, and that it echoes your own.
Special thanks to all those whose images are included in this book; to my
diligent technical reviewers and editor whose suggesons were invaluable;
and to Poorvi for keeping me on schedule!
About the Reviewers
Thomas Bleicher graduated in Architecture at the TU Braunschweig in Germany. Since
then he has been working as Architect, Lighng Designer and IT consultant. As a student he
started using daylight simulaon soware and began to program computer soware. He is
working in London as a daylight designer and in his free me he writes plugins for SketchUp.
Colin Holgate has been programming for almost 30 years, with the last 22 years involving
mulmedia authoring tools, including HyperCard, Director, Flash, and Unity. He uses 3D
models in his work, in both touch screen kiosk applicaons, and in online and oine
simulaons, and has been a SketchUp Pro user since 2004. Using SketchUp models, he has
developed a virtual walkthrough of the future World Trade Center site.
For Debbie
Table of Contents
Preface 1
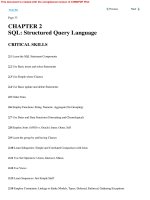
Chapter 1: Quick Start Tutorial 7
Can SketchUp really produce pro visuals? 8
Modeling the room 10
Time for acon – model the room in SketchUp 10
Composing the view 13
Time for acon – seng up the camera 13
Saving the camera view 14
Time for acon – seng up the sun 14
Add simple ceiling lights 15
Materials 16
Time for acon – mber ooring materials 17
Modeling the window 18
Photo images 21
Time for acon – seng up the scenery backdrop 22
Time for acon – hanging digital art 23
Exporng to the render applicaon 26
Modifying materials in Kerkythea quickly 27
Time for acon – Kerkythea materials 28
Diused light 29
Reecve oors 29
Rendering in Kerkythea 30
Summary 32
Chapter 2: How to Collect an Arsenal Rambo Would Be Proud of 33
If it's not free, it's not worth having 34
Don't be beholden to your soware 34
How is free soware so good? 34
Table of Contents
[ ii ]
Google soware 35
Google's component bonus packs 35
Time for acon – restoring the collecon to its righul place 35
Google Earth 37
Geo locaon toolbars 37
Why do I need Google Earth? 37
SketchUp Pro, LayOut, and Style Builder 38
Addional import formats with SketchUp Pro 38
Addional export formats with SketchUp Pro 38
SketchUp's hidden features 39
Time for acon – enabling the organic modeling tools 40
Your image processing studio with GIMP 41
Why do I need a professional level image processor? 41
The importance of layer masks 41
Grabbing a copy of GIMP 42
Become a movie making genius—almost 44
Why can't I just use raw AVI output from SketchUp? 44
VirtualDub 44
Time for acon – installing VirtualDub 45
MPEG Streamclip 46
Obtaining MPEG Streamclip 46
Unlimited upgrades: Ruby plugins 46
Time for acon – how to install Ruby scripts 47
What rendering soware? 48
Podium, IRender, and Twilight 48
High end rendering soware 48
Kerkythea: preparing to go photo real 49
Why are we using Kerkythea in this book? 49
Downloading Kerkythea 50
Time for acon – downloading and installing extras for Kerkythea 50
The marvel of SketchUp to Kerkythea 52
Installing the SU2KT plugin 53
Summary 54
Chapter 3: Composing the Scene 55
The importance of planning 55
How to begin with the end in mind 56
Think like a lm set designer 56
The four ways to set up an arch-viz scene 59
Using a site photo 59
What you need for a Photo-Match photo 60
Time for acon – seng up a scene with Photo-Match 62
Time for acon – 3D drawing in a 2D photo 64
Table of Contents
[ iii ]
Seng up a real world locaon and sun posion 66
Time for acon – real life sunlight 66
Checking North locaon 67
Seng up me and date for shadows 67
Starng with a CAD site plan 68
Time for acon – seng up a CAD site plan 68
Seng up a Google Earth plan 69
Time for acon 69
Time for acon – using a Google Earth / Maps screenshot 70
Sketch plan 71
Fleshing out your site plan 71
Time for acon – massing 71
Seng up the camera to challenge and impress 73
Time for acon – changing the eld of view 74
Think like a pigeon 74
Other useful perspecve tricks 76
Orthographic and parallel projecon 77
Two point perspecve 78
Smoke machine eects (fog) 78
Time for acon – obscure with Fog eects 79
Saving days of toil with ready-made scenery 80
Creang billboard scenery elements 80
Time for acon – how to create billboard elements 82
Framing the scene with entourage 84
The specity trap 84
The answer is rough place holders 85
Time for acon – inserng entourage place holders 85
Prinng a test view 86
Summary 87
Chapter 4: Modeling for Visualizaon 89
Time for acon – creang the basic building shape 90
Time for acon – swapping high/low resoluon versions 91
Carving out the detail 93
Three ways to model the building 93
Time for acon – modeling detail from CAD elevaons 94
Time for acon – modeling from a photograph 96
Low polygon modeling techniques 100
What's low poly? 101
So what's the big deal about low poly modeling? 102
Will I see it? 103
Can I replace it with 2D? 103
Can I reduce the number of segments in an arc or circle? 104
Table of Contents
[ iv ]
Time for acon – low poly curves and circles 104
Using components to increase producvity 108
How to benet most from using components 108
Using the Outliner for easy access 110
Why you should name components 111
3D Warehouse components: Problems to be aware of 111
Time for acon – purging 3D Warehouse components for your own use 112
Default material 112
Taking it further: Challenging modeling tasks explained 113
Time for acon – windows and doors 113
Roof 115
Time for acon – ashing in a ash 116
Time for acon – modeling ridge les 118
Copying the les 120
Curtain walls 124
Creang large glazed areas 124
Roads 125
Time for acon – realisc roads and pavements 125
Masonry features 126
Landscaping with sandbox: Watch your polygon count 126
Modeling for realisc highlights in interior scenes 126
What's the problem with sharp edges? 127
Time for acon – how to add corner detail to your model 128
Easy edges with free plugins 130
Summary 132
Chapter 5: Applying Textures and Materials for Photo-Real Rendering 133
How much realism do I need? 134
To texture or not to texture 134
The texturing process ow chart 135
Beginning with basic photo textures 136
Starng with Photo-Match textures 136
Textures from the photo modeling method 137
Using basic leable textures 137
Time for acon – applying Sketchup's own textures 138
Scaling textures 138
Colouring textures 139
Using Google Street View 140
Time for acon – travel the world for real textures! 140
Moving on from basic texturing 143
Applying whole photographs as textures 143
Where to nd texture photos 143
Table of Contents
[ v ]
Time for acon – set up a fake room 144
Using, nding, and creang leable textures 151
Manipulang textures 151
Time for acon – exact texture placement 152
Free Pins mode 153
Creang your own leable textures 154
Time for acon – correcng perspecve 154
Time for acon – ling method one 156
Time for acon – ling method two 158
Time for acon – imporng a texture into SketchUp 160
Saving a material to a library 161
Time for acon – saving the texture 162
Advanced image consideraons 163
Texture size 163
File type 164
Compression 164
The way forward with size and compression 164
Modifying textures in GIMP for added realism 166
Time for acon – telling SketchUp to link to an image editor 166
Time for acon – making unique textures for surfaces 167
Eding textures in GIMP 168
Time for acon – adding some muck and variaon 169
Time for acon – how to add extra elements to a texture 170
Know when to call it quits 175
Summary 175
Chapter 6: Entourage the SketchUp Way 177
The "noce hierarchy" 178
The rst aim: Don't be bad! 179
Be the markeng exec 179
Choosing entourage 180
At which stage do I introduce entourage? 180
What's my acquision strategy? 181
What about subscripon sites? 181
2D or not 2D, that is the queson 182
Furniture 183
Accessing the 3D Max furniture back-catalogue 183
List of websites 184
SketchUp furniture models 185
People cutouts 185
Time for acon – how to create 2D people components 187
Scaling the person 188
Table of Contents
[ vi ]
Tracing the outline 188
Applying the photo texture 189
Checking for halos 190
Time for acon – creang the Face-Me component 191
Switching between PR and NPR versions. 192
Vegetaon 193
Non photo real sketchy trees 193
Want an automac veggie maker? 194
Vehicles 194
Watch out for fussy models 194
2D vehicles 195
Summary 196
Chapter 7: Non Photo Real with SketchUp 197
SketchUp's nave output 198
Time for acon – eding SketchUp's built-in styles 199
Saving 2D images in SketchUp 201
Time for acon – 2D graphic export 201
The Dennis technique 202
Time for acon – seng up the Dennis technique in SketchUp 204
Color wash 204
Lines only 206
Lines and shadows 207
Exporng the scene tabs 208
Time for acon – seng up GIMP for the Dennis technique 210
Using layer masks in GIMP 213
Time for acon – using layer masks for the Dennis eect 213
Time for acon – using a sky image in GIMP 215
Time for acon – creang the vignee layer 217
Modifying the nal composion with new SketchUp output 218
Richard's sketchy pencil technique 221
Time for acon – seng up Pencil sketch technique 222
Time for acon – creang pencil shading in GIMP 226
Add some grunge: the Dirty Hands layer 227
Finishing touches 228
Summary 230
Chapter 8: Photo-Realisc Rendering 231
The learning feedback loop 232
A learning strategy despite long render mes 232
Photo or hyper, what's the dierence anyway? 232
Seng up for photo-real rendering 232
The SketchUp - Kerkythea rendering process diagram 233
Table of Contents
[ vii ]
Step 1: Checking integrity and the modify/test-render loop 235
Time for acon – the modify / test loop 236
Common import bugs and how to recfy them 238
Step 2: Inserng extra entourage 238
Time for acon – test rendering models in Kerkythea 239
Time for acon – manipulang entourage in Kerkythea 240
Step 3: Dening the lighng 244
Time for acon 244
To change the intensity/colour of the sky 246
To change strength of the sun 246
Step 4: Rening materials 247
Modifying SketchUp materials for render 249
Time for acon – adding specularity and reecons 249
Time for acon – controlling reecons in glass 251
Step 5: Tesng the producon render 252
Time for acon 252
Can I simplify materials to reduce render me? 254
Step 6: Producon render 254
Time for acon – sengs for a render using only sunlight 255
Saving the nal image 255
Step 7: Post producon renders 256
Time for acon – the Depth Render 257
Mask render 257
Time for acon 258
Arcially lit indoor scenes 258
Time for acon – creang spot-lights in SketchUp 259
Time for acon – switching o sun and sky lighng 260
Changing light parameters in SketchUp 261
Adding light-eming materials 261
Time for acon – radiant materials 262
The nal indoor render 264
Advanced materials techniques 265
Time for acon – applying Alpha transparency to face-me components 266
Creang bump map materials 269
Time for acon 269
Summary 272
Chapter 9: Important Composing and Aer Eects in GIMP 275
Part 1: Tweaks and lighng levels 276
Adjusng levels manually 278
Time for acon – the levels dialogue 278
Table of Contents
[ viii ]
Time for acon – adjusng light quanty 281
Correcng individual color channels 281
Removing unwanted image noise 282
Time for acon – nd a way of removing noise 283
Light bloom 286
Time for acon 286
Simulang depth of eld 289
Time for acon – depth of eld using a depth render 291
Lighng eects 294
Time for acon – adding light eects in GIMP 294
Using a vignee layer to nish the image 297
Time for acon – fade out the edges with a vignee 297
Part 2: Composing mulple images 300
Time for acon – using the Kerkythea mask render for windows 300
SketchUp window reecons without rendering 302
Time for acon 302
Using Paths to mask photos 304
Time for acon 306
Summary 309
Chapter 10: Walkthroughs and Flyovers 311
The same principles for slls and animaon 311
Rome wasn't built in a day 312
Making a start: Sketch it out 312
Time for acon – write out your inerary 312
Generang the story board 314
Dealing with detracons 314
Time for acon – the storyboard 314
Animang in SketchUp 316
Time for acon – a simple walkthrough 316
Animaon sengs 318
Time for acon – geng the ming right 319
Time for acon – adding individual ming to scenes 319
Creang ythroughs from paths 321
Time for acon – smooth transions 321
Fine tuning with camera controls 324
Let's put it together 325
Authoring video sequences 328
High resoluon animaon from SketchUp 330
Time for acon – animang with Kerkythea 330
Why save individual frames for animaons? 333
Table of Contents
[ ix ]
Composing in VirtualDUB 333
Time for acon 333
Compressing and preparing for web use 336
Time for acon – preparing an MP4 video with MPEG Streamclip 336
Creang the nal video composion 339
Summary 340
Chapter 11: Presenng Visuals in LayOut 341
Geng started with LayOut 342
Time for acon – customizing a page border 342
Displaying SketchUp models in LayOut 345
Time for acon – displaying a SketchUp 3D view 346
Mulple views of the same model 347
Time for acon – orthographic views in LayOut 348
Orientang a view using SketchUp Scenes 350
Time for acon – align the view using a face 351
Displaying SketchUp secons 353
Time for Acon – creang secons 353
Slideshows and presentaons 354
Time for acon – creang a presentaon 354
Adding further elements to enhance LayOut pages 355
Exporng and prinng 357
Time for acon – exporng images from LayOut 357
Exporng a PDF document from LayOut 359
Output for print 359
Controlling the line-weight 360
Summary 361
Appendix A: Choosing Rendering Soware 363
Am I outgrowing Kerkythea? 363
What should I look for in a renderer? 364
Interoperability with SketchUp 364
Global Illuminaon rendering quality 364
Training, support, help forums, and user-generated content 365
Rendering soware tables 365
Appendix B: Suggested Basic Toolbar Layout 371
Appendix C: Pop Quiz Answers 373
Image credits 376
Index 377
Preface
SketchUp 7.1 for Architectural Visualizaon: Beginner's Guide shows you how to master
SketchUp's unique tools to create architectural visuals using professional rendering and image
eding techniques in a clear and friendly way. You'll be able to get started immediately using
SketchUp (free version) and open-source rendering and image processing soware. The book
also shows you how to create watercolor and pencil style sketchy visuals. In no me you'll be
creang photo-realisc renders, animated y-overs, and walkthroughs to show o your designs
in their best light!. You will also create composites of real and rendered images, creang digital
and paper presentaons to wow clients. If you're impaent, you'll nd a "Quickstart" tutorial is
provided in the rst chapter to get you rendering a photo-realisc scene immediately. The rest
of the book builds on this knowledge by introducing you gradually to in-depth concepts, tricks,
and insights in an easy-to-follow format through quick tutorials.
Using easy step-by-step explanaons, this book opens the door to the world of architectural
visualizaon. With no prior visualizaon experience you will quickly get to grips with materials,
texturing, composion, photo-composing, lighng setup, rendering, and post-processing.
You'll also be able to take SketchUp's unique sketchy output and add the arsc touch to create
pencil and watercolor scenes. With this book you'll be able to get started immediately using
the free SketchUp download and open-source rendering soware.
What this book covers
Chapter 1, Quick Start Tutorial: This chapter is an immediate x if you're impaent to
get photo-realisc rendered SketchUp scenes. Straight away you will learn how to model
the gallery scene, x up lighng, add materials, add a photo background, and nally render
in Kerkythea.
Chapter 2, How to Collect an Aresenal Rambo Would Be Proud of: Did you know that by
downloading a few free plugins and other soware you can turn SketchUp into a free, fully
funconal 3D visualizaon and animaon suite similar to high end commercial soware?
Follow this chapter to obtain all the goodies.
Preface
[ 2 ]
Chapter 3, Composing the Scene: In this chapter you will learn how to take the hard work out
of modeling by seng up your scenes prior to starng modelling work. You will learn how to
start from CAD plans, site images, or Google Earth, and build the scene opmized for quick
rendering or animaon later.
Chapter 4, Modeling for Visualizaon: SketchUp is so easy to use that we're tempted to jump
right in and model everything. But this can lead to ineecve presentaon later and large
polygon counts, which slow the computer. This chapterwill lead you through some of the
professional modeling methods you need to learn to save you me and hassle, and to make
photo-real rendering a cinch.
Chapter 5, Applying Textures and Materials for Photo-Real Rendering: Most visualizers are
crazy enough to use the materials bundled with rendering soware. But this methodology
was developed during the ice age! Now that we all have digital cameras and access to
unlimited free online image resources, we have a far more eecve way of "dressing" the
model. The tutorials in this chapter show you how to use SketchUp's unique photo and
material handling tools to create ultra-real textured models mega easily.
Chapter 6, Entourage the SketchUp Way: Now that you've created the scene, modeled the
buildings, and applied materials, you can add life to the scene with Entourage. Learn how to
nd the best free people, foliage, vehicles, and furniture online, and beer sll learn how to
easily create your own with the foolproof methods in this chapter. In no me you'll be able
to build up a comprehensive library to use or give/sell to others.
Chapter 7, Non Photo Real with SketchUp: Exporng images from SketchUp is not the only
way to produce sketchy visuals. Combining several image layers in GIMP, a powerful free
photo eding suite, you will learn how to simulate sketchy pencil and watercolor styles. Fans
of these methods will be pleased to know the famous Dennis Technique is presented in this
chapter, along with Dennis's own creaons.
Chapter 8, Photo-Realisc Rendering: Here, the amazing Kerkythea introduced in Chapters 1
and 2 is explored in more depth, giving you the skills and condence to tackle any rendering
project. A hassle-free method of working is introduced along with proven best sengs for
test renders and nal outdoor and indoor scenes. This chapter covers everything you need to
get professional photo-realisc renders from your SketchUp model that you'll be personally
amazed with.
Chapter 9, Important Composing and Aer Eects in GIMP: The rendering process isn't the
end of the line, because there are lots of subtle but important aer-eects you can apply
to make the image even more eecve. This chapter covers how to add reecons without
rendering, creang depth of eld eects from a depth render, adjusng levels for realisc
daylight scenes, and composing real and rendered images.
Preface
[ 3 ]
Chapter 10, Walkthroughs and Flyovers: The crowning glory of your visualizaon project is
likely to be a rendered or arsc-style animaon. The tutorials in this chapter will take you
through this step-by-step, showing you how to create storyboards, set up cameras and paths
in SketchUp with extra plugin funconality, export test animaons and nal renders. Photo-
real animaons are then composited to make a simple show reel.
Chapter 11: Presenng Visuals in LayOut: Layout is bundled as part of SketchUp Pro and
is introduced in this nal chapter for those who wish to explore the free trial before
comming to Pro. You will learn how to bring together SketchUp models and arsc or
rendered output into a screen presentaon or printed porolio, adding borders, text and
dimensions.
What you need for this book
The basics are: Google SketchUp (Free) 7, Kerkythea 2008, GIMP 2.6, and VirtualDub. Also
the book touches on Google Earth, MPEG Sreamclip, Microso MovieMaker, SketchUp
Pro, and Layout (Installed with SketchUp Pro). An Internet connecon is needed for some
secons of the book.
Who this book is for
This book is suitable for all levels of Sketchup users, from amateurs right through to
architectural technicians, professional architects, and designers who want to take their 3D
designs to the next level of presentaon. SketchUp for Architectural Visualizaon is also
parcularly suitable as a companion to any architectural design or mulmedia course, and is
accessible to anyone who has familiarized themselves with the basics of SketchUp through
Google's online videos.
Conventions
In this book, you will nd several headings appearing frequently.
To give clear instrucons of how to complete a procedure or task, we use:
Preface
[ 4 ]
Time for action – heading
Acon 1
Acon 2
Acon 3
Instrucons oen need some extra explanaon so that they make sense, so they are
followed with:
What just happened?
This heading explains the working of tasks or instrucons that you have just completed.
You will also nd some other learning aids in the book, including:
Pop quiz – heading
These are short mulple choice quesons intended to help you test your own understanding.
Have a go hero – heading
These set praccal challenges and give you ideas for experimenng with what you
have learned.
You will also nd a number of styles of text that disnguish between dierent kinds of
informaon. Here are some examples of these styles, and an explanaon of their meaning.
Code words in text are shown as follows: "Save it in the
My Documents folder."
New terms and important words are shown in bold. Words that you see on the screen, in
menus or dialog boxes for example, appear in the text like this: "Select the image you want
to use and click Open".
Warnings or important notes appear in a box like this.
Tips and tricks appear like this.

