A Programmer’s Introduction to PHP 4.0 phần 6 potx
Bạn đang xem bản rút gọn của tài liệu. Xem và tải ngay bản đầy đủ của tài liệu tại đây (581.35 KB, 47 trang )
Although some of these seem equivalent in function due to the similarity of
their names, be forewarned that each has a distinct purpose.
include()
The include() function does exactly what its name implies; it includes a file. This
is its syntax:
include (file insertion_file)
An interesting characteristic of include() is that you can execute it condition-
ally. For example, if an include is placed in an if statement, insertion_file will be
included only if the if statement in which it is enclosed evaluates to true. Keep in
mind that if you decide to use include() in a conditional, the include() construct
must be enclosed in statement block curly brackets or in the alternative statement
enclosure. Consider the difference in syntax between Listings 9-1 and 9-2.
Listing 9-1: Incorrect usage of include()
…
if (some_conditional)
include ('some_file');
else
include ('some_other_file');
…
Listing 9-2: Correct usage of include()
. . .
if (some_conditional) :
include ('some_file');
else :
include ('some_other_file');
endif;
. . .
One misleading aspect of the include() statement is that any PHP code in the
included file must be escaped with valid PHP enclosure tags. Therefore, you could
not just place a PHP command in a file and expect it to parse correctly, such as
the one found here:
print "this is an invalid include file";
Chapter 9
216
Gilmore_09 12/4/00 1:07 PM Page 216
Instead, any PHP statements must be enclosed with the correct escape tags,
as shown here:
<?
print "this is an invalid include file";
?>
include_once()
The include_once() function has the same purpose as include(), except that it
first verifies whether or not the file has already been included. If it has been,
include_once() will not execute. Otherwise, it will include the file as necessary.
Other than this difference, include_once() operates in exactly the same way as
include(). Its syntax follows:
include_once (file insertion_file)
require()
For the most part, require() operates like include(), including a template into
the file in which the require() call is located. It has this syntax:
require(file insertion_file)
However, there is one important difference between require() and
include(). The insertion_file will be included in the script in which the require()
construct appears regardless of where require() is located. For instance, if
require() were placed in an if statement that evaluated to false, insertion_file
would be included anyway!
It is often useful to create a file containing variables and other information
that may be used throughout the site and then require it where necessary.
Although you can name this file anything you like, I like to call mine “init.tpl”
(short for “initialization.template”). Listing 9-3 shows what a very simple init.tpl
file would look like. Listing 9-4 subsequently uses require() to include the init.tpl
information into its script.
PHP and Dynamic Site Development
217
TIP A URL can be used with require() only if “URL fopen wrappers” has
been enabled, which by default it is.
Gilmore_09 12/4/00 1:07 PM Page 217
Listing 9-3: A sample file to be inserted (init.tpl)
<?
$site_title = "PHP Recipes";
$contact_email = "";
$contact_name = "WJ Gilmore";
?>
Listing 9-4 inserts the init.tpl information into its script and then uses the
variables in it to dynamically change the page contents.
Listing 9-4: Making use of init.tpl
<? require ('init.tpl'); ?>
<html>
<head>
<title><?=$site_title;?></title>
</head>
<body>
<?
print "Welcome to $site_title. For questions, contact <a href =
\"mailto:$contact_email\">$contact_name</a>."; ?>
</body>
</html>
As your site grows in size, you may find yourself redundantly including partic-
ular files. While this might not always be a problem, sometimes you will not want
modified variables in the included file to be overwritten by a later inclusion of the
same file. Another problem that arises is the clashing of function names should
they exist in the inclusion file. And thus I introduce the next function,
require_once().
require_once()
The require_once() function ensures that the insertion file is included only once
in your script. After require_once() is encountered, any subsequent attempts to
include the same file will be ignored. Its syntax follows:
require_once(file insertion_file)
Other than the verification procedure of require_once(), all other aspects of
the function are the same as for require().
You will probably use these functions extensively as your Web applications
grow in size. You will regularly see these functions in my examples throughout the
Chapter 9
218
Gilmore_09 12/4/00 1:07 PM Page 218
remainder of this book in order to eliminate code redundancies. The first practi-
cal use of these functions occurs in the next section, where I introduce basic tem-
plate construction strategies.
Building Components
When referring to the structure of a typical Web page, I generally like to break it
up into three distinct parts: header, footer, and body. Usually, most well-organized
Web sites have a top section that remains largely unchanged; a middle section
that displays the requested content, thus changing regularly; and finally a bottom
section containing copyright and general link information that, like the header,
generally does not change. Don’t get me wrong; I’m not trying to stifle creativity.
I’ve seen many fantastic sites that do not follow this structure. I’m just attempting
to set up a framework from which we can begin.
The Header
One thing I like to use in almost all of my PHP-enabled Web sites is a header file,
such as the one shown in Listing 9-5. This file holds several pieces of information
that will be applied sitewide, such as the title, contact information, and actual ini-
tial HTML components of the page.
Listing 9-5: A sample header file
<?
// filename: header.tpl
// purpose: site header file for PhpRecipes site
// date: August 22, 2000
$site_name = "PHPRecipes";
$site_email = "";
$site_path = "http://localhost/phprecipes";
?>
<html>
<head>
<title> <?=$site_name;?> </title>
</head>
<body bgcolor="#7b8079" text="#ffffff" link="#e7d387" alink="#e7d387"
vlink="#e7f0e4">
<table width = "95%" cellpadding="0" cellspacing="0" border="1">
<tr>
<td valign = "top">
PHPRecipes
</td>
PHP and Dynamic Site Development
219
Gilmore_09 12/4/00 1:07 PM Page 219
<td valign = "top" align="right">
<?
// output current date and time
print date ("F d, h:i a");
?>
</td>
</tr>
</table>
You may often want to ensure that unwanted visitors do not view your
included files, particularly if they hold information such as access passwords. In
Apache, you can wholly deny the viewing of certain files by modifying your
http.conf or htaccess file. This is an example of how you can prevent the viewing
of any file with a .tpl extension:
<Files "*.tpl">
Order allow,deny
Allow from 127.0.0.1
Deny from all
</Files>
The Footer
What is typically deemed the “footer” of a site is the information at the bottom
of site pages, generally the contact, linking, and copyright information. This
information can be placed in a single file and included as a template just as easily
as the header information can. Consider the need to change the copyright infor-
mation to read “Copyright © 2000-2001” You have two choices: spend your New
Year’s Eve frantically changing hundreds of static pages or use a footer template
like the one in Listing 9-6. Make one simple change and voilà! Back to the
festivities.
Chapter 9
220
NOTE PHP and site security are discussed in more detail in Chapter 16.
Gilmore_09 12/4/00 1:07 PM Page 220
Listing 9-6: A sample footer file (footer.tpl)
<table width="95%" cellspacing="0" cellpadding="0" border="1">
<tr><td valign="top" align="middle">
Copyright © 2000 PHPRecipes. All rights reserved.<br>
<a href = "mailto:<?=$site_email;?>">contact</a> | <a href =
"<?=$site_path;?>/privacy.php">your privacy</a>
</td></tr>
</table>
</body>
</html>
Take note that I am using one of the global variables ($site_email) within the
footer file. This is because that variable will propagate throughout the entire page,
since it is assumed that the header.tpl and footer.tpl files will be assimilated into
one cohesive page. Also, notice that I output $site_path in the “privacy” link. I
always want to use a complete path to any link in a template file because if I use
this footer in any child directories, the path would not be correct if I were only to
use privacy.php as the link URL.
The Body
The page body connects the header to the footer. The body section of a Web docu-
ment is basically the “meat-and-bones” section of the page—that is, the page that
the readers care about. Sure, the header is cool, the footer is helpful, but it is the
body that keeps readers returning. Although I can’t provide any pointers as to the
content of your page structure, I can help in terms of your ease of page adminis-
tration by providing Listing 9-7.
Listing 9-7: A simple body section (index_body.tpl)
<table width="95%" cellspacing="0" cellpadding="0" border="1">
<tr>
<td valign="top" width="25%">
<a href = "<?=$site_path;?>/tutorials.php">tutorials</a> <br>
<a href = "<?=$site_path;?>/articles.php">articles</a> <br>
<a href = "<?=$site_path;?>/scripts.php">scripts</a> <br>
<a href = "<?=$site_path;?>/contact.php">contact</a> <br>
</td>
<td valign="top" width="75%">
Welcome to PHPRecipes, the starting place for PHP scripts, tutorials, and
information about gourmet cooking!
</td>
</tr>
</table>
PHP and Dynamic Site Development
221
Gilmore_09 12/4/00 1:07 PM Page 221
Putting It Together: Incorporating the Header,
Footer, and Body
My feelings are perhaps best phrased as Colonel “Hannibal” Smith (George Pep-
pard) put it on the famous A-Team television show, “I love it when a good plan
comes together.” In my nerdy way, I feel the same when I see several template
files come together to form a complete Web document. Combining the three doc-
ument sections, header.tpl, index_body.tpl, footer.tpl, you can quickly build a
basic page like the one in Listing 9-8.
Listing 9-8: Various includes compiled together to produce index.php
<?
// file: index.php
// purpose: Home page of PHPRecipes
// date: August 23, 2000
// Include the header
include ("header.tpl");
// Include the index body
include ("index_body.tpl");
// Include the footer
include ("footer.tpl");
?>
How about that? Three simple commands, and the page is built. Check out
the resulting page in Listing 9-9.
Listing 9-9: Resulting HTML constructed from Listing 9-8 (index.php)
<html>
<head>
<title> PHPRecipes </title>
</head>
<body bgcolor="#7b8079" text="#ffffff" link="#e7d387" alink="#e7d387"
vlink="#e7f0e4">
<table width = "95%" cellpadding="0" cellspacing="0" border="1">
<tr>
<td valign = "top">
PHP Recipes
</td>
<td valign = "top" align="right">
Chapter 9
222
Gilmore_09 12/4/00 1:07 PM Page 222
August 23, 03:17 pm
</td>
</tr>
</table>
<table width="95%" cellspacing="0" cellpadding="0" border="1">
<tr>
<td valign="top" width="25%">
<a href = "http://localhost/phprecipes/tutorials.php">tutorials</a> <br>
<a href = "http://localhost/phprecipes/articles.php">articles</a> <br>
<a href = "http://localhost/phprecipes/scripts.php">scripts</a> <br>
<a href = "http://localhost/phprecipes/contact.php">contact</a> <br>
</td>
<td valign="top" width="75%">
Welcome to PHPRecipes, the starting place for PHP scripts, tutorials, and gourmet
cooking tips and recipes!
</td>
</tr>
</table><table width="95%" cellspacing="0" cellpadding="0" border="1">
<tr><td valign="top" align="middle">
Copyright © 2000 PHPRecipes. All rights reserved.<br>
<a href = "mailto:">contact</a> | <a href =
"http://localhost/phprecipes/privacy.php">your privacy</a>
</td></tr>
</table>
</body>
</html>
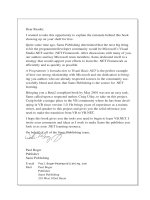
Figure 9-1 shows you the resulting page as viewed in the browser. Although I
detest table borders, I set them to 1 so that you can more easily differentiate the
three sections of the page.
PHP and Dynamic Site Development
223
Gilmore_09 12/4/00 1:07 PM Page 223
Optimizing Your Site’s Templates
A second, and arguably preferred, method of using your templates is to store
them in functions, placed in a single file. This further organizes your template,
making a “template of templates.” I also call this my initialization file, as I tend to
store other useful information in it. Since you already have been exposed to a rel-
atively lengthy header and footer example, I’ll abbreviate the ones in Listings 9-10
and 9-11 for the sake of illustrating this new idea.
Listing 9-10: Optimized site template (site_init.tpl)
<?
// filename: site_init.tpl
// purpose: PhpRecipes Initialization file.
// date: August 22, 2000
$site_name = "PHPRecipes";
$site_email = "";
$site_path = "http://localhost/phprecipes";
function show_header($site_name) {
?>
<html>
Chapter 9
224
Figure 9-1. Resulting page as constructed from Listing 9-8
Gilmore_09 12/4/00 1:07 PM Page 224
<head>
<title> <? print $site_name; ?> </title>
</head>
<body bgcolor="#7b8079" text="#ffffff" link="#e7d387" alink="#e7d387"
vlink="#e7f0e4">
This is the header
<hr>
<?
}
function show_footer() {
?>
<hr>
This Is the footer
</body>
</html>
<?
}
?>
Listing 9-11: Using the initialization file
<?
// Include site Initialization Information
include("site_init.tpl");
// display the header
show_header($site_name);
?>
This is some body information
<?
// display the footer
show_footer();
?>
Using functions further condenses the code and number of templates
needed, ultimately allowing you to more efficiently administer your site. This
strategy also makes it easier to reuse your code to build other sites without having
to keep track of a number of involved files.
Project: Build a Page Generator
Although large parts of the Web sites I build make use of database information to
display content, there are always a few pages that aren’t going to change much.
PHP and Dynamic Site Development
225
Gilmore_09 12/4/00 1:07 PM Page 225
Some of these pages may contain information about the development team, con-
tact information, advertising information, and so on. You get the picture. I gener-
ally store this “static” information in its own folder and use a PHP script to pull it
to the Web page on request. Of course, since this information is static, you may be
asking yourself why you should even employ the use of a PHP script. Why not just
use plain old HTML pages? The advantage of using PHP is that you can take
advantage of the templates, just inserting the static part as necessary.
The link used to call the various static files is dynamic. Its general form is:
<a href = "<?=$site_path;?>/static.php?content=$content">Static Page Name</a>
To begin, create your various static pages. For sake of simplicity, I’ll create
three of them: About This Site (Listing 9-12), Advertising Information (Listing
9-13), and Contact Us (Listing 9-14).
Listing 9-12: About This Site (about.html)
<h3>About PHPRecipes</h3>
What programmer doesn't mix all night programming with gourmet cookies? Here at
PHPRecipes, hardly a night goes by without one of our coders mixing a little bit
of HTML with a tasty plate of Portobello Mushrooms or even Fondue. So we decided
to bring you the best of what we love most: PHP and food!
<p>
That's right, readers. Tutorials, scripts, souffles and more. <i>Only</i> at
PHPRecipes.
Listing 9-13: Advertising Information (advert_info.html)
<h3>Advertising Information</h3>
Regardless of whether they come to learn the latest PHP techniques or for brushing
up on how to bake chicken, you can bet our readers are decision makers. They are
the Industry professionals who make decisions about what their company purchases.
For advertising information, contact <a href = "mailto:
"></a>.
Listing 9-14 Contact Us (contact.html)
<h3>Contact Us</h3>
Have a coding tip? <br>
Know the perfect topping for candied yams?<br>
Let us know! Contact the team at <a href =
"mailto:"></a>.
Chapter 9
226
Gilmore_09 12/4/00 1:07 PM Page 226
Now you will design the page that will house the requested information, enti-
tled “static.php”. This file acts as the aggregator of the various components of a
page on our site and makes use of the site_init.tpl file, shown in Listing 9-15.
Listing 9-15: Page aggregator (static.php)
<?
// file: static.php
// purpose: display various requested static pages.
// IMPORTANT: It Is assumed that "site_init.tpl" and all of the static files are
located in the same directory.
// load functions and site variables
include("site_init.tpl");
// display the page header
show_header($site_name);
// display the requested content
include("$content.html");
// display the page footer
show_footer();
?>
OK, now you’re ready to implement this script. Simply place the correct link
reference relative to the page, as shown here:
<a href = "static.php?content=about">About This Site</a><br>
<a href = "static.php?content=advert_info">Advertising Information</a><br>
<a href = "static.php?content=contact">Contact Us</a><br>
Clicking any of the links will take you to the respective static page, embedded
in static.php!
What’s Next?
This chapter introduced you to the heart of what PHP was intended to do in the
first place: dynamic Web page generation. In this chapter, you learned how to do
the following:
• Manipulate URLs
• Generate dynamic content
• Include and build basic templates
PHP and Dynamic Site Development
227
Gilmore_09 12/4/00 1:07 PM Page 227
The project concluding the chapter illustrated how you could build a page
generator that would pull static pages into a larger template structure, making it
ever so easy for you to maintain large numbers of static HTML pages.
The next chapter builds on this foundation significantly, introducing how
PHP can be used in conjunction with HTML forms, adding a whole new degree of
user interactivity into your site. Then, it’s onward to databasing! What an exciting
few chapters these are going to be!
Chapter 9
228
Gilmore_09 12/4/00 1:07 PM Page 228
CHAPTER 10
Forms
The ability to retrieve and process user-provided information has become an
integral part of most successful Web sites. The ability to collect statistics, poll
users, store preferential information, and offer document searches certainly adds
a whole new dimension to what would be an otherwise only minimally interactive
medium.
Information retrieval is largely implemented through the use of HTML forms.
Certainly you are already familiar with the look and feel of an HTML form. Gen-
eral practice is that you enter one or more pieces of data (for example, your name
and email address), press a submit button of sorts, and are then greeted with a
response message.
You may be thinking that the process of collecting user data via HTML forms
is a complicated and tedious process. If so, you will be surprised to learn that it is
actually quite easy.
An Introduction to Forms
There are a number of different forms you can use to input information. Some
require users to enter information using their keyboard, while others require the
users to select one or more choices by clicking with a mouse. Yet others simply
involve a hidden form value that is embedded in the form itself and is not
intended to be modified by the user.
It is possible to have multiple forms on the same page, so there must be some
way to distinguish one form from the other. Furthermore, there must be a way to
tell the form where to go once the user initiates the form action (usually by click-
ing a button). Both of these needs are taken care of by enclosing the form entities
in the following HTML tags:
<form action="some_action" method="post">
… form entities …
</form>
As you can see, two important elements make up this enclosure: the action
and the method. The action specifies what script should process the form, while
the method specifies how the form data will be sent to the script. There are two
possible methods:
229
Gilmore_10 12/5/00 2:23 PM Page 229
• The get method sends all of the form information at the end of the URL.
This method is rarely used, due to various language and length restrictions.
• The post method sends all of the form information in the request body.
This method is usually preferred over get.
Keyboard-Oriented Form Entities
Now you’re ready to begin building forms. The first step is to learn the keyboard-
oriented form entities. There are only two: the text box and the text area box.
The Text Box
The text box is typically used for short text entries, such as an email address,
postal address, or name. Its syntax is:
<input type="text" name="variable_name" size="N" maxlength="N" value="">
There are five text box components:
• type: Type of form input, in this case text.
• name: Variable name used to store the data.
• size: Total size of the text box as it will display in the browser.
• maxlength: Total number of characters that can be input into the text box.
• value: Default value that will display in the text box.
A sample text box is shown in Figure 10-1.
Chapter 10
230
NOTE This introduction is intended to be a brief primer regarding the
basic syntax of HTML forms. For a more complete introduction, I suggest
checking out Special Edition Using HTML 4 by Molly E. Holzschlag (QUE;
ISBN 0789722674, December 1999).
Gilmore_10 12/5/00 2:23 PM Page 230
A variation on the text box is the password text box, which operates exactly
like the text box, except that the data is hidden with asterisks as it is entered
in the text field. To change the text box to a password text box, just use
type = “password” instead of type = “text”.
The Text Area Box
The text area box is useful when you would like the reader to be a bit more ver-
bose than just entering a name or email address. Its syntax is:
<textarea name="variable_name" rows="N" cols="N"></textarea>
There are three textarea components:
• name: Variable name used to store the data.
• rows: Number of rows comprising textarea.
• cols: Number of columns comprising textarea.
A sample text area box is shown in Figure 10-2.
Forms
231
Figure 10-1. A text box
Gilmore_10 12/5/00 2:23 PM Page 231
Mouse-Oriented Form Entities
There are several other form entities that are controlled by the user selecting a
predefined value with a mouse. I will limit the introduction to checkboxes, radio
buttons, and pull-down menus.
The Checkbox
Checkboxes are convenient when you would like to present users with one or
more choices to check, much like making a checkmark on some form with a pen-
cil. The syntax is:
<input type="checkbox" name="variable_name" value="variable_value">
There are three checkbox components:
• type: Type of form input, in this case a checkbox.
• name: Variable name used to store the data, in this case the entity value.
• value: Default value that will be assigned to the variable name. Note that if
the checkbox is checked, this is the value that is assigned to variable name.
If it is not checked, then this variable will not be passed.
A sample checkbox is shown in Figure 10-3.
Chapter 10
232
Figure 10-2. A text area box
Gilmore_10 12/5/00 2:23 PM Page 232
The Radio Button
The radio button is a variation of the checkbox, similar in all aspects except that
only one button can be checked. The syntax is:
<input type="radio" name="variable_name" value="variable_value">
As you can see, its syntax is exactly like that of the checkbox. There are three
radio button components:
• type: Type of form input, in this case a radio.
• name: Variable name used to store the data, in this case the entity value.
• value: Default value that will display in the text box. Note that if the radio
button is selected, this is the value that is assigned to variable name. If it is
not selected, then this variable will not be passed.
Sample radio buttons are shown in Figure 10-4.
Forms
233
Figure 10-3. Checkboxes
Figure 10-4. Radio buttons
Gilmore_10 12/5/00 2:23 PM Page 233
The Pull-Down Menu
Pull-down menus are particularly convenient when you have a long list of data
from which you would like users to select a value. Pull-down menus are com-
monly used for large data sets, a list of American states or countries, for example.
The syntax is:
<select name="variable_name">
<option value="variable_value1">
<option value="variable_value2">
<option value="variable_value3">
. . .
<option value="variable_valueN">
</select>
There are two pull-down menu components:
• name: Variable name used to store the data, in this case the variable name
that will store the chosen value.
• value: Default value that will display in the text box. Note that if the check-
box is checked, this is the value that is assigned to variable name.
A sample pull-down menu is shown in Figure 10-5.
Hidden Values
Hidden form values are embedded in the form itself and are generally used as a
means to persist data from one script to the other. While there is nothing wrong
with doing so, PHP offers a much more convenient method for keeping persistent
data: session tracking, which is the subject of Chapter 13. Regardless, hidden val-
ues have their uses, so I will proceed with the introduction.
Chapter 10
234
Figure 10-5. A pull-down menu
Gilmore_10 12/5/00 2:23 PM Page 234
The syntax of the hidden form value is exactly like that of the text box, save for
the differing type value. Since the hidden value is hidden from the user, there is
no way to show a sample. The syntax is:
<input type="hidden" name="variable_name" value="variable_value">
There are three hidden value components:
• type: Type of form input. In this case it’s hidden.
• name: Variable name used to store the hidden data.
• value: Default value that will display in the text box.
Keep in mind that perhaps the title of this form entity is a misnomer. While the
hidden value does not display to the browser, the user could simply perform a
View Source and view whatever hidden values are in the form.
The Submit Button
The submit button actuates the action specified in the action component of the
form enclosure. Its syntax is:
<input type="submit" value="button_name">
There are two submit button components:
• type: Type of form input, in this case submit.
• value: Default value that will display in the text box.
A sample submit button is shown in Figure 10-6.
Forms
235
Figure 10-6. A submit button
Gilmore_10 12/5/00 2:23 PM Page 235
The Reset Button
The reset button will erase all information entered into the form. This is generally
a pretty useless feature, but has become so commonly used in forms on the Web
that I thought I should include it. The syntax is:
<input type="reset" name="reset" value="button_name">
There are two reset button components:
• type: Type of form input, in this case reset.
• value: Name shown on top of the button.
A reset button looks exactly like a submit button (illustrated in Figure 10-6),
except that its type and value are set to “reset”.
Putting It Together: A Sample Form
Now that you have been introduced to the basic form components, you can cre-
ate one that will accept user information. Suppose you wanted to create a form
that would pose various questions to users about what they think about your new
site. I’ll create this form in Listing 10-1.
Listing 10-1: Sample user feedback form
<form action = "process.php" method = "post">
<b>Please take a moment to tell us what you think about our site:</b><p>
<b>Name:</b><br>
<input type="text" name="name" size="15" maxlength="25" value=""><br>
<b>Email:</b><br>
<input type="text" name="email" size="15" maxlength="45" value=""><br>
<b>How frequently do you visit our site?:</b><br>
<select name="frequency">
<option value="">Site frequency:
<option value="0">This is my first time
<option value="1">< 1 time a month
<option value="2">Roughly once a month
<option value="3">Several times a week
Chapter 10
236
NOTE Jakob Nielsen, a noted Web-usability expert, recently wrote a rather
interesting article about the drawbacks to the reset button. It is at
/>Gilmore_10 12/5/00 2:23 PM Page 236
<option value="4">Every day
<option value="5">I'm addicted
</select><br>
<b>I frequently purchase the following products from our site:</b><br>
<input type="checkbox" name="software" value="software">Software<br>
<input type="checkbox" name="cookware" value="cookware">Cookware<br>
<input type="checkbox" name="hats" value="hats">Chef's Hats<br>
<b>Our site's greatest asset is:</b><br>
<input type="radio" name="asset" value="products">Product selection<br>
<input type="radio" name="asset" value="design">Cool design<br>
<input type="radio" name="asset" value="service">Customer Service<br>
<b>Comments:</b><br>
<textarea name="comments" rows="3" cols="40"></textarea><br>
<input type="submit" value="Submit!">
</form>
The form as displayed in the browser is illustrated in Figure 10-7.
Forms
237
Figure 10-7. A sample user input form
Gilmore_10 12/5/00 2:23 PM Page 237
Pretty straightforward, right? But the question now arises of how you take the
user input and do something useful with it. That is the subject of the next section,
“Forms and PHP.”
Keep in mind that this introduction to forms should be considered just that;
an introduction. It is by no means a comprehensive summary of all options
offered to the various form components. Check out any of the many forms-
related tutorials on the Web and recently released HTML books for further infor-
mation.
Having completed this introduction to HTML forms, I now proceed to the
really interesting part of this chapter; that is, how PHP can be used to process and
interact with user information input via these forms.
Forms and PHP
How PHP handles form information is really not all that different from how PHP
handles variable data passed along with the URL, a subject I discussed in detail in
the previous chapter.
Introductory Examples
To facilitate rapid learning of the various ways you can use PHP to manipulate
form information, I present a series of scenarios. Each scenario illustrates a differ-
ent way you can take advantage of this technology to add interactivity to your site.
Scenario 1: Passing Form Information
from One Script to Another
This is perhaps the most basic of examples, in which user input is simply gath-
ered on one page and displayed on another. Listing 10-2 contains the form that
will prompt a user for a name and email address. When the user clicks the submit
button, entitled “go!” the form will request listing10-3.php. Listing 10-3 will in
turn display the $name and $email variables that were passed along with the page
request.
Listing 10-2: A simple form
<html>
<head>
<title>Listing 10-2</title>
</head>
Chapter 10
238
Gilmore_10 12/5/00 2:23 PM Page 238
<body bgcolor="#ffffff" text="#000000" link="#cbda74" vlink="#808040"
alink="#808040">
<form action="listing10-3.php" method="post">
<b>Give us some information!</b><br>
Your Name:<br>
<input type="text" name="name" size="20" maxlength="20" value=""><br>
Your Email:<br>
<input type="text" name="email" size="20" maxlength="40" value=""><br>
<input type="submit" value="go!">
</form>
</body>
</html>
Listing 10-3: Displaying the data collected in Listing 10-1
<html>
<head>
<title>Listing 10-3</title>
</head>
<body bgcolor="#ffffff" text="#000000" link="#cbda74" vlink="#808040"
alink="#808040">
<?
// output the user's name and email address.
print "Hi, $name!. Your email address is $email";
?>
</body>
</html>
In summary, the user fills out the form fields, clicks the submit button, and is
directed to Listing 10-3, which then formats and displays the data. Simple as that.
An alternative method to carry out form processing uses just one script. The
disadvantage of this method is that the script becomes longer and therefore rela-
tively more difficult to view and understand; the advantage is that you minimize
the total number of files to handle. Furthermore, you eliminate code redundancy
when error checking, a subject I discuss later in this chapter. Of course, there will
be times when one script is not advantageous, but it’s always nice to keep in mind
that it’s easily done. In Scenario 2, I reconsider Scenario 1, this time using just one
script.
Forms
239
Gilmore_10 12/5/00 2:23 PM Page 239
Scenario 2: Alternative (One-Script) Form Processing
Processing forms using one script is fairly simple, making use of an if conditional
statement to tell us whether or not the form variables have been set. If they have
been set, then they will be processed (in this example, displayed). Otherwise, the
form will be displayed. Verifying whether or not the variables have been set is
accomplished with the strcmp() function, described in Chapter 8, “Strings and
Regular Expressions.” Listing 10-4 provides an example of one-script processing.
Notice how the form action calls the page in which it resides. A conditional if
statement is used to check for the transmission of a hidden variable named seen-
form. If seenform doesn’t exist, the form will be displayed. If seenform does exist,
this implies that the form has been filled out by the user, and the information is
processed, in this case output to the browser.
Listing 10-4: One-script form processing
<html>
<head>
<title>Listing 10-4</title>
</head>
<body bgcolor="#ffffff" text="#000000" link="#cbda74" vlink="#808040"
alink="#808040">
<?
// all double quotations in $form must be escaped,
// otherwise a parse error will occur
$form = "
<form action=\"listing10-4.php\" method=\"post\">
<input type=\"hidden\" name=\"seenform\" value=\"y\">
<b>Give us some information!</b><br>
Your Name:<br>
<input type=\"text\" name=\"name\" size=\"20\" maxlength=\"20\" value=\"\"><br>
Your Email:<br>
<input type=\"text\" name=\"email\" size=\"20\" maxlength=\"40\" value=\"\"><br>
<input type=\"submit\" value=\"subscribe!\">
</form>";
// If we haven't already seen the form ($seenform passed by hidden
// form value), show the form.
if ($seenform != "y"):
print "$form";
else :
print "Hi, $name!. Your email address is $email";
endif;
?>
</body>
</html>
Chapter 10
240
Gilmore_10 12/5/00 2:23 PM Page 240