AJAX and PHP Building Responsive Web Applications phần 4 ppsx
Bạn đang xem bản rút gọn của tài liệu. Xem và tải ngay bản đầy đủ của tài liệu tại đây (609.33 KB, 28 trang )
Server-Side Techniques with PHP and MySQL
74
// catching potential errors with Firefox
var rootNodeName = xmlResponse.documentElement.nodeName;
if (rootNodeName == "parsererror")
throw("Invalid XML structure:\n" + xmlHttp.responseText);
// getting the root element (the document element)
xmlRoot = xmlResponse.documentElement;
// testing that we received the XML document we expect
if (rootNodeName != "response" || !xmlRoot.firstChild)
throw("Invalid XML structure:\n" + xmlHttp.responseText);
// the value we need to display is the child of the root <response>
element
responseText = xmlRoot.firstChild.data;
// display the user message
myDiv = document.getElementById("myDivElement");
myDiv.innerHTML = "Server says the answer is: " + responseText;
}
4. Create a file called morephp.php:
<?php
// load the error handling module
require_once('error_handler.php');
// specify that we're outputting an XML document
header('Content-Type: text/xml');
// calculate the result
$firstNumber = $_GET['firstNumber'];
$secondNumber = $_GET['secondNumber'];
$result = $firstNumber / $secondNumber;
// create a new XML document
$dom = new DOMDocument();
// create the root <response> element and add it to the document
$response = $dom->createElement('response');
$dom->appendChild($response);
// add the calculated sqrt value as a text node child of <response>
$responseText = $dom->createTextNode($result);
$response->appendChild($responseText);
// build the XML structure in a string variable
$xmlString = $dom->saveXML();
// output the XML string
echo $xmlString;
?>
5. Finally, create the error-handler file, error_handler.php:
<?php
// set the user error handler method to be error_handler
set_error_handler('error_handler', E_ALL);
// error handler function
function error_handler($errNo, $errStr, $errFile, $errLine)
{
// clear any output that has already been generated
if(ob_get_length()) ob_clean();
// output the error message
$error_message = 'ERRNO: ' . $errNo . chr(10) .
'TEXT: ' . $errStr . chr(10) .
'LOCATION: ' . $errFile .
', line ' . $errLine;
echo $error_message;
// prevent processing any more PHP scripts
exit;
}
?>
6. Load http://localhost/ajax/foundations/morephp/morephp.html and play
with it.
Chapter 3
Figure 3.3: PHP Parameters and Error Handling
What Just Happened?
You must be familiar with almost all the code on the client side by now, so let's focus on the
server side, where we have two files:
morephp.php and error_handler.php.
The
morephp.php file is expected to output the XML structure with the results of the number
division. However, it starts by loading the error-handling routine. This routine is expected to catch
any errors, create a better error message than the default one, and send the message back to the client.
<?php
// load the error handling module
require_once('error_handler.php');
PHP 5 does support exceptions like the other OOP languages. However, with PHP 5, you
are limited to using exception objects that you throw and catch yourself, and they can
help when building a large architecture where they can improve your code. PHP's core
doesn't generate exceptions when something bad happens. Probably because of backward
compatibility reasons, when a problem happens, instead of throwing exceptions, PHP 5
generates errors, which represent a much more primitive way to handle run-time problems.
For example, you can't catch an error, deal with it locally, and then let the script continue
normally, as you can do with exceptions. Instead, to deal with errors, the best you can do
is to specify a function to execute automatically; this function is called before the script
dies, and offers you a last chance to do some final processing, such as logging the error,
closing database connections, or telling your visitor something "friendly".
In our code, the error_handler.php script is instructed to handle errors. It simply receives the
error, and transforms the error message into something easier to read than the default error
message. However, note that
error_handler.php catches most errors, but not all! Fatal errors
cannot be trapped with PHP code, and they generate output that is out of the control of your
program. For example, parse errors, which can happen when you forget to write the
$ symbol in
the front of a variable name, are intercepted before the PHP code is executed; so they cannot be
caught with PHP code, but they are logged in the Apache error log file.
75
Server-Side Techniques with PHP and MySQL
76
It is important to keep an eye on the Apache error log when your PHP script behaves
strangely. The default location and name of this file is Apache2\logs\error.log, and it
can save you from many headaches.
After setting the error-handling routine, we set the content type to XML, and divide the first
received number by the second number. Note the usage of
$_GET to read the variables sent using T
GET. If you sent your variables using POSTT you should have used $_POST. Alternatively, you can
use
T
$_REQUEST, which finds variables sent with any method (including cookies); but it is generally
recommended to avoid using it because it is a bit slower than the others.
// specify that we are outputting an XML document
header('Content-Type: text/xml');
// calculate the result
$firstNumber = $_GET['firstNumber'];
$secondNumber = $_GET['secondNumber'];
$result = $firstNumber / $secondNumber;
The division operation will generate an error if $secondNumber is 0. In this case, we expect the
error-handler script to intercept the error. Note that in a real-world the situation, the professional
way would be to check the value of the variable before calculating the division, but in this case we
are interested in checking the error-handling script.
After calculating the value, you package it into a nice XML document and output it, just as in the
previous exercise:
// create a new XML document
$dom = new DOMDocument();
// create the root <response> element and add it to the document
$response = $dom->createElement('response');
$dom->appendChild($response);
// add the calculated sqrt value as a text node child of <response>
$responseText = $dom->createTextNode($result);
$response->appendChild($responseText);
// build the XML structure in a string variable
$xmlString = $dom->saveXML();
// output the XML string
echo $xmlString;
?>
Let's now have a look at the error-handling script—error_handler.php. This file has the role of
intercepting any error messages generated by PHP, and outputting an error message that makes
sense, and can be displayed by your JavaScript code:
Figure 3.4: Good Looking Error Message
Chapter 3
Without the customized error handler, the error message you will get would be:
Figure 3.5: Bad Looking Error Message
The error message will look like Figure 3.5 if the display_errors option in php.ini is
On. By default, that option is Off and the errors are logged just in the Apache error log,
but while writing code it may help to make them be displayed as well. If the code was
production code, both error messages would have been inappropriate. You should never
show such debugging information to your end users.
So what happens in error_handler.php? First, the file uses the set_error_handler function to
establish a new error-handling function:
<?php
// set the user error handler method to be error_handler
set_error_handler('error_handler', E_ALL);
When an error happens, we first call ob_clean() to erase any output that has already been
generated—such as the
<response></response> bit from Figure 3.5:
// error handler function
function error_handler($errNo, $errStr, $errFile, $errLine)
{
// clear any output that has already been generated
if(ob_get_length()) ob_clean();
Of course, if you prefer to decide to keep those bits when doing certain debugging things,
you can comment out the
ob_clean() call. The actual error message is built using the system
variables
$errNo, $errStr, $errFile, and $errLine, and the carriage return is generated using
the
chr function.
// output the error message
$error_message = 'ERRNO: ' . $errNo . chr(10) .
'TEXT: ' . $errStr . chr(10) .
'LOCATION: ' . $errFile .
', line ' . $errLine;
echo $error_message;
// prevent processing any more PHP scripts
exit;
}
?>
77
Server-Side Techniques with PHP and MySQL
78
The error-handling scheme presented is indeed quite simplistic, and it is only appropriate
while writing and debugging your code. In a production solution, you need to show your
end user a friendly message without any technical details. If you want to package the
error details as an XML document to be read on the client, keep in mind that parse and
fatal errors will not be processed by your function, and will behave as set up in PHP's
configuration file (php.ini).
This case also presents the scenario where the user can attempt to make several server requests at
the same time (you can do this by clicking the
Send button multiple times quickly enough). If you
try to make a request on a busy
XMLHttpRequest object, its open method generates an exception.
The code is well protected with
try/catch constructs, but the error message doesn't look very
user-friendly as shown in Figure 3.6.
Figure 3.6: Request on a Busy XMLHttpRequest
This message might be just what you need, but in certain circumstances you may prefer to react
differently to this kind of error than with other kinds of errors. For example, in a production
scenario, you may prefer to display a note on the page, or display a friendly "
please try again
later
" message, by modifying the process() function as shown in the following code snippet:
// read a file from the server
function process()
{
// only continue if xmlHttp isn't void
if (!xmlHttp) return;
// don't try to make server requests if the XMLHttpObject is busy
if !(xmlHttp.readyState == 0 || xmlHttp.readyState == 4)
alert("Can't connect to server, please try again later.");
else
{
// try to connect to the server
try
{
// get the two values entered by the user
var firstNumber = document.getElementById("firstNumber").value;
var secondNumber = document.getElementById("secondNumber").value;
// create the params string
var params = "firstNumber=" + firstNumber +
"&secondNumber=" + secondNumber;
// initiate the asynchronous HTTP request
xmlHttp.open("GET", "morephp.php?" + params, true);
xmlHttp.onreadystatechange = handleRequestStateChange;
xmlHttp.send(null);
}
Chapter 3
// display the error in case of failure
catch (e)
{
alert("Can't connect to server:\n" + e.toString());
}
}
}
The exact way you handle these errors can vary depending on the scenario. During the course of
this book, you will see more solutions in action:
• Sometimes you may prefer to simply ignore these errors.
• Other times you will display a custom error message as shown in the code above.
In most cases you will try to avoid getting the errors in the first place—it is always better to
prevent a problem than to handle it after it happened. For example, there are several ways to avoid
getting "connection busy"-type errors, which happen when you try to make a server request using
an
XMLHttpRequest object that is still busy processing a previous request:
• You could open a new connection (create a new
XMLHttpRequest object) for every
message you need to send to the server. This method is easy to implement and it can
be helpful in many scenarios, but we'll generally try to avoid it because it can affect
the server's performance (your script continues to open connections and initiate
requests even if the server hasn't finished answering older requests), and it doesn't
guarantee that you receive the responses in the same order as you made the calls
(especially if the server is busy or the network is slow).
• You could record the message in a
queue and send it later when the connection
becomes available (you will see this method in action in several exercises of this book,
including the AJAX Form Validation, and the AJAX Chat).
• You can ignore the message altogether if you can implement the code in such a way
that it would not attempt to make multiple requests over the same connection, and
use the existing error-handling code.
Connecting to Remote Servers and JavaScript
Security
You may be surprised to find out that the PHP exercises you have just completed worked
smoothly because the server (PHP) scripts you called asynchronously were running on the same
server from which the HTML file was loaded.
Web browsers have very strict (and different) ways to control what resources you can access from
the JavaScript code. If you want to access another server from your JavaScript code, it is safe to
say that you are in trouble. And this is what we will do in the exercise that follows; but before that,
let's learn a bit of theory first.
79
Server-Side Techniques with PHP and MySQL
So, the JavaScript code runs under the security privileges of its parent HTML file. By default,
when you load an HTML page from a server, the JavaScript code in that HTML page will be
allowed to make HTTP requests only to that server. Any other server is a potential enemy, and
(unfortunately) these enemies are handled differently by each browser.
Internet Explorer is a friendly kind of web browser; which means that is arguably less secure, but
more functional. It has a security model based on zones.
The four zones are Internet, Local intranet,
Trusted sites, and Restricted sites.
Each zone has different security settings, which you can change
going to
Tools | Internet Options | Security. When accessing a web resource, it will be automatically
assigned to one of the security zones, and the specific security options will be applied.
The default security options may vary depending on your system. By default, Internet Explorer will
give full privileges to scripts loaded from a local file resource (not through a web server, not even the
local web server). So if you try to load
c:\ajax\ the script will run smoothly (before execution,
you may be warned that the script you are loading has full privileges). If the JavaScript code was
loaded through HTTP (say,
http://localhost/ajax/ /ping.html), and that JavaScript code
tries to make an HTTP request to another server, Internet Explorer will automatically display a
confirmation box, where the user is asked to give permission for that action.
Firefox and Mozilla-based browsers have a more restrictive and more complicated security model,
based on privileges. These browsers don't display a confirmation window automatically; instead,
your JavaScript code must use a Mozilla specific API to ask about performing the required
actions. If you are lucky the browser will display a confirmation box to the user, and depending on
user's input, it will give the permission (or not) to your JavaScript code. If you aren't lucky, the
Mozilla-based browser will ignore your code request completely. By default, Mozilla-based
browsers will listen to privilege requests asked from local (
file:///) resources, and will ignore
completely requests from scripts loaded through HTTP, unless these scripts are
signed (these are
the default settings that can be changed manually, though). Learn more about signing scripts for
Mozilla browsers at
signed-scripts.html
.
In the next exercise, you'll create a JavaScript program that reads random numbers from the online
service
. This site provides an online web service that generates truly
random numbers
. The page that explains how to access the server through HTTP is located at
When writing programs for this purpose, you should check the
guidelines mentioned at:
Finally, to get a feeling about
what random numbers look like, feel free to load
in
your web browser (when called with no options, by default it generates 100 random numbers
between 1 and 100). Our client will ask for one random number between 1 and 100 at a time, by
making a request to
80
Chapter 3
Figure 3.7: Connecting to Remote Servers
Time for Action—Connecting to Remote Servers
1. Start by creating a new subfolder of the foundations folder, called ping.
2. In the ping folder, create a new file named ping.html with the following contents:
<!DOCTYPE html PUBLIC "-//W3C//DTD XHTML 1.1//EN"
"
<html>
<head>
<title>Practical AJAX: Connecting to Remote Servers</title>
<script type="text/javascript" src="ping.js"></script>
</head>
<body onload="process()">
Server, tell me a random number!<br/>
<div id="myDivElement" />
</body>
</html>
3. Create a new file named ping.js with the following code:
// holds an instance of XMLHttpRequest
var xmlHttp = createXmlHttpRequestObject();
// holds the remote server address and parameters
var serverAddress = "
var serverParams = "num=1" + // how many random numbers to generate
"&min=1" + // the min number to generate
"&max=100"; // the max number to generate
// creates an XMLHttpRequest instance
function createXmlHttpRequestObject()
{
// will store the reference to the XMLHttpRequest object
var xmlHttp;
// this should work for all browsers except IE6 and older
try
{
// try to create XMLHttpRequest object
xmlHttp = new XMLHttpRequest();
}
catch(e)
{
81
Server-Side Techniques with PHP and MySQL
// assume IE6 or older
var XmlHttpVersions = new Array("MSXML2.XMLHTTP.6.0",
"MSXML2.XMLHTTP.5.0",
"MSXML2.XMLHTTP.4.0",
"MSXML2.XMLHTTP.3.0",
"MSXML2.XMLHTTP",
"Microsoft.XMLHTTP");
// try every prog id until one works
for (var i=0; i<XmlHttpVersions.length && !xmlHttp; i++)
{
try
{
// try to create XMLHttpRequest object
xmlHttp = new ActiveXObject(XmlHttpVersions[i]);
}
catch (e) {}
}
}
// return the created object or display an error message
if (!xmlHttp)
alert("Error creating the XMLHttpRequest object.");
else
return xmlHttp;
}
// call server asynchronously
function process()
{
// only continue if xmlHttp isn't void
if (xmlHttp)
{
// try to connect to the server
try
{
// ask for permission to call remote server, for Mozilla-based browsers
try
{
// this generates an error (that we ignore) if the browser is not
// Mozilla
netscape.security.PrivilegeManager.enablePrivilege('UniversalBrowserRead')
;
}
catch(e) {} // ignore error
// initiate server access
xmlHttp.open("GET", serverAddress + "?" + serverParams, true);
xmlHttp.onreadystatechange = handleRequestStateChange;
xmlHttp.send(null);
}
// display the error in case of failure
catch (e)
{
alert("Can't connect to server:\n" + e.toString());
}
}
}
// function called when the state of the HTTP request changes
function handleRequestStateChange()
{
// when readyState is 4, we are ready to read the server response
if (xmlHttp.readyState == 4)
{
82
Chapter 3
// continue only if HTTP status is "OK"
if (xmlHttp.status == 200)
{
try
{
// do something with the response from the server
handleServerResponse();
}
catch(e)
{
// display error message
alert("Error reading the response: " + e.toString());
}
}
else
{
// display status message
alert("There was a problem retrieving the data:\n" +
xmlHttp.statusText);
}
}
}
// handles the response received from the server
function handleServerResponse()
{
// retrieve the server's response
var response = xmlHttp.responseText;
// obtain a reference to the <div> element on the page
myDiv = document.getElementById('myDivElement');
// display the HTML output
myDiv.innerHTML = "New random number retrieved from server: "
+ response + "<br/>";
}
4. Load http://localhost/ajax/foundations/ping/ping.html. If you are using
Internet Explorer with the default options, you will be asked whether you will allow
the script to connect to a remote server as shown in Figure 3.8. If you are using
Firefox or Opera with the default options, you will get security errors like the ones
shown in Figure 3.9 and Figure 3.10, respectively.
Figure 3.8: Internet Explorer Asking for Permission
Figure 3.9: Firefox Denying Access
83
Server-Side Techniques with PHP and MySQL
Figure 3.10: Opera Denying Access
5. Now try to load the very same HTML file but directly from the file system. The path
to the file should be like
file:///C:/Apache2/htdocs/ajax/foundations/
ping/ping.html
. With the default options, Internet Explorer will run with no
problems, because the page is located in a trusted zone. Firefox will ask for a
confirmation as shown in Figure 3.11. Opera will display the very same error
message that you saw in Figure 3.10.
Figure 3.11: Firefox Asking for Permission
What Just Happened?
Opera is indeed the safest browser in the world. You have no way of convincing Opera 8.5 to
allow the JavaScript code to access a different server than the one it was loaded from.
Internet Explorer behaves as instructed by the zones settings. By default, it will make your life
easy enough, by giving maximum trust to local files, and by asking for confirmation when scripts
loaded from the Internet try to do potentially dangerous actions.
Firefox has to be asked politely if you want to have things happen. The problem is that by default
it won't even listen for your polite request unless the script is signed, or loaded from a local
file:// location. However, requesting your visitor to change browser settings isn't a real option
in most scenarios.
84
Chapter 3
You can make Firefox listen to all requests, even those coming from unsigned scripts, by
typing about:config in the address bar, and changing the value of
signed.applets.codebase_principal_support to true.
The following is the code that asks Firefox for permission to access a remote server:
// ask for permission to call remote server, for Mozilla-based browsers
try
{
// this generates an error (that we ignore) if the browser is not
// Mozilla
netscape.security.PrivilegeManager.enablePrivilege('UniversalBrowserRead');
}
catch(e) {}
// ignore error
Any errors in this code are ignored using the try/catch construct because the code is
Mozilla-specific, and it will generate an exception on the other browsers.
Using a Proxy Server Script
It is quite clear that unless you are building a solution where you can control the environment,
such as ensuring that your users use Internet Explorer or Firefox (in which case you would need to
sign your scripts or configure the browsers manually to be more permissive), accessing remote
servers from your JavaScript code is not an option.
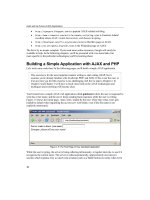
The very good news is that the workaround is simple; instead of having the JavaScript access the
remote server directly you can have a PHP script on your server that will access the remote server
on behalf of the client. This technique is described in the following figure:
Figure 3.12: Using a Proxy PHP Script to Access a Remote Server
To read data from a remote server with PHP we will use the file_get_contents function, whose
documentation can be found at
/>contents.php
.
85
Server-Side Techniques with PHP and MySQL
A popular (and more powerful) alternative to using file_get_contents is a library
Client URL Library (CURLcalled ). You can find more details about CURL from
86
, and
zend/tut/tutorial-thome3.php. For basic needs though, file_get_contents gets the
job done nicely and easily.
Let's try this out with some code. The functionality we want to implement is the same as in
the previous exercise (get a random number and display it), but this time it will work with
all browsers.
Time for Action—Using a Proxy Server Script to Access Remote Servers
1. In the foundations folder, create a subfolder named proxyping.
2. In the
proxyping folder, create proxyping.html:
<!DOCTYPE html PUBLIC "-//W3C//DTD XHTML 1.1//EN"
"
<html>
<head>
<title>Practical AJAX: Accessing Remote Server through Proxy PHP
Script</title>
<script type="text/javascript" src="proxyping.js"></script>
</head>
<body onload="process()">
Server, tell me a random number!<br/>
<div id="myDivElement" />
</body>
</html>
3. In the same folder create proxyping.js. Note that this file is similar to ping.js, and
the new bits are highlighted. (We removed the bits that handle Mozilla security from
process(), changed the server address in the header, removed the num parameter
because in this scenario we'll only request one number at a time, and added an error-
handling measure.)
// holds an instance of XMLHttpRequest
var xmlHttp = createXmlHttpRequestObject();
// holds the remote server address and parameters
var serverAddress = "proxyping.php";
var serverParams = "&min=1" + // the min number to generate
"&max=100"; // the max number to generate
// creates an XMLHttpRequest instance
function createXmlHttpRequestObject()
{
// will store the reference to the XMLHttpRequest object
var xmlHttp;
// this should work for all browsers except IE6 and older
try
{
// try to create XMLHttpRequest object
xmlHttp = new XMLHttpRequest();
}
catch(e)
{
// assume IE6 or older
var XmlHttpVersions = new Array("MSXML2.XMLHTTP.6.0",
"MSXML2.XMLHTTP.5.0",
Chapter 3
"MSXML2.XMLHTTP.4.0",
"MSXML2.XMLHTTP.3.0",
"MSXML2.XMLHTTP",
"Microsoft.XMLHTTP");
// try every prog id until one works
for (var i=0; i<XmlHttpVersions.length && !xmlHttp; i++)
{
try
{
// try to create XMLHttpRequest object
xmlHttp = new ActiveXObject(XmlHttpVersions[i]);
}
catch (e) {}
}
}
// return the created object or display an error message
if (!xmlHttp)
alert("Error creating the XMLHttpRequest object.");
else
return xmlHttp;
}
// call server asynchronously
function process()
{
// only continue if xmlHttp isn't void
if (xmlHttp)
{
// try to connect to the server
try
{
// initiate server access
xmlHttp.open("GET", serverAddress + "?" + serverParams, true);
xmlHttp.onreadystatechange = handleRequestStateChange;
xmlHttp.send(null);
}
// display the error in case of failure
catch (e)
{
alert("Can't connect to server:\n" + e.toString());
}
}
}
// function called when the state of the HTTP request changes
function handleRequestStateChange()
{
// when readyState is 4, we are ready to read the server response
if (xmlHttp.readyState == 4)
{
// continue only if HTTP status is "OK"
if (xmlHttp.status == 200)
{
try
{
// do something with the response from the server
handleServerResponse();
}
catch(e)
{
// display error message
alert("Error reading the response: " + e.toString());
}
}
else
87
Server-Side Techniques with PHP and MySQL
88
{
// display status message
alert("There was a problem retrieving the data:\n" +
xmlHttp.statusText);
}
}
}
// handles the response received from the server
function handleServerResponse()
{
// retrieve the server's response
var response = xmlHttp.responseText;
// if the response is longer than 3 characters, or if it is void, we
// assume we just received a server-side error report
if(response.length > 3 || response.length == 0)
throw(response.length == 0 ? "Server error" : response);
// obtain a reference to the <div> element on the page
myDiv = document.getElementById("myDivElement");
// display the HTML output
myDiv.innerHTML = "Server says: " + response + "<br/>";
}
4. Build the hero proxy PHP script,
proxyping.php:
<?php
// load the error handling module
require_once('error_handler.php');
// make sure the user's browser doesn't cache the result
header('Expires: Wed, 23 Dec 1980 00:30:00 GMT');
header('Last-Modified: ' . gmdate('D, d M Y H:i:s') . ' GMT');
header('Cache-Control: no-cache, must-revalidate');
header('Pragma: no-cache');
// retrieve the parameters
$num = 1; // this is hardcoded on the server
$min = $_GET['min'];
$max = $_GET['max'];
// holds the remote server address and parameters
$serverAddress = '
$serverParams = 'num=' . $num . // how many random numbers to generate
'&min=' . $min . // the min number to generate
'&max=' . $max; // the max number to generate
// retrieve the random number from foreign server
$randomNumber = file_get_contents($serverAddress . '?' . $serverParams);
// output the random number
echo $randomNumber;
?>
5. Finally, add the error-handler function. Yes, it's a bit more to type, but it does good
things to your solution (you can copy and paste it from other examples, because it
is not going to change). Create a new file named
error_handler.php, and write
this code:
<?php
// set the user error handler method to be error_handler
set_error_handler('error_handler', E_ALL);
// error handler function
function error_handler($errNo, $errStr, $errFile, $errLine)
{
// clear any output that has already been generated
if(ob_get_length()) ob_clean();
// output the error message
$error_message = 'ERRNO: ' . $errNo . chr(10) .
Chapter 3
'TEXT: ' . $errStr . chr(10) .
'LOCATION: ' . $errFile .
', line ' . $errLine;
echo $error_message;
// prevent processing any more PHP scripts
exit;
}
?>
6. Load http://localhost/ajax/foundations/proxyping/proxyping.html with
your favorite web browser (yes, even with Opera), and admire the random number
you get.
Figure 3.13: Using a Proxy PHP Script to Access the Remote Server
What Just Happened?
The JavaScript code is allowed to access the server it was loaded from. We placed a script on the
server, called
proxyping.php, which accesses the random number generator server on the behalf
of the client.
In order for the client to still have complete control over what kind of number to receive, we pass
the
min and max parameters to the PHP script, and the PHP script passes them in its turn to the
random number generator server. We don't pass the
num parameter from the client because now we
don't want to give the client the option to ask for more than one number at a time. In this example,
if the response is larger than
3 characters, we assume we received a server error report:
// handles the response received from the server
function handleServerResponse()
{
// retrieve the server's response
var response = xmlHttp.responseText;
// if the response is longer than 3 characters, or if it is void, we assume
// we just received a server-side error report
if(response.length > 3 || response.length == 0)
throw(response.length == 0 ? "Server error" : response);
89
Server-Side Techniques with PHP and MySQL
90
Errors can happen on the client side, or on the server side. We made efforts to have the
client protected by implementing a try/catch mechanism in key portions of the code.
On the other hand, when an error happens on the server, that error doesn't propagate to
the client as a client error. Instead, on the client we must manually analyze the input
received from the server, and if it doesn't look like what we expected, we generate an
error manually using throw.
If the display_errors setting in php.ini is set to Off, when a PHP parse or fatal error
happens, the error is logged only to the Apache error log file (Apache/logs/error.log),
and the script's output will be void. So if we receive a void response, we also assume that
something bad happened on the server, and we build a generic error message on the client.
For example, if you try to load the page when no internet connection is available (so the remote
server isn't reachable), then it should result in the following error being displayed (the error
message will look differently if
display_errors is set to Off in php.ini):
Figure 3.14: An Error Message When No Internet Connection is Available
The code in proxyping.php simply uses the parameters received though GET to access the random
number generator server. One interesting detail to note in this script is the way we set the
T
page
expiration
headers. Setting page expiration is important because the server is always called using
the same URL and query string, and the client browser may decide to cache the result—and we
don't want that, because the results wouldn't be exactly random any more.
<?php
// load the error handling module
require_once('error_handler.php');
// make sure the user's browser doesn't cache the result
header('Expires: Wed, 23 Dec 1980 00:30:00 GMT');
header('Last-Modified: ' . gmdate('D, d M Y H:i:s') . ' GMT');
header('Cache-Control: no-cache, must-revalidate');
header('Pragma: no-cache');
You can find an excellent article on page caching and PHP at
article/php-anthology-2-5-caching
. The remainder of proxyping.php simply uses the
file_get_contents function to retrieve a response from the random number generator service,
and output it for the client.
Chapter 3
// retrieve the parameters
$num = 1; // this is hardcoded on the server
$min = $_GET['min'];
$max = $_GET['max'];
// holds the remote server address and parameters
$serverAddress = '
$serverParams = 'num=' . $num . // how many random numbers to generate
'&min=' . $min . // the min number to generate
'&max=' . $max; // the max number to generate
// retrieve the random number from foreign server
$randomNumber = file_get_contents($serverAddress . '?' . $serverParams);
// output the random number
echo $randomNumber;
?>
A Framework for Making Repetitive Asynchronous
Requests
Quite frequently when building AJAX applications, you will need your client script to retrieve
data from the server at regular intervals. There are numerous example scenarios, and you will meet
many in this book, and perhaps many more in your real-world projects.
JavaScript offers four functions that can help achieving repetitive (or scheduled) functionality:
setTimeout, setInterval, clearTimeout, and clearInterval, which can be used like this:
// using setTimeout and clearTimeout
timerId = window.setTimeout("function()", interval_in_milliseconds);
window.clearTimeout(timeId);
// using setInterval and clearInterval
timerId = window.setInterval("function()", interval_in_milliseconds);
window.clearInterval(timeId);
setTimeout causes the function to be executed once, after the specified time period. setInterval
executes the function repeatedly, at the mentioned interval, until
clearInterval is used. In most
AJAX scenarios we prefer using
setTimeout because it offers more flexibility in controlling when
the server is accessed.
For a quick demonstration, we will extend the client that reads random numbers by making the
following improvements:
• When making a server request, we wait until the response containing the random
number is received, and then we use
setTimeout to restart the sequence (to make a
new server request) after one second. This way, the interval between two requests is
one second plus the time it takes to retrieve the random number. If you want to make
the requests at exact periods, you must use
setInterval, but in that case you need to
check that the
XMLHttpRequest object isn't busy waiting to complete the previous
request (which can happen if the network is slow, or the server busy).
• In this new example, we will also check for the server's availability from time to time.
The random number generator service has a buffer of random numbers, which is used to
serve the requests, and anyone can check the buffer's level at
cgi-bin/checkbuf
. Our program will check this page every 10 requests, and will request
new random numbers only if the buffer level is at least
. 50%
91
Server-Side Techniques with PHP and MySQL
The web application will look like Figure 3.15:
Figure 3.15: Making Repetitive Asynchronous Requests
This repetitive task must start somewhere. In our application, everything starts with process().
There, we decide what kind of server request to make; we can either ask for a new random
number, or we can check for the buffer level of the random number generator server. We check for
the buffer level every 10 requests, and by default we don't ask for new random numbers unless the
buffer is higher than
. The process is described in the flowchart given opposite: 50%
92
Chapter 3
Figure 3.16: Flowchart Describing the Process of Retrieving Random Numbers
With the default code, setTimeout is only called to restart the process after successful HTTP
requests; there is no
setTimeout in the catch blocks. (Depending on your particular solution, you
may want to try calling the server again after a while even if an error happens.)
Time for Action—Implementing Repetitive Tasks
1. In the foundations folder, create a new folder named smartproxyping.
2. In the
smartproxyping folder, create a file named smartproxyping.html:
<!DOCTYPE html PUBLIC "-//W3C//DTD XHTML 1.1//EN"
"
<html>
<head>
<title>Practical AJAX: Making Repetitive Asynchronous Requests</title>
<script type="text/javascript" src="smartproxyping.js"></script>
</head>
<body onload="process()">
93
Server-Side Techniques with PHP and MySQL
Server, gimme some random numbers!<br/>
<div id="myDivElement" />
</body>
</html>
3. In the same folder, create smartproxyping.js:
// holds an instance of XMLHttpRequest
var xmlHttp = createXmlHttpRequestObject();
// holds the remote server address and parameters
var serverAddress = "smartproxyping.php";
var getNumberParams = "action=GetNumber" + // get a new random number
"&min=1" + // the min number to generate
"&max=100"; // the max number to generate
var checkAvailabilityParams = "action=CheckAvailability";
// variables used to check for server availability
var requestsCounter = 0; // counts how many numbers have been retrieved
var checkInterval = 10; // counts interval for checking server
availability
var updateInterval = 1; // how many seconds to wait to get a new number
var updateIntervalIfServerBusy = 10; // seconds to wait when server busy
var minServerBufferLevel = 50; // what buffer level is considered acceptable
// creates an XMLHttpRequest instance
function createXmlHttpRequestObject()
{
// will store the reference to the XMLHttpRequest object
var xmlHttp;
// this should work for all browsers except IE6 and older
try
{
// try to create XMLHttpRequest object
xmlHttp = new XMLHttpRequest();
}
catch(e)
{
// assume IE6 or older
var XmlHttpVersions = new Array("MSXML2.XMLHTTP.6.0",
"MSXML2.XMLHTTP.5.0",
"MSXML2.XMLHTTP.4.0",
"MSXML2.XMLHTTP.3.0",
"MSXML2.XMLHTTP",
"Microsoft.XMLHTTP");
// try every prog id until one works
for (var i=0; i<XmlHttpVersions.length && !xmlHttp; i++)
{
try
{
// try to create XMLHttpRequest object
xmlHttp = new ActiveXObject(XmlHttpVersions[i]);
}
catch (e) {}
}
}
// return the created object or display an error message
if (!xmlHttp)
alert("Error creating the XMLHttpRequest object.");
else
return xmlHttp;
}
// call server asynchronously
function process()
{
94
Chapter 3
// only continue if xmlHttp isn't void
if (xmlHttp)
{
// try to connect to the server
try
{
// if just starting, or if we hit the specified number of requests,
// check for server availability, otherwise ask for a new random number
if (requestsCounter % checkInterval == 0)
{
// check if server is available
xmlHttp.open("GET", serverAddress + "?" +
checkAvailabilityParams, true);
xmlHttp.onreadystatechange = handleCheckingAvailability;
xmlHttp.send(null);
}
else
{
// get new random number
xmlHttp.open("GET", serverAddress + "?" + getNumberParams, true);
xmlHttp.onreadystatechange = handleGettingNumber;
xmlHttp.send(null);
}
}
catch(e)
{
alert("Can't connect to server:\n" + e.toString());
}
}
}
// function called when the state of the HTTP request changes
function handleCheckingAvailability()
{
// when readyState is 4, we are ready to read the server response
if (xmlHttp.readyState == 4)
{
// continue only if HTTP status is "OK"
if (xmlHttp.status == 200)
{
try
{
// do something with the response from the server
checkAvailability();
}
catch(e)
{
// display error message
alert("Error reading server availability:\n" + e.toString());
}
}
else
{
// display status message
alert("Error reading server availability:\n" + xmlHttp.statusText);
}
}
}
// handles the response received from the server
function checkAvailability()
{
// retrieve the server's response
var response = xmlHttp.responseText;
95
Server-Side Techniques with PHP and MySQL
96
// if the response is long enough, or if it is void, we assume we just
// received a server-side error report
if(response.length > 5 || response.length == 0)
throw(response.length == 0 ? "Server error" : response);
// obtain a reference to the <div> element on the page
myDiv = document.getElementById("myDivElement");
// display the HTML output
if (response >= minServerBufferLevel)
{
// display new message to user
myDiv.innerHTML += "Server buffer level is at " + response + "%, "
+ "starting to retrieve new numbers. <br/>";
// increases counter to start retrieving new numbers
requestsCounter++;
// reinitiate sequence
setTimeout("process();", updateInterval * 1000);
}
else
{
// display new message to user
myDiv.innerHTML += "Server buffer is too low (" + response + "%), "
+ "will check again in " + updateIntervalIfServerBusy
+ " seconds. <br/>";
// reinitiate sequence
setTimeout("process();", updateIntervalIfServerBusy * 1000);
}
}
// function called when the state of the HTTP request changes
function handleGettingNumber()
{
// when readyState is 4, we are ready to read the server response
if (xmlHttp.readyState == 4)
{
// continue only if HTTP status is "OK"
if (xmlHttp.status == 200)
{
try
{
// do something with the response from the server
getNumber();
}
catch(e)
{
// display error message
alert("Error receiving new number:\n" + e.toString());
}
}
else
{
// display status message
alert("Error receiving new number:\n" + xmlHttp.statusText);
}
}
}
// handles the response received from the server
function getNumber()
{
// retrieve the server's response
var response = xmlHttp.responseText;
// if the response is long enough, or if it is void, we assume we just
// received a server-side error report
if(response.length > 5 || response.length == 0)
Chapter 3
throw(response.length == 0 ? "Server error" : response);
// obtain a reference to the <div> element on the page
myDiv = document.getElementById("myDivElement");
// display the HTML output
myDiv.innerHTML += "New random number retrieved from server: "
+ response + "<br/>";
// increase requests count
requestsCounter++;
// reinitiate sequences
setTimeout("process();", updateInterval * 1000);
}
4. In the same folder, create smartproxyping.php:
<?php
// load the error handling module
require_once('error_handler.php');
// make sure the user's browser doesn't cache the result
header('Expires: Wed, 23 Dec 1980 00:30:00 GMT'); // time in the past
header('Last-Modified: ' . gmdate('D, d M Y H:i:s') . ' GMT');
header('Cache-Control: no-cache, must-revalidate');
header('Pragma: no-cache');
// retrieve the action parameter
$action = $_GET['action'];
// check availability or get new random number?
if ($action == 'GetNumber')
{
$num = 1; // value is hardcoded because client can't deal with more numbers
$min = $_GET['min'];
$max = $_GET['max'];
// holds the remote server address and parameters
$serverAddress = '
$serverParams = 'num=' . $num . // how many random numbers to generate
'&min=' . $min . // the min number to generate
'&max=' . $max; // the max number to generate
// retrieve the random number from foreign server
$randomNumber = file_get_contents($serverAddress . '?' . $serverParams);
// output the random number
echo $randomNumber;
}
elseif ($action == 'CheckAvailability')
{
// address of page that returns buffer level
$serverAddress = '
// received buffer level is in form 'x%'
$bufferPercent = file_get_contents($serverAddress);
// extract the number
$buffer = substr($bufferPercent, 0, strlen($bufferPercent) - 2);
// echo the number
echo $buffer;
}
else
{
echo 'Error talking to the server.';
}
?>
5. In the same folder, create the error_handler.php file, which should be identical to
its version from the previous exercises:
<?php
// set the user error handler method to be error_handler
set_error_handler('error_handler', E_ALL);
// error handler function
97
Server-Side Techniques with PHP and MySQL
98
function error_handler($errNo, $errStr, $errFile, $errLine)
{
// clear any output that has already been generated
if(ob_get_length()) ob_clean();
// output the error message
$error_message = 'ERRNO: ' . $errNo . chr(10) .
'TEXT: ' . $errStr . chr(10) .
'LOCATION: ' . $errFile .
', line ' . $errLine;
echo $error_message;
// prevent processing any more PHP scripts
exit;
}
?>
6. Load http://localhost/ajax/foundations/smartproxyping/
smartproxyping.html
. The output should look like the one in Figure 3.15.
What Just Happened?
Our client, in this example, knows how to check from time to time if the server is available. The
random number generator service provides the page
—which you can use to check its buffer level.
The JavaScript code in smartproxyping.js starts by defining a number of global variables that
you use to control the program's behavior:
// holds the remote server address and parameters
var serverAddress = "smartproxyping.php";
var getNumberParams = "action=GetNumber" + // get a new random number
"&min=1" + // the min number to generate
"&max=100"; // the max number to generate
var checkAvailabilityParams = "action=CheckAvailability";
// variables used to check for server availability
var requestsCounter = 0; // counts how many numbers have been retrieved
var checkInterval = 10; // counts interval for checking server availability
var updateInterval = 1; // how many seconds to wait to get a new number
var updateIntervalIfServerBusy = 10; // seconds to wait when server busy
var minServerBufferLevel = 50; // what buffer level is considered acceptable
These variables contain the data required to make server requests. getNumberParams contains the
query string parameters needed to request a new random number, and
checkAvailabilityParams
contains the parameters used to check the server's buffer level. The other variables are used to
control the intervals for making the asynchronous requests.
A novelty in this exercise compared to the previous ones is that you have two functions that
handle server responses—
handleCheckingAvailability and handleGettingNumber. The roots of
this happen to be in the
process() function, which assigns one of these callback functions
depending on the server action it requests.
In this program,
process() is not called only once as in other exercises; instead, it is called
multiple times, and each time it must decide what action to make—should it ask for a new random
number, or should it check the server's buffer level? The
requestsCounter variable, which keeps
a track of how many times we have retrieved a new random number since the last buffer check,
helps us make a decision: