BeginningASP.NET 2.0 with C# PHẦN 6 pot
Bạn đang xem bản rút gọn của tài liệu. Xem và tải ngay bản đầy đủ của tài liệu tại đây (2.55 MB, 76 trang )
Consider this scenario: What happens if your boss tells a designer to change the font on the web site,
while telling the developer to add a search text box to the front page to search on the contents of the site?
In times gone by, both people would be scrambling for the same page to make the alterations. Worse
still, the designer could do his version of
index.asp, while the programmer could do his, and therefore
neither version would please the boss. Even if they did it sequentially, quite often the programmer
would mess up the pristine design, or the designer would break a vital piece of code. I’m not intending
to patronize either job; this has honestly happened on projects I’ve worked on. It therefore makes more
sense to have two different versions of the same page. And it makes sense to let the designer with his
graphic design and art qualifications do the interface of the web site, with the programmer at the back
end connecting all the bits of the site and making them work.
This is where separating the code from the content comes in. In this fictitious scenario, you’d probably
use Cascading Style Sheets to get around the problem. However, you’d still have the problem of the sep-
arating the design from the code. In other words, the positioning of the ASP.NET controls would still be
the responsibility of the programmer. ASP.NET 2.0 goes beyond the separation of code from content.
The Separation of Code from Design
So far you’ve read about two distinct areas in ASP.NET 2.0, the first being the HTML code and ASP.NET
controls, which you can see in this sample page:
<html>
<head>
</head>
<body>
<form runat=”server”>
<aspnet:label id=”label1” runat=”server” text=”Enter your name:”><aspnet:label>
<aspnet:textbox id=”textbox1” runat=”server”></aspnet:textbox>
<aspnet:button id=”button1” runat=”server” text=”submit”>
</form>
</body>
</html>
The second is the actual code, which is placed within the <head> tags of the first:
<script language=”C#”>
private void Page_Load(object sender, EventArgs e)
{
if (Page.IsPostback==true)
{
Label1.Text = “Hello” + textbox1.Text;
}
}
</script>
This layout is known as the single-file scenario. This chapter uses the term “single-file” when talking
about putting the code within
<script> tags on the page. The first section of code in the single-file sam-
ple page is purely concerned with the design and structure of the page. For example, you could move
349
Componentization
13_042583 ch10.qxd 4/4/06 2:48 PM Page 349
the label and textbox and button around, and the program would still work perfectly. However, if
you altered the order of the second section of code, everything would come to a jarring halt.
Worse still, behind the scenes the single-file scenario actually created far more work than was necessary.
A second scenario is a little sidebar that displays a shopping basket as you browse around the site. How
would you do it? Would you have to add this code to every single page? If you added it to every page,
would you have to update every single page, every time you made a change? A sensible strategy of sep-
arating content from code, data from code, and being able to reuse the code is obviously needed. So let’s
start by looking at the first point in this three-pronged strategy.
Code-Behind
Code-behind is simply a separate code file linked to your Web Form or .aspx page. You place all of your
HTML tags and ASP.NET controls in the .aspx page, and you have a separate page “behind” this page
that contains all of the code that is normally contained within the
<script> blocks for the page. So to
answer the designer/developer dilemma, your designer can update the .aspx page, while your devel-
oper can update the code-behind page.
Code-behind pages are very easy to use. Like their .aspx counterparts, they are composed of pure text
and can be viewed in Visual Web Developer, Notepad, or any text editor. The .aspx is the centerpoint,
and the code-behind is like an attachment. In Visual Web Developer, code-behind pages are not created
until they are needed, although when you select a Create Web Site option, a
Default.aspx page and
the corresponding code-behind
Default.aspx.cs are created automatically. However, for any further
pages that you create, only the .aspx page is added, unless you check the Place Code in Separate File
option, which is unchecked by default.
The code is stored in a separate file, which is identified by a .cs suffix or (if you’re using VB.NET) a .vb
suffix. So if you created a
Default.aspx page, the code-behind file for that page would be called
Default.aspx.cs. Not all languages in the .NET Framework support the code-behind model, most
notably J#, but the two main languages that most developers use and the only two considered in this
book both use code-behind.
The Page Directive
You’ve already met the Page directive in Chapter 5 when you learned about the idea of using inheri-
tance with the .NET Framework, to inherit certain features from classes. The
Page directive also refers to
where your separate code-behind file is stored. Look at the same directive and the same attributes again,
but this time from a slightly different angle:
<%@Page Language=”C#” CodeFile=”Default.aspx.cs” Inherits=”_default”%>
This runs contrary to what happens in Visual Studio .NET 2005, where when you
create a new Web Form, a new code-behind file is automatically created at the
same time.
350
Chapter 10
13_042583 ch10.qxd 4/4/06 2:48 PM Page 350
You’re interested in two particular attributes of Page:
❑
Inherits: This attribute tells you which class you want to inherit from. It’s vital that the
Inherits attribute matches a class in the code-behind file.
❑
CodeFile: This attribute specifies the name of the code-behind file. Typically you would expect
the code-behind file to be kept in the same folder, but it’s possible to keep it separate and spec-
ify a URL inside this attribute as well.
If you want to use code-behind, you must include these two attributes at all times. If you want to add a
code-behind file manually to an .aspx file, then after you’ve added these two attributes, next you need to
create the code-behind file itself.
Partial Classes
You can check the contents of a typical code-behind file by creating a new ASP.NET web site and then
viewing the contents of
Default.aspx.cs, which is created automatically. You will see the following
three lines:
partial class _Default : System.Web.UI.Page
{
}
Any code you create should be placed within a partial class. Although this section won’t go into partial
classes too much, it is necessary to talk a little about them. In the last chapter, you saw classes as being
cookie cutters that define the shape of the cookies. So what is a partial class? Half a cookie cutter? Well in
some ways, yes is the answer. If you’ve played around with ASP.NET 1.x at all, you’ll have noticed that
there was a lot more than just three lines of code in the code-behind file, in the section marked Web Form
Designer Generated Code. In the previous version of ASP.NET, if you stuck your control in the page,
under certain conditions your code-behind file didn’t always see it. Partial classes mean that at compila-
tion time, your code-behind file and the Web Form are now merged into one class file, thus making sure
this kind of scenario didn’t happen. It also means you only need these three lines of code to make it
work. So your code-behind file is one half of the cookie cutter and the Web Form is the other half, and
together they make the whole. Let’s leave that analogy before it gets squeezed any more.
Event Handlers/Functions
You place the code in the partial class; however, this is not quite enough to make it work. The code also
should be placed within an event handler or a subroutine or function of some sort. All code in ASP.NET
is run in reaction to an event of some sort. If you don’t actually place your code in an event handler,
you’ll probably need a call to your subroutine or function placed within an event handler. The most
common one is the
Page_Load event handler that occurs when the page is first loaded:
private void Page_Load (object sender , EventArgs e ) {
}
351
Componentization
13_042583 ch10.qxd 4/4/06 2:48 PM Page 351
Of course you don’t have to type this in —if you double-click the page in Design View, the Page_Load
event handler will be added for you. This is just another good reason for using Visual Web Developer. In
previous versions of this book, we’ve used humble Notepad as our editor to make changes to the code.
This isn’t because we endorse a firmly Luddite/anti-progress view of the world, but because Notepad
made no changes to our HTML code (unlike the majority of HTML editors), and because it is something
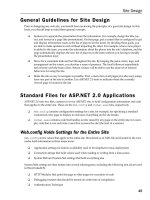
everybody with a version of Windows automatically had. With code-behind, things become slightly
more complex, in that you have two files that basically refer to the same page (see Figure 10-1). You can
still of course manage them via Notepad, but the features in Visual Web Developer make it much easier
to manage the two separate pages (and see them as connected entities).
Figure 10-1
Of course, you might think, well why not stick with Notepad and also stick with the single-file model?
The following list reiterates some of the advantages of using code-behind files:
❑ Separation of the content (user interface) from the code. It is practical to have a designer work-
ing on the markup while a programmer writes code.
❑ Better security, because code is not exposed to the designers or others who are working only
with the page content.
❑ Code can be easily reused for multiple pages.
However, this doesn’t mean that code-behind is always the perfect solution to all your problems. Using
a single file for your code and content is still the more sensible option within some scenarios:
❑ Single-file is best suited for pages where the code consists primarily of event handlers for the
controls on the page.
❑ Where there is little code, it can be easier to view a single-file page because both the code and
the HTML are in the same place.
There are also some reasons of convenience to consider as well, namely single-file pages are easier to
send to another programmer because there is only one file, they’re easier to rename, and managing files
is slightly easier, because the page is self-contained in a single file, and there are therefore fewer pages to
manage. Generally, though, you really should be placing your code in a separate code-behind file,
because the advantages outweigh the disadvantages for the most part.
Creating a Code-Behind File
That’s enough talk. In the next Try It Out, you get down to the business of creating an incredibly simple
code-behind file that interacts with a sample page containing
TextBox, Button, and Label controls.
352
Chapter 10
13_042583 ch10.qxd 4/4/06 2:48 PM Page 352
You’ll see how you can manipulate all of these controls in the same way as you might expect to when
using a single file.
Try It Out Creating a Code-Behind File
1.
Open VWD and create a new web site called TestCodeBehind in the Chapter directory
(
C:\BegASPNET2\Chapters\Begin\Chapter10).
2. Go to Solution Explorer and click the plus symbol (+) next to Default.aspx to expand the tree
to reveal the file
Default.aspx.cs (refer to Figure 10-1).
3. Go back to the Default.aspx file and add two Label controls, a TextBox control, and a
Button control, as shown in Figure 10-2.
Figure 10-2
Again, Default.aspx is the only file that has the code-behind file automatically
created for you. If you create another Web Form, you must make sure to check the
Place Code in a Separate File option, which is unchecked by default.
353
Componentization
13_042583 ch10.qxd 4/4/06 2:48 PM Page 353
Adjust the source HTML to read as follows:
<asp:Label ID=”Label1” runat=”server” Text=”What is the answer to the meaning of
life, the universe and everything?:”></asp:Label>
<br /><br />
<asp:TextBox ID=”TextBox1” runat=”server”></asp:TextBox>
<br /><br />
<asp:Button ID=”Button1” runat=”server” Text=”Submit” />
<br /><br />
<asp:Label ID=”Label2” runat=”server” Text=””></asp:Label>
4. Go back to Design View and double-click anywhere on the background of Default.aspx other
than on the controls. Doing so will open up into the code-behind file, shown in Figure 10-3.
Figure 10-3
5. Add the following code to the Page_Load event handler:
if (Page.IsPostBack)
{
if (TextBox1.Text == “42”)
Label2.Text = “So you read Douglas Adams as well ”;
else
{
354
Chapter 10
13_042583 ch10.qxd 4/4/06 2:48 PM Page 354
Label2.Text = “No, I’m not sure that’s it”;
}
}
6. Click the green arrow to run it. You may get a textbox asking whether or not to add a new
Web.config file or run without debugging. Click the former.
7. Enter a value or lengthier sentence into the text box, as shown in Figure 10-4.
Figure 10-4
How It Works
It all seems very simple —instead of putting your code within <script> tags, you place it within a sep-
arate page, connected by the
Page directive tag. Indeed, if you check at the top of the Source View for
Default.aspx, you can see that the following was already created:
<%@Page CodeFile=”Default.aspx.cs” Inherits=”_Default” %>
This refers to the code-behind file Default.aspx.cs. There the following code is run when the
Page_Load event is called (when the page is viewed). This is just the normal kind of code talked about
in Chapter 9:
if (Page.IsPostBack)
{
if (TextBox1.Text == “42”)
Label2.Text = “So you read Douglas Adams as well ”;
else
{
Label2.Text = “No, I’m not sure that’s it”;
}
}
It says if the page has been posted back (submitted), check the contents of the TextBox control. If it
equals
42, then you have your correct answer, and you set the Label2 control’s Text property accord-
ingly. If the contents of the
TextBox control do not equal 42, you display a different answer (“No, I’m
not sure that’s it”
).
However, there is a bit more going on beneath the covers, namely the method by which your code is
compiled.
355
Componentization
13_042583 ch10.qxd 4/4/06 2:48 PM Page 355
Compilation in ASP.NET 2.0
Compilation is another one of those subjects that this book doesn’t go into in depth, because you don’t
need to know too much about it. However, you should be aware of its presence. When you submit your
Web Form to the server, your Web Form and ASP.NET pages first have to be translated into a language
the server can understand. This is known as compilation. You can see how this process works in .NET 2.0
in Figure 10-5.
Figure 10-5
The compiler changes your code into something known as intermediate code, or Microsoft Intermediate
Language (MSIL). This language is something that is independent of any PC it is run on. The .NET CLR
(Common Language Runtime) is able to take this intermediate code and change it into executable code
that it can run and provide output for. The output is then sent back to the user as a response. (There’s
actually a bit more to this process, as you’ll see in Chapter 14.)
During the process of compilation, your pages are approved syntactically, so if you’ve made any typos
such as the following, they will be spotted at compile time:
if (Paige.IsPostBack)
Your code can be compiled in two ways:
❑ Pre-Runtime Compilation: The “normal” way (or the “old way,” —the default way in ASP.NET
1.1). Code-behind files are compiled into an assembly and stored in the
\bin directory. Web
Forms and .aspx pages are compiled when needed.
Disk
Request
ASP.NET page
Compiler
Intermediate Code
Response
.NET CLR
Runtime
356
Chapter 10
13_042583 ch10.qxd 4/4/06 2:48 PM Page 356
❑ Full Runtime Compilation: Code-behind files and any other associated code can now be placed
in the
App_Code folder. ASP.NET 2.0 will then create and maintain references to the assembly
that is generated from these files at runtime.
The App_Code Folder
If you create an App_Code folder in your project, any code you place in that project will automatically be
compiled when you run the project. It’s a far more robust solution than the old
\bin folder used by
ASP.NET 1.x, and for that reason you should use it for any code other than code-behind. The reason you
should not use it for code-behind is that it is easier in VWD to keep your code files attached to the page
they are related to; otherwise viewing them could be a pain.
So not only can you organize your code and in which pages it is placed, but ASP.NET 2.0 dictates a
different structure for ordering where those pages are placed.
Data Layers
You’ve looked at how code and content can be successfully separated, but there is a third dimension to
our discussions, namely that of the data. Throughout this book, we’ve paused to reflect briefly on vari-
ous aspects of the history of the Internet and the Web, while trying to keep you away from a huge lec-
ture on the entire subject. However, another quick history lecture is in order here to help you understand
the purpose of the next ASP.NET 2.0 feature.
Two-Tier Applications
Rather than rewinding too far back, let’s jump in halfway. When HTML started getting beyond the uni-
versities, it became necessary to provide something more than just static text and images. One of the first
ways in which web pages were made dynamic was to enable them to access a database. The browser
was one tier, and the database was the second tier. In this scenario, the browser dealt with rules about
the business or application and user interface.
The data retrieval and manipulation was performed by another separate database application, such as
SQL Server or Microsoft Access. It would handle the data storage and retrieval device for the applica-
tion. These two-tier applications were also commonly know as client-server applications. A typical client-
server application is depicted in Figure 10-6.
The term business rules is used to encompass any part of the application logic that
isn’t the user interface or the database. If the application isn’t being used for a busi-
ness, then the term application logic might be more applicable, although they mean
the same thing.
There is actually a third option called deployment pre-compilation, which is for full
compilation of your project prior to deployment. You’ll learn a little more about this
in Chapter 16.
357
Componentization
13_042583 ch10.qxd 4/4/06 2:48 PM Page 357
Figure 10-6
The other popular variation on the two-tier application saw the business rules (application logic) being
executed on the database system. Such applications would commonly use stored procedures to manipulate
the database (or in some cases triggers). A stored procedure is a query that is stored on the database. It
can be called by the client application and then run on the server. It would contain rules about the busi-
ness as well. For example, if you had a league table on Wrox United that awarded three points for a win
and one point for a draw, then in the database query, it would somehow have to record that when one
side scores more goals than another side, it is worth three points. This is a business rule. It doesn’t mat-
ter to the database how many points you add on to the win; however, your league table would fail to
work properly if you added two or five points for a win.
Three-Tier Applications
The big difference with three-tier applications is that business rules are no longer located on either the
client or the database. They are stored and run on a system in between the client and the server. The
advantage of this is that the business rules server can ensure that all of the business processing is done
correctly. There is now a third layer interface, business rules and data. The introduction of the data tier is
illustrated in Figure 10-7.
Figure 10-7
In a three-tier application, the client never accesses the data storage system directly. You can make
changes to the business rules and this would mean you could change any part of the system without
having to alter the other two parts. As the three different sections of the application communicate via
interfaces, and as long as the interface between the code and application front-end remains the same,
the internal workings of each part can be changed without affecting the rest of the application. The
REQUEST
RESPONSE
RECORDS QUERY
Client
Server
BUSINESS
RULES
Data
Source
REQUEST
RESPONSE
Client
Server
358
Chapter 10
13_042583 ch10.qxd 4/4/06 2:48 PM Page 358
advantages of doing this are similar to those for keeping code and content separate. Typically, a database
is managed by a database administrator (DBA), and it might even be managed by a separate company.
The web developer as jack-of-all-trades would previously have been required to know the intimate
workings of the database, when really they shouldn’t be interfering there at all. So this brings you to the
end of your little excursion, because you can now look at a new feature in ASP.NET 2.0 that allows you
to separate your applications more simply into three tiers.
What’s New in ASP.NET 2.0
In ASP.NET 2.0, you are no longer restricted to binding only to data controls. You can also bind to sepa-
rate business controls via the
ObjectDataSource control.
Using the ObjectDataSource Control
The new ASP.NET ObjectDataSource control enables you to declaratively bind data controls such as
the
GridView, DataList, and DropDownList controls to a separate business control or a data compo-
nent. Previously, you could only bind the controls directly to a database. This new development enables
the separation of your business rules from your content and your data.
ObjectDataSource is a more difficult control to explain than a GridView or DropDownList control, so
rather than wasting excessive verbiage, it’s quicker to show you exactly what the
ObjectDataSource
control does in an example. You’re actually going to do two examples to show it in action. In the first
example, you’ll see how to create a data component to return a list of players from the Players table. This
Try It Out is split into two sections: the first section where you create the
ObjectDataSource itself and
the second where you bind the
ObjectDataSource control to a GridView control. The resulting output
will be completely non-editable. In the second example, you’ll use the Try It Out to create a data compo-
nent that can not only read from the Wrox United database but also write data to it. You’ll create and
bind the data component in this same example that will make it quite lengthy.
The data component that you create in both examples will consist of an XSD schema file (.xsd). This file
describes the data you require and defines which methods will be used to read and write data. This
doesn’t require any code or knowledge of XML schemas because when you run the application, the .xsd
file is compiled for you and performs all of the tasks needed.
Start by creating the data component for the read-only example.
Try It Out Creating the Data Component
1.
Open Visual Web Developer and select Open Web Site. From the C:\BegASPNet2\Chapters\
Begin\Chapter10
folder, select ObjectDataSource and click OK.
2. In Solution Explorer, right-click the name of your web site, select Add ASP.NET Folder, and
select
App_Code.
3. Right-click the App_Code folder and select Add New Item from the list.
4. From the Visual Studio installed templates, click DataSet.
5. Rename the DataSet ods.xsd and click Add.
6. VWD starts the TableAdapter Configuration Wizard. (Be patient here, because this one really
does take a while to kick in.) When the wizard finally arrives, select ConnectionString
(Web.config) from the drop-down list (see Figure 10-8) and click Next.
359
Componentization
13_042583 ch10.qxd 4/4/06 2:48 PM Page 359
Figure 10-8
7. Next you get a page where you can choose to use SQL statements or stored procedures. Select
the Use SQL statements radio button (as shown in Figure 10-9) and click Next.
Figure 10-9
360
Chapter 10
13_042583 ch10.qxd 4/4/06 2:48 PM Page 360
8. On the next wizard screen, you can define the SQL statement. Type the following SQL statement
into the “What data should be loaded into the table” area of the dialog box:
SELECT PlayerID, FirstName, LastName, Position, DateJoined, DateLeft FROM Players
9. After entering the SQL statement, click Next. You can now define which methods the compo-
nent will expose. Uncheck the Fill a DataTable check box and make sure that the Return a
DataTable check box is checked (see Figure 10-10). In the Method name box, type GetPlayers.
This method is used later to retrieve the data. Uncheck the final check box.
Figure 10-10
10. Click Finish. In Figure 10-11, you can see the data component in the designer. It shows both the
data you selected and the method you created.
Figure 10-11
11. Save the data component and close the component designer.
12. Select Build➪Build Web Site to compile the component. (Note that this won’t produce anything
viewable.)
361
Componentization
13_042583 ch10.qxd 4/4/06 2:48 PM Page 361
How It Works
The data component is now usable as a data source within a Web Form. You’ve used the wizard to create
the component for you, to select the fields from the database, and also to name the method by which you
want to be able to call this component.
Thenext step is to bind to this component. To do this, you can create and configure an
ObjectDataSource control. You can then add controls, such as the GridView control, to the page and
bind them to the data source control.
Try It Out Binding to the ObjectDataSource Control
1.
Open the Default.aspx from Solution Explorer and switch to Design View.
2. Open the Toolbox and from the Data section drag an ObjectDataSource control onto the page.
3. Select the Toolbox again, and from the Data section drag a GridView control onto the page.
4. Click the black arrow in the top-right corner of the ObjectDataSource control. The Common
Tasks box appears with the words “Configure Data Source.” Click this.
5. In the dialog box that appears, there is a single drop-down list asking you to choose your
business object (see Figure 10-12). There should only be one, the
odsTableAdapters.
PlayersTableAdapter
. Select it and click Next.
Figure 10-12
6. On the next screen (shown in Figure 10-13), under the Select tab in the Choose a method drop-
down box, the
GetPlayers(), returns PlayersDataTable method is displayed. Select it
and click Finish (the other methods are automatically picked for you).
362
Chapter 10
13_042583 ch10.qxd 4/4/06 2:48 PM Page 362
Figure 10-13
7. Click the black arrow on the top-right corner of the GridView control and from the Choose Data
Source list that appears, select
ObjectDataSource1. The Grid will update in Design View.
8. Open the Properties window and check that the DataKeyNames property is set to PlayerID.
9. Run the application, and you will see Figure 10-14 in your browser.
Figure 10-14
363
Componentization
13_042583 ch10.qxd 4/4/06 2:48 PM Page 363
How It Works
You started by creating an instance of an ObjectDataSource control. To give it its functionality, you
attached it to the
GetPlayers() method that was specified in the data component. The GetPlayers()
method was created in the previous Try It Out. This method returns the results of the SQL statement,
available as a
DataTable object. The DataTable object is an object that the GridView (and indeed all
data controls) can bind to. If you go back and look at the source that has been created, you can see the
source for the two controls you added to your form.
<div>
<asp:ObjectDataSource ID=”ObjectDataSource1” runat=”server”
OldValuesParameterFormatString=”original_{0}”
SelectMethod=”GetPlayers” TypeName=”odsTableAdapters.PlayersTableAdapter”>
</asp:ObjectDataSource>
</div>
<asp:GridView ID=”GridView1” runat=”server” AutoGenerateColumns=”False”
DataKeyNames=”PlayerID”
DataSourceID=”ObjectDataSource1”>
<Columns>
<asp:BoundField DataField=”PlayerID” HeaderText=”PlayerID”
InsertVisible=”False”
ReadOnly=”True” SortExpression=”PlayerID” />
<asp:BoundField DataField=”FirstName” HeaderText=”FirstName”
SortExpression=”FirstName” />
<asp:BoundField DataField=”LastName” HeaderText=”LastName”
SortExpression=”LastName” />
<asp:BoundField DataField=”Position” HeaderText=”Position”
SortExpression=”Position” />
<asp:BoundField DataField=”DateJoined” HeaderText=”DateJoined”
SortExpression=”DateJoined” />
<asp:BoundField DataField=”DateLeft” HeaderText=”DateLeft”
SortExpression=”DateLeft” />
</Columns>
</asp:GridView>
The GridView control binds each of the fields in the dataset to a column in a table on the display.
The
ObjectDataSource takes five attributes. The ID and runat attributes are standard, the
OldValuesParameterFormatString is set to the original setting, the SelectMethod attribute specifies
the name of the actual method, and the
TypeName specifies the PlayersTableAdapter. These are all the
instructions needed to be able to bind the return PlayersTable to the
GridView control. The final display
looks the same as a normal
GridView control— it’s only the plumbing underneath that has routed your
data from the
ObjectDataSource control that is different.
The Wrox United ObjectDataSource
This data so far has been static. So as mentioned previously, in this next Try It Out, you go one further
and use the
ObjectDataSource control to be able to edit and update your squad’s details. In the Admin
section of the Wrox United site, there is a page called
EditSquad.aspx, which is used to change the
players’ details. However, it uses the
SqlDataSource control for the details. This can be replaced with
an
ObjectDataSource control. It has insert, update, select, and delete methods that map neatly to the
methods in a simple class.
364
Chapter 10
13_042583 ch10.qxd 4/4/06 2:48 PM Page 364
Try It Out The Wrox United ObjectDataSource
1.
Open the Wrox United application from the chapter samples (C:\BegASPNET2\Chapters\
Begin\Chapter10\WroxUnited
) in Visual Web Developer.
2. Right-click the App_Code folder and select Add New Item from the list.
3. From the Visual Studio installed templates, click DataSet.
4. Rename the DataSet wroxunited.xsd and click Add.
5. VWD starts the TableAdapter Configuration Wizard. (As before, be patient here.) When the
wizard finally arrives, select wroxunited (Web.config) and click Next.
6. When you get the page where you can choose to use SQL statements or stored procedures.
select the Use SQL statements radio button and click Next.
7. On the next wizard screen, you can define the SQL statement. Type the following SQL statement
into the “What data should be loaded into the table” area of the dialog box:
SELECT PlayerID, FirstName, LastName, Position, PictureURL, DateJoined, DateLeft
FROM Players
WHERE PlayerID = @PlayerID
8. After entering the SQL statement, click Next. You can now define which methods the compo-
nent will expose. Uncheck the Fill a DataTable check box and make sure that Return a DataTable
check box is checked. In the Method name box, type GetPlayers. This method is used later to
retrieve the data. Make sure the final check box, “Create methods to send update directly to the
database,” is checked.
9. Click Next and then click Finish. Save the data component, and close the component designer.
10. Select Build➪Build Web Site to compile the component.
11. Open the Admin folder of WroxUnited and open the EditSquad.aspx file.
12. In Design View, scroll down, select the second SqlDataSource control, DetailsDataSource
(shown in Figure 10-15), and delete it.
13. From the Data Section of the Toolbox, drag an ObjectDataSource control where the
SqlDataSource used to be.
14. Click the black arrow at the top right of the ObjectDataSource control, and from the Common
Tasks menu, select Configure Data Source.
15. In the opening dialog box, select wroxunitedTableAdapters.PlayersTableAdapter and
click Next.
16. In the Select tab, select the GetPlayers(Int32 PlayerID), returns PlayersDataTable
method from the drop-down list box and click Next.
17. In the Define Parameters dialog box, select Control from the Parameter Source drop-down list
box. Select
GridView1 in Control view. The parameters on the left of the dialog box will now
show
GridView.SelectedValue. Click Finish.
365
Componentization
13_042583 ch10.qxd 4/4/06 2:48 PM Page 365
Figure 10-15
18. Right-click the ObjectDataSource control in Design View and select Properties.
19. In the Properties window, change the (ID) property so that it reads “DetailsDataSource”.
20. Open EditSquad.aspx.cs and amend the code in the procedure parameters to read as follows
in the three subs:
protected void DetailsDataSource_Updated(object sender ,
System.Web.UI.WebControls.ObjectDataSourceMethodEventArgs e)
{
}
protected void DetailsDataSource_Inserted(object sender ,
System.Web.UI.WebControls.ObjectDataSourceMethodEventArgs e)
}
protected void DetailsDataSource_Deleting(object sender , As
System.Web.UI.WebControls.ObjectDataSourceMethodEventArgs e)
{
}
366
Chapter 10
13_042583 ch10.qxd 4/4/06 2:48 PM Page 366
21. Save and close the file.
22. Run the application, log in as an administrator (dave\dave@123), and navigate to the
EditSquad.aspx page. It works in the same way as before except that you are now using an
ObjectDataSource control.
How It Works
You haven’t changed much between this and the previous example. You built a data component, and
you then added an
ObjectDataSource control into the EditSquad.aspx page. You added methods for
the Update, Insert, and Delete methods via the wizard. The code that provided your functionality in the
classes was already in existence— all you had to do was change the references from the
SqlDataSource
control to the ObjectDataSource control. Then you ran it, and the WroxUnited application was able to
use the
ObjectDataSource instead.
User Controls
Your final problem is that of making your code easy to reuse, and this is addressed by user controls.
Again, these existed in ASP.NET 1.x, but this is something that also has been improved upon in ASP.NET
2.0. So what are user controls? Well in a nutshell, user controls are reusable Web Forms. They’ve been
through several name changes and evolutions from scriptlets to pagelets, before arriving at user con-
trols. They can be thought of as mini-scripts, mini-pages, or pages within your pages, but however you
choose to think of them, the key is that they can be called up as many times as you need them.
If you browse the Wrox United site, you can see several examples of user controls, and one, the
News
control, is visible on the front page. In fact, if you look at the front page (shown in Figure 10-16), it is a
multitude of components garnered from different sources.
The
News control is a user control, the Login control is an ASP.NET control, the shopping cart is a link to
a user control, and the menu is derived from the site master, which itself is an ASP.NET control. So the
entire site front page and design is reusable. If you click the Shopping Cart link, you will see the second
user control, shown in Figure 10-17.
And there are a couple more user controls in the administrative section of the site too, but you get the
idea that these controls can be used in multiple pages, or called from different places, and rather than
having to cut and paste the code individually each time, you can just call on this one section of code over
and over again. One question you might have is how do they differ from the normal ASP.NET server
controls, such as the
TextBox control or the Login control that you looked at earlier?
Very little is the answer. The main difference is that you have to provide the code behind the control
yourself, whereas ASP.NET server controls come fully functional out of the box. You can add properties
to user controls and set them as attributes, just like you would with a normal ASP.NET server control.
367
Componentization
13_042583 ch10.qxd 4/4/06 2:48 PM Page 367
Figure 10-16
So why isn’t everything an ASP.NET server control? Well, ASP.NET 2.0 ships with a multitude of con-
trols designed for the most common scenarios and situations. ASP.NET 2.0 adds greatly to the number of
server controls. For example, in ASP.NET 1.1 if you wanted a
Login control, you had to stitch together a
username text box, a password text box, a button, and a label for messages within a panel, so you had to
create this as a user control. In version 2.0, the
Login control comes as a server control. However, it just
isn’t possible to anticipate everything that a user might want or need. Therefore, it makes sense to have
the flexibility to create your own.
If you view the source code in Internet Explorer for the home page (
Default.aspx) in WroxUnited.net,
you’ll see no indication that a user control has been used— it’s all HTML elements and some occasional
script, which is just as it should be. If you were using a Flash plug-in or a Java applet, you would see
some indication with an
<object> tag or on older browsers, possibly an <embed> tag. So there’s no
worry about extra download time being taken either.
Login Control (ASP.NET)
Link to ShoppingCart Control (User) News Control (User)
368
Chapter 10
13_042583 ch10.qxd 4/4/06 2:48 PM Page 368
Figure 10-17
If you look at the actual page that is sent to the server, you can see the user control is included with two
simple lines of code that highlighted here (this source code page is available for download at
www.wrox.com):
<%@ Page Language=”C#” Trace=”false” MasterPageFile=”~/site.master”
AutoEventWireup=”true” codefile=”Default.aspx.cs” Inherits=”_Default” %>
<%@ Register TagPrefix=”uc1” TagName=”News” Src=”News.ascx” %>
<asp:Content ID=”Content1” ContentPlaceHolderID=”mainContent” Runat=”server”>
<h2>Welcome to the Wrox United Web site.</h2>
<p>We’re a great football team. No really, we are. Don’t take any notice
of our past performance. We’re just unlucky.</p>
<uc1:news id=”News1” runat=”server” ItemsToShow=”3”></uc1:news>
</asp:Content>
This page starts giving you some clues as to how user controls work.
User Control Structure
User controls are stored in separate files with a separate .ascx extension. Any time you see this extension,
you know that you are dealing with a user control. To create a user control, you need to add a
@Register
directive to the top of your Web Form identifying where you can find your user control:
<%@Register TagPrefix=”WroxUnited” TagName=”MyControl” %>
369
Componentization
13_042583 ch10.qxd 4/4/06 2:48 PM Page 369
You need to add a new tag specifying where the control will go on your page. It consists of the
TagPrefix, followed by a colon, followed by the TagName, an ID, and the now familiar runat=server
attribute:
<WroxUnited:MyControl id=”mycontrol1” runat=”server”>
</WroxUnited:MyControl>
Lastly, you need to specify the user control itself in a separate .ascx file. Unlike Web Forms, you don’t
need to specify extra
<html> and <body> tags, because the contents of this control will be added to the
body of the containing main page. In fact, all you need to have is the controls that you want to include.
For example, you could include the controls from the code-behind example used earlier in the chapter:
<asp:Label ID=”Label1” runat=”server” Text=”What is the answer to the meaning
of life, the universe and everything?:”></asp:Label>
<asp:TextBox ID=”TextBox1” runat=”server”></asp:TextBox>
<br /><br />
<asp:Button ID=”Button1” runat=”server” Text=”Submit” />
<br />
<asp:Label ID=”Label2” runat=”server” Text=””></asp:Label>
Of course, user controls can have code-behind files as well, just like Web Forms:
public void Page_Load( object sender, System.EventArgs e)
{
if (Page.IsPostBack)
{
if (TextBox1.Text == “42”)
Label2.Text = “So you read Douglas Adams as well ”;
else
{
Label2.Text = “No, I’m not sure that’s it”;
}
}
This control can then be bolted into your web pages wherever you specify the @Register directive and
add a tag for the control.
A Simple User Control
In the next Try It Out, you’re going to start by creating a trivial “Hello World”-style user control to get
you used to the idea of including them in your pages. This code does no more than encapsulate the
code-behind from the first example you created in the chapter as a user control. You’ll see how you can
place the user control in one web page, and then in a second web page.
Try It Out Creating a Simple User Control
1.
Open VWD and create a new ASP.NET web site called SimpleUserControl in the chapter direc-
tory (
C:\BegASPNET\Chapters\Begin\Chapter10).
2. In Solution Explorer, right-click the web site and select Add New Item. Select Web User Control,
enter the name SimpleUserControl.ascx, and check the Place Code in Separate File option, as
shown in Figure 10-18.
370
Chapter 10
13_042583 ch10.qxd 4/4/06 2:48 PM Page 370
Figure 10-18
3. Now you need to add the controls to the page. Again, drag two Label controls, a TextBox con-
trol, and a
Button control, as shown in Figure 10-19.
Figure 10-19
371
Componentization
13_042583 ch10.qxd 4/4/06 2:48 PM Page 371
You can cut and paste the relevant code from the first Try It Out in this chapter into Source View
if you still have it at hand:
<asp:Label ID=”Label1” runat=”server” Text=”What is the answer to the meaning of
life, the universe and everything?:”></asp:Label>
<asp:TextBox ID=”TextBox1” runat=”server”></asp:TextBox>
<br /><br />
<asp:Button ID=”Button1” runat=”server” Text=”Submit” />
<br />
<asp:Label ID=”Label2” runat=”server” Text=””></asp:Label>
4. Double-click the page again and this time, add the following code-behind to
SimpleUserControl.ascx.cs:
public partial class SimpleUserControl : System.Web.UI.UserControl
{
protected void Page_Load(object sender, EventArgs e)
{
if (Page.IsPostBack)
{
if (TextBox1.Text == “42”)
Label2.Text = “So you read Douglas Adams as well ”;
else
{
Label2.Text = “No, I’m not sure that’s it”;
}
}
}
}
5. Next you need to add this control to a page. From Solution Explorer, drag
SimpleControlUser.ascx into Design View for Default.aspx (see Figure 10-20).
6. Click the green arrow to run Default.aspx. It works in exactly as it did in the first Try It Out of
this chapter, as evidenced in Figure 10-21.
7. Go to Solution Explorer and right-click the project. Select Add New Item and add a new Web
Form to the page called secondpage.aspx.
8. Go to Design View and drag SimpleUserControl.ascx into this page. Next, go to Solution
Explorer and right-click
secondpage.aspx and select Set As Start Page.
372
Chapter 10
13_042583 ch10.qxd 4/4/06 2:48 PM Page 372
Figure 10-20
Figure 10-21
9. Run the project again. You should see what appears in Figure 10-22. Your control has been suc-
cessfully duplicated with no extra lines of code being required.
373
Componentization
13_042583 ch10.qxd 4/4/06 2:48 PM Page 373