Mastering unix shell scripting phần 7 pdf
Bạn đang xem bản rút gọn của tài liệu. Xem và tải ngay bản đầy đủ của tài liệu tại đây (487.79 KB, 70 trang )
# Using $FILENAME as input
# MUST USE DOUBLE QUOTES AROUND $PATTERN!!! -> “$PATTERN”
cat “$FILENAME” \
| sed s/”${PATTERN}”/$(tput smso)”${PATTERN}”$(tput rmso)/g \
> $OUTPUT_FILE
else
# Input is from standard input
# MUST USE DOUBLE QUOTES AROUND $PATTERN!!! -> “$PATTERN”
sed s/”${PATTERN}”/$(tput smso)”${PATTERN}”$(tput rmso)/g \
> $OUTPUT_FILE
# Check to see if the pattern was in the standard input
grep “$PATTERN” $OUTOUT_FILE >/dev/null 2>&1
if [ $? -ne 0 ]
then
echo “\nSORRY: The string \c”
tput smso
echo “${PATTERN}\c”
tput rmso
echo “ was not found in standard input \c”
echo “\n\n EXITING \n”
exit 3
fi
fi
# Check the operating system, on AIX and HP-UX we need to
# use the “pg”, or “page” command. The “more” command does
# not work to highlight the text, it will show only the
# characters that make up the escape sequence. All
# other operating systems use the “more” command.
case $(uname) in
AIX|HP-UX)
# This is a fancy “pg” command. It acts similarly to the
# “more” command but instead of showing the percentage
# displayed it shows the page number of the file
/usr/bin/cat $OUTPUT_FILE | /usr/bin/pg -csn -p”Page %d:”
;;
*)
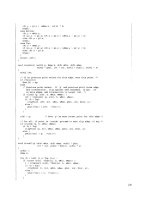
Listing 15.1 hgrep.ksh shell script. (continued)
398 Chapter 15
/usr/bin/cat $OUTPUT_FILE | /usr/bin/more
;;
esac
rm -f $OUTPUT_FILE # End of Script Cleanup
Listing 15.1 hgrep.ksh shell script. (continued)
In the shell script in Listing 15.1 we first check for the correct number of command-
line arguments; either one or two arguments are valid. Otherwise, the script usage
message is displayed, and the script will exit with a return code 1. If we have the cor-
rect number of arguments, then we assign the arguments to variables. If we have two
command-line arguments, then an input file is specified in $2—at least it is supposed
to be a file. We need to do some sanity checking on this second command-line argu-
ment by first checking to see that the file exists as a regular file. We do not want to do
anything with the file if it is a block or character special file, a directory, or any other
nonregular file. Next we make sure that the file is not empty. Then we ensure that the
script can read the file, and finally we grep for the pattern in the file to see if we have
anything to highlight. If all of the tests are passed, then we can proceed.
By checking if the $FILENAME variable is null, or empty, we know which type of
input we are dealing with. A null or empty $FILENAME variable means we use stan-
dard input, which is input from a pipe in this case. If $FILENAME is not null, then we
have a file specified as input to the script on the command line. The only difference
in handling an input file versus standard input is that we will supply the ”cat
$FILENAME |” if there is an input file specified. Otherwise, the input is already com-
ing in from a pipe directly into the sed statement—it’s that simple. We have one more
check before displaying the output. If we are using piped-in standard input, then we
grep for “$PATTERN” in the $FILENAME to see if it exists. If not, we display a string not
found message and exit.
The output display is interesting because more will not work on HP-UX or AIX to dis-
play the highlighted text. For HP-UX and AIX we use pg instead of more. To determine
which flavor of Unix we are running, we use the uname command in a case statement. If
the OS is either AIX or HP-UX, we used a fancy pg command, which has output that
appears similar to the more output. Using pg -csn -p"Page %d:" will display the page
number of the file, where more displays the percentage of file. All other Unix flavors will
use more to display the output file.
The script in Listing 15.1 is a good example of how a little ingenuity can greatly sim-
plify a challenge. We sometimes make things more complicated than they need to be,
as in my initial test script that parsed through the file line by line and character by char-
acter, searching for the pattern. We live and learn!
hgrep: Highlighted grep Script 399
Other Options to Consider
As with every script there is room for improvement or customization, however you
want to look at it.
Other Options for the tput Command
The only tput command option that we worked with was the tput smso command,
which is used to turn on highlighting. The tput command has many other options to
control terminal display. In our example we did a highlight of not only the text but also
the surrounding block for each character. We could also highlight only the text piece,
double video the entire text block, underline with other options—for example, we
could have underlined bold text. The tput command is fun to play with. The short list
of command options is shown in Table 15.1.
Table 15.1 Options for the tput Command
tput bell Ring the bell
tput blink Start blinking mode
tput bold Start double intensity (much brighter than reverse video)
tput civis Turn the cursor off (make the cursor invisible)
tput cnorm Make the cursor normal again
tput cr Send a carriage to the terminal
tput cvvis Make the cursor very bright
tput dim Start one-half intensity mode
tput ed Clear to the end of the display
tput el Clear to the end of the line
tput flash Send a visible bell (good to send a flash to someone’s screen)
tput invis Start invisible text mode
tput prot Start protected mode
tput rc Restore the last saved cursor position (paved by tput sc)
tput rev Begin reverse video mode (bright!)
tput rmso End the standout mode (reverses tput smso)
tput rmul Ends the underline (underscore) mode
tput sc Save the cursor position
400 Chapter 15
Table 15.1 (Continued)
tput sgr0 Turn off all video modes
tput smso Start the standout mode (soft reverse video we used in
this chapter)
tput smul Start the underline (underscore) mode
tput Underscore one character and move to the next character
Table 15.1 is only an abbreviated listing of the tput command options. As you can
see, we can do a lot with the text on the screen. Use your imagination, and play around
with the commands.
Summary
In this chapter we introduced using reverse video to highlight text within our output.
Also we showed how to do command substitution inside a sed command statement.
There are many more options for the tput command to control the terminal; for exam-
ple, we could have underlined the matching pattern. The nice thing about the tput
command is that it will let you mix things up, too.
In the next chapter we are going to look at how to keep the printers in the landscape
printing. If you do not automate this function you could spend all of your time doing
printer management instead of doing any real work. See you in the next chapter!
hgrep: Highlighted grep Script 401
403
If you have worked in a large systems environment for very long you already know
how frustrating it can be to keep the printer farm happy. In my contracting days I
worked in several shops that consistently had problems with the printers. In most cases,
the print queues went down because of network timeouts and extended device waits.
In this kind of environment you have two choices: keep answering the calls from the
help desk or write a shell script to monitor the printer queues and reenable the queues
as they drop offline.
I prefer the second method. Like every other Systems Administrator, I like to be
proactive in my approach to solving the little problems as well as the big ones. The
shop I remember the best was a hospital. This hospital has more than 30 satellite clin-
ics around town and only one 100MB/Sec pipe coming in to the hospital from the out-
side world. Most of the clinics have between three and five printers, with at least one
printer active most of the day. When I came on board, the first problem I encountered
was the huge volume of calls to the help desk about printer problems. What caught my
eye was the fact that all of the calls came from the clinics, not from inside the hospital.
I knew immediately that a shell script was in order! In this chapter we are going to look
at two methods of bringing up the print queues, enabling individual queues and bring-
ing up the whole lot. Because Unix flavors vary on handling printers and queues, we
first will look at the differences between the Unix flavors.
Print Queue Hell: Keeping
the Printers Printing
CHAPTER
16
System V versus BSD Printer Subsystems
Depending on the Unix flavor, the commands vary to control the printers and queues
because some use the System V subsystem and others use BSD. With AIX you have an
ever more confusing situation beginning with AIX 5L. Starting with this release, AIX
now supports both the “classic” AIX printer subsystem and the System V printer ser-
vice. Another problem is that some commands do not provide the full print queue
name if the queue name exceeds seven characters. I have come up with some ways to
get around the long queue names, and on most systems you do not have to worry
about long queue names too much if you want to control all of the printers at once.
In this book we are covering AIX, HP-UX, Linux, and Solaris. For no other reason
that I can think of, let’s cover the printer systems in alphabetical order.
AIX Print Control Commands
AIX is the most interesting of the bunch with its new support for the System V printer
service starting with AIX 5L. Although the AIX classic printer subsystem will still be
supported for many years, the move seems to be going to System V for printing service.
Classic AIX Printer Subsystem
Most AIX Systems Administrators still prefer to use the classic AIX printer subsystem.
This is the primary printing that I have supported for years. With the AIX printer sub-
system you do not have the detailed control that the System V service offers. For exam-
ple, you do not control forms and user priorities at a granular level, and you cannot
manage the printers independently of the print queues easily. With this printer sub-
system anyone can print on any printer, and the print queue is either UP, allowing you
to print, or DOWN, disabling all printing. The shell scripts we are going to write for the
classic AIX printer subsystem work at the print queue level.
The two commands we are going to use are lpstat and enq -A. Both commands pro-
duce the same output, but some administrators seem to like one over the over. As I stated
earlier, we need to be aware that sometimes print queues are created with queue names
longer than seven characters, which is the default that can be displayed with both of
these commands. I guess IBM noticed this little problem and added the -W switch to give
a wide character output. Look at Listings 16.1 and 16.2 to see the different outputs.
# lpstat
Queue Dev Status Job Files User PP % Blks Cp Rnk
hp4 lp0 READY
hp4-ps lp0 READY
hp4-gl lp0 READY
yogi_hp lp0 DOWN
yogi_hp lp0 DOWN
Listing 16.1 Output using lpstat or enq -A.
404 Chapter 16
# lpstat -W
Queue Dev Status Job Files User PP % Blks Cp Rnk
hp4 lp0 READY
hp4-ps lp0 READY
hp4-gl lp0 READY
yogi_hp4_1 lp0 DOWN
yogi_hp4_1ps lp0 DOWN
Listing 16.2 Output using lpstat -W or enq -AW.
As you can see in Listing 16.1, the long queue names are cut off at the seventh char-
acter when using the lpstat or enq -A commands. By adding the -W switch to these
commands we see the entire long queue name. This is important because you cannot
control a print queue if you do not have the exact, and full, queue name.
There are two methods to script using either lpstat -W or enq -AW. One method is
to loop through each queue that is reported DOWN; the other is to use one long com-
pound command. We are first going to look at the looping method.
A little for loop can be used to extract out the queue names of the printers in a
DOWN state. The list used for the for loop comes from either of the following command
statements:
lpstat -W | tail +3 | grep DOWN | awk ‘{print $1}’
or
enq -AW | tail +3 | grep DOWN | awk ‘{print $1}’
Both of the previous statements produce the same output. Notice that tail +3 is the
second command in pipe, just after the lpstat and enq commands. We use tail +3 in this
statement to remove the two lines of header information. This method is much cleaner
than trying to grep out some unique character in both of the header lines.
Notice that the number of lines, specified by +3, is one larger than the actual num-
ber of lines that we want to remove. Using the tail command this way, we are telling
tail to start listing at the third line, so two lines are removed at the top of the output.
The third command in the pipe is where we grep for DOWN, looking for disabled
printers, as shown in Listing 16.2. The output from this stage of the command is only
the lines of the enq and lpstat output that contains the word DOWN. Using these lines as
input for the next command in the pipe, we are ready to extract the actual queue
name(s) of the disabled printers, as shown in the output here.
yogi_hp4_1 lp0 DOWN
yogi_hp4_1ps lp0 DOWN
Print Queue Hell: Keeping the Printers Printing 405
The awk command, as we use it, is used to extract the field that we want to work
with, which is the first field, the queue name. Using the previous output as input to our
awk statement we extract out the first field using the following syntax:
command | awk ‘{print $1}’
You can extract any valid field using awk as well as different fields at the same time.
For example, if we want to extract fields 1 and 3, specified by $1 and $3, the following
awk statement will take care of the task.
command | awk ‘{print $1, $3}’
Notice that I added a comma between $1 and $3. If the comma is omitted, then there
will not be a space between the two strings. Instead the output will be two strings
appended together without a space.
For our for loop we can first send the lpstat and enq command output to a file and
process the file in a loop, or we can use command substitution to add the statement
directly into the for loop to create the list of objects to loop through. Let’s look at our
for loop structure.
for Q in $( enq -AW | tail +3 | grep DOWN | awk ‘{print $1}’ )
do
# Do something here.
done
Using this loop command statement, the for loop will loop through yogi_hp4_1
and yogi_hp4_1ps print queue names, which is equivalent to the following for loop
structure:
for Q in yogi_hp4_1 yogi_hp4_1ps
do
# Do something here.
done
Because we never know which queues may be down, we need to parse through the
output of the actual queue names of the printers in a disabled state. The shell script in
its entirety is shown in Listing 16.3.
#!/bin/ksh
#
# SCRIPT: enable_AIX_classic.ksh
#
# AUTHOR: Randy Michael
# DATE: 03/14/2002
# REV: 1.1.P
Listing 16.3 For loop to enable “classic” AIX print queues.
406 Chapter 16
#
# PLATFORM: AIX Only
#
# PURPOSE: This script is used to enable print queues on AIX systems.
#
# REV LIST:
#
# set -x # Uncomment to debug this script
# set -n # Uncomment to check syntax without any execution
#
for Q in $( enq -AW | tail +3 | grep DOWN | awk ‘{print $1}’)
do
enable $Q
(( $? == 0 )) || echo “\n$Q print queue FAILED to enable.\n”
done
Listing 16.3 For loop to enable “classic” AIX print queues. (continued)
Inside the for loop we attempt to enable each print queue individually. If the return
code of the enable command is not zero we echo an error message indicating that the
queue could not be enabled. Notice the highlighted lines in Listing 16.3. We use the
mathematical test, specified by the double parentheses, (( math test )). Using this
math test you normally do not add a dollar sign, $, in front of a numeric variable.
When the variable is produced by the system, such as $?, the dollar sign is required.
Testing for equality also requires using the double equal signs, ==, because the single
equal sign, =, is meant as an assignment, not a test.
After the test to check for a zero return code, we use a logical OR, specified by the
double pipes, ||. This logical OR will execute the next command only if the return
code of the enable $Q command is nonzero, which means that the command failed.
There is also a logical AND that is used by placing double ampersands, &&, in a com-
mand statement. A logical AND does just the opposite; it would execute the succeeding
command if the test is true, instead of false. Both the logical OR and logical AND are
used as replacements for if then else statements.
We can also accomplish this task by using a single compound command statement.
Just as we used command substitution in the for loop, we can use command substitu-
tion to produce command parameters. For example, we can use our for loop command
to create command parameters to the enable command. To see this more clearly, look
at the following two commands.
enable $(enq -AW | tail +3 | grep DOWN | awk ‘{print $1}’) 2>/dev/null
or
enable $(lpstat -W | tail +3 | grep DOWN | awk ‘{print $1}’) 2>/dev/null
Print Queue Hell: Keeping the Printers Printing 407
Both of the previous compound command statements produce the same result,
enabling all of the print queues on the system. The only problem with using this tech-
nique is that if you execute this command and all of the printers are already enabled,
then you will get the following output from standard error:
usage: enable PrinterName
Enables or activates printers.
As you can see, I sent this output to the bit bucket by adding 2>/dev/null to the
end of the statement, but the return code is still nonzero if all of the printers are already
enabled. This should not be a problem unless you want to create some notification that
a printer failed to enable. In our for loop in Listing 16.3 we used the return code from
the enable command to produce notification. I will leave the technique that you use
up to you. If you do not want to see any output, then you could add the single com-
pound statement as a cron table entry or use the for loop technique in a shell script to
redirect the failure notification to a log file. If you use a log file you may want to add a
date stamp.
System V Printing on AIX
Beginning with AIX 5L, IBM supports System V printing. I find that Solaris has the
closest command usage and output. With only a few differences between AIX and
Solaris System V printing in the output produced, you could use the shell scripts inter-
changeably. Because people tend to read only the parts of a technical book that they
need to, I will devote this entire section to AIX System V printing.
To switch your AIX system from the “classic” AIX printer subsystem to System V
printing, refer to your AIX reference manual. This section expects that you are already
running System V printing.
Like Solaris, AIX uses the System V lpc (line printer control) command to control the
printers and print queues. The nice thing about this print service is that you can con-
trol the queues and the printers independently. The main commands that we are inter-
ested in for AIX queuing and printing include the following options and parameters to
the lpc command, as shown in Table 16.1.
Table 16.1 AIX lpc Command Options
LPC COMMAND COMMAND RESULT
disable (printer[@host] | all) Disables queuing
stop (printer[@host] | all) Disables printing
down (printer[@host] | all) Disables printing and queuing
enable (printer[@host] | all) Enables queuing
start (printer[@host] | all) Enables printing
up (printer[@host] | all) Enables printing and queuing
408 Chapter 16
As you can see in Table 16.1, the granularity of printer control is excellent, which
gives us several options when creating shell scripts. To control all of the printing and
queuing at one time you really do not need a shell script. The following two commands
can start and stop all printing and queuing on all print queues at the same time.
lpc down all # Disable all printing and queuing
lpc up all # Enable all printing and queuing
To keep all of the printers printing and queuing you only need the lpc up all com-
mand entered into a cron table. I placed an entry in my root cron table to execute this
lpc command every 10 minutes, as shown here:
5,15,25,35,45,55 * * * * /usr/sbin/lpc up all >/dev/null 2>&1
This cron table entry enables all printing and queuing on all printers on the 5s, 24
hours a day, 7 days a week. With AIX System V printing, the data we are interested in
is separated on three lines of output when we use the lpc status all command to mon-
itor the printer service. The same command executed on AIX , Linux, and Solaris is
shown here.
AIX SYSTEM V OUTPUT
# lpc status all
hp4V:
queueing is enabled
printing is disabled
5 entries in spool area
LINUX SYSTEM V OUTPUT
# lpc status
Printer Printing Spooling Jobs Server Subserver Redirect
Status/(Debug)
hp4@localhost enabled disabled 0 none none
SOLARIS SYSTEM V OUTPUT
# lpc status all
bambam_hp4:
queueing is enabled
printing is enabled
no entries
Of these three outputs Linux is the one that differs. With the data we are interested
in for AIX residing on three separate lines for each print queue, we need a different
Print Queue Hell: Keeping the Printers Printing 409
strategy to get the exact data the we want. First notice that at the beginning of each
stanza a queue name has a colon, :, appended to the name of the queue. Because this
character occurs only in the queue name, we can use the colon character as a tag for a
grep statement. Following the queue name entry, the next two lines contain the data
that we are interested in pertaining to the status of the queuing and printing.
Because we have some unique tag for each entry, it is easy to extract the lines of data
that we are interested in by using an extended grep, or egrep, statement, as shown here:
lpc status all | egrep ‘:|printing|queueing’ | while read LINE
The egrep command works the same way as the grep command except that you can
specify multiple patterns to match. Each pattern is separated by a pipe without any
spaces! If you add spaces on either side of the search pattern, the egrep statement will
fail to make a match. The entire list of patterns is then enclosed within single forward
tic marks, ’pattern1|pattern2|pattern3’. The output produced has the queue
name on the first line, the printing status on the second line, and the queuing status on
the third line.
The last part of the previous command is where the output is piped to a while loop.
On each read the entire line of data is loaded into the variable LINE. Inside of the while
loop we use the following case statement to assign the data to the appropriate variable.
case $LINE in
*:) Q=$(echo $LINE | cut -d ‘:’ -f1)
;;
printing*)
PSTATUS=$(echo $LINE | awk ‘{print $3}’)
;;
queueing*)
QSTATUS=$(echo $LINE | awk ‘{print $3}’)
;;
esac
Notice that if $LINE begins with *: then we load the Q variable. If $LINE begins
with printing* we load the PSTATUS variable with the third field, which should be
either enabled or disabled. We do the same thing in loading the QSTATUS variable
with the third field of the value that the $LINE variable points to.
The trick in this script is how to load and process three lines of data and then load
and process three more lines of data, and so on. The most intuitive approach is to have
a loop counter. Each time the loop counter reaches three we process the data and reset
the loop counter back to zero. Take a look at the entire script in Listing 16.4 to see how
this loop count works. Pay close attention to the bold type.
410 Chapter 16
#!/bin/ksh
#
# SCRIPT: print_UP_SYSV_AIX.ksh
#
# AUTHOR: Randy Michael
# DATE: 03/14/2002
# REV: 1.1.P
#
# PLATFORM: AIX System V Printing
#
# PURPOSE: This script is used to enable printing and queuing separately
# on each print queue on AIX and Solaris systems.
#
# REV LIST:
#
# set -x # Uncomment to debug this script
# set -n # Uncomment to check syntax without any execution
#
#################################################
LOOP=0 # Loop Counter - To grab three lines at a time
lpc status all | egrep ‘:|printing|queueing’ | while read LINE
do
# Load three unique lines at a time
case $LINE in
*:) Q=$(echo $LINE | cut -d ‘:’ -f1)
;;
printing*)
PSTATUS=$(echo $LINE | awk ‘{print $3}’)
;;
queueing*)
QSTATUS=$(echo $LINE | awk ‘{print $3}’)
;;
esac
# Increment the LOOP counter
(( LOOP = LOOP + 1 ))
if ((LOOP == 3)) # Do we have all three lines of data?
then
# Check printing status
case $PSTATUS in
Listing 16.4 print_UP_AIX.ksh shell script listing. (continues)
Print Queue Hell: Keeping the Printers Printing 411
disabled) lpc start $Q >/dev/null
(($? == 0)) && echo “\n$Q printing re-started\n”
;;
enabled|*) : # No-Op - Do Nothing
;;
esac
# Check queuing status
case $QSTATUS in
disabled) lpc enable $Q >/dev/null
(($? == 0)) && echo “\n$Q queueing re-enabled\n”
;;
enabled|*) : # No-Op - Do Nothing
;;
esac
LOOP=0 # Reset the loop counter to zero
fi
done
Listing 16.4 print_UP_AIX.ksh shell script listing. (continued)
Notice that we grab three lines at a time. The reason that I say that we are grabbing
three lines at a time is because I use the case statement to specify unique tags for each
line of data. I know that the queue name will have a colon, :, as a suffix. I know that
the printing status line will begin with printing*, and I know that the queuing line
will begin with queueing*. We load only one variable on each loop iteration. So, to
get three pieces of data (queue name, printing status, and queuing status), we need to
go through the while loop three times for each printer queue. Once we pass the initial
case statement, we increment the LOOP counter by one. If the $LOOP variable is equal
to 3 then we have all of the data that we need to process a single printer queue. After
processing the data for this printer queue, we reset the LOOP variable to zero, 0, and
start gathering data for the next printer queue.
Sounds simple enough? This same technique works for any fixed set of lines of data
in command output or in a file. The only changes that are needed to use this method
include creating unique tags for the data you are interested in and setting the $LOOP
equality statement to reflect the number of lines in each set of data.
More System V Printer Commands
We have been looking at only the lpc command thus far. We also need to look at two
command parameters to the lpstat command in this section. The -a parameter lists the
status of queuing, and the -p command parameter lists the status of printing. The nice
thing about these two command options is that the output for each queue is on a sin-
gle line, which makes the data easier to parse through. See Table 16.2.
412 Chapter 16
Table 16.2 System V lpstat Command Options
COMMAND DESCRIPTION
lpstat -a Show status of queuing on all printers
lpstat -p Show status of printing on all printers
Other than having to query the printer service twice, having to use separate com-
mands for monitoring printing and queuing is not so bad. The separation is built in
because the -a and -p command parameters are mutually exclusive, which means that
you cannot use -a and -p at the same time. Output from each command option is
shown here:
# lpstat -a
hp4 accepting requests since May 07 07:02 2002
yogi_hp4_1ps accepting requests since May 07 07:02 2002
long_queue not accepting requests since Tue May 7 07:02:23 EDT 2002 -
s_q_nam not accepting requests since Tue May 7 07:02:23 EDT 2002 -
# lpstat -p
printer long_queue disabled since Tue May 7 07:02:01 EDT 2002.
available.
stopped by user
printer s_q_nam disabled since Tue May 7 07:02:01 EDT 2002. available.
stopped by user
printer hp4 unknown state. enabled since May 07 07:30 2002. available.
printer yogi_hp4_1ps unknown state. enabled since May 07 07:30 2002.
available.
Listing 16.5 lpstat -a and lpstat -p command output.
Notice in Listing 16.5 that the output from each command option has a unique set of
status information for each printer on each line of output. We want to use the unique-
ness of the status information as tags in a grep statement. The terms make sense, too. A
queue is either accepting new requests or is not accepting new requests, and a printer is
either enabled for printing or is disabled from printing. Because we are interested only in
the disabled and not-accepting states, we can create a simple script or a one-liner.
We need to know two things to enable printing and to bring up a print queue to
accept new requests, the printer/queue name and the state of the queue or printer. The
first step is to grep out the lines of output that contain our tag. The second step is to
Print Queue Hell: Keeping the Printers Printing 413
extract the printer/queue name from each line of output. Let’s first look at using a
while loop to bring everything up, as shown in the Listing 16.6.
lpstat -a | grep ‘not accepting’ | while read LINE
do
Q=$(echo $LINE | awk ‘{print $1}’)
lpc enable $Q
done
lpstat -p | grep disabled | while LINE
do
P=$(echo $LINE | awk ‘{print $2}’)
lpc start $P
done
Listing 16.6 Scripting the lpstat command using -a and -p.
Notice in Listing 16.6 that we have to work on the print queues and printers sepa-
rately, by using two separate loops. In the first while loop all of the queuing is started.
In the second loop we enable printing for each of the printers. The down side to this
method occurs when you have hundreds of printers and scanning through all of the
printers twice can take quite a while. Of course, if you have hundreds of printers you
should use lpc up all to bring everything up at once.
As I said before, we can also make a one-liner out of the two loops in Listing 16.6. We
can combine the grep and awk commands on the same line and use command substi-
tution to execute the lpc command. The following two commands replace the two
while loops.
lpc enable $(lpstat -a | grep ‘not accepting’ | awk ‘{print $1}’)
lpc start $( lpstat -p | grep disabled | awk ‘{print $2}’)
The first command enables queuing, and the second command starts printing. The
command substitution, specified by the $(command) notation, executes the appropri-
ate lpstat command, then greps on the tag and extracts the printer/queue name out.
The resulting output is used as the parameter to the lpc commands.
HP-UX Print Control Commands
Of the Unix operating systems, HP-UX has a unique lpstat command output. We do
not have to do anything special to see the full print queue names, and if a queuing is
disabled or printing is stopped, we get a Warning: message. With a warning message
for each printer on a single line we can use grep and awk to find the printer/queue
name and the status in a case statement. Let’s first look at the lpstat output when both
printing and queuing is up, as shown here:
414 Chapter 16
# lpstat
printer queue for hp4_yogi_1
printer queue for yogi_hp4_1ps
If print requests were queued up they would be listed below the queue name. Now
let’s disable printing on the hp4_yogi_1 print queue.
# disable hp4_yogi_1
printer “hp4_yogi_1” now disabled
Now look at the output of the lpstat command:
# lpstat
printer queue for hp4_yogi_1
dino: Warning: hp4_yogi_1 is down
printer queue for yogi_hp4_1ps
The warning message tells us that the printer is down; however, notice that the
queue status is not listed here. Now let’s bring down the hp4_yogi_1 print queue and
see what this does.
# reject hp4_yogi_1
destination “hp4_yogi_1” will no longer accept requests
To see only queuing status we use the lpstat -a command, as shown here:
# lpstat -a
hp4_yogi_1 not accepting requests since Oct 1 05:45 -
reason unknown
yogi_hp4_1ps accepting requests since Sep 26 04:23
Because hp4_yogi_1 now has printing disabled and queuing stopped, I would
expect that we should see some queue status output in the lpstat command output for
the first time.
# lpstat
printer queue for hp4_yogi_1
Print Queue Hell: Keeping the Printers Printing 415
dino: Warning: hp4_yogi_1 queue is turned off
dino: Warning: hp4_yogi_1 is down
printer queue for yogi_hp4_1ps
Just what we expected. From this little exercise we have determined that queuing is
reported only when the queuing is stopped on the queue using the lpstat command
alone. For our scripting effort let’s stick to the lpstat output. We want to use the word
Warning as a tag for our grep statement. Then we can further grep this extracted line
to check printing and queuing status. If the string ‘queue is turned off’ is
present we know that queuing is turned off, and if the string ‘is down’ appears on
the line we know that printing is disabled. The only thing left to extract is the
printer/queue name, which is always located in the third field.
To script this we can use the code in Listing 16.7. Pay attention to the bold type, and
we will cover the script at the end.
#!/bin/ksh
#
# SCRIPT: print_UP_HP-UX.ksh
#
# AUTHOR: Randy Michael
# DATE: 03/14/2002
# REV: 1.1.P
#
# PLATFORM: HP-UX Only
#
# PURPOSE: This script is used to enable printing and queuing separately
# on each print queue on an HP-UX system.
#
# REV LIST:
#
# set -x # Uncomment to debug this script
# set -n # Uncomment to check syntax without any execution
lpstat | grep Warning: | while read LINE
do
if (echo $LINE | grep ‘is down’) > /dev/null
then
enable $(echo $LINE | awk ‘{print $3}’)
fi
if (echo $LINE | grep ‘queue is turned off’) >/dev/null
then
accept $(echo $LINE | awk ‘{print $3}’)
fi
done
Listing 16.7 print_UP_HP-UX.ksh shell script listing.
416 Chapter 16
I want to point out a nice little trick in the shell script in Listing 16.7. In both of the
if then fi statements, notice that we execute a command inside parentheses. What this
technique allows us to do is execute a command in a sub-shell and use the command’s
resulting return code directly in the if then fi structure. We really could not care less
about seeing the line that we are grepping on; however, if the return code from the
command is zero, then the pattern is present.
In the first half of the script in Listing 16.7 we check the status of printing. If a printer
is found to be disabled, then we use command substitution to produce the printer
name for the enable command. Likewise, we check for the status of queuing in the sec-
ond half of the script. Again, using command substitution we have the queue name to
provide as a parameter to the accept command. Notice that I added the redirection to
the bit bucket, specified by >/dev/null, after the command in the if statement. I add
this redirection to /dev/null to suppress the output of the grep statement.
That is it for HP-UX printing. HP did a good job of keeping everything pretty
straightforward in the printing arena.
Linux Print Control Commands
Linux uses the System V lpc (line printer control) command to control the printers and
print queues, as most System V Unix does. The nice thing about this print service is
that you can control the queues and the printers independently. The main commands
that we are interested in for Linux queuing and printing include the options to the lpc
command listed in Table 16.3.
As you can see in Table 16.3, the granularity of printer control is excellent, which
gives up several options when creating shell scripts. To control all of the printing and
queuing at one time you really do not need a shell script. The following two commands
can start and stop all printing and queuing on all print queues at the same time.
lpc down all # Disable all printing and queuing
lpc up all # Enable all printing and queuing
Table 16.3 Linux lpc Command Options
LPC COMMAND COMMAND RESULT
disable (printer[@host] | all) Disables queuing
stop (printer[@host] | all) Disables printing
down (printer[@host] | all) Disables printing and queuing
enable (printer[@host] | all) Enables queuing
start (printer[@host] | all) Enables printing
up (printer[@host] | all) Enables printing and queuing
Print Queue Hell: Keeping the Printers Printing 417
To keep all of the printers printing and queuing you need just the lpc up all com-
mand entered into a cron table. I placed an entry in my root cron table to execute this
command every 10 minutes. My cron table entry is shown here:
5,15,25,35,45,55 * * * * /usr/sbin/lpc up all >/dev/null 2>&1
This cron table entry enables all printing and queuing on all printers on the 5s,
24 hours a day, 7 days a week.
If you do want a little more control and if you keep a log of what is going on on a per
queue/printer basis, then we have to do a little scripting. The script that follows
searches all of the queues and reports on the individual status of printing and queuing
and then enables each one independently.
For this script we are going to use arrays to load the variables on each loop iteration.
Array can be created and elements assigned values in two ways. The first technique is
to use set -A to define the array and all of its elements. For example, if I want an array
called QUEUE to contain the values for printing and queuing for a specified queue, I can
set it up this way:
PQueue=yogi_hp4
Print_val=enabled
Queue_val=disabled
set -A QUEUE $PQueue $Print_val $Queue_val
We could have assigned the values directly in the set -A statement, but this time we
used variables for the assignments. This statement defines an array named QUEUE that
contains three array elements. The elements loaded into the array are the values that
the variables $PQueue, $Print_val, and $Queue_val point to. For example, we
assigned PQueue the value yogi_hp4, Print_val is assigned the value enabled,
and Queue_val is assigned the value disabled. The result is that the first array ele-
ment, 0 (zero) contains the value yogi_hp4, the second array element, 1 (one), has the
value enabled, and the third array element, 2, contains the value disabled, which is
what the $Queue_val variable points to. Using this technique requires that you access
the array elements starting with 0, zero.
To address the array elements you use the following syntax:
${QUEUE[0]} # Points to value assigned to the first array element,
yogi_hp4
${QUEUE[1]} # Points to value assigned to the second array element,
enabled
${QUEUE[2]} # Points to the value assigned to the third array element,
disabled
To address all of the array’s elements at the same time use the following syntax:
# print “${QUEUE[*]}”
OR
418 Chapter 16
# print “${QUEUE[@]}”
yogi_hp4 enabled disabled
Now, before I lose you, let’s take a look at a more intuitive way of working with
arrays and array elements. Instead of using the set -A command to define and load an
array, we can define an array and load its elements at the same time using the follow-
ing syntax:
QUEUE[1]=yogi_hp4
QUEUE[2]=enabled
QUEUE[3]=disabled
Notice that the first array element is now referenced by 1, one. These commands cre-
ate an array named QUEUE and load the first three array elements, referenced by 1, 2,
and 3, into array QUEUE. Now you can use the array directly in a command statement
by pointing to the array element that you want to use. For example, if I want to print
the printing status of the yogi_hp4 print queue, I use the following syntax:
echo “\nPrinter ${QUEUE[1]} has print status ${QUEUE[2]}\n”
The previous command produces the following output:
Printer yogi_hp4 has print status enabled
Now that we have seen the basics of working with arrays, let’s look at a shell script
to handle keeping the printing and queuing enabled on all of the printers individually.
The first step is to load an array in a while loop. This is a little different from what we
did before with arrays. In this case I want to use the lpc status all command to find
printers that have either printing or queuing disabled. The output of the lpc status all
command is shown below.
# lpc status all
Printer Printing Spooling Jobs Server Subserver Redirect
Status/(Debug)
hp4@localhost enabled disabled 0 none none
This is an easy output to deal with because all of the data for each queue is on a sin-
gle line. The output that we are interested in is the printer name, the printing status,
and the spooling status—the first three fields on the second line. We are not interested
in the first line at all so we can get rid of it with a pipe to the tail command. When we
add to our command we get the following output:
# lpc status all | tail +2
yogi_hp4@localhost enabled disabled 0 none none
I currently have only one printer defined on this system, so the output is the status
of a single printer. Now we want to load the first three fields into an array using a
Print Queue Hell: Keeping the Printers Printing 419
while loop. Look at the next command line to see how we are directly loading an array
called pqstat with array elements of the first three fields on each line.
lpc status all | tail +2 | while read pqstat[1] pqstat[2] pqstat[3] junk
Because I want just the first three fields in the output, notice that the fourth variable
in the read part of the while statement is junk. The junk variable is a catch-all vari-
able to capture any remaining strings on the line of output in a single variable. It is a
requirement that you take care of this remaining text because if you neglect adding a
variable to catch any remaining characters on the line, you will read the characters in
as strings on the next loop iteration! This type of error produces some strange output
that is hard to find and troubleshoot.
Notice that in the output of the lpc status all command the printer has queuing dis-
abled, which is the third field. The easiest way to handle the two status fields is to use
two case statements, with each tagging on a separate field. Look at the full script code
in Listing 16.8, and we will cover the technique at the end.
#!/bin/ksh
#
# SCRIPT: print_UP_Linux.ksh
#
# AUTHOR: Randy Michael
# DATE: 03/14/2002
# REV: 1.1.P
#
# PLATFORM: Linux Only
#
# PURPOSE: This script is used to enable printing and queuing separately
# on each print queue on a Linux system. Logging can be
# enabled.
#
# REV LIST:
#
# set -x # Uncomment to debug this script
# set -n # Uncomment to check syntax without any execution
#
#################################################
# Initial Variables Here
#################################################
LOGILE=/usr/local/log/PQlog.log
[ -f $LOGFILE ] || echo /dev/null > $LOGFILE
#################################################
lpc status | tail +2 | while read pqstat[1] pqstat[2] pqstat[3] junk
Listing 16.8 print_UP_Linux.ksh shell script listing.
420 Chapter 16
do
# First check the status of printing for each printer
case ${pqstat[2]} in
disabled)
# Printing is disabled - print status and restart printing
echo “${pqstat[1]} Printing is ${pqstat[2]}” \
| tee -a$LOGFILE
lpc start ${pqstat[1]} | tee -a $LOGFILE
(($? == 0)) && echo “${pqstat[1]} Printing Restarted” \
| tee -a $LOGFILE
;;
enabled|*) : # No-Op - Do Nothing
;;
esac
# Next check the status of queueing for each printer
case ${pqstat[3]} in
disabled)
echo “${pqstat[1]} Queueing is ${pqstat[3]}” \
| tee -a $LOGFILE
lpc enable ${pqstat[1]} | tee -a $LOGFILE
(($? == 0)) && echo “${pqstat[1]} Printing Restarted” \
| tee -a $LOGFILE
;;
enabled|*) : # No-Op - Do Nothing
;;
esac
done
Listing 16.8 print_UP_Linux.ksh shell script listing. (continued)
We start off this script in Listing 16.8 by defining the $LOGFILE. Notice that the fol-
lowing command, after the log file definition, checks to see if the log file exists. If the
$LOGFILE does not exist, then the result of the test is a nonzero return code. We use a
logical OR, specified by the double pipes, ||, to execute the succeeding command to
create a zero length $LOGFILE because it does not exist if the return code of the test is
nonzero.
Next, we start our while loop to load the pqstat array on each loop iteration,
which in our case is a single loop iteration for a single printer. This means that we load
a one-dimensional array with new data on each loop iteration (one-dimensional arrays
are all that the Korn shell can use). Again, notice the junk variable that is added as the
last variable in the while loop statement. This extra variable is required to catch the
remaining text in a single variable.
With the array loaded we proceed with two case statements to test for the status of
printing and queuing on each print queue. Notice that we use the array element
directly in the case statement, as shown here:
case ${pqstat[2]} in
Print Queue Hell: Keeping the Printers Printing 421
We use the same technique with the print queuing array element in a separate case
statement. We have only two possible results for the array elements, enabled and
disabled. The only result we are concerned about is any disabled value. If we
receive any disabled values we attempt to reenable the printing or queuing on the
printer. Notice that the second option in both case statements includes enabled and
anything else, specified by the wildcard, *, as shown here:
enabled|*)
We could have just used the wildcard to cover everything, but it is clearer to the
reader of the script to see actual expected results in a case statement than just a catchall
asterisk.
When a reenabling task is completed successfully, notice the use of the logical AND
to test the return code and give notification on a zero return code value, as shown here:
(($? == 0)) && echo “${pqstat[1]} Printing Restarted”
The second part of the command will execute only if the test for a zero return code
is true. Otherwise, the system will report an error, so there is no need for us to add any
failure notification.
To see everything that is happening on the screen and to log everything at the same
time we use the tee -a command. This command works with a pipe and prints all of the
output to the screen; at the same time it sends the exact same output to the file speci-
fied after tee -a. An example is shown here.
lpc start ${pqstat[1]} | tee -a $LOGFILE
The previous command attempts to restart printing on the print queue specified by
the array element pqstat[1] and sends any resulting output to the screen and to the
$LOGFILE simultaneously.
Controlling Queuing and Printing Individually
Depending on the situation, you may not always want to enable printing and queuing
at the same time. We can break up the shell script in Listing 16.8 and pull out the indi-
vidual case statements to start either printing or queuing. Because printing is con-
trolled by array element 2 we can extract the first case statement to create a new shell
script. Let’s call this shell script printing_only_UP_Linux.ksh. You can see the
modifications in Listing 16.9.
#!/bin/ksh
#
# SCRIPT: printing_only_UP_Linux.ksh
#
Listing 16.9 printing_only_UP_Linux.ksh shell script listing.
422 Chapter 16