Unix for mac your visual blueprint to maximizing the foundation of mac osx phần 9 potx
Bạn đang xem bản rút gọn của tài liệu. Xem và tải ngay bản đầy đủ của tài liệu tại đây (3.22 MB, 36 trang )
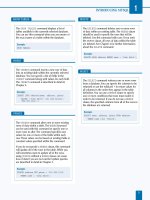
‹ Double-click the XInstall
file.
■ The Authenticate dialog
box appears.
› Type your password.
ˇ Click OK.
■ The language selection
dialog box appears.
Á Click the drop-down
menu to select a language
from the menu.
‡ Click OK.
■ Continue through the
remainder of the installation.
RUN THE X WINDOW SYSTEM
16
While the procedure described below installs
basic X Windows, keep in mind that the version
of XFree86 that you should install will change as
time passes. Consult the XonX site and amend
the filenames and your procedure according to
the information available on this site.
You can also install an X server using Apple's Get
MacOS X Software link from your Apple menu.
Apple's X server is called X11 for Mac OS and, at
this writing, is a Public Beta release. Apple's
implementation of X Windows is also based on
XFree86.
Files used in X Windows include .Xdefaults, which
sets default preferences for windows services, and
.xinitrc, which establishes your initial screen setup. A
typical .xinitrc file might start several windows on
your display. These will often include the more typical
X clients, such as xterm — a terminal emulator;
xlock — a simple analog clock; and xeyes — a pair of
eyeballs that follow your cursor around the screen.
275
16 53730X Ch16.qxd 3/25/03 9:00 AM Page 275
⁄ Double-click the ZIP file
for your XFree86 upgrade.
■ The file unzips.
¤ Double-click the install
file for your XFree86 upgrade.
■ The Authenticate dialog
box appears.
‹ Type your password.
› Click OK.
■ The Introduction page
appears.
ˇ Click Next to continue.
Y
ou can install XFree86 upgrades to bring your
XFree86 installation up to the current release from
the base release. Upgrades will usually bring bug fixes
and performance improvements and are generally worth
the time that it takes to install them. Because the ZIP files
containing the modified files are generally small, the
process of downloading and installing them takes little time
and little effort.
The upgrade installations complete the installation and
assume that the two upgrade files have been downloaded
as described in the "Get X Software for Mac OS X" section.
While one specific upgrade is being installed in this section,
this process is repeated for both of the upgrades
downloaded in the previous section and for other upgrades
that you may need to install in the future.
XFree86 upgrades are distributed as ZIP files. The easiest
way to install one of these files is to double-click the icon in
the Finder. This will unzip the file and create an install file.
When you double-click the install file, your upgrade
installation will begin.
As with most installations of this type, you will be required
to authenticate yourself so that the system can verify that
you are an administrator on the system and have the
authority to install applications.
The process will then run through a couple of additional
steps. You will have to select the disk on which the software
is to be installed. You should select your Mac OS X system
disk to simplify administration. Click Next to proceed with
the installation and click Install before the software starts to
load onto your drive. The installation can be restarted if
needed. Whenever you install more than one upgrade, be
sure to install them in the order in which they were created.
INSTALL XFREE86 UPGRADES
UNIX FOR MAC
276
INSTALL XFREE86 UPGRADES
16 53730X Ch16.qxd 3/25/03 9:00 AM Page 276
■ The Choose Install Folder
page appears.
Á Select your disk, if
applicable, and click
Next to continue.
■ The installation disk is
identified.
■ A summary description of
the software appears.
‡ Click install to complete
the installation.
■ The installation completes.
RUN THE X WINDOW SYSTEM
16
After XFree86 is installed on your system and you
have verified that it works properly, you can
remove the ZIP and install files for the upgrades
along with the SIT file for the major release. If
you do not need the space, keeping these files
available in case a re-install is needed is probably
a good idea. There is little reason to keep these
files after you install and verify a new major
release, like XFree86 4.3.
While XFree86 is an extremely useful tool and
enables you to run many applications previously
not available on Mac OS X, the look and feel of
your X environment depends on the window
manager that you decide to use. For most X
users, installing XFree86 is just the beginning of
setting up a versatile X Windows environment.
If you need help with XDarwin, you can take
advantage of the discussion forum on the
www.xdarwin.org site. You can also look for
in-depth information on technical issues at the
SourceForge/projects/XonX site. The XonX site
provides a public discussion forum as well as several
mailing lists that are devoted to such topics as
porting Unix software to Mac OS X.
277
16 53730X Ch16.qxd 3/25/03 9:00 AM Page 277
⁄ Double-click the XDarwin
application icon.
■ The Welcome to XDarwin
window appears.
¤ Click Rootless.
Y
ou can start up your X Windows server in rootless
mode. This allows you to run X applications
side-by-side with Mac OS X applications.
Each time you start XDarwin, the system will ask whether
you want to run in full-screen or rootless mode. If you will
always be running in one mode or the other, you can select
your mode and click the check box so that the application
stops asking you this question. Both modes have their
advantages, however.
To start in rootless mode, click the Rootless button after
double-clicking the icon for your XFree86 application or
after starting it from the Dock. The X Windows that launch
when you do this depend on the contents of your system's
.xinitrc file or on your personal .xinitrc file if you have one.
For example, the following lines from an .xinitrc file would
start up several xterm windows and a clock:
xclock -geometry 50x50-1+1 &
xterm -geometry 80x50+0+0 &
xterm -geometry 80x20+400-0 &
exec xterm -geometry 80x66+0+0 -name login
You will notice these windows when you start your X
session. The numbers associated with the xterm command
define the number of columns, the number of rows, and the
screen location. For example, the first xterm defined in the
lines above will have 80 columns and 50 rows; 80 columns
wide is equivalent to the width of 80 mono-spaced
characters side-by-side. Its upper-left corner will be placed
in the upper-left corner of the screen.
The most convenient way to start X Windows is to elect to
keep it in the Dock after you first bring it up. You can then
customize the windows that start by making a copy of the
system-wide .xinitrc file and installing that copy as .xinitrc in
your home directory.
When you first install XFree86, you will be using the default
window manager. It is called twm and, while it adds some
window controls to your windows, it is a dull window
manager.
START XFREE86 IN ROOTLESS MODE
UNIX FOR MAC
278
START X86FREE IN ROOTLESS MODE
16 53730X Ch16.qxd 3/25/03 9:00 AM Page 278
■ X clients launch on your
Aqua desktop, displaying
three screens by default.
‹ Type xeyes in an xterm
window and press Return.
■ The xeyes tool opens on
your desktop.
RUN THE X WINDOW SYSTEM
16
You can update your search path to include X
Windows tools. This will allow you to start X
tools by entering their names without a full
pathname. X tools will usually install in the
directory /usr/X11R6/bin. By including this path
in your PATH variable, you instruct your shell to
look in that directory when you enter a simple
name such as xeyes.
Your search path, defined in your .tcshrc file, will
look something like this:
Example:
setenv PATH /usr/bin:/bin:/sbin:/
sw/bin:/usr/local/bin:/usr/X11R6/bin
You can change the colors used on a xterm window
by modifying the parameters used in your .xinitrc
file. The command "xterm -n xterm-
blahblahblah -bg black -fg white -
geometry 80x25+0+0 &", for example,
generates a window named "xterm-blahblahblah"
with a black background and white letters. The
Terminal window would be 80 columns wide
(standard width) and 25 lines long beginning
in the upper-left corner of the screen.
279
16 53730X Ch16.qxd 3/25/03 9:00 AM Page 279
⁄ Click XDarwin in the
Dock.
■ The XDarwin welcome
screen appears.
¤ Click Full screen.
Y
ou can install the GNOME desktop on your Mac OS X
system if you have first installed an X server such as
XFree86.
GNOME is one of the most popular X Window System
desktops. Developed for the Linux community, GNOME
now runs on Solaris and Mac OS X systems as well. Because
this porting effort is recent, installing Gnome can be a slow
and somewhat problematic installation – especially on a
slow dial-up connection. You can also acquire binaries on
CD-ROM. The following sites provide information on X
Windows for Mac OS X.
/>
After GNOME is installed on your system, you can use it as
your X Windows desktop. To use GNOME, you should edit
your .xinitrc file and add the line exec gnome-session to
the bottom of the file. Be sure to comment out the line that
starts the default window manager, twm. The bottom of
your .xinitrc file, after editing, might look like this:
gnome-wm &
exec gnome-session
The next time you start X Windows after making these
changes, your desktop will start running with GNOME. As
with XFree86 out of the box, you can run GNOME in
rootless or full-screen mode. When you run rootless, your X
Windows will take on the appearance of GNOME windows,
using the GNOME window dressings. The rest of your
windows will retain their Aqua look. You will be able to
start additional X tools from your xterm windows. For
example, you can start the xeyes tool by typing
/usr/X11R6/bin/xeyes in an xterm window and
pressing Return.
When you start GNOME in full screen mode, as is generally
the case, GNOME will take over your desktop. All vestiges
of your Aqua tools and menus will disappear from view.
GNOME menus will be available on your desktop for
starting any of a number of X applications.
RUN THE GNOME DESKTOP
UNIX FOR MAC
280
RUN THE GNOME DESKTOP
16 53730X Ch16.qxd 3/25/03 9:00 AM Page 280
■ A window appears, stating
that full-screen mode will take
over your screen, and telling
you how to return to the Mac
OS X desktop.
‹ Click Show X11. ■ XDarwin launches in
full-screen mode.
■ The GNOME desktop
appears.
RUN THE X WINDOW SYSTEM
16
Many of the applications available through the
GNOME desktop are traditional X tools such as
xterm, a terminal emulator, and xcalc, a simple
calculator. Other applications, such as xv and the
GIMP are quite sophisticated tools for
manipulating images.
GNOME supports the concept of virtual
desktops. The small object in the bottom left
hand corner of the screen represents each of four
virtual desktops. You can move from one desktop
to the next by clicking any of the four rectangles.
The upper left rectangle represents your default
screen. If you do not like working with a cluttered
desktop, you can start different applications on
each of the four virtual desktops and move from
one to the other as needed.
To exit the GNOME desktop, click Desktop ➪
Log Out.
You can also start other X applications, those not
included in the GNOME menus but installed on your
system, by typing their names in an xterm window.
281
16 53730X Ch16.qxd 3/25/03 9:00 AM Page 281
⁄ Click Programs ➪
Applications.
■ The set of applications
available on the GNOME
desktop appears.
¤ Click Programs ➪ Utilities ➪
Simple Calculator.
Programs
Applications
Programs
Utilities
Simple Calculator
Y
ou can take advantage of an impressive collection of
useful tools and applications when you run the
GNOME desktop.
The GNOME desktop includes a number of utilities and
applications that are built into the desktop. That is, you can
start up these tools by selecting them from the menus
available to you on your GNOME desktop. Some of these
tools are simple applications that can make your system a
little nicer to use. Others will make a tremendous
difference in what you are able to accomplish on your
system.
The GNOME Programs menu contains a number of sub-
menus, each with a variety of tools. The Applications menu
includes tools such as emacs — a highly configurable editor,
and Gnumeric — a spreadsheet program. The Utilities menu
provides access to a simple calculator, a color browser, and
other tools. The graphics menu provides access to GNOME
Ghostview, a tool for viewing PostScript files; the GIMP, an
image editing program; and xv, a program for viewing and
modifying image files. Each of these tools can be an
extremely useful addition to your desktop.
The look of your GNOME desktop will vary quite a bit
depending on the window manager that you decide to use.
Several are available to you and others can be obtained.
Enlightenment and Window Maker are used in screenshots
in this book. These two window managers have extremely
different appearances, but will, of course, run the same
applications. The third choice, twm, is also available. To alter
your window manager, click Settings ➪ Desktop ➪ Window
Manager. When you change your window manager, you will
have an opportunity to save your new settings.
Xterm windows are similar in character and to Terminal
windows; therefore, you should be able to use these
windows in the same manner that you would use the
Terminal application when you are running in Aqua.
EXPLORE GNOME APPLICATIONS
UNIX FOR MAC
282
EXPLORE GNOME APPLICATIONS
16 53730X Ch16.qxd 3/25/03 9:00 AM Page 282
■ The GNOME Calculator
tool opens.
‹ Click X to close the
calculator.
› Click Programs ➪
Graphics.
■ The menu shows
Ghostview, the GIMP, and xv.
Programs
Graphics
RUN THE X WINDOW SYSTEM
16
If your GNOME desktop opens without
the panels at the top and bottom of
the screen, type panel –no-xshm in an
xterm window.
Clicking the globe in the bottom panel
will open Mozilla, the Web browser.
With this tool, you can browse the
Web the same as you would using
Internet Explorer or Safari on your Mac
OS X desktop.
You can make the bottom panel slide
over to the edge of your screen by
clicking either end where the small
arrow is displayed.
The Window Maker window manager gives your
GNOME desktop an entirely different look and feel.
If you selected this desktop by clicking Settings ➪
Desktop ➪ Window Manager, your desktop will
change character. You can start up additional virtual
desktops or workspaces by right-clicking in the
background and clicking Workspaces ➪ New. You will
then be able to navigate between these workspaces by
clicking the backward and forward buttons on the icon
in the upper-left corner of your screen.
Within each workspace, you can then start different
tools as if you had a number of work surfaces for
working on different projects.
283
16 53730X Ch16.qxd 3/25/03 9:00 AM Page 283
⁄ Double-click the icon for
the most recent version of
OroborOSX.
■ A TAR file and a folder
appear.
¤ Double-click the
OroborOSX-Folder icon.
Y
ou can install the OroborOSX desktop to take
advantage of X tools on your Aqua desktop.
OroborOSX allows you to run X applications while
maintaining the look and feel of your normal Mac OS X
desktop.
The OroborOSX window manager actually provides several
graphical themes. One of these mimics the look of your
Aqua desktop and gives your Mac OS X and your X
applications a seamless appearance. OroborOSX also
provides a drop-down menu of applications that can be
launched from your desktop when you are running
OroborOSX. This menu appears at the top of your
OroborOSX screen and is titled Launch. One of these tools
is the GIMP, the impressive open source image-editing tool
that rivals the capabilities of PhotoShop.
Installing OroborOSX is a smooth process after XFree86 has
been installed. The OroborOSX application can be retrieved
from any of several places – rceforge.
net/download.html and both binary and source distributions
are available. This section outlines the process of installing
the binary file, which is downloaded as a gzipped TAR file.
When you double-click this file, you will walk through the
installation process. OroborOSX will be installed in a matter
of minutes and will be ready for use.
You might want to keep OroborOSX in the Dock to
facilitate its use. You will then be able to start X applications
by first clicking on OroborOSX in the Dock and then
starting your X application through the Launch menu or by
entering the pathnames for the binaries in an xterm
window. When you launch OrorborOSX, it will in turn
launch XDarwin.
OroborOSX is a good choice for anyone who wants to work
in their normal Mac OS X desktop while adding some
applications that only run in X Windows. Installation is
trouble-free and extremely quick.
INSTALL OROBOROSX
UNIX FOR MAC
284
INSTALL OROBOROSX
16 53730X Ch16.qxd 3/25/03 9:00 AM Page 284
■ The folder opens, revealing
the new OroborOSX
application.
‹ Double-click the
OroborOSX icon.
■ OroborOSX launches
XDarwin.
RUN THE X WINDOW SYSTEM
16
After OroborOSX is started, you can keep it in
the Dock to make it easier to start when you
want to use it again. Because OroborOSX works
so well with your Mac OS X desktop, you may
sometimes forget that you are running X
Windows simultaneously with your Mac desktop.
If you would like your inactive windows to
appear dimmed, you can accomplish this by
clicking Options ➪ Dim Inactive Windows.
OroborOSX does not make use of your .xinitrc
file. However, you can get it to read and execute
the commands in this file if you click Launch ➪
xinitrc.
When you are running OroborOSX, all of the
windows that you have open will be listed at the
bottom of your Windows menu. To move from one
to the next, you can click the window of your
choice as you would normally do, or you can
choose the window that you want to make active
by clicking Windows and the name of the window
that you want to make active.
OroborOSX is an Aqua-like window manager based
on a window manager named Oroborus.
285
16 53730X Ch16.qxd 3/25/03 9:00 AM Page 285
Y
ou can use xv, an interactive image manipulation
program for X Windows, to display, crop, stretch,
and dither images of many different types. To start xv,
type xv in an xterm window. If you are using GNOME, you
will find the program in the Graphics menu. A colorful fish-
out-of-the-water banner will greet you. Near the bottom of
the page, you will see the message Press <right> mouse
button for menu. To view the control panel for xv, press
Control + click.
To load an image, click the Load button. This will open a file
browse window that allows you to select the image that you
want to load. The image will load on your screen after you
click OK. You can use the options under the Image Size
button to control the size of the image on your screen.
The algorithms included in the Algorithms menu include a
number of image manipulation routines that you can apply
to the image. These include blur, sharpen, edge detect,
emboss, oil painting, and copy and clear that rotate the
image with and without blanking out the corners, pixelize,
spread, and despeckle. For dabblers, there is also an
Undo All option that reverses any changes you have made,
bringing you back to the original image. xv operates on GIF,
JPEG, TIFF, PBM, PGM, XPM, X11 Bitmap, Sun rasterfile,
Targa, RLE, RGB, BMP, PCX, FITS, and PM image files. It can
also generate postscript.
VIEW IMAGES WITH XV
286
⁄ Type xv in an xterm
window and press Return.
■ The xv welcome page
appears.
¤ Command-click inside the
welcome page.
■ The xv controls panel
appears.
‹ Click Load.
VIEW IMAGES WITH XV
UNIX FOR MAC
17 53730X Ch17.qxd 3/25/03 9:00 AM Page 286
The program can be downloaded from
www.trilon.com/xv/downloads.html in source
form and is included in binary format in the
Darwin Collection: Free Software for Darwin OS
and Mac OS X CD set for those who don't want
to compile their own code. The program is
available in binary form on the trilon site, but
not for Mac OS X. Manuals are available in
PostScript, PDF, and HTML format.
You can close the xv controls panel any time you
like. To get it back again, press Ô + click in the
displayed image.
After you have modified an image, you can save it
using the Save button. The Format menu in the
upper-right corner allows you to select the format
for your saved image and, depending on the
image type you select, asks if you want to use
compression.
You can load a number of images and flip through
them using the Next and Prev buttons.
You can crop an image by first selecting the area
you want to retain using your left mouse button and
then pressing Crop in the xv controls.
INSTALL X WINDOW SYSTEM SOFTWARE
17
287
■ The xv file load window
opens.
› Select an image file.
ˇ Click Ok.
Á The image file displays
on-screen.
17 53730X Ch17.qxd 3/25/03 9:00 AM Page 287
⁄ Click Launch ➪ MacGimp
in OroborOSX.
■ The GIMP window
appears on your screen.
¤ Click File ➪ Open from
the GIMP menu.
MacGimp
Launch
Y
ou can use the GIMP to manipulate photo quality
images. The GIMP, which stands for GNU Image
Manipulation Program, is a freely distributed software
tool that allows you to retouch photos and compose
interesting images using a massive set of features. The tool
is available from www.gimp.org/download.html and is often
loaded when you install an X desktop, such as GNOME.
GIMP is also included on the CD that accompanies this
book.
In an X windowing environment such as OroborOSX or
GNOME, you can launch the GIMP through a menu. To
launch the GIMP in OroborOSX, you click Launch ➪
MacGimp.
Unlike most of the tools that you will use in X Windows,
the GIMP opens a number of windows on your desktop.
The toolbox provides the main controls by offering a grid of
icons, each of which represents a different function, such as
selecting a portion of the image, zooming in or out, and
painting on top of the image with brush strokes.
The toolbox also contains the File menu that provides for
opening and saving images. It also allows you to modify
preferences, such as the default image size and resolution,
that apply each time you use GIMP. The toolbox is like a
toolbar that lies along the top of most applications.
Because it is a separate window, you can open and close
it as needed.
For serious image work, you will probably find layers
essential. The best way to think of layers is to picture your
image as composed of a number of transparencies, each
which contributes a portion of the overall image, and
yourself as looking through all of them at once. As you work
with your images, the layers that you create will display in
the Layers, Channels & Paths window that opened when
you first started the GIMP. The active layer will always
appear highlighted.
EDIT IMAGES WITH GIMP
288
EDIT IMAGES WITH GIMP
UNIX FOR MAC
17 53730X Ch17.qxd 3/25/03 9:00 AM Page 288
■ The Load Image window
opens.
‹ Select the name of a file.
■ A thumbnail of the
selected image appears.
› Double-click the name of
the image file you want to
edit.
■ The image file opens and
appears as a layer.
ˇ In the Layers, Channels &
Paths window, click the New
Layer button in the lower-left
corner.
Á Click the Text Tool in your
toolbox and then click the
image.
oldhouse.jpg
Background
INSTALL X WINDOW SYSTEM SOFTWARE
17
You can delete a layer by pressing and holding
down the right mouse button in the Layers,
Channels & Paths window and sliding down to
Delete Layer. The ability to delete a layer is one
of the best reasons to work with layers in the
first place. They allow you to easily remove
elements that you add to an image if they do
not look as you had intended.
If you have many layers, you can switch between
them, determining which layer you are editing at
any point in time, by selecting the layer in the
Layers, Channels & Paths window. When you are
completely satisfied with the overall image that
you have created, you can collapse your image
into a single layer. After performing this step, you
cannot manipulate layers separately.
To save an image, press Ô + click within the image
window and click File ➪ Save As from the pop-up
menu. If you want to save an image in the original
format, you can leave the option for Determine
File Type by Extension as is and type in your new
filename. GIMP's format is called XCF.
If your image has layers, you will have to collapse
the layers using the Layers ➪ Flatten Image option
or export the image to save it in a format that does
not support image layers. You can preserve the
layers by using GIMP's xcf format.
289
CONTINUED
17 53730X Ch17.qxd 3/25/03 9:00 AM Page 289
■ The Text Tool window
opens.
‡ Type the text that you
want to appear in your new
layer.
° Select the font, font style,
and size for your text.
· Click OK.
■ The new text floats over
your image.
‚ In the Layers, Channels &
Paths window, click the
Floating Selection.
— Click the Anchor Layer
icon to anchor your text.
new century schoolbook
bold
24 *
Floating Selection
Y
ou can apply many transformations to your images
by pressing Ô + click within an image and selecting
from the menu. For example, if you click Filters ➪
Glass Effects ➪ Apply Lens, your image will appear distorted
as if you were looking through a (convex) lens. The filter
effects also include edge detection, colorification options,
and various other distortions that you can apply to get the
effect that you want. Unless you are a full time graphics
professional, it is likely that you will never use most of
the tools available in the GIMP. Experimenting with the
various options, on the other hand, is bound to be good
entertainment on some otherwise uneventful day and is
probably the only way to fully understand what this tool
can do for you.
There is also an option to revert to the original image. This
is available through File ➪ Revert. This is useful if you apply
a transformation and do not like the way it looks. Many
people who use GIMP make a habit of preserving their
original images and saving their modified images using
different names so that they can always start over.
To crop an image, select the crop tool from the toolbox.
The icon resembles a craft knife. Then left-click within the
image window. When you click twice, you should notice
two sets of corners appear like the diagonal corners of a
box that move independently. The space between these
corners, or elbows, defines the portion of the image that
will remain after you click the Crop button.
While you might find quite a bit of information on using
the GIMP on the Web — because this is a very popular
tool — using the tool is the best way to unveil all of the
manipulations that are possible and which of them is
going to work best with your own graphical style.
EDIT IMAGES WITH GIMP (CONTINUED)
290
EDIT IMAGES WITH GIMP (CONTINUED)
UNIX FOR MAC
17 53730X Ch17.qxd 3/25/03 9:00 AM Page 290
■ Your layers collapse, and
your text is no longer floating.
± Click the image window
to view your revised image.
■ Your image appears
full-screen with the text
anchored in place.
INSTALL X WINDOW SYSTEM SOFTWARE
17
The 5 x 5 element toolbox allows you to easily
access the tools available for use within the
GIMP. Pausing your cursor over any of the icons
will cause a brief description to appear.
The magnifying glass tool allows you to quickly
zoom in on an image so that you can see more
detail and have a finer degree of control over
your work. To zoom back out, double-click the
magnifying glass and click Zoom out in the Tool
Options. Then click the image again. The effect
of the magnifying glass will then cause you to
zoom out. You can toggle between zooming in
and zooming out as needed.
If you want to draw on top of an image, you can use
the pencil tool. The Tool Options window for this
tool allows you to modify the opacity of your pencil
stroke and to select a color for your pencil strokes.
The icon in the middle of the toolbox that looks like
an eyedropper allows you to pick colors from your
image. This allows you to work with colors that
match the colors in your image instead of trying to
match the colors by selecting them from a palette.
291
17 53730X Ch17.qxd 3/25/03 9:00 AM Page 291
⁄ Type AbiWord in an xterm
window and press Return.
■ AbiWord opens with a
blank document.
Y
ou can display and edit Word documents with
AbiWord. AbiWord is an intuitive word processing
application with the same basic features as Microsoft
Word. You start AbiWord when you are running an X
Windows server by typing abiword in an xterm window. The
tool will open up on your screen, allowing you to begin
entering the text of your document. You can also open a
pre-existing Word file.
You use the AbiWord program in the same way as you
would use other GUI word processors such as MS Word or
Corel Word Perfect. If you trained on older, keyboard-
oriented word processing systems, you must get used to
clicking on icons to make things happen. For example,
formatting a page for right or left justification of text
requires an easy click near the upper-right corner of the
screen where pictograms display your choices.
Other icons may be less obvious but clicking on any of
them will usually bring up a menu with a logical suite of
choices. For instance, if you want to save your work, you
click File in the top menu bar and see a menu with Save
and Save As choices along with open and print options.
Moving your cursor over the diskette icon causes the
description to appear — Save the document. If you select
the diskette with a pencil pointing at it instead, you can
rename the document.
To concentrate on writing, you can easily remove most of
the clutter of your AbiWord menus by clicking on View and
then checking the Full screen box; only the menu at the top
of the screen will then remain along with your text. You can
manipulate tabs and margins with menus, or adjust their
bars and pointers along the edges of the screen, as though
you were using a real typewriter.
As with any program, the fastest way to do something may
be revealed only after some experimentation with different
menus and patterns of keystrokes that suit your style of
typing. If you are an experienced wordsmith, you can use
these tricks intuitively in AbiWord and save a bundle of
money by not purchasing expensive commercial products.
WORD PROCESSING WITH ABIWORD
292
WORD PROCESSING WITH ABIWORD
UNIX FOR MAC
17 53730X Ch17.qxd 3/25/03 9:00 AM Page 292
¤ Click File ➪ Open.
■ The Open File window
appears.
‹ Click a filename. ■ Your file appears
on-screen.
› Edit and format your text.
ˇ When you have finished,
save your document to keep
the changes.
INSTALL X WINDOW SYSTEM SOFTWARE
17
If you are writing a newsletter or other
publication, you can choose one, two, or three
columns to suit the style of your publication.
You can find documentation for AbiWord,
including an overview and a tutorial, at
www.abisource.com/help. If you have any
questions about quirks in the program, contact
the authors at AbiSource.com. As with other
open source products, news about problems
experienced can be sent upstream to the
community and tips and tricks can be
downloaded from other users via discussion
groups or FAQ pages.
AbiWord enables you to import images into your
document by using the icon that looks like a
landscape snapshot. It is probably wise to begin a
document with this step and then write around the
image.
You can open Microsoft Word files, identified by
their .doc file extensions, directly in AbiWord and
then edit and save the files in the Rich Text Format.
293
17 53730X Ch17.qxd 3/25/03 9:00 AM Page 293
⁄ Type gnumeric in an
xterm window and press
Return.
■ Gnumeric opens with a
blank spreadsheet.
¤ Type =sqrt(64) in a cell
and press Return.
■ The answer appears in
your cell, and the formula
displays in the toolbar field.
Y
ou can use Gnumeric for simple calculations to
complex numerical analysis. Gnumeric is a free
spreadsheet released under the GNU General Public
License. It has all the features that you would expect in a
quality spreadsheet application, including a built-in manual,
support for graphs, an extensive range of functions, cell
formatting, and printing. It also has a powerful set of import
and export filters that allow it to work with Excel, Lotus
1-2-3, Sylk and other spreadsheet formats. Graphic support,
however, requires that you also have Guppi installed.
To start Gnumeric, you can type Gnumeric in an xterm
window. The tool will open with an empty spreadsheet.
Entering data is as simple as clicking in a cell and typing text
or a number. To enter a formula, you start by typing = and
then you enter the formula, such as cos(100) or sum(A2:A20)
where A2:A20 defines a range of cells. If you are not used
to spreadsheets, you will have to get accustomed to this
nomenclature. The columns in a spreadsheet are labeled A,
B, C, and so on while the rows are numbered 1, 2, 3, and so
on. A2 is the cell defined by the second row in the first
column.
You can also select data by holding down your left mouse
button and sliding over it. This often simplifies the process.
Gnumeric, like most modern spreadsheets, will allow you to
copy and paste a formula, adjusting the cell addresses in the
process. If you sum A2:A20 and then copy your formula
from A21 to B21, the new formula will sum B2:B20. If you
are familiar with any spreadsheet application, you will
probably be perfectly at home using Gnumeric.
CREATE SPREADSHEETS IN GNUMERIC
294
CREATE SPREADSHEETS IN GNUMERIC
UNIX FOR MAC
17 53730X Ch17.qxd 3/25/03 9:00 AM Page 294
‹ Type some numbers in
several cells in the same
column.
› Type =sum( in the cell
below.
ˇ Select the numbers in the
cells with your mouse.
Á Type ) and press Return.
■ The spreadsheet calculates
your total.
INSTALL X WINDOW SYSTEM SOFTWARE
17
You can turn a number in a cell into a percentage
simply by clicking the percentage sign in the
toolbar after clicking on the particular cell. This
speeds up the process of modifying the format of
your numbers, but uses the default format with
two decimal points. Similarly, you can convert a
number to display in monetary format by clicking
the symbol that looks like a stack of dollar bills.
You can use the green and red arrow keys
near the upper-right corner of the spreadsheet
to sort a series of cells in alphabetic or reverse
alphabetic order. Simply select the cells that you
want to sort and click the arrow representing the
sort order of your choice.
The undo operation is available both as Edit ➪
Undo and through use of the curved arrow in the
toolbar. Anytime you make a mistake, you can
quickly reverse your most recent operation.
You can add arrows and other annotations to your
spreadsheet by selecting these tools from your
toolbar.
Icons in the toolbar allow you to change the
justification of data in cells to right, left, or center
justified.
Click Help ➪ Gnumeric Manual to open a very
handy user's guide.
295
17 53730X Ch17.qxd 3/25/03 9:00 AM Page 295
File
⁄ Click the Open Office
icon in the Dock.
■ Writer opens with an
empty document.
¤ Click File ➪ Open.
Open Control+O
Y
ou can use Open Office to create documents,
spreadsheets, illustrations, and presentations. You
can also open documents that were created by other
applications, such as Microsoft Office. Open Office is a
suite of office applications that includes a word processor,
spreadsheet, drawing program, presentation package, data
source editor, HTML editor, formula editor, and macro and
scripting language. Each tool is a professional and full-
featured office automation tool that has years of
development behind it from talented volunteers from
around the world. Completely free, Open Office is based
on code from StarOffice and 15 years of development by
Sun Microsystems. It runs on Sparc systems as well as
Windows and Linux and, as of this writing, is in the final
stages of development for Mac OS X.
To use Open Office, you need to first install X Windows.
The word processor that is included in the Open Office
suite is called Writer. You can use it to read, write, and
modify Microsoft Word documents. Open Office comes
with spell check, clip art, and many of the same formatting
features that you would expect in other professional word
processing applications.
When you start Open Office from the Dock or by double-
clicking on its icon in the Finder, the tool opens with Writer.
From this application, you start the other applications as
well. For example, File ➪ New ➪ Spreadsheet launches the
spreadsheet application. Open Office will start XDarwin if it
is not already running.
Most of the items in the toolbar along the top and down
the left side of the Writer's window will look familiar to you
if you have used Microsoft Word or another word
processor. If you are unsure of the meaning of any of the
icons, position and hold your cursor over them and a short
description appears.
VIEW OFFICE DOCUMENTS WITH OPEN OFFICE
296
VIEW OFFICE DOCUMENTS WITH OPEN OFFICE
UNIX FOR MAC
17 53730X Ch17.qxd 3/25/03 9:00 AM Page 296
■ A file browser opens.
‹ Select the document you
want to open.
› Click Open. ■ The document appears
on-screen.
INSTALL X WINDOW SYSTEM SOFTWARE
17
To view nonprinting characters, click View ➪
Nonprinting characters or press Control + F10. If
you press Control + F10 several times in a row,
you will notice how the nonprinting characters
toggle on and off.
Depending on the type of document you are
creating, autocorrection can be a blessing or an
annoyance. Tools ➪ AutoCorrect/AutoFormat . . .
allows you to control the extent to which
autoformatting and autocorrection are used
in your documents.
You can save documents created in Writer in
many formats, such as OpenOffice text or
template, Word 6.0, 95, or 97/2000/XP, StarWriter,
Rich Text Format, and HTML.
You can turn the spell checker on and off by clicking
the symbol that contains the letters ABC with a wavy
line underneath. You can choose to see your spelling
mistakes as you type or spell check later.
You can insert tables by clicking Insert Table . . . or
by clicking on the table icon near the top of the left
window border.
You can easily number the lines in your document
and have control over the frequency with which
lines are numbered. For example, you can number
every fifth or tenth line in a document. Line
numbering is selected through Tools ➪ Line
Numbering.
297
17 53730X Ch17.qxd 3/25/03 9:00 AM Page 297
⁄ In the Writer window,
click File ➪ New ➪
Spreadsheet.
■ Calc opens with a blank
spreadsheet.
¤ Enter some text and
numbers into your
spreadsheet.
‹ Select your cells.
› Click the Insert Object
button.
File
Spreadsheet
Stress 33
Anxiety 12
Grief 4
Worry 28
Pain 2
Y
ou can create spreadsheets using Open Office
or import spreadsheets created by other popular
spreadsheet applications. The spreadsheet that
is included with Open Office is called Calc and, like
Gnumeric, is likely to be familiar and, thus, easy to use if
you have used any spreadsheet application. The labeling of
the rows and columns and the symbols in the toolbars are
generally self-explanatory and, if you pause over them with
your cursor, a short description will appear to explain their
functions.
To start Calc, click File ➪ New ➪ Spreadsheet from Writer.
This will open an empty spreadsheet in another window on
your screen.
Clicking the Help button will bring up a useful guide on
how to use Calc along with a panel in which you can enter
or browse search terms, look through the contents of the
Open Office documentation or create and use bookmarks.
As with other spreadsheets, you can enter data or formulas
in cells and can copy and paste these items to avoid having
to enter the same data more than once.
Calc also includes graphing. If you select data and click the
Insert Object icon, a short series of forms for creating a
number of graphs, such as pie charts and scatter diagrams,
will appear.
Insert ➪ Graphics lets you import images into your
spreadsheets.
Like Gnumeric, Calc has one-click options for transforming
the format of a cell to a percentage or monetary figure.
Edit ➪ Repeat:Attributes is a very useful function that allows
you to repeat changes that you make in one cell to others.
If you change one cell to bold and then use this function,
the new cell or group of cells will also take on the changed
attribute.
CREATE SPREADSHEETS WITH OPEN OFFICE
298
CREATE SPREADSHEETS WITH OPEN OFFICE
UNIX FOR MAC
17 53730X Ch17.qxd 3/25/03 9:00 AM Page 298
■ The AutoFormat Chart
window appears.
ˇ Select a graph type from
the menu.
Á Click Create.
■ The new graph appears in
your spreadsheet.
INSTALL X WINDOW SYSTEM SOFTWARE
17
Spreadsheets created in Calc can be stored in
Open Office format or you can choose from
other formats which include several versions of
MicrosoftExcel, StarCalc, Data Interchange
Format, dBASE, and SYLK.
You can also create HTML documents in Open
Office by clicking File ➪ New ➪ HTML
Document. This tool will allow you to enter text
and will provide the HTML code. You can insert
links and create tables using options from the
Insert menu. While you work with the context of
the page, the HTML code is being constructed
for you.
You can create a slide presentation by clicking
File ➪ New ➪ Presentation from Writer or from
Calc. The presentation package is called Impress
and is a multimedia presentation tool that includes
clip art, animation, and high-quality drawing tools.
When you start Impress, you will complete a series
of forms in which you make selections for your
presentation — such as whether to use wipes of
some type as your slide show moves from one slide
to the next. Impress simplifies preparation of a
presentation and includes many features for
creating a dynamic slide show.
299
17 53730X Ch17.qxd 3/25/03 9:00 AM Page 299